
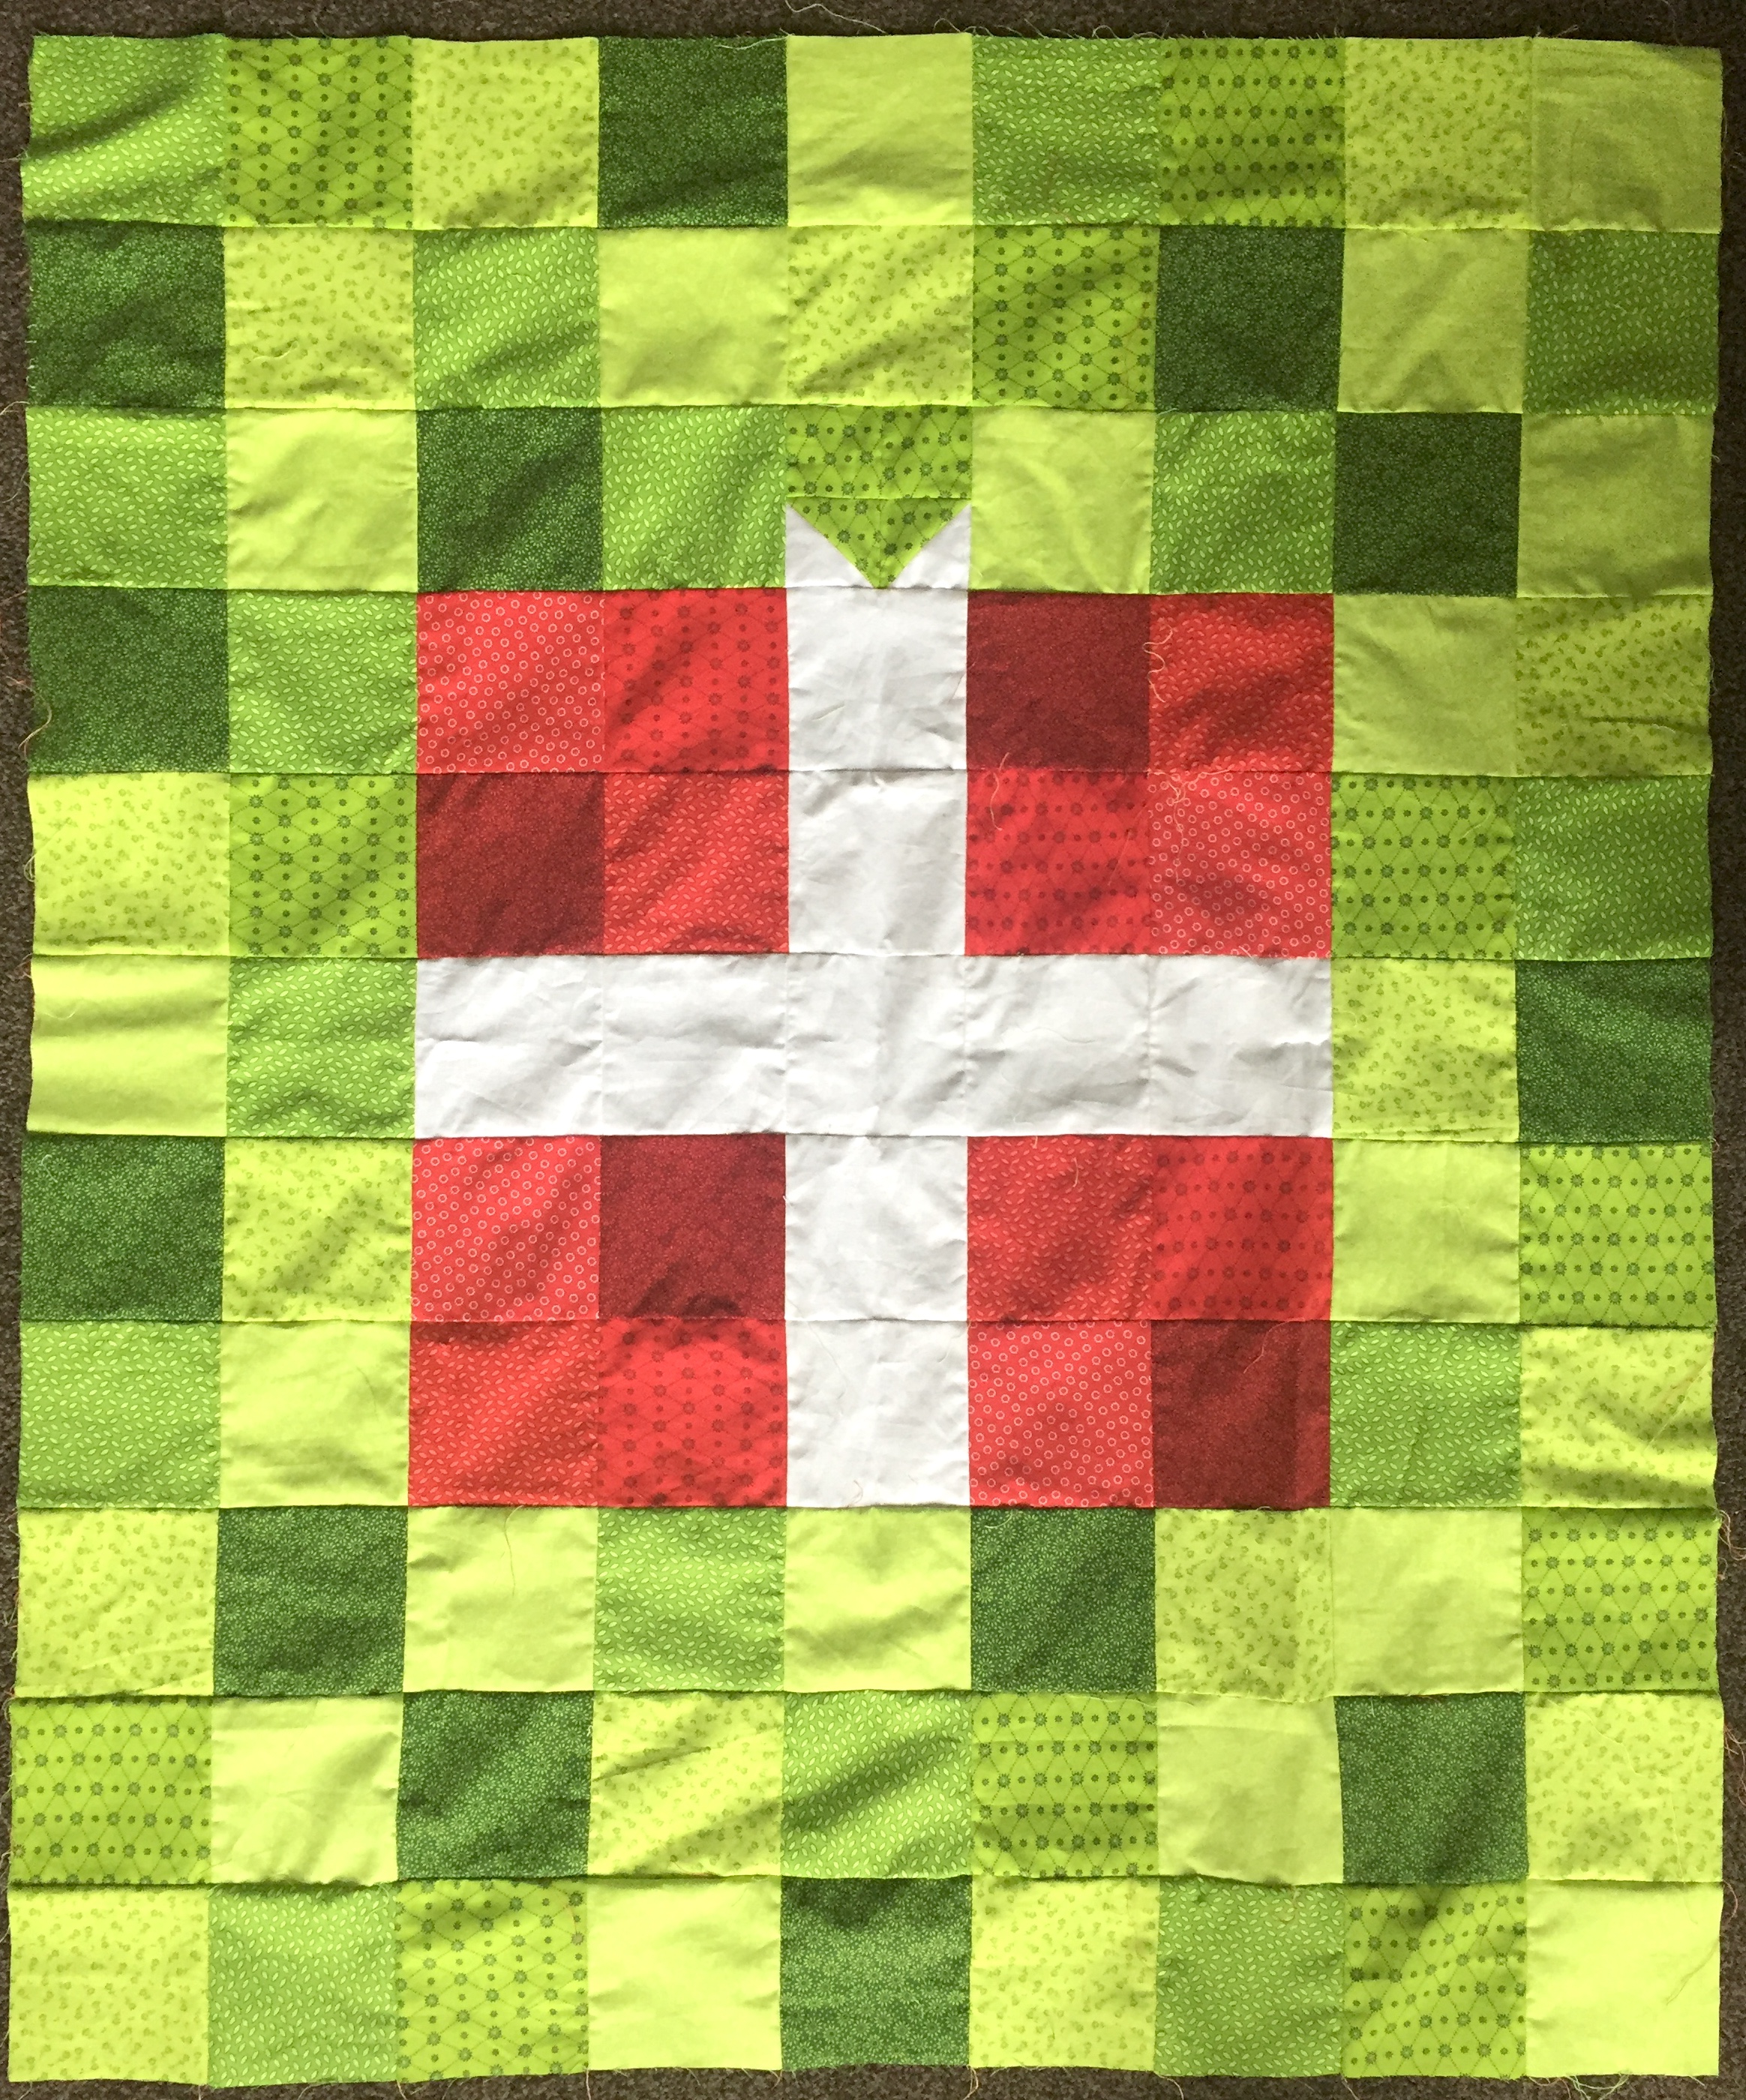
This quilt is great if your wanting a festive themed quilt to keep warm this winter, and it makes the perfect gift.
You could always change the colour of the present too when gifting to a favourite colour of the recipient.
Fabric gifted by The Craft Cotton Company.
Check out my other Christmas sewing tutorials.
Sewing Tutorial: Present Patchwork Quilt Pattern
Materials
- Essential trends fabrics in red and green by the Craft Cotton Company:
- 4 different reds: 1m x 0.5m in each.
- 5 different greens: 1m x 0.5m in each.
- White fabric: 1m x1.30m.
- Batting: 1m x 1.10m.
- Thread.
- Needle.
- Scissors.
- Paper.
- Ruler.
- Pencil.
- Pins.
Finished size:
- 1×1.1m, for a bigger size add more green squares rows and columns (remember you will need more backing fabric/batting/binding if you make it bigger).
Sewing Tutorial: Present Patchwork Quilt Pattern
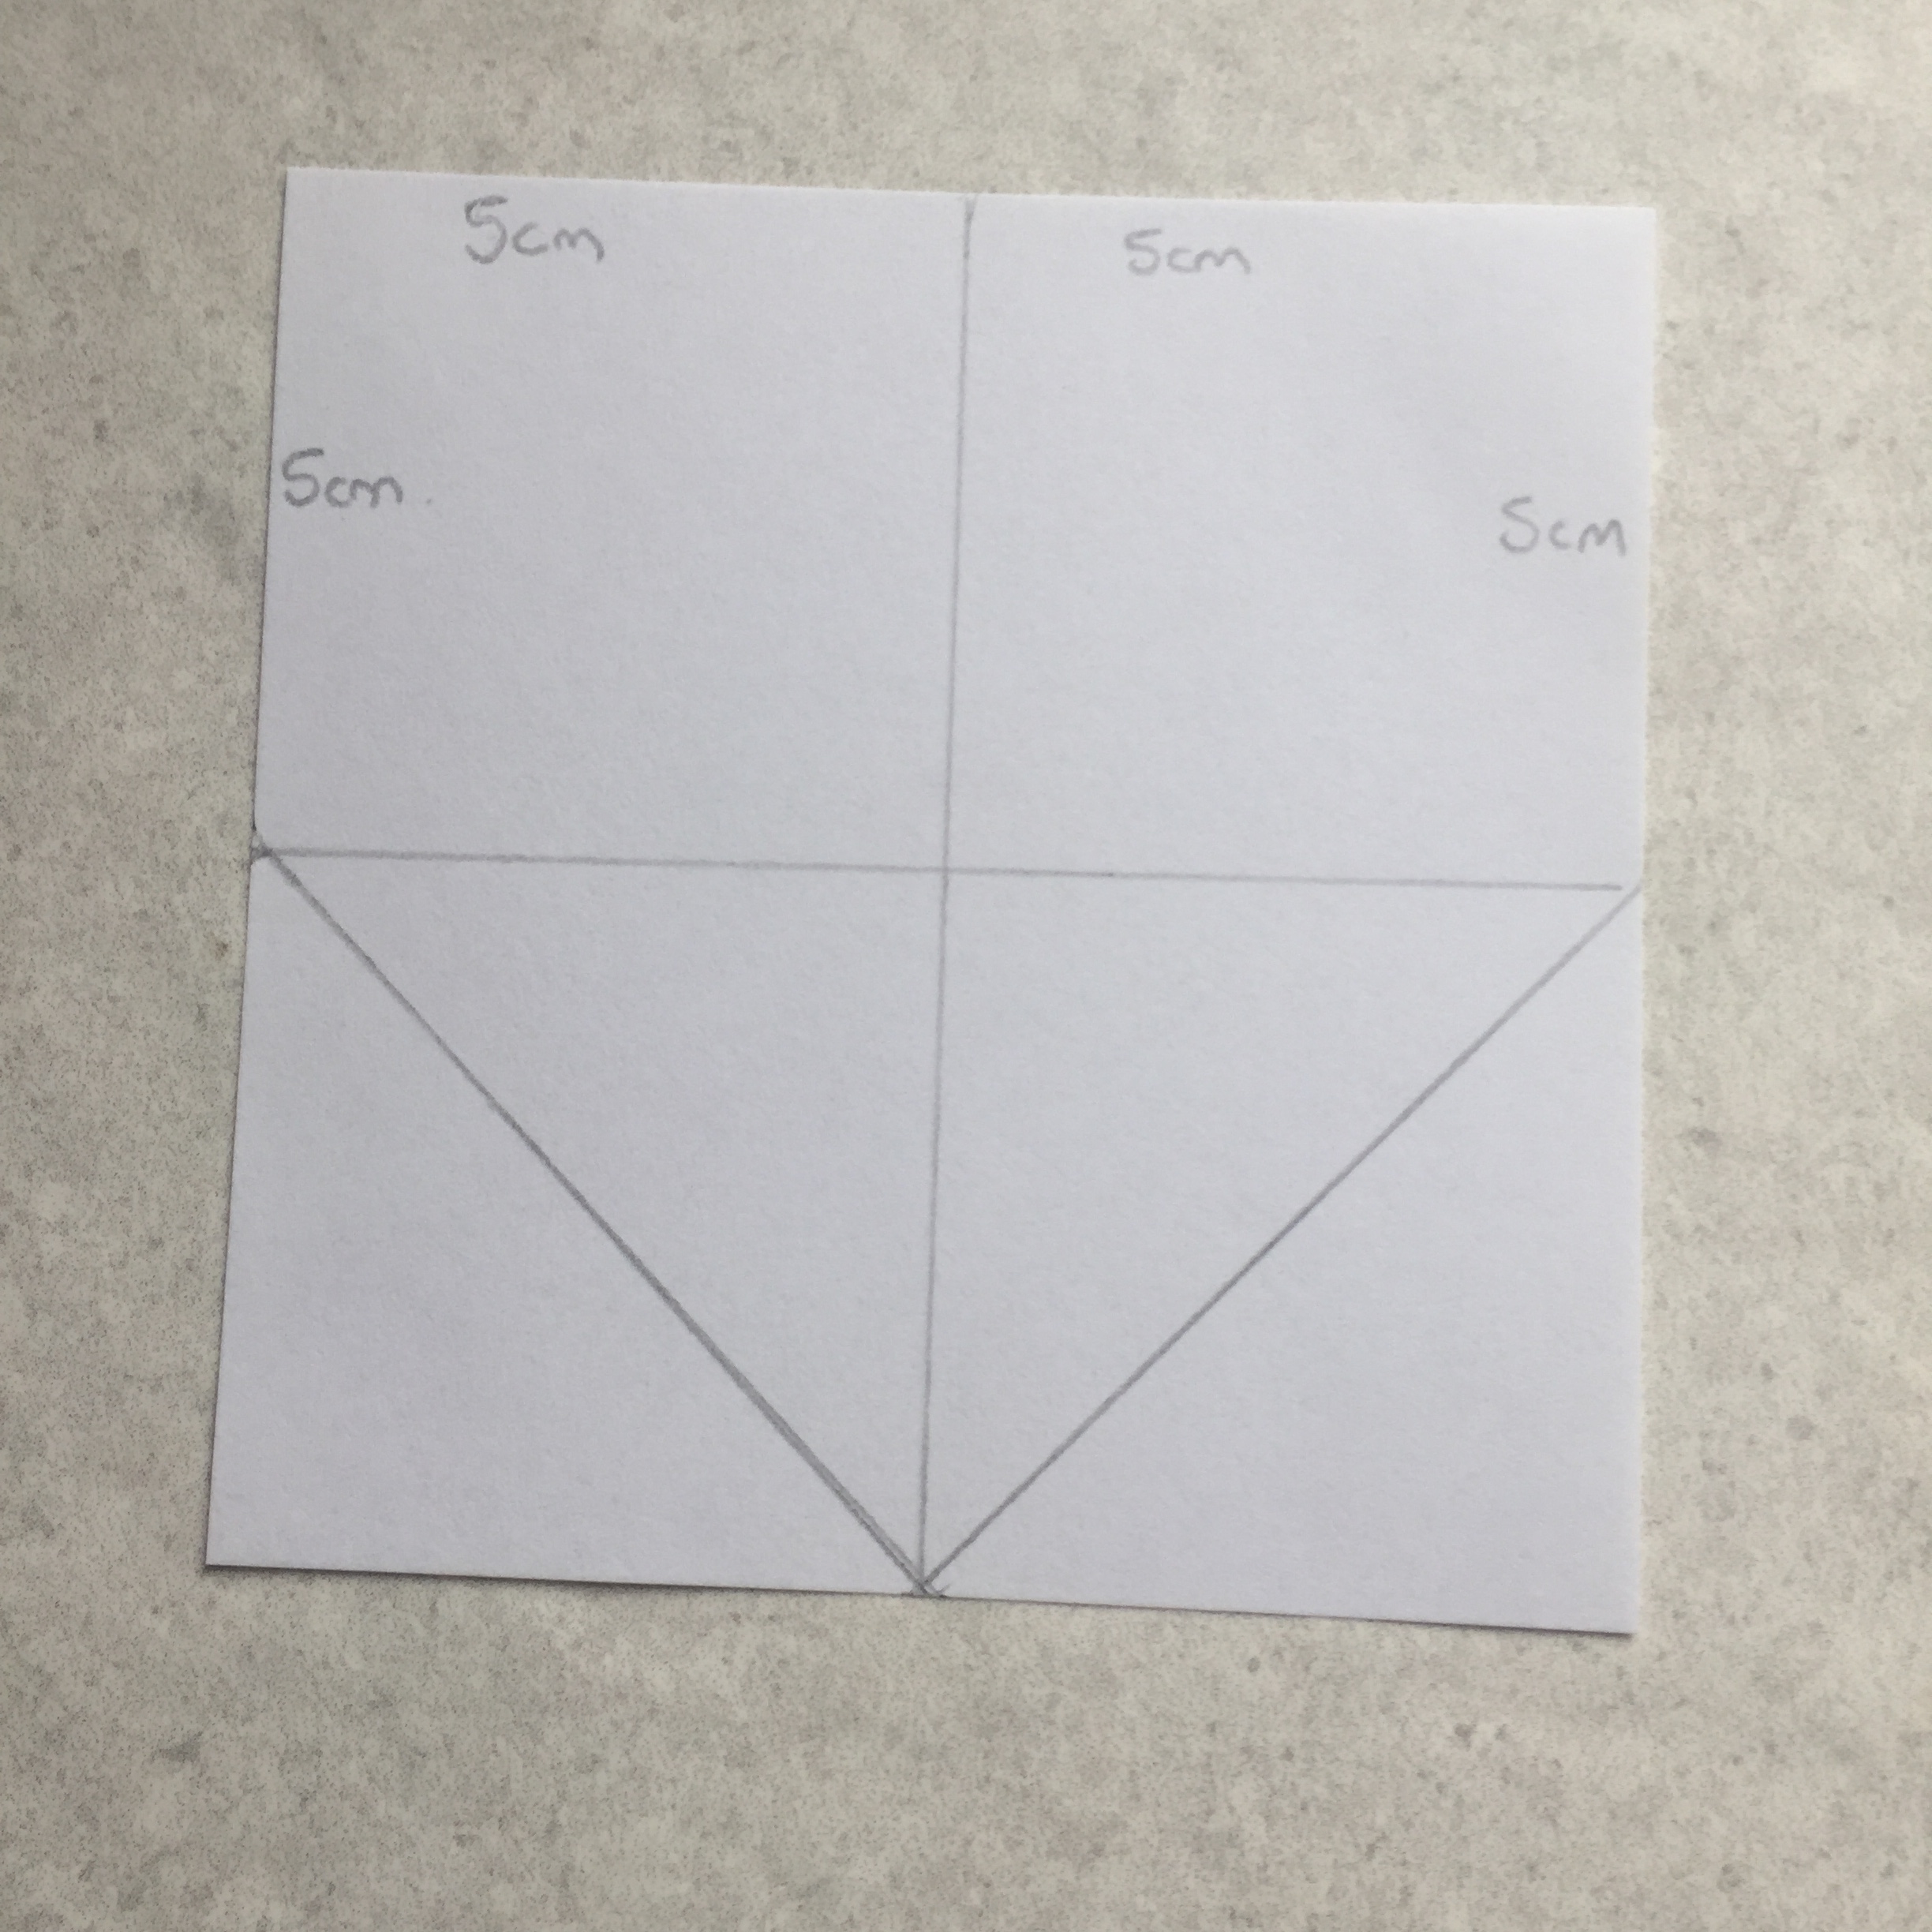
- Make paper templates:
- Cut out a square measuring 10x10cm – This is the main block piece for the quilt.
- Cut out another square which is 10x10cm and divide into 4, then divide two of the squares diagonally so these two squares consist of two triangles, cut along the lines to make the bow detail block piece.

- Cut out the fabrics:
- Using the main block piece and leaving a 0.5cm seam allowance cut out:
- 73 block pieces from the different green fabrics.
- 16 block pieces from the different red fabrics.
- 9 block pieces from the white fabric.
- Using the bow detail block piece and leaving a 0.5cm seam allowance:
- 2 small squares from one of the green fabrics.
- 2 triangles from one of the green fabrics.
- 2 triangles from the white fabric.


- Making the bow detail block piece:
- Take the bow detail block fabric pieces:
- Start with the two green squares and place right sides together, sew down the side seam then fold out and press.
- Next take two of the triangle pieces which make up one of the smaller squares and placing right sides together sew down the long edge, fold out and press.
- Repeat with the other two triangle pieces which will give you two squares.
- Next sew these two blocks together by placing right sides together and sewing down the side.
- Take the two sets of two squares and place right sides together and sew along the top edge to join.
- Fold out and press.


- Sew the quilt front together:
- Sew together the main block pieces row by row following the present pattern.
- Once all rows have been sewn, sew together the rows to complete the quilt top.
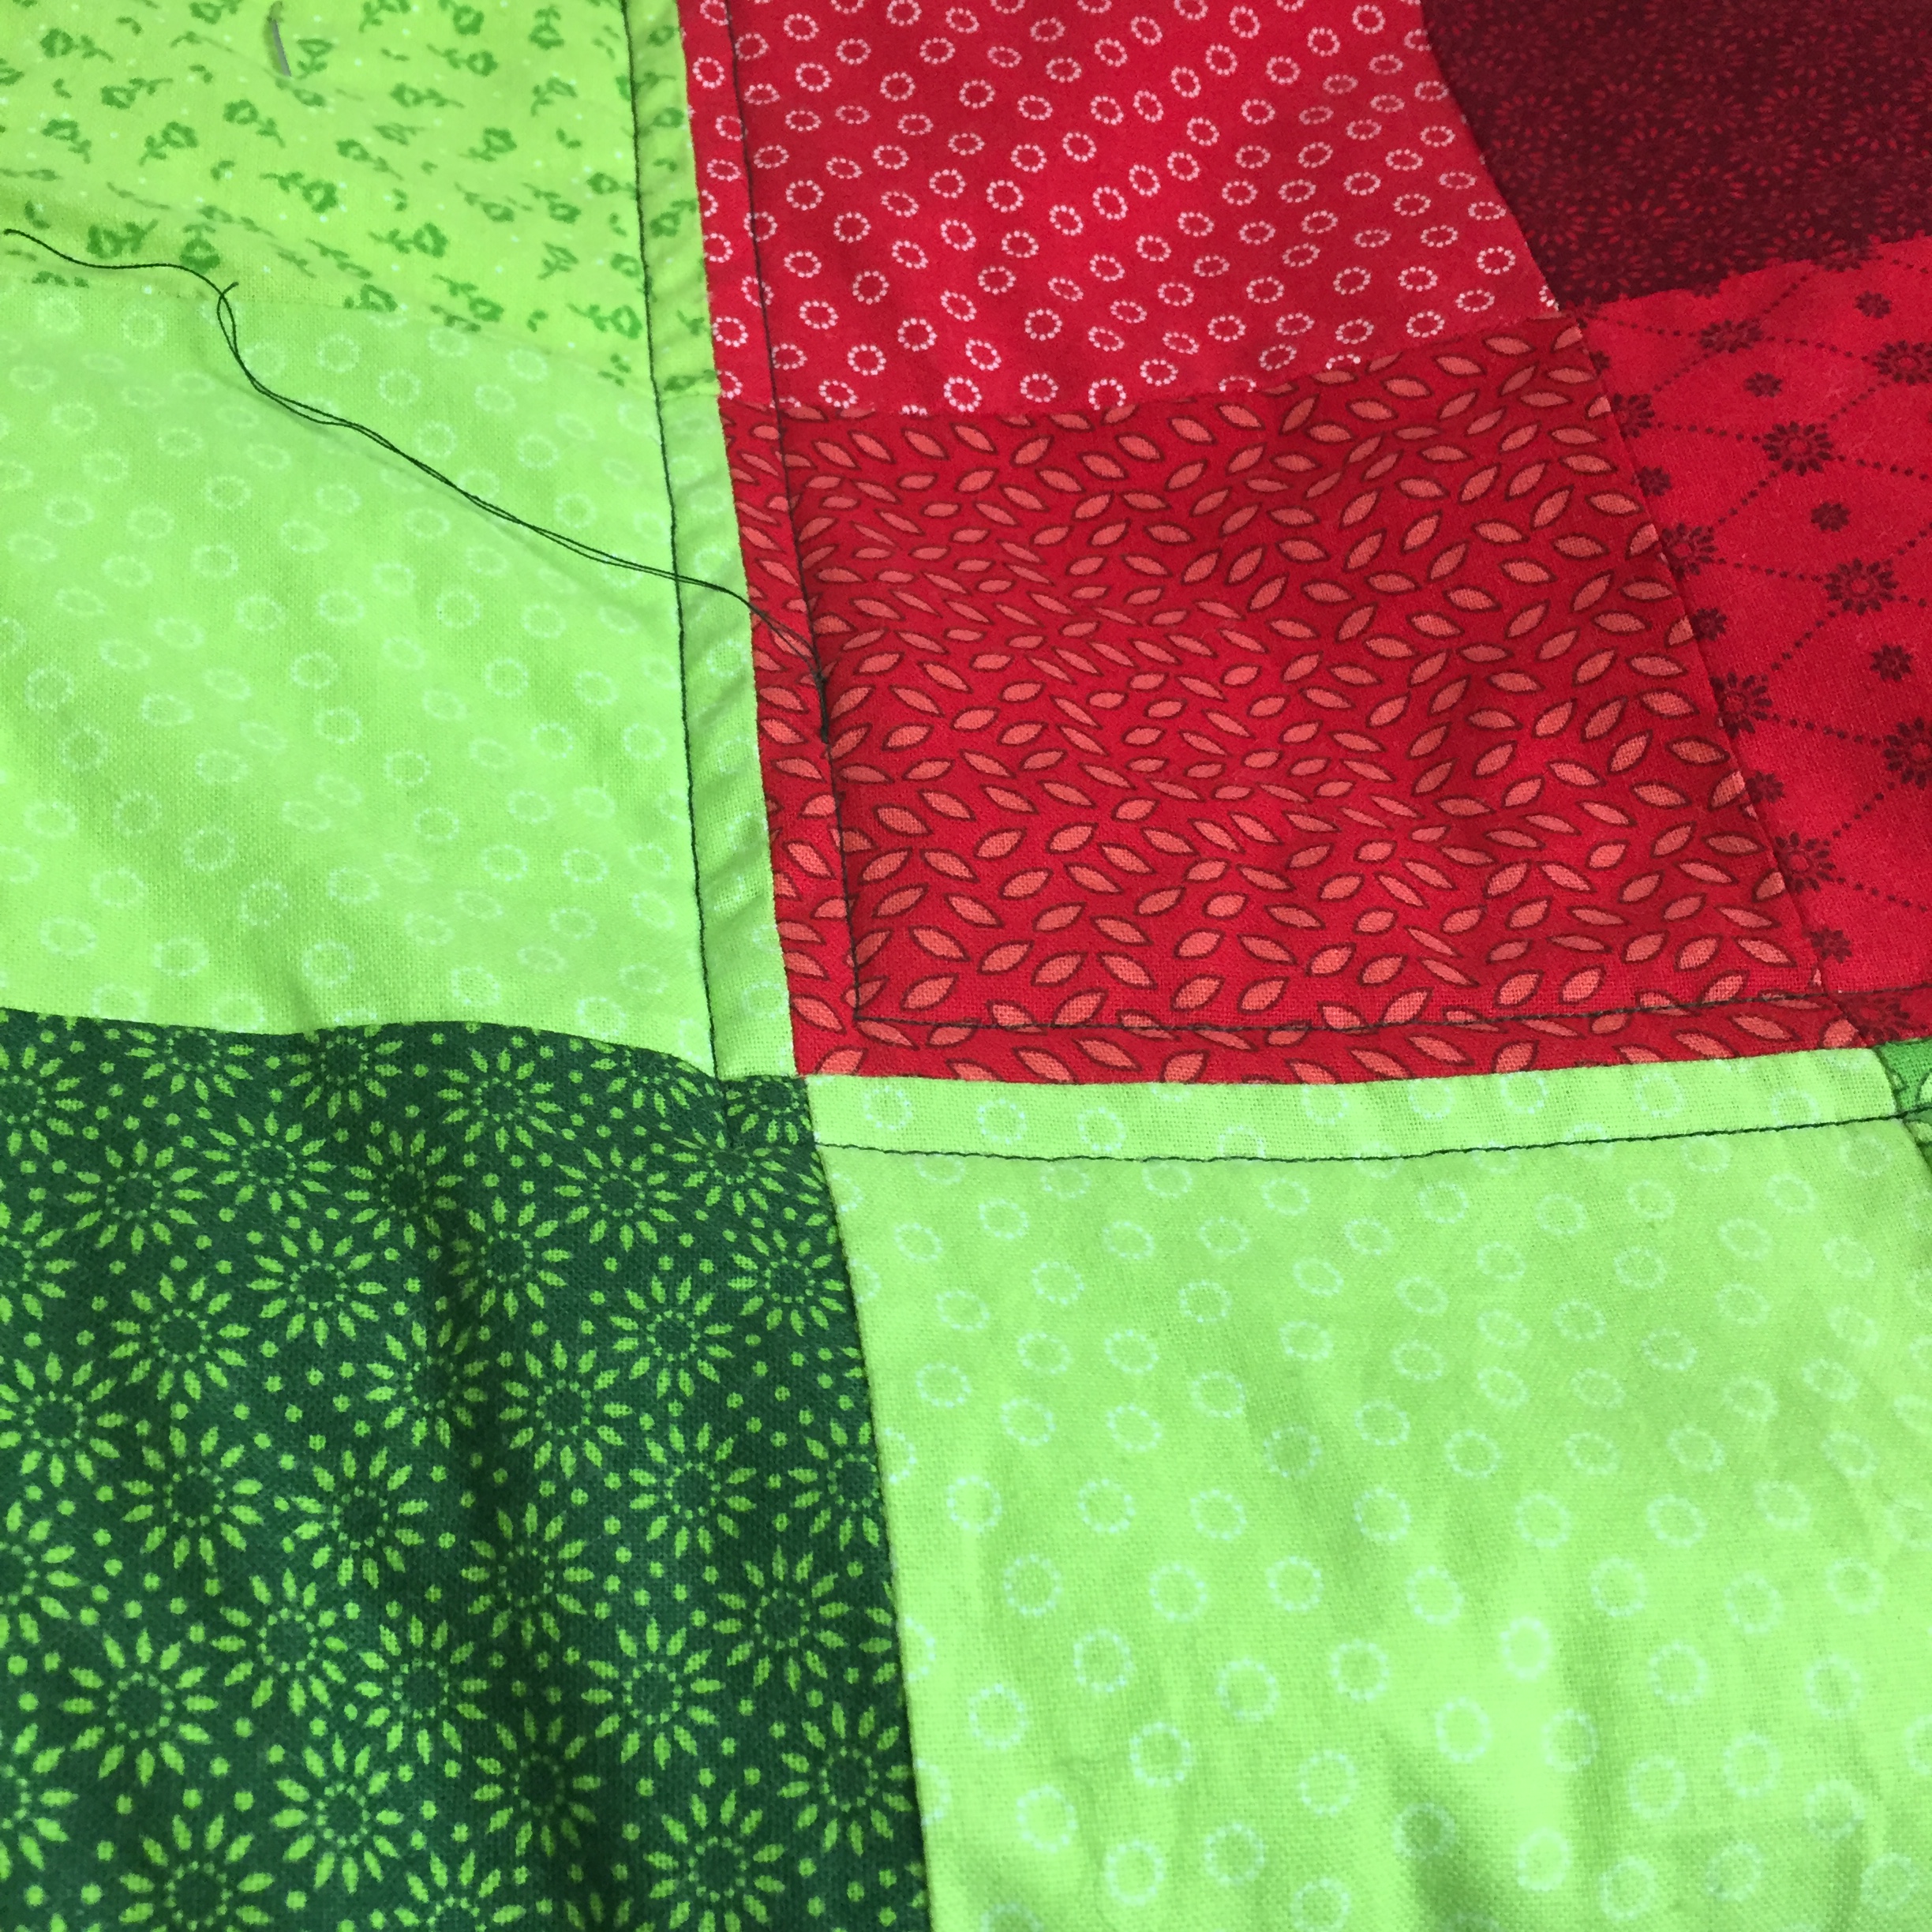
- Adding quilted detail:
- Layout the batting and place the quilt top on top.
- Pin to secure then add quilting detail by sewing lines 1cm either side of the block join seams of the present.
- Add the binding:
How to make binding tutorial can be found here.
- Make the binding with 8cm wide strips of fabric. The binding will need to be 4.20m long.
- Once made diagonally fold over the starting end and press. Next fold the strip in half along the long edge pressing as you go.
- Once you have made the binding place the raw edge of the binding against the raw edge of the quilt and pin to secure then sew 0.5 cm from the raw edge all the way around the quilt to attach the binding.
- Next fold the binding over to the back of the quilt pin to secure then slip stitch around the edge to secure.


The tutorial to make one is also available over on The Craft Cotton Company’s blog

Leave a comment