
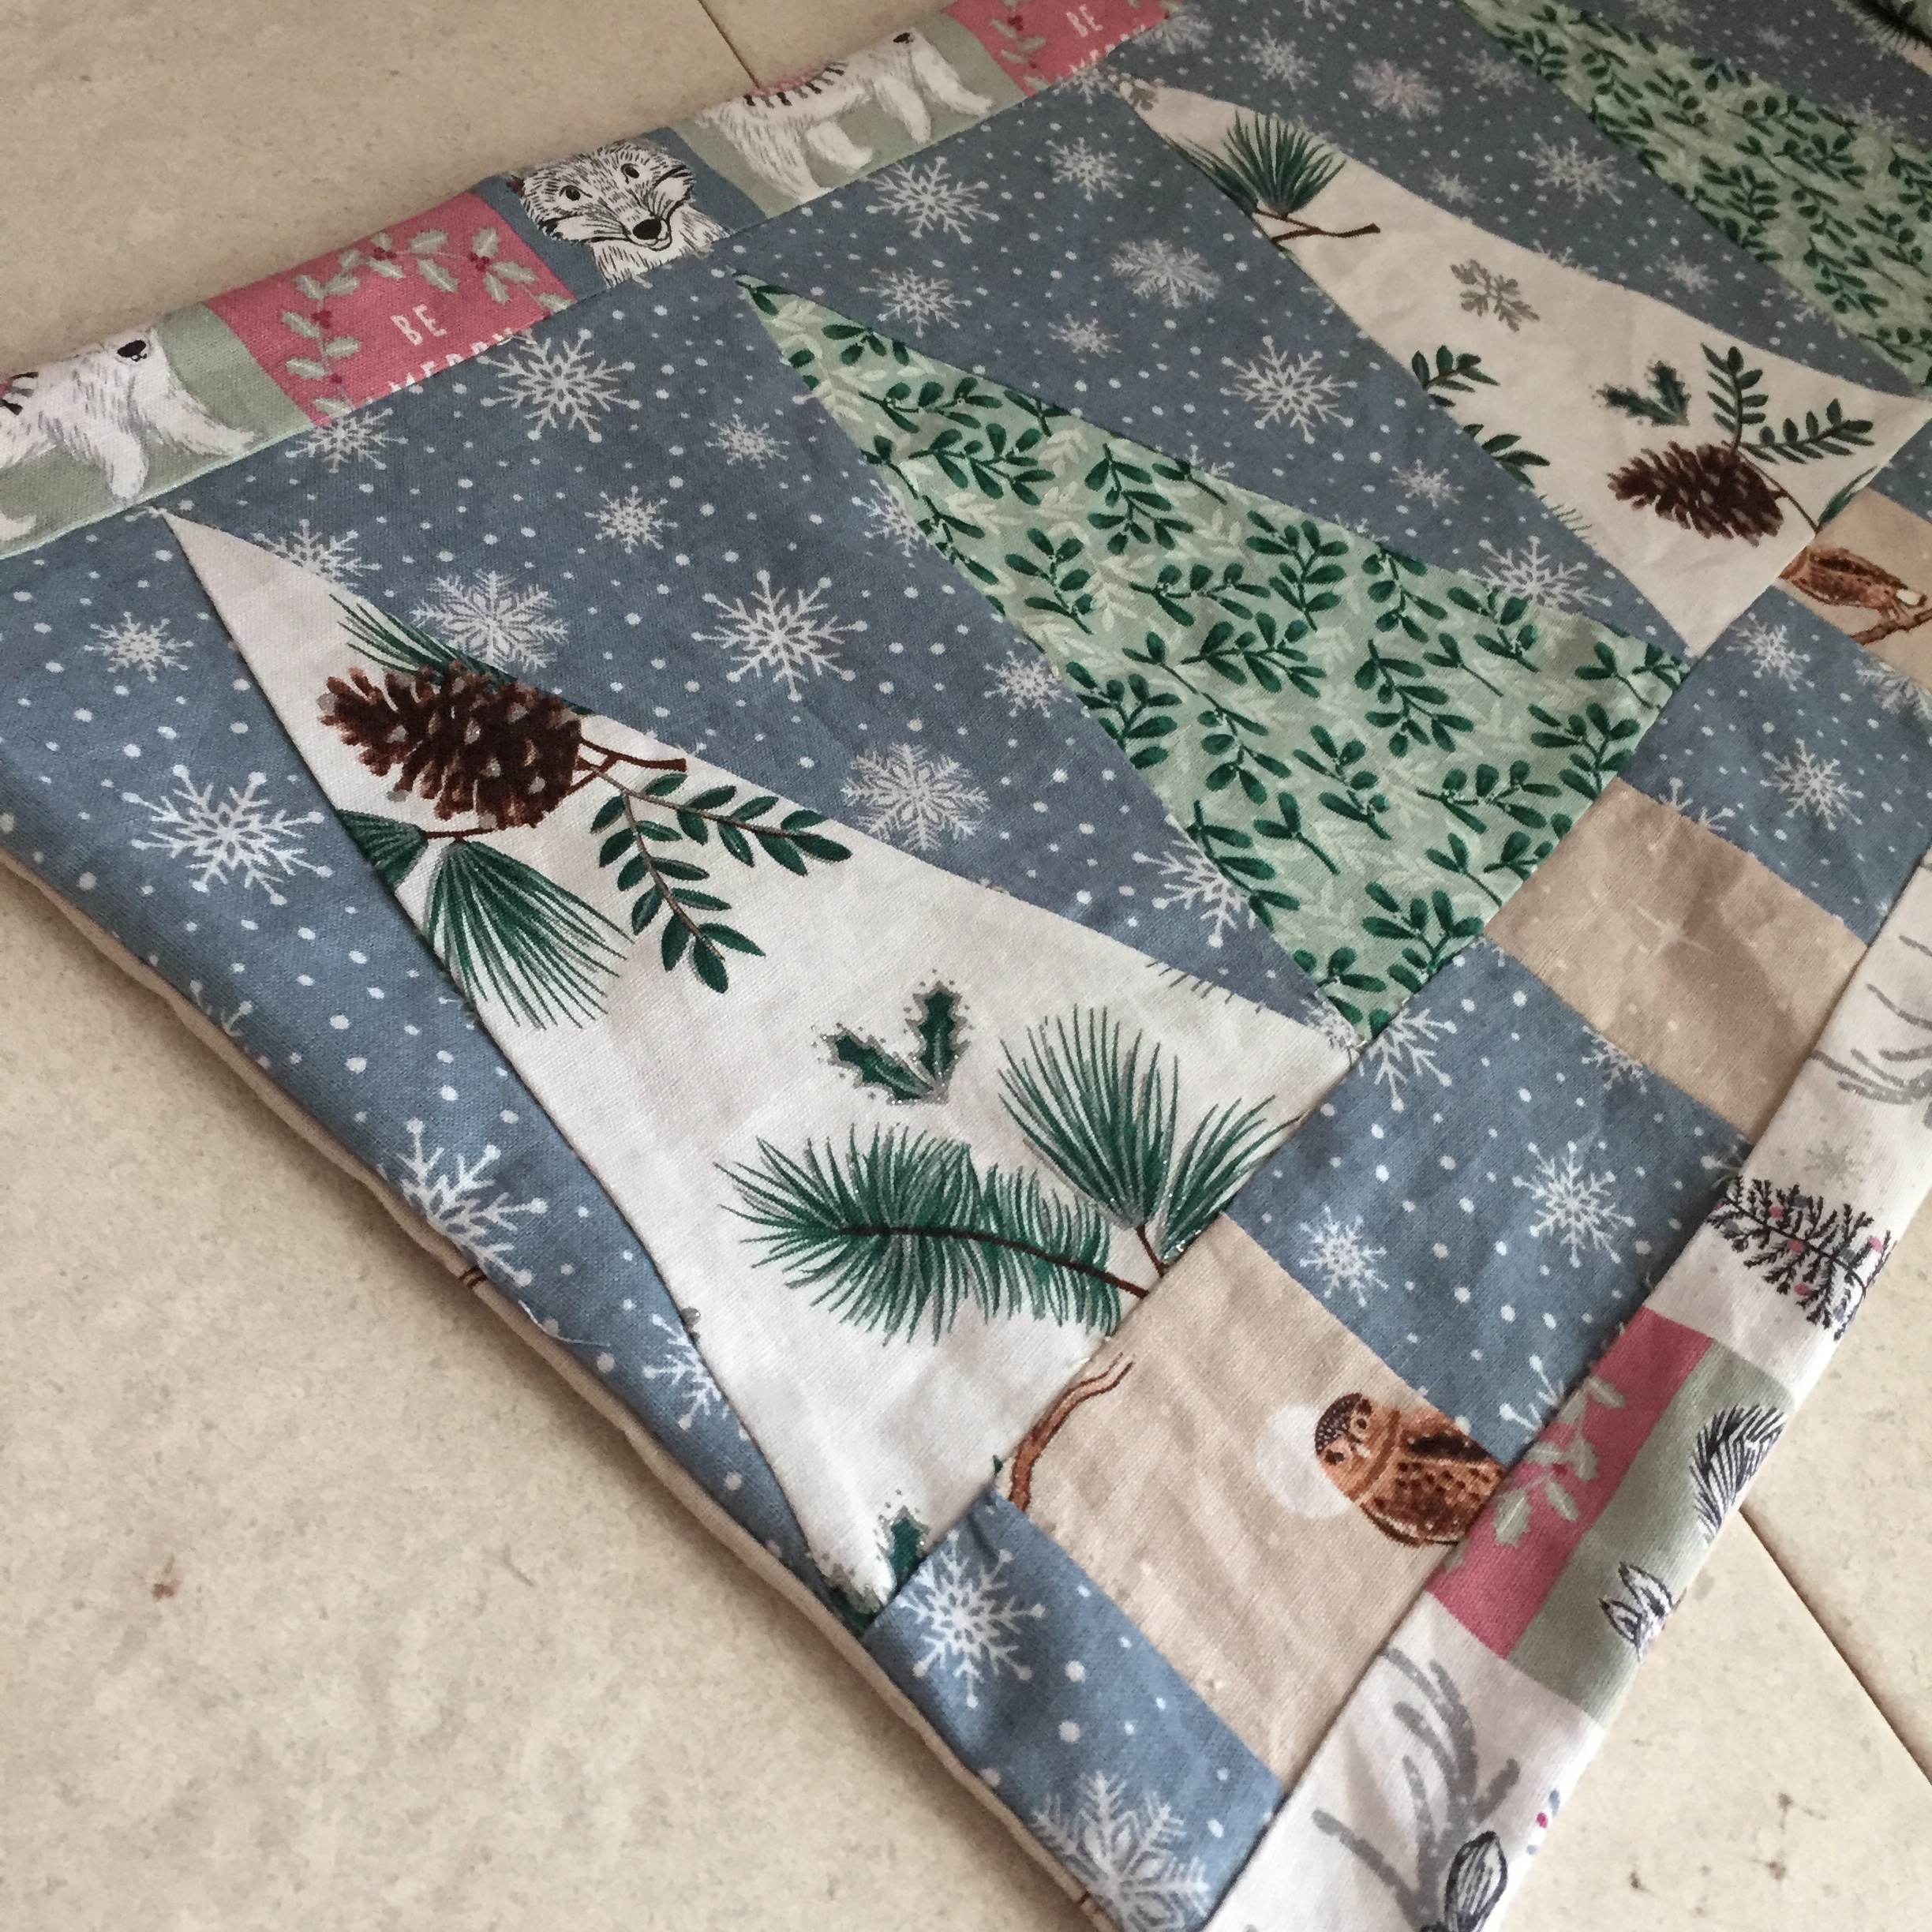
Perfect for Decorating your table this Christmas
It’s great to add a little Christmas sparkle to your table over Christmas and when I saw the Snowy Woodland fabric which was gifted by The Craft Cotton Company I knew I had to make a table runner using it.
I decided to go for a tree theme as two of the fabrics were perfect for this – the green mistletoe and the white pine cone.
I really enjoyed making this – despite having a bit of a disaster half way through when I sewed it all together and realised I had one of the fabric pieces backwards, but luckily that wasn’t too tricky to fix!
Sewing Tutorial: Christmas Patchwork Tree Table Runner Pattern
Materials
- Snowy Woodland fabric by The Craft Cotton Company:
- Snowflake (45×45 – for background).
- Pine cone (30x30cm – for trees).
- Mistletoe (30x30cm – for trees).
- Woodland lodge (20x20cm – for trunks).
- Owls (1m x 32cm – for backing, 20x20cm – for trunks).
- Woodland creatures (2, 1x4cm – for front strips).
- Ruler.
- Pencil.
- Paper.
- Pins.
- Scissors.
- Needle.
- Thread.
Finished Size
- 1m x 33cm.
Sewing Tutorial: Christmas Patchwork Tree Table Runner Pattern
- On paper draw out a template for the patchwork pieces (below is drawn on a 20x21cm piece of paper).
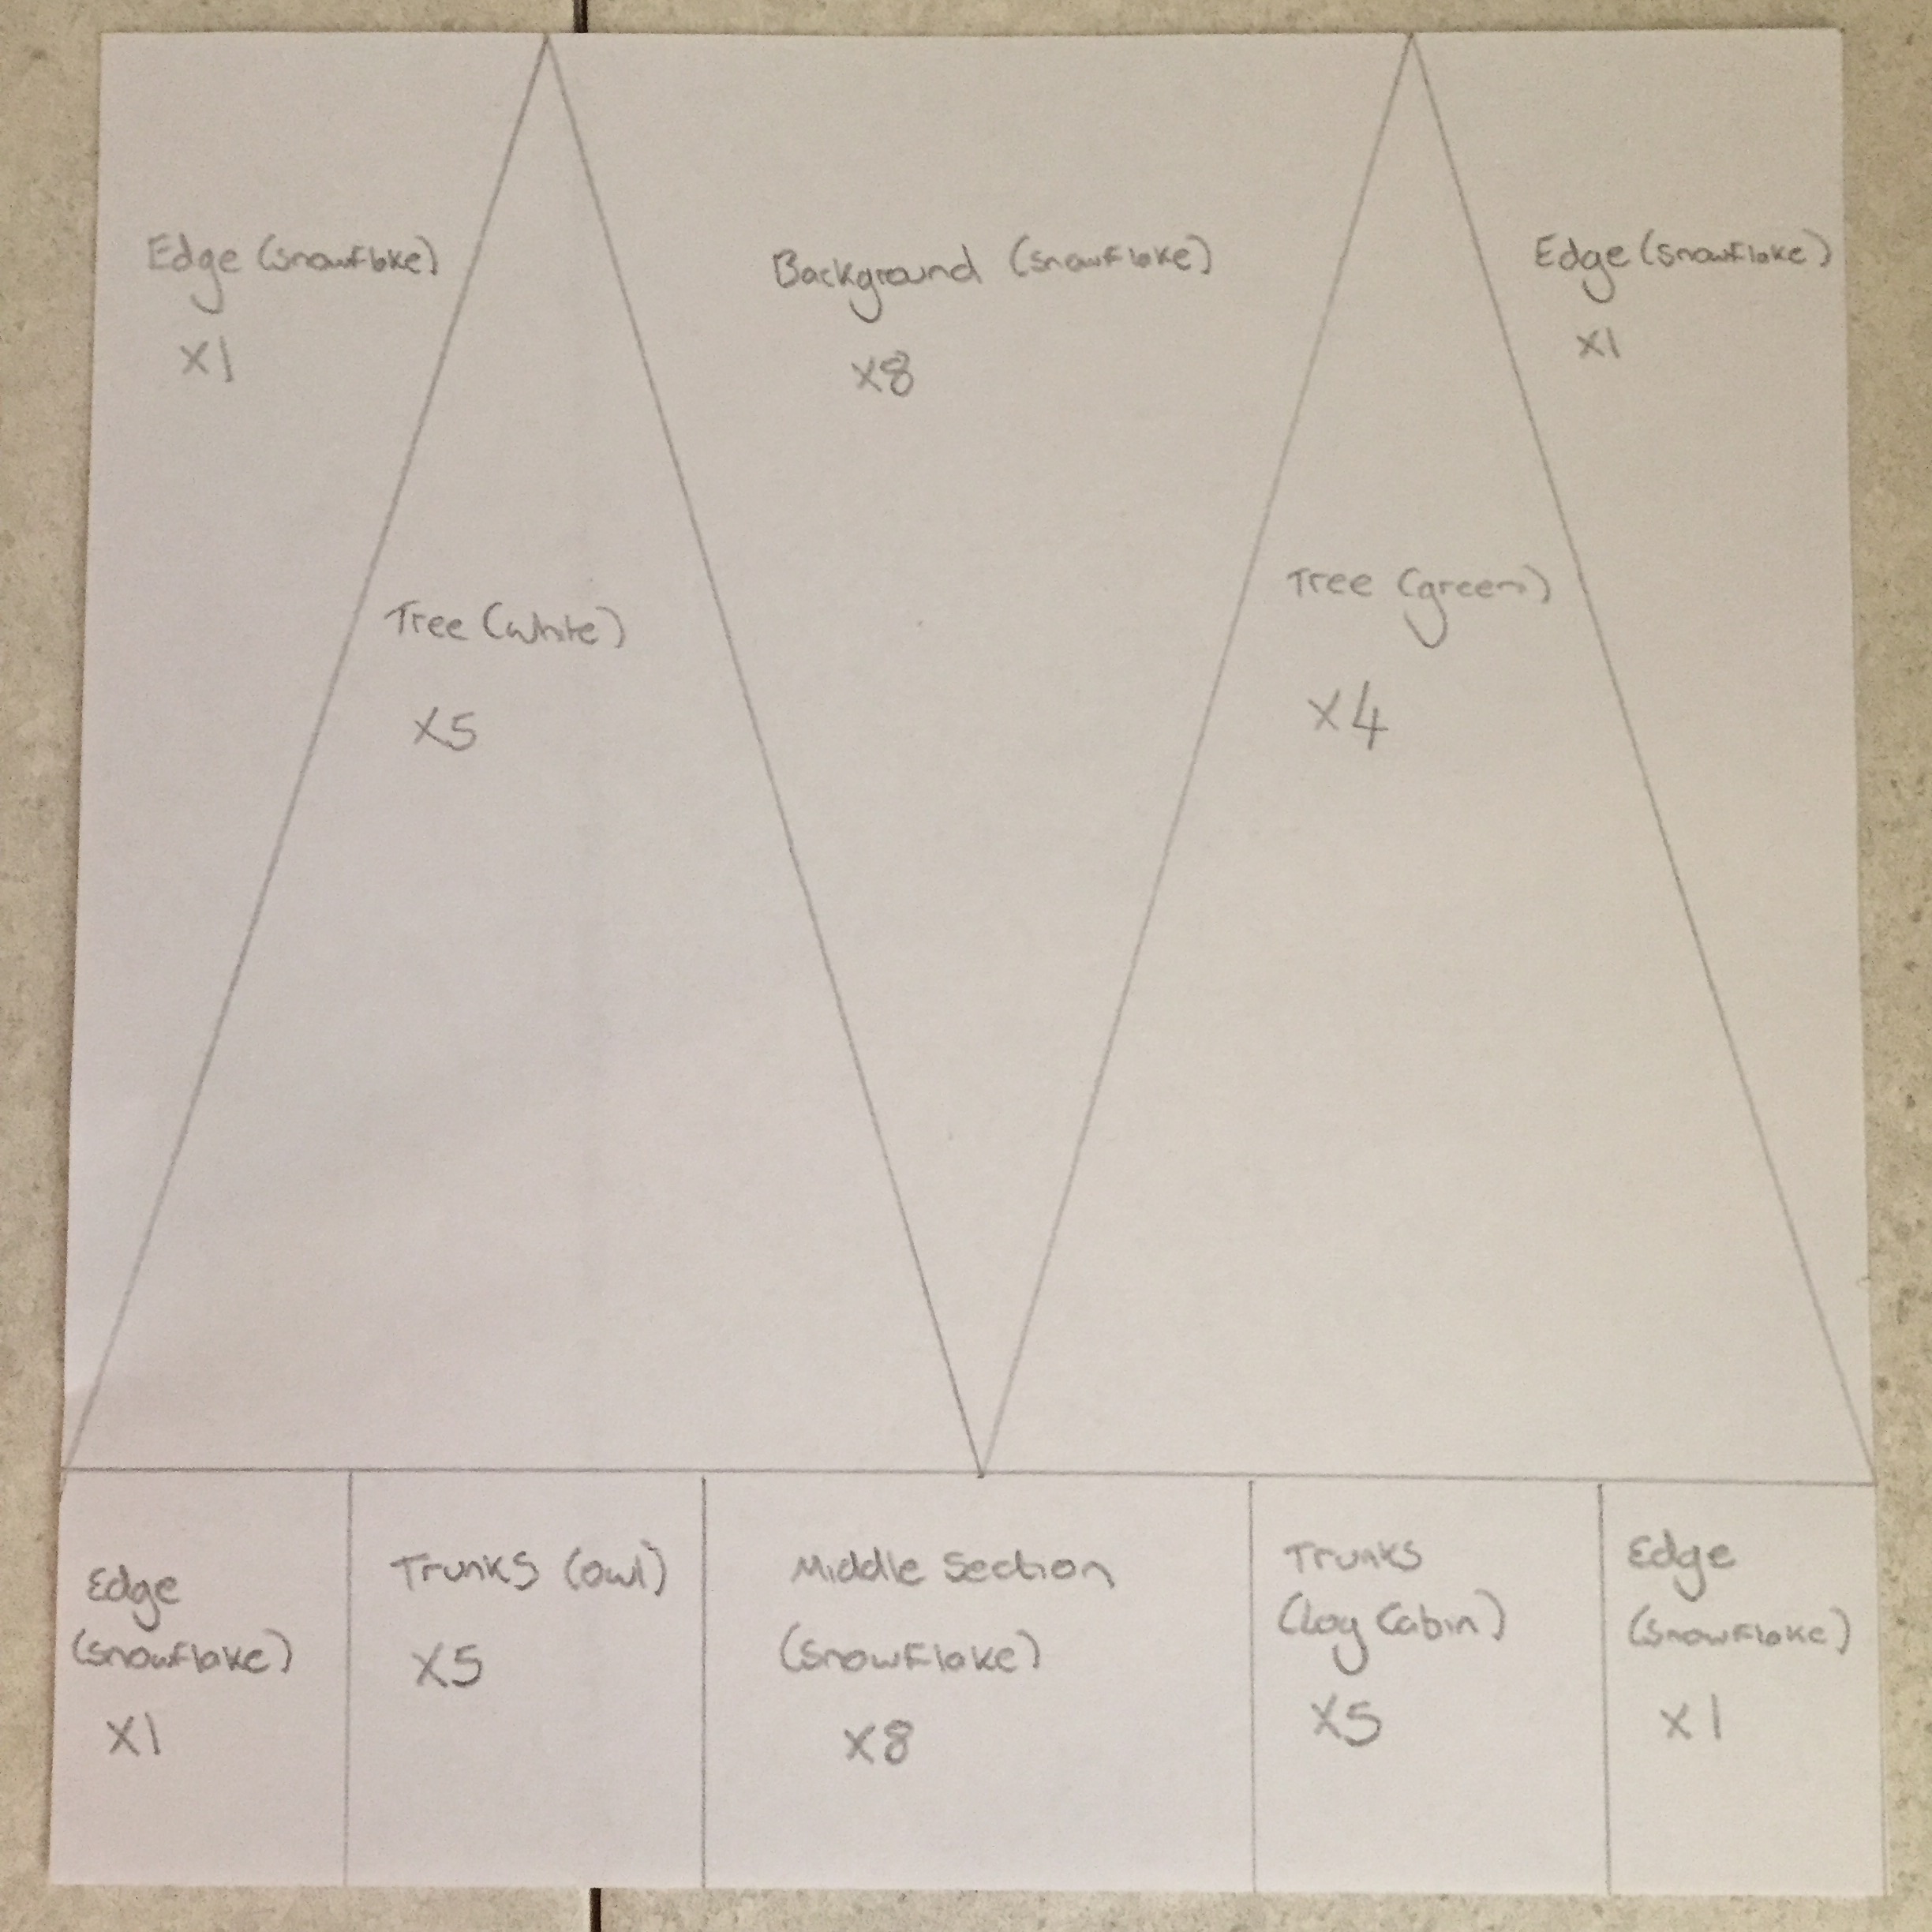
- Cut out the template and use this to cut out the fabric using a 0.5cm seam allowance.
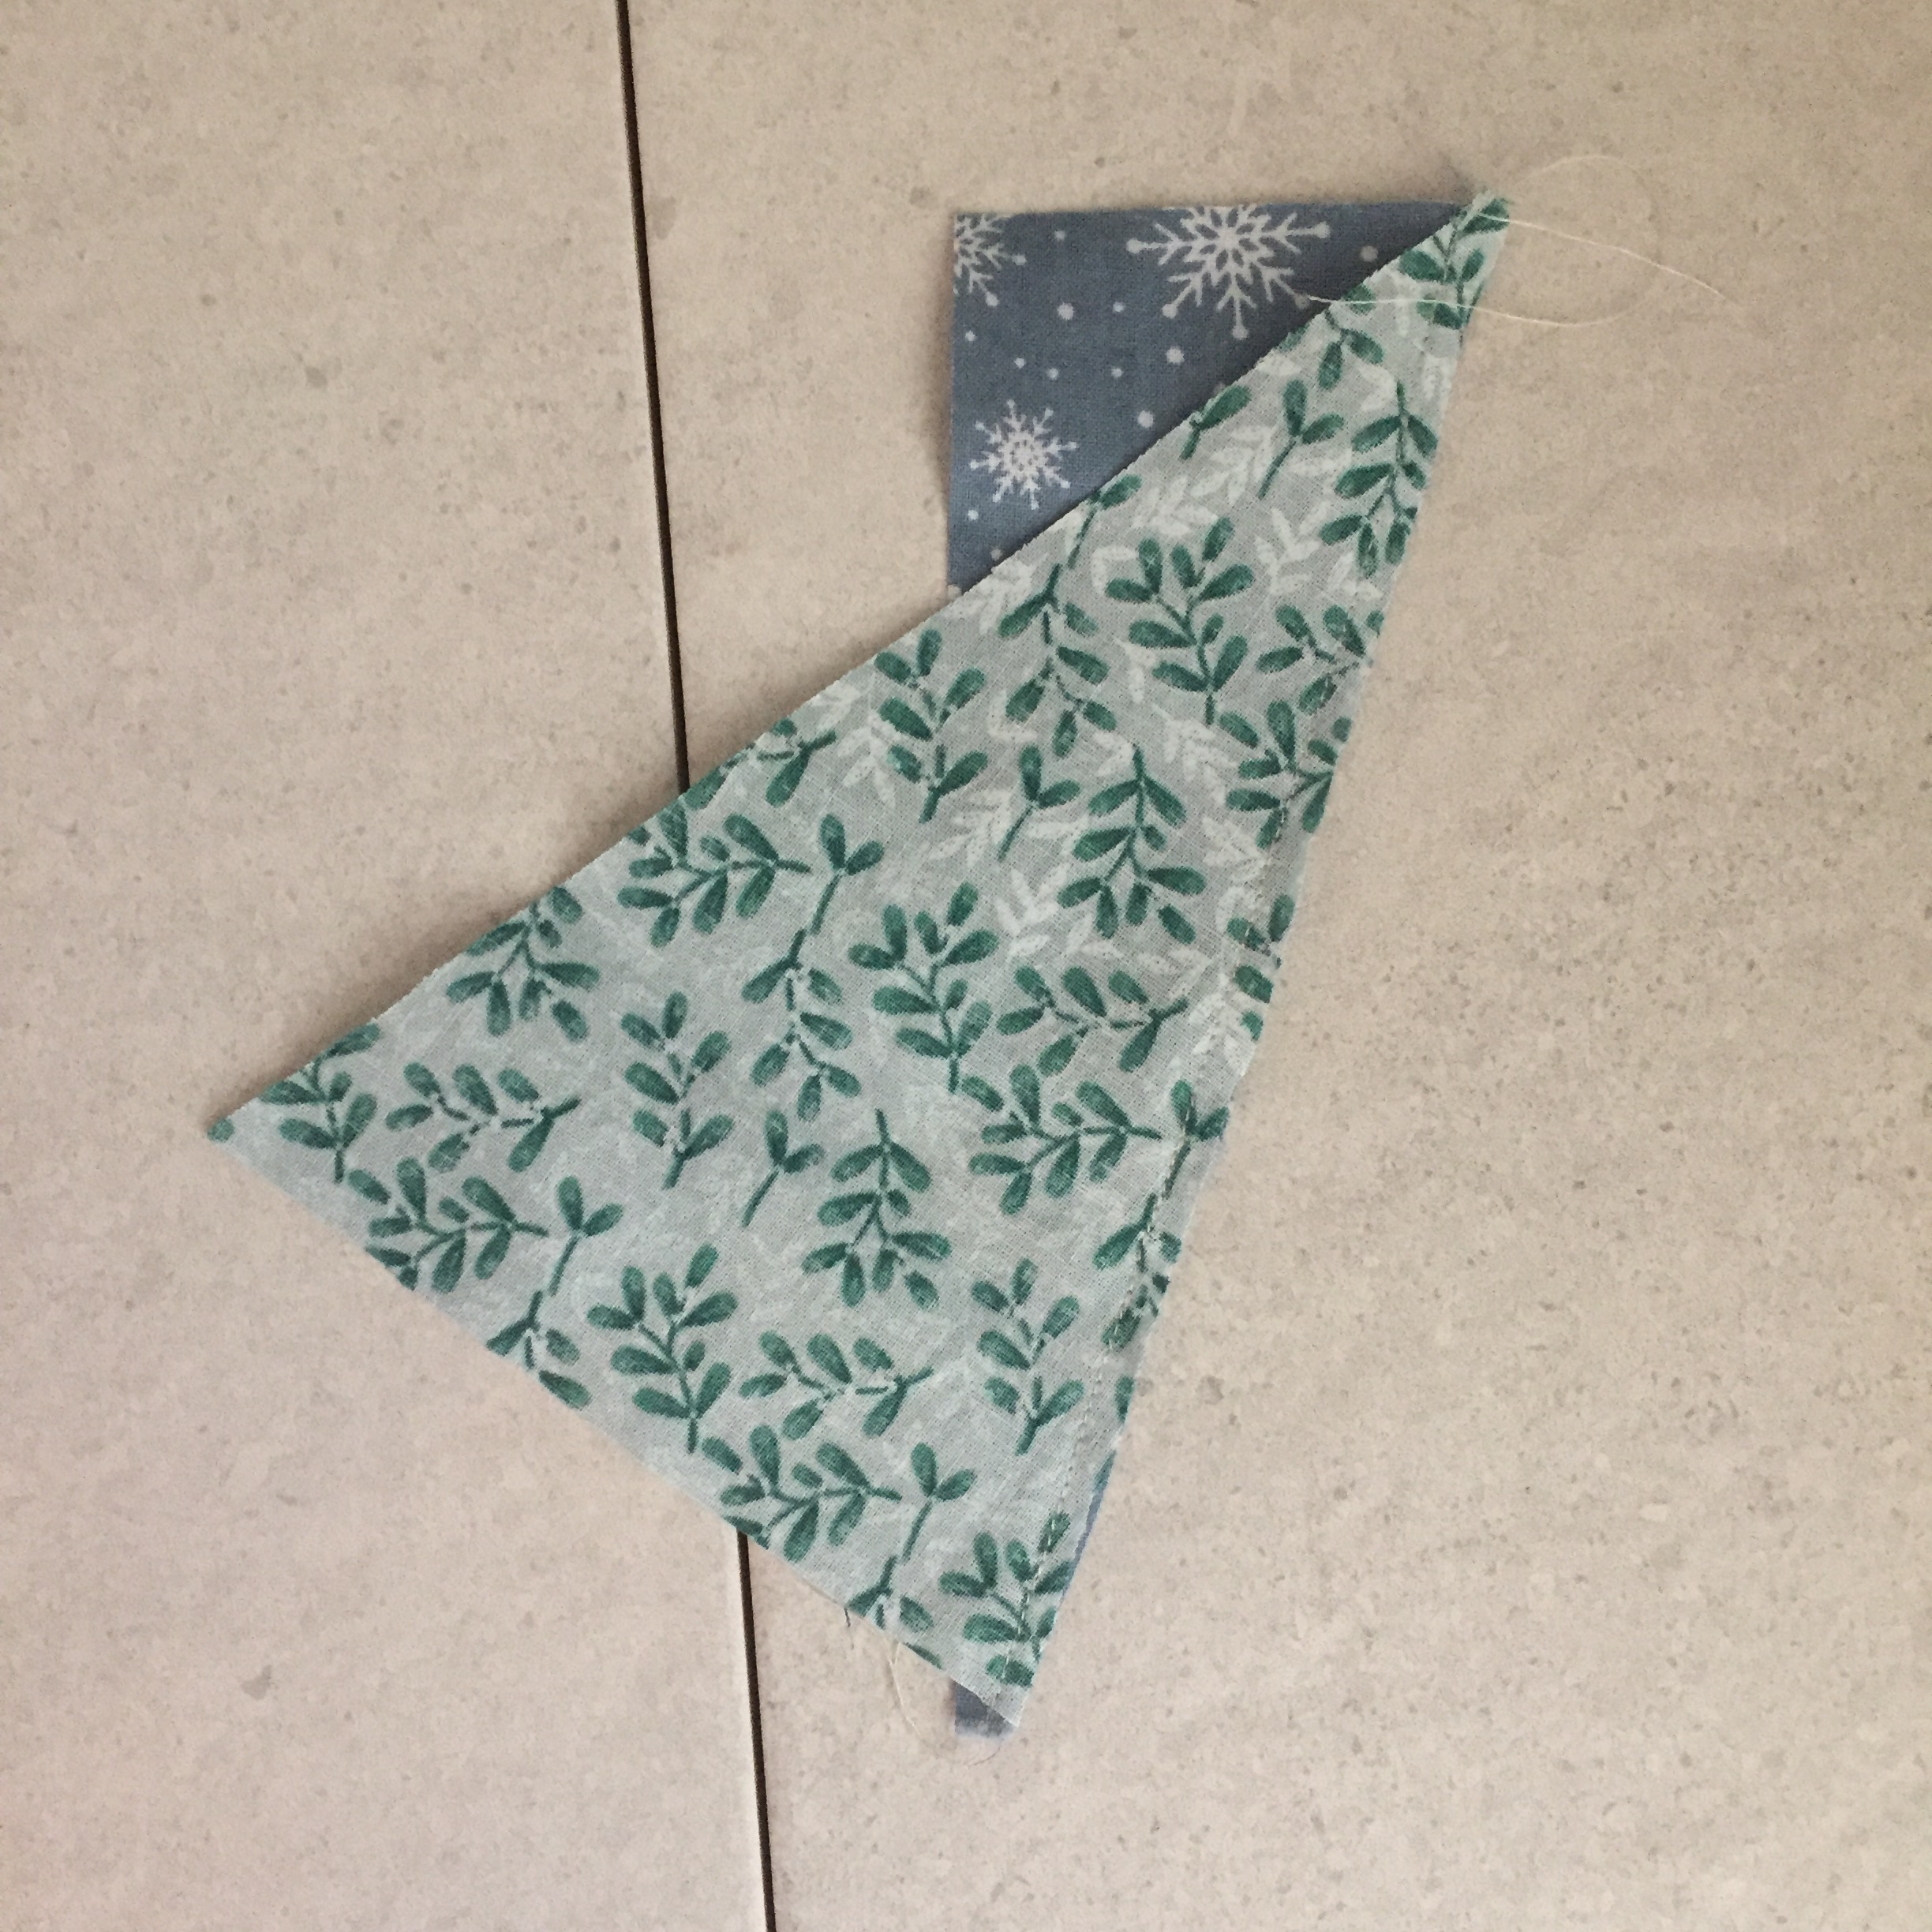
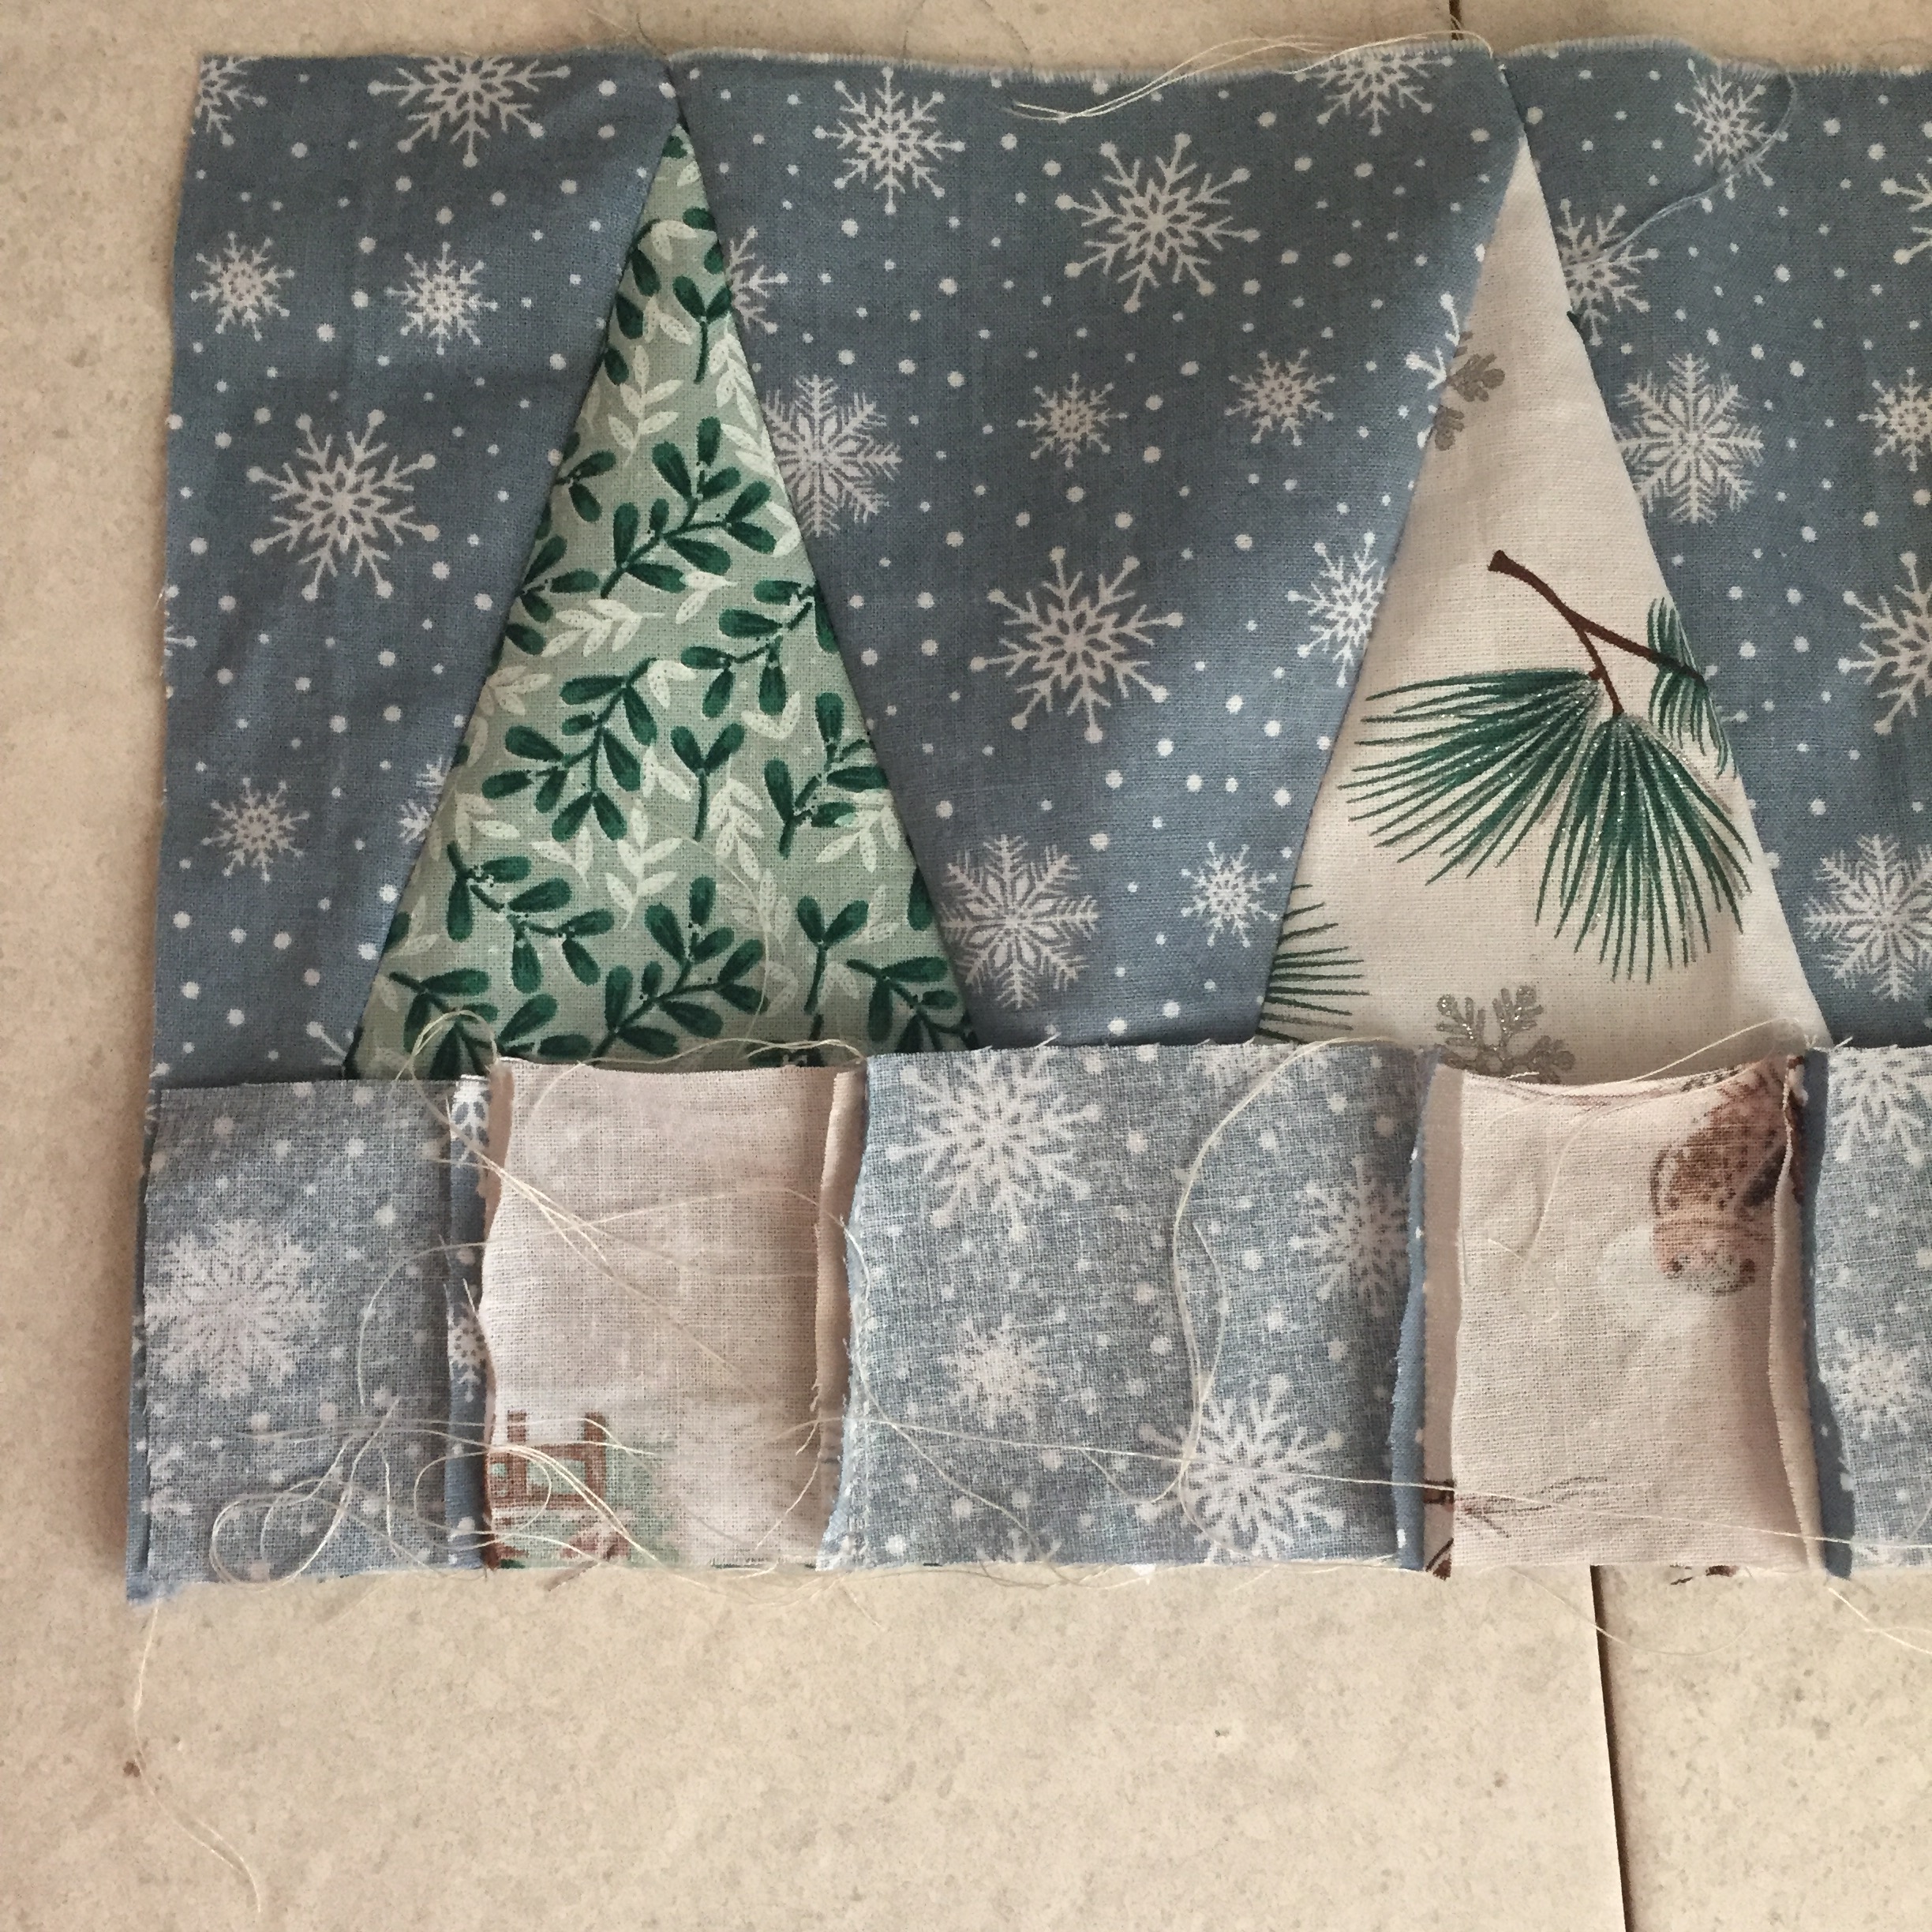
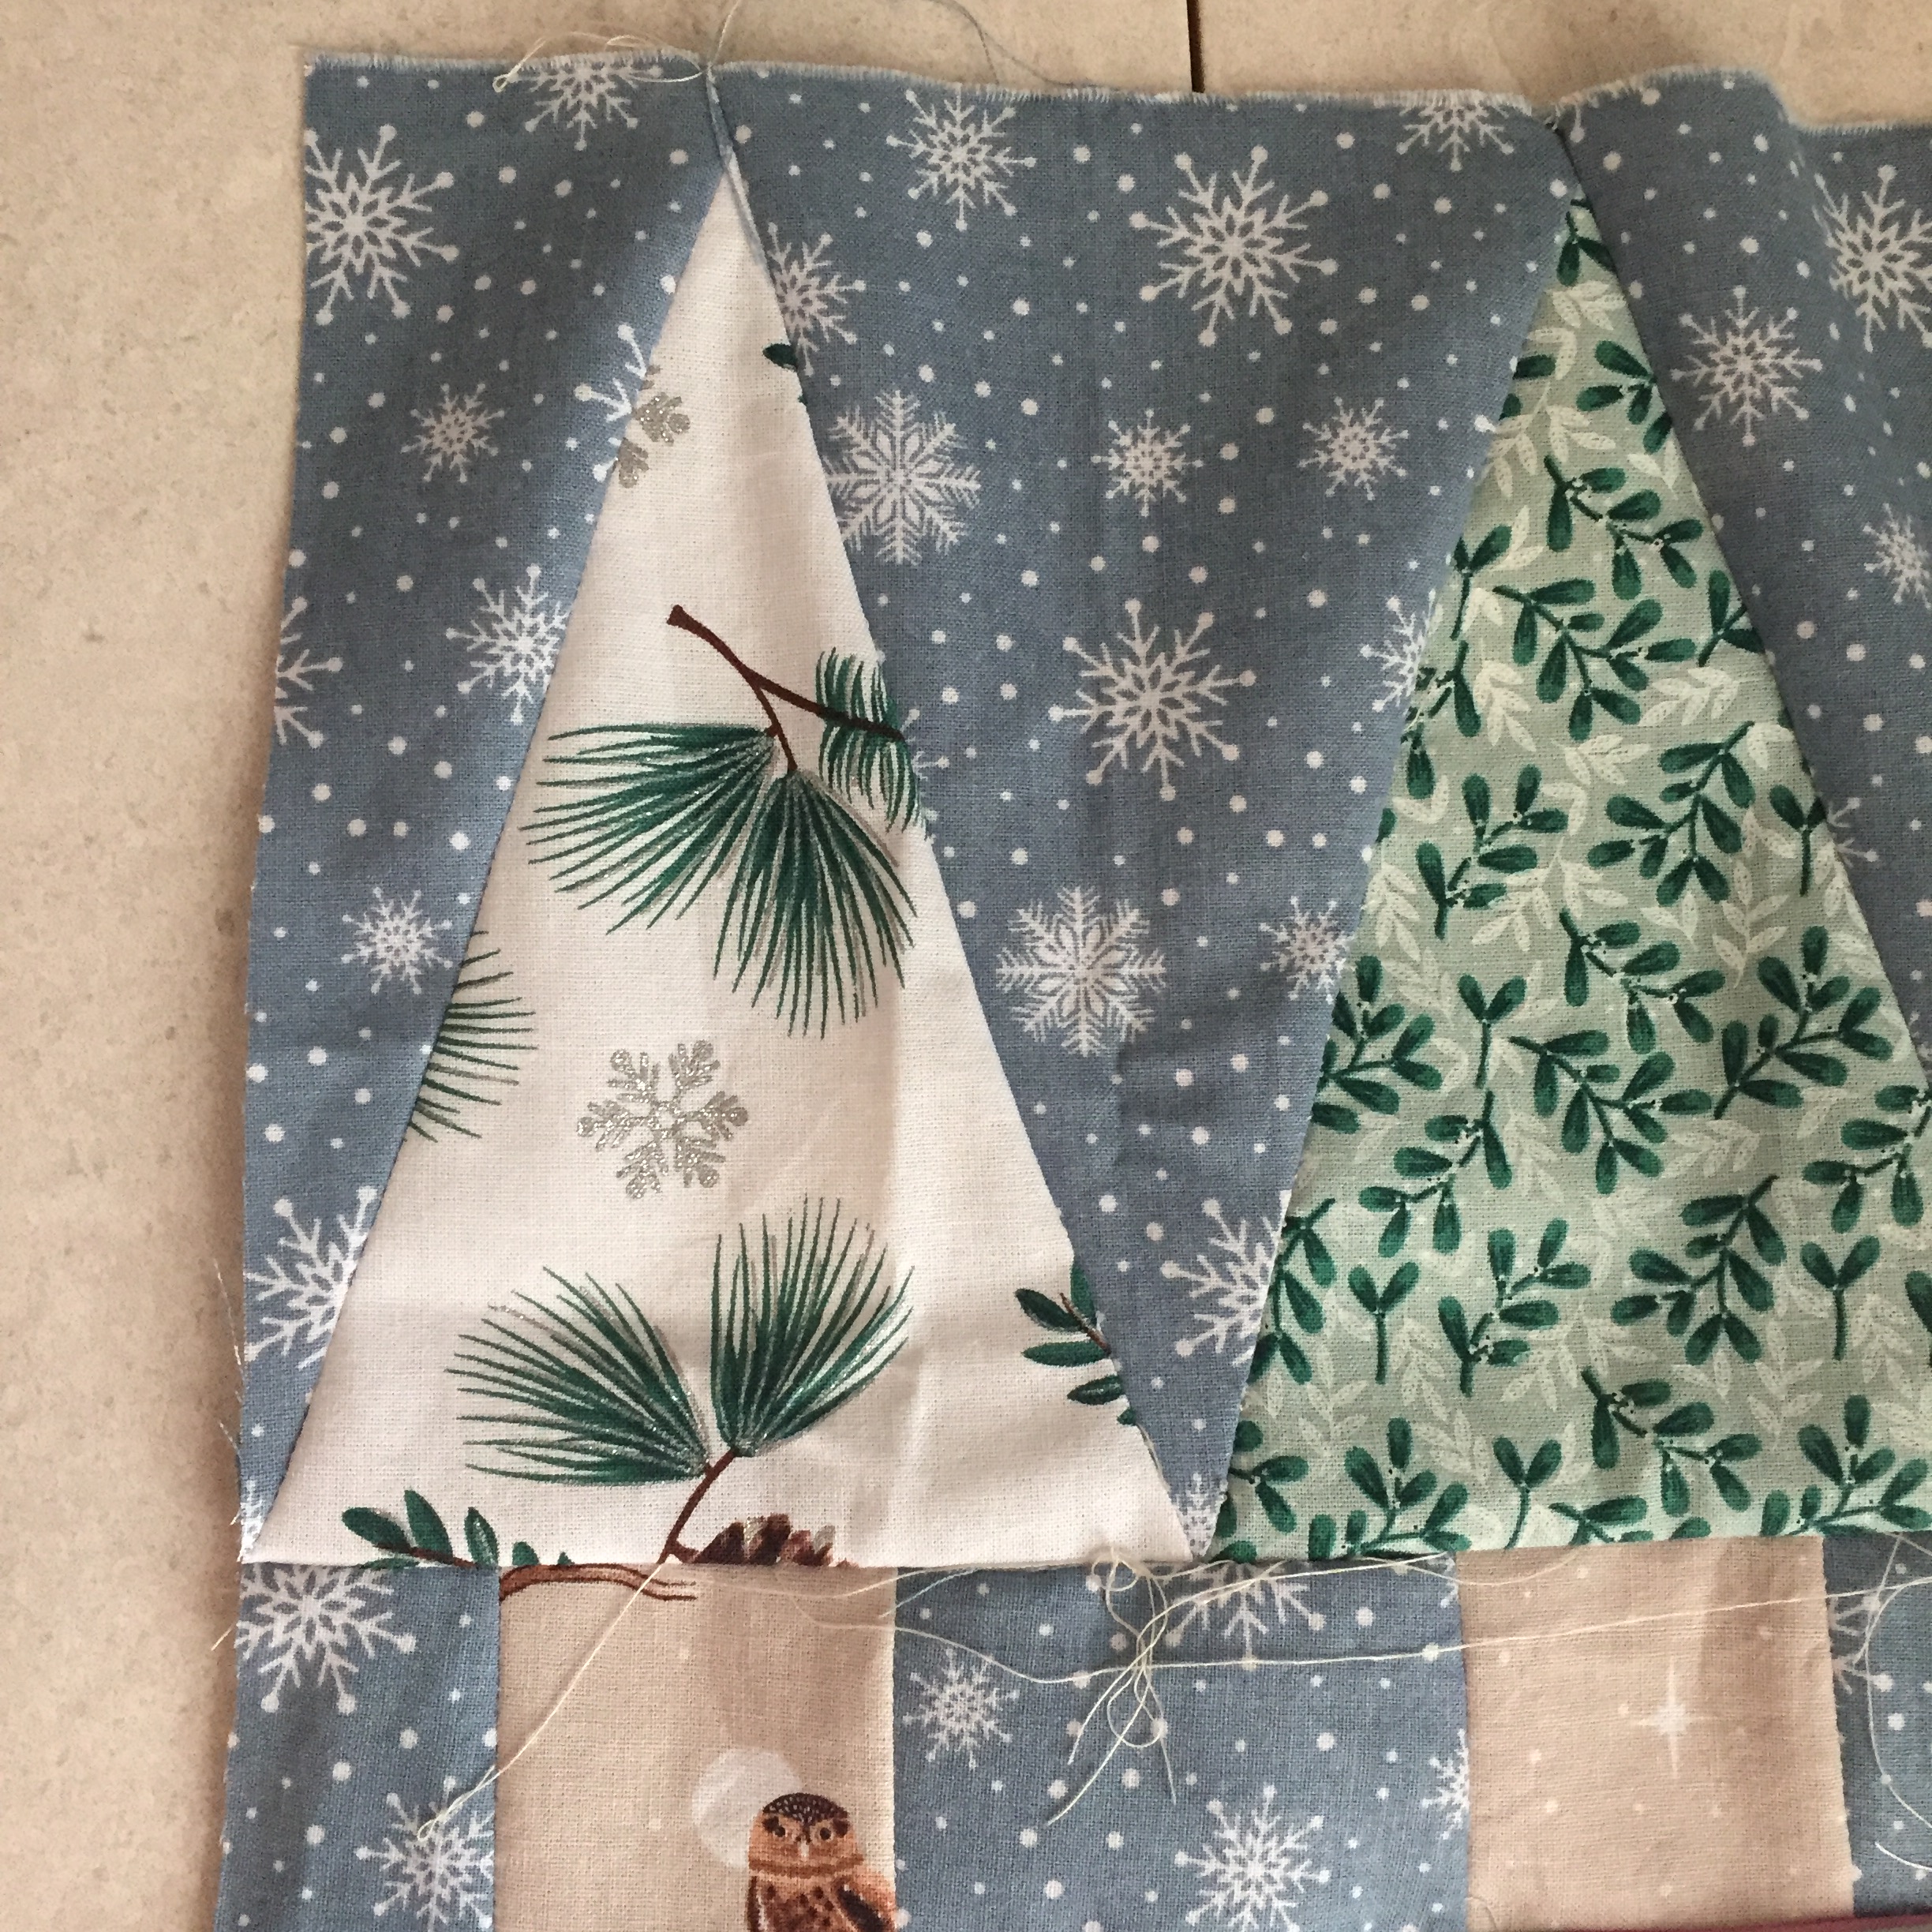
- Take the trunks and snowflake background pieces that will form the tree trunk bottom patchwork row of the table runner and join them together by placing right sides together and sewing down the right hand side.

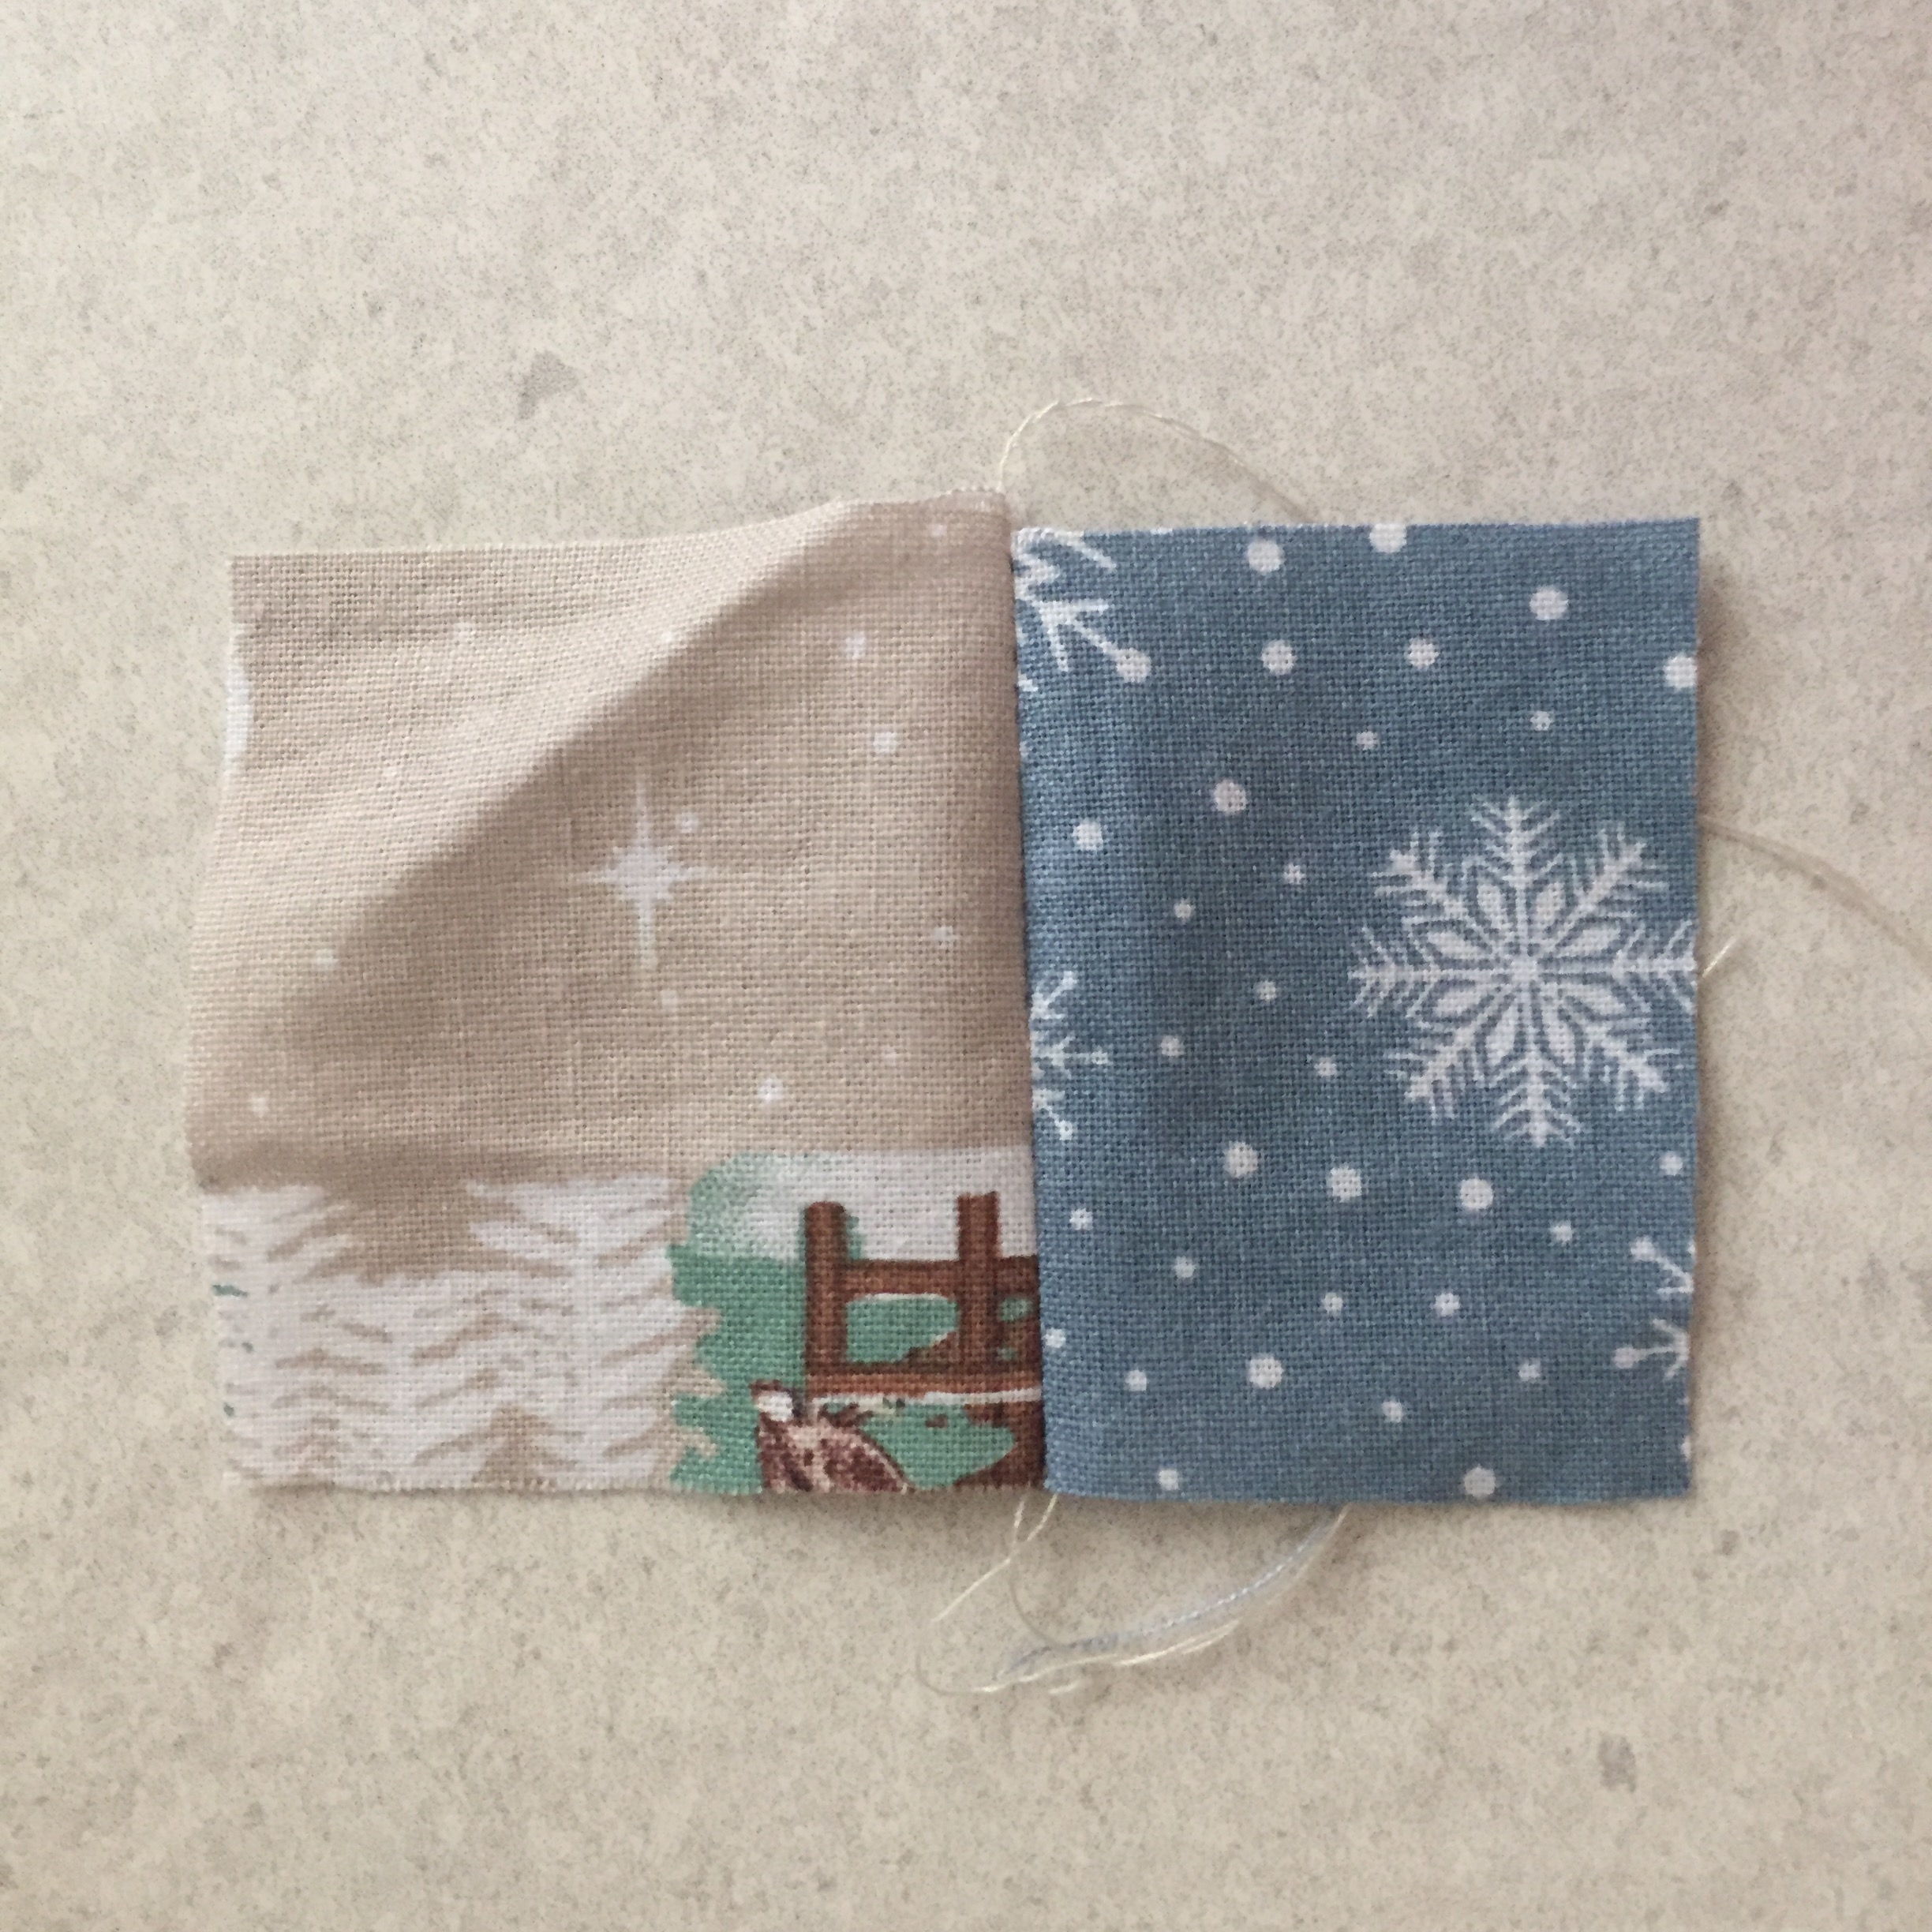
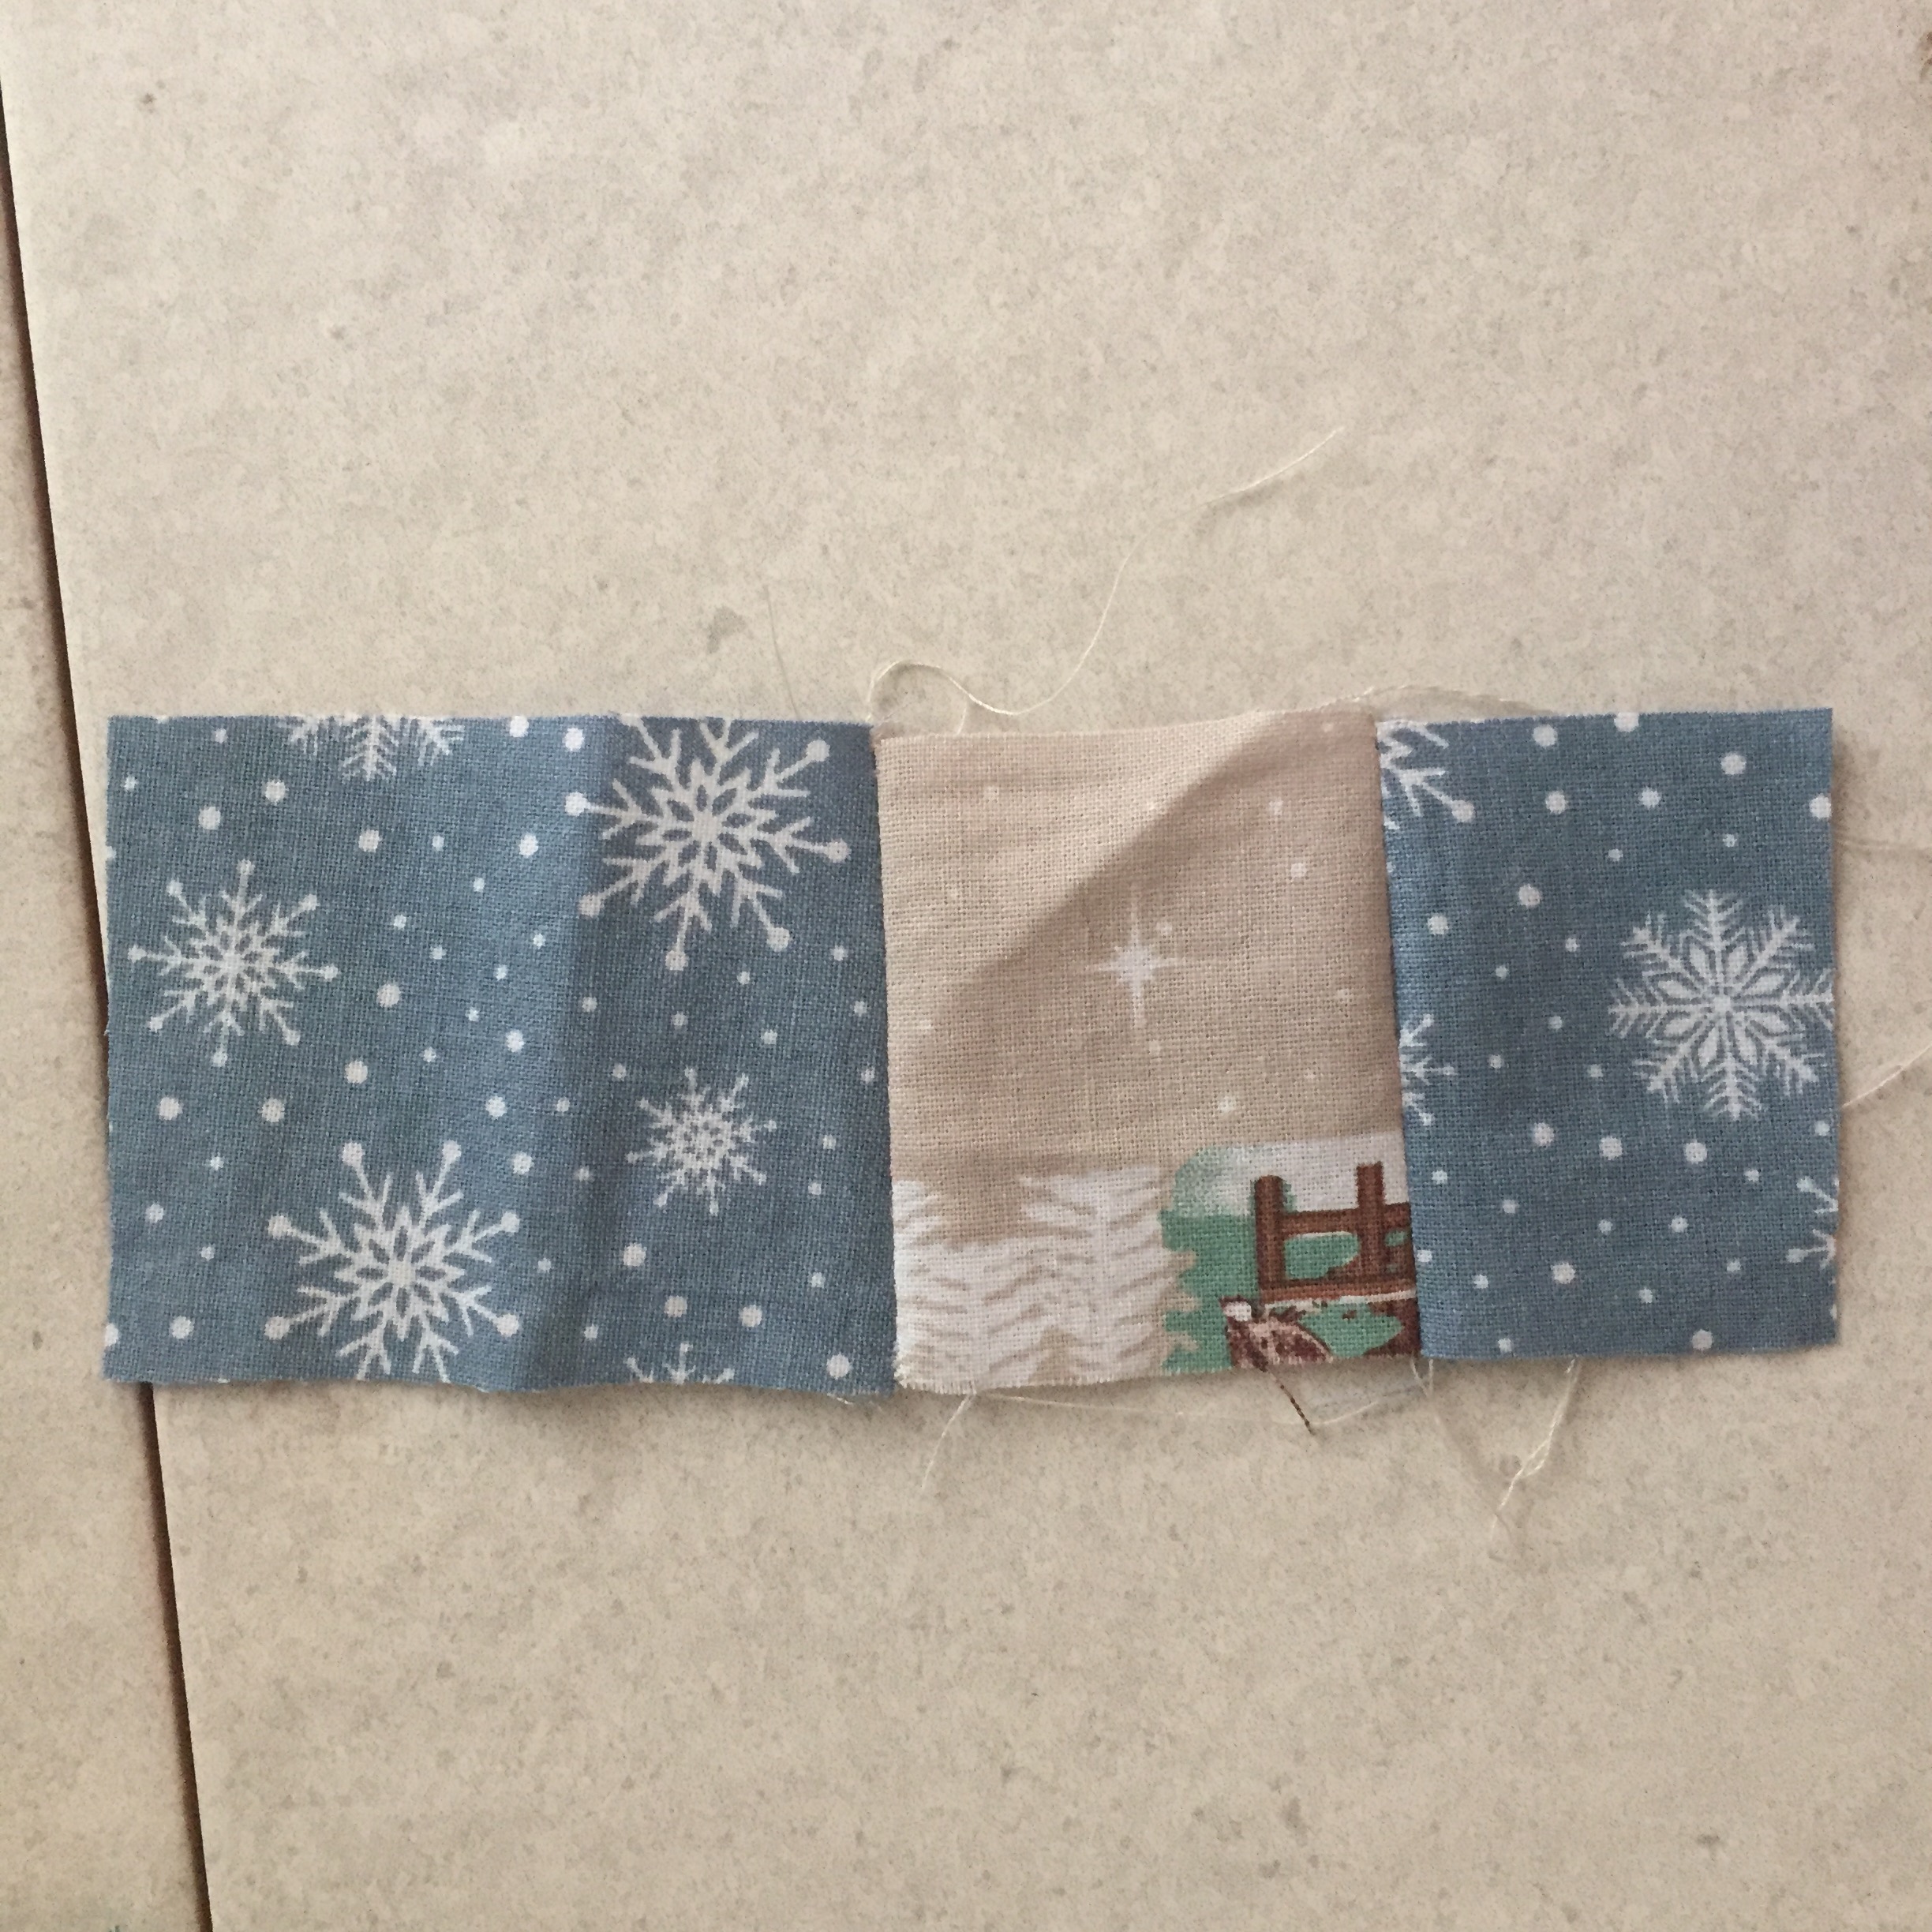
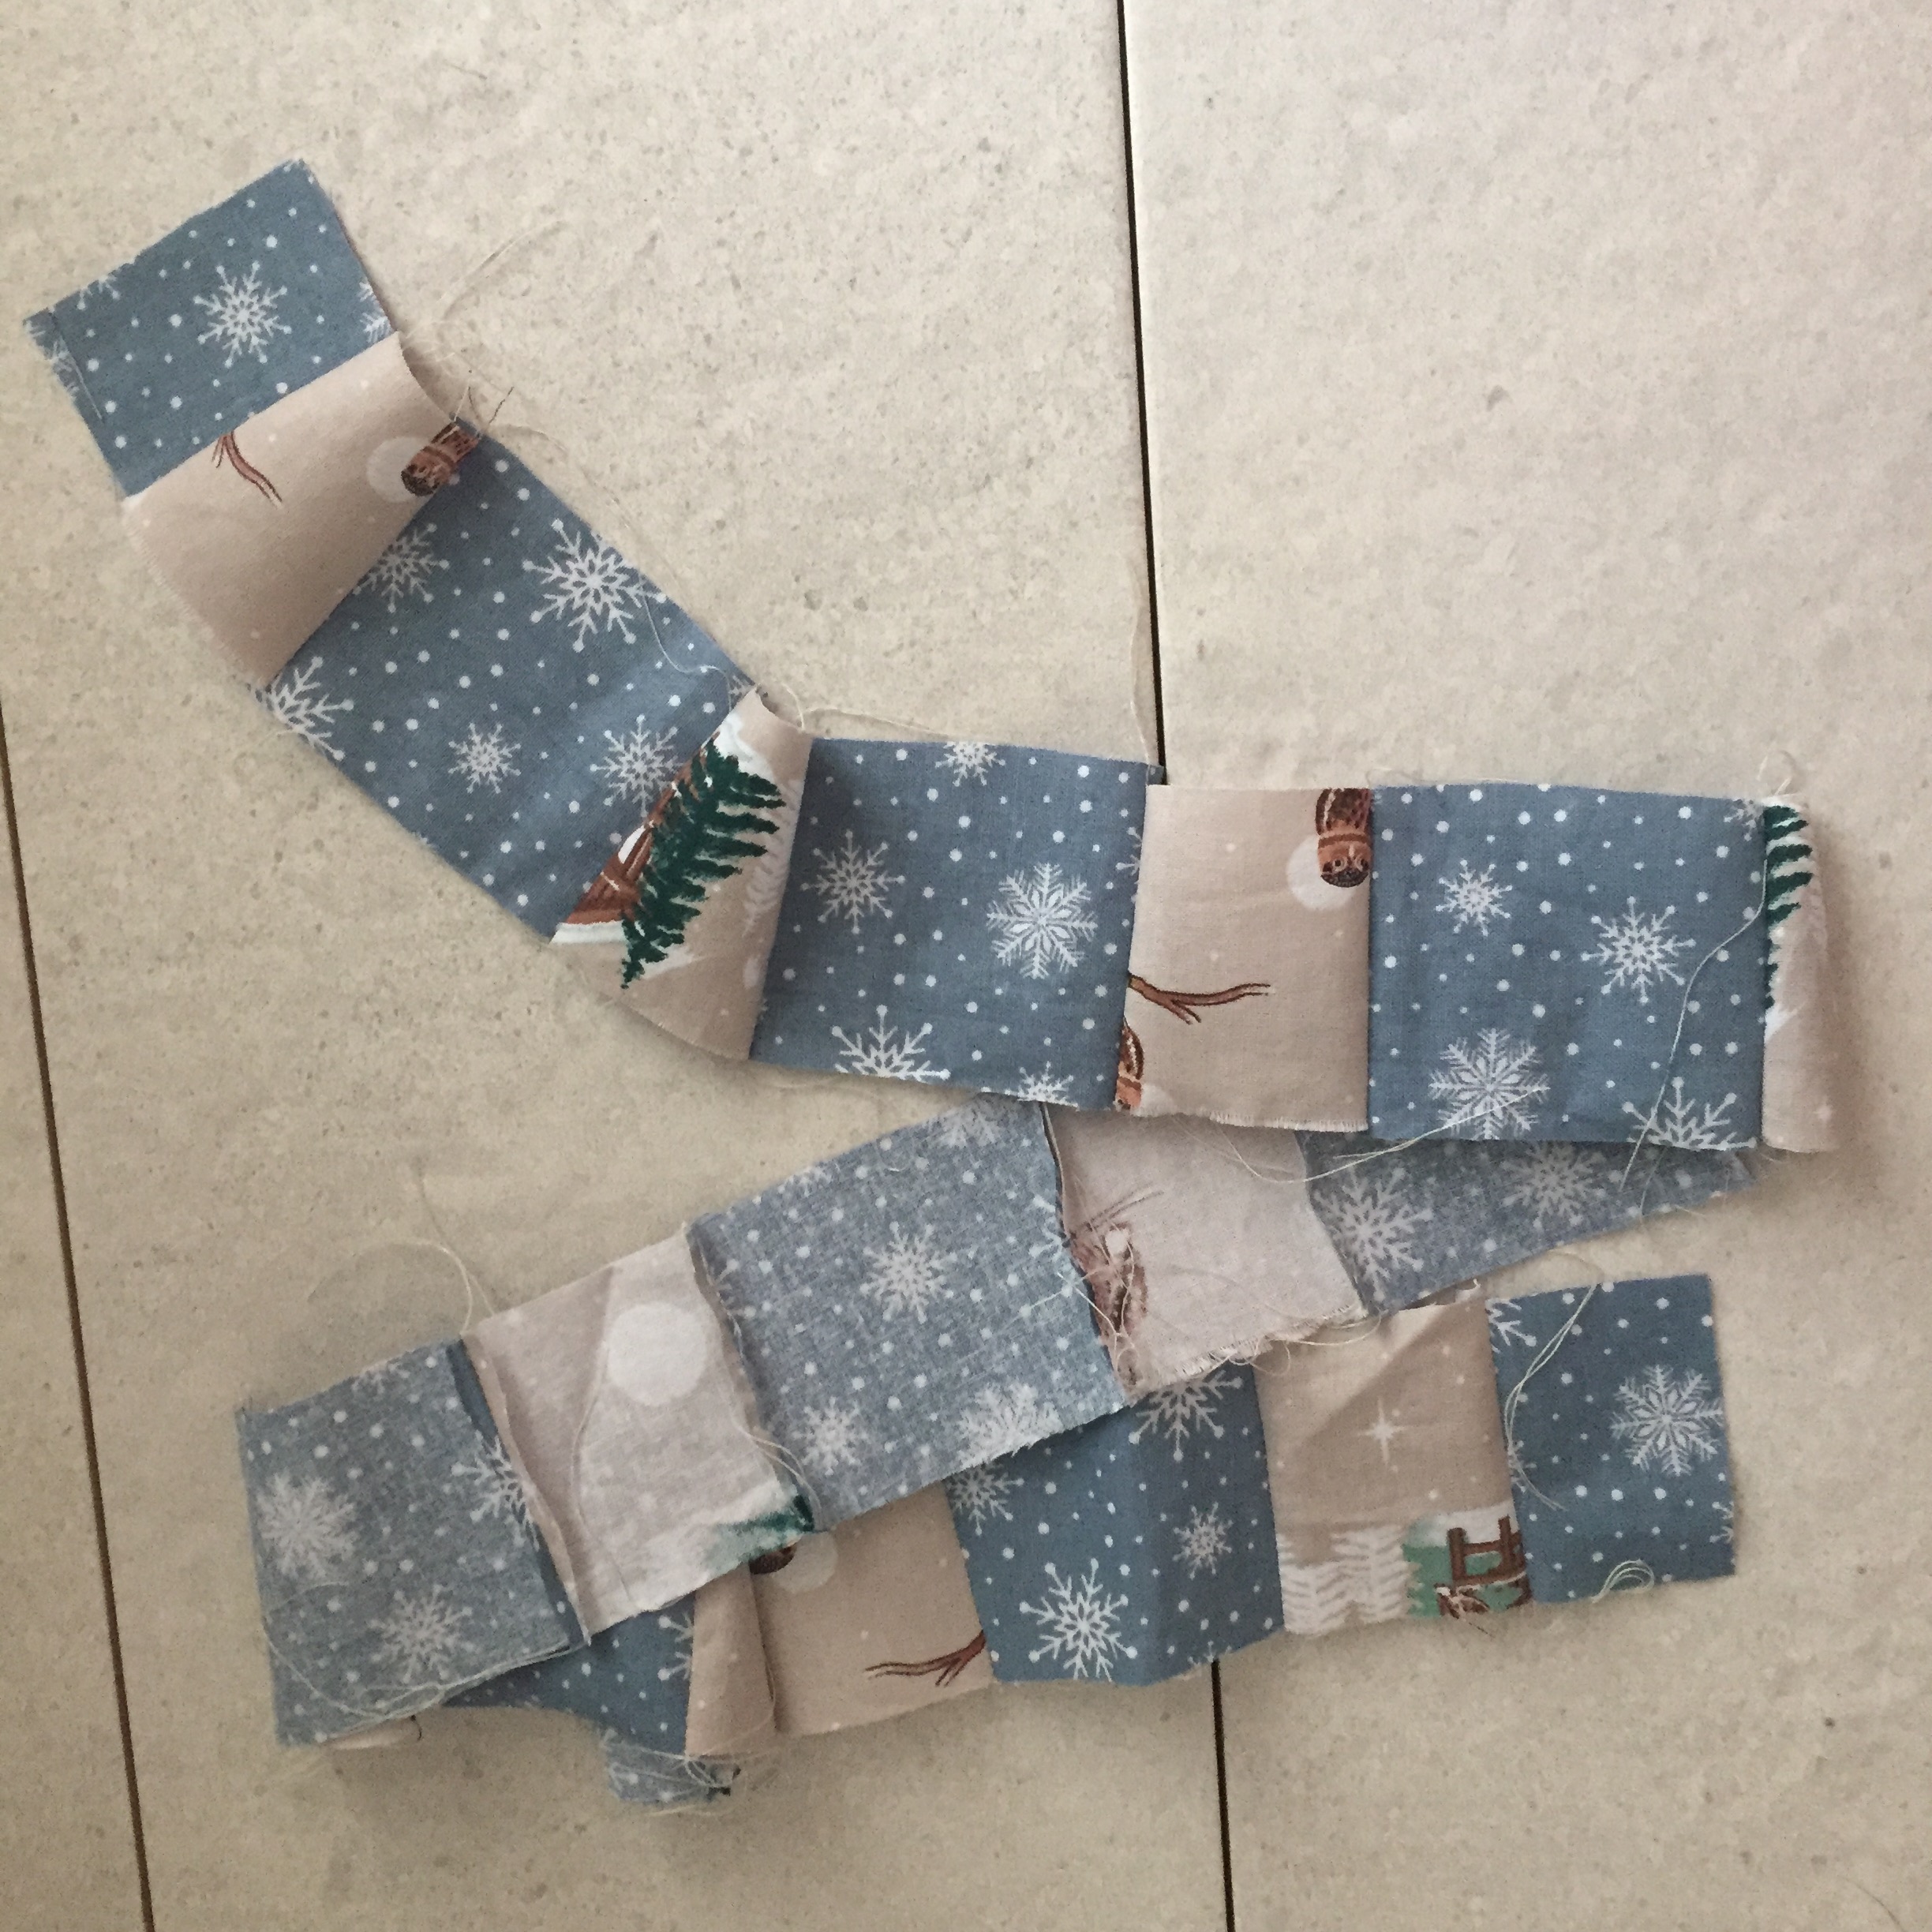
- Take the trees and snowflake background pieces that will form the tree top patchwork row and sew together by placing right sides together and sewing down the right hand side.


- Take the two patchwork rows and sew together by placing right sides together and sewing to join.
- Take the two front strips and place one along the top edge and one along the bottom edge, place right sides together and sew to join.
- Take the back piece and place right side up, place the patchwork from right sides down on top and sew around to join, leaving a 10cm gap for turning.
- Turn out the right way and slip stitch to close.

The tutorial to make one is also available over on The Craft Cotton Company’s blog

Leave a comment