-
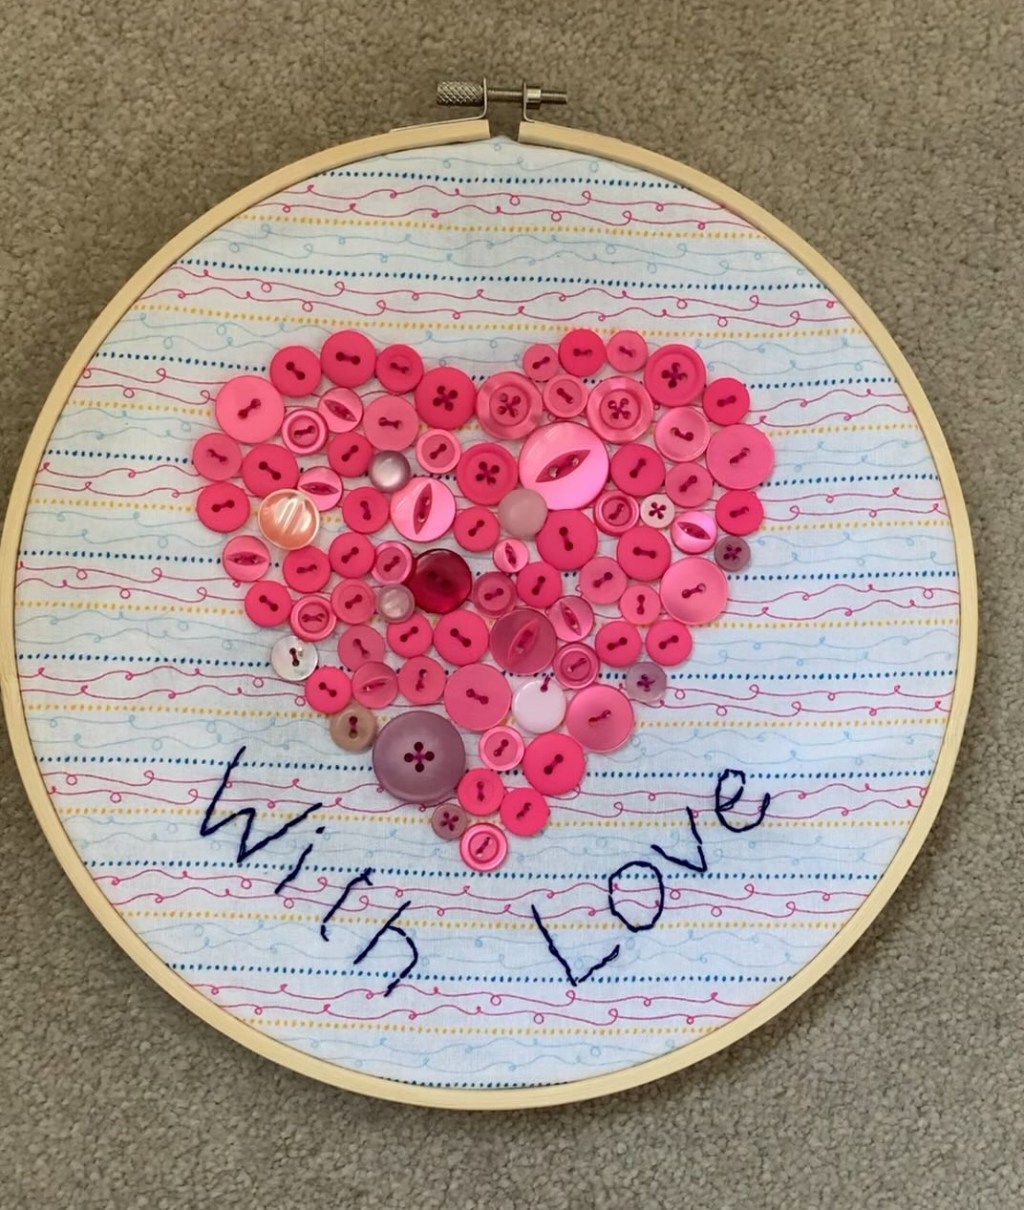
Sewing Tutorial: Button With Love Heart Embroidery Hoop, Perfect For Valentines Day
Sewing Tutorial: With Love Heart Themed Button Detail Embroidery Hoop Need a quick make for valentines day? – this heart themed embroidery hoop is the perfect solution. It is also a great idea for using up all those buttons that seem to grow in number by themselves!. The background fabric colour/pattern is entirely your choice…
-

Sewing Tutorial: Bean Bag Frogs/Pattern Weights
These little frogs are great as gifts and also make great pattern weights!. You can make these as big or as small as you like and can customise the colours/patterns on the fabric to suit the recipient or your own taste. they are quick to make too so are great if you need a last…
-
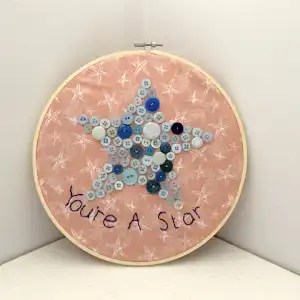
Sewing Tutorial: Button Star Embroidery Hoop, Perfect Make For A New Baby Gift/Thank You Gift
Sewing Tutorial: You’re A Star Themed Button Detail Embroidery Hoop Need a quick make for a new baby gift or a thank you gift for someone? – this star themed embroidery hoop is the perfect solution. It is also a great idea for using up all those buttons that seem to grow in number by…
-

Sewing Tutorial: Cross Stitch Christmas Gnome Mini Stocking Decoration/Gift
While making my cross stitch Christmas Gnome cutlery holder stockings I had an idea that these would also make great little mini stockings for decorating the tree and would also be perfect for little gifts – there’s plenty of room for a little treat to fit inside them!. You can even use different colours for…
-

Sewing Tutorial: Cross Stitch Christmas Gnome Cutlery Stockings
Make your Christmas table even more Christmassy this year with some gnome themed cutlery holders! I am always looking for something different for my Christmas day table and have previously used my fabric Christmas stocking cutlery holders , however I don’t have enough of these this year so decided it was time to add a…
-
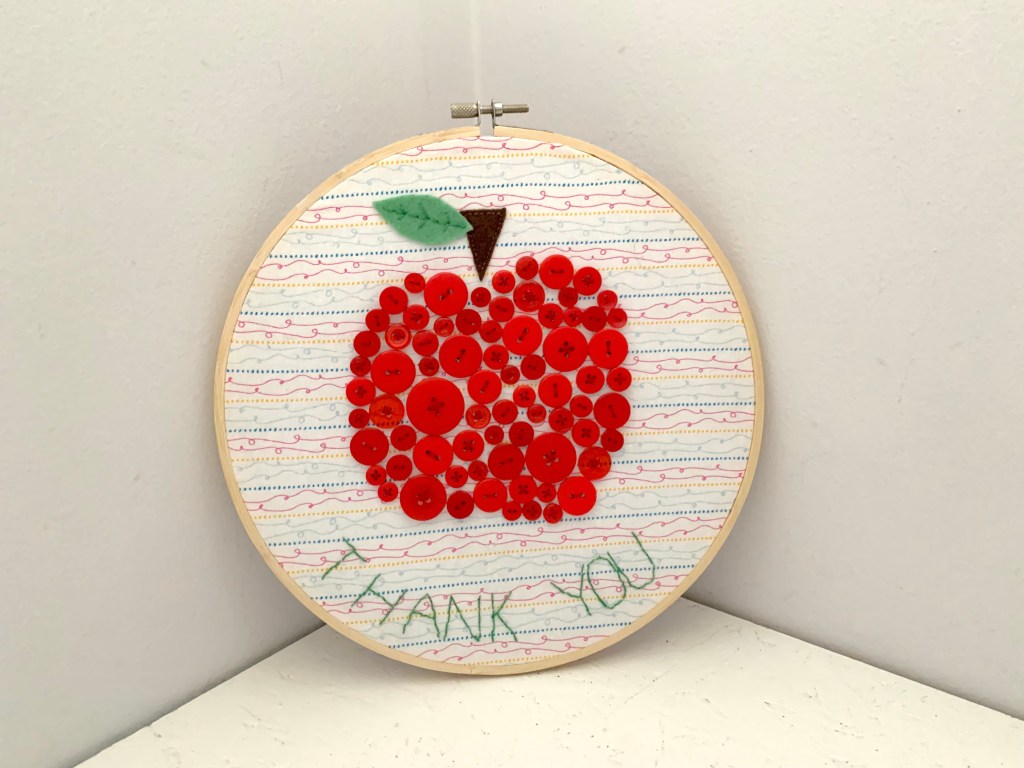
Sewing Tutorial: Thank You Gift – Button Apple Embroidery Hoop, Perfect Make For A Teachers Gift
Sewing Tutorial: Thank You Apple Themed Button Detail Embroidery Hoop Need a quick make for a teachers end of year thank you gift – this apple themed thank you embroidery hoop is the perfect solution. It is also a great idea for using up all those buttons that seem to grow in number by themselves!.…
