
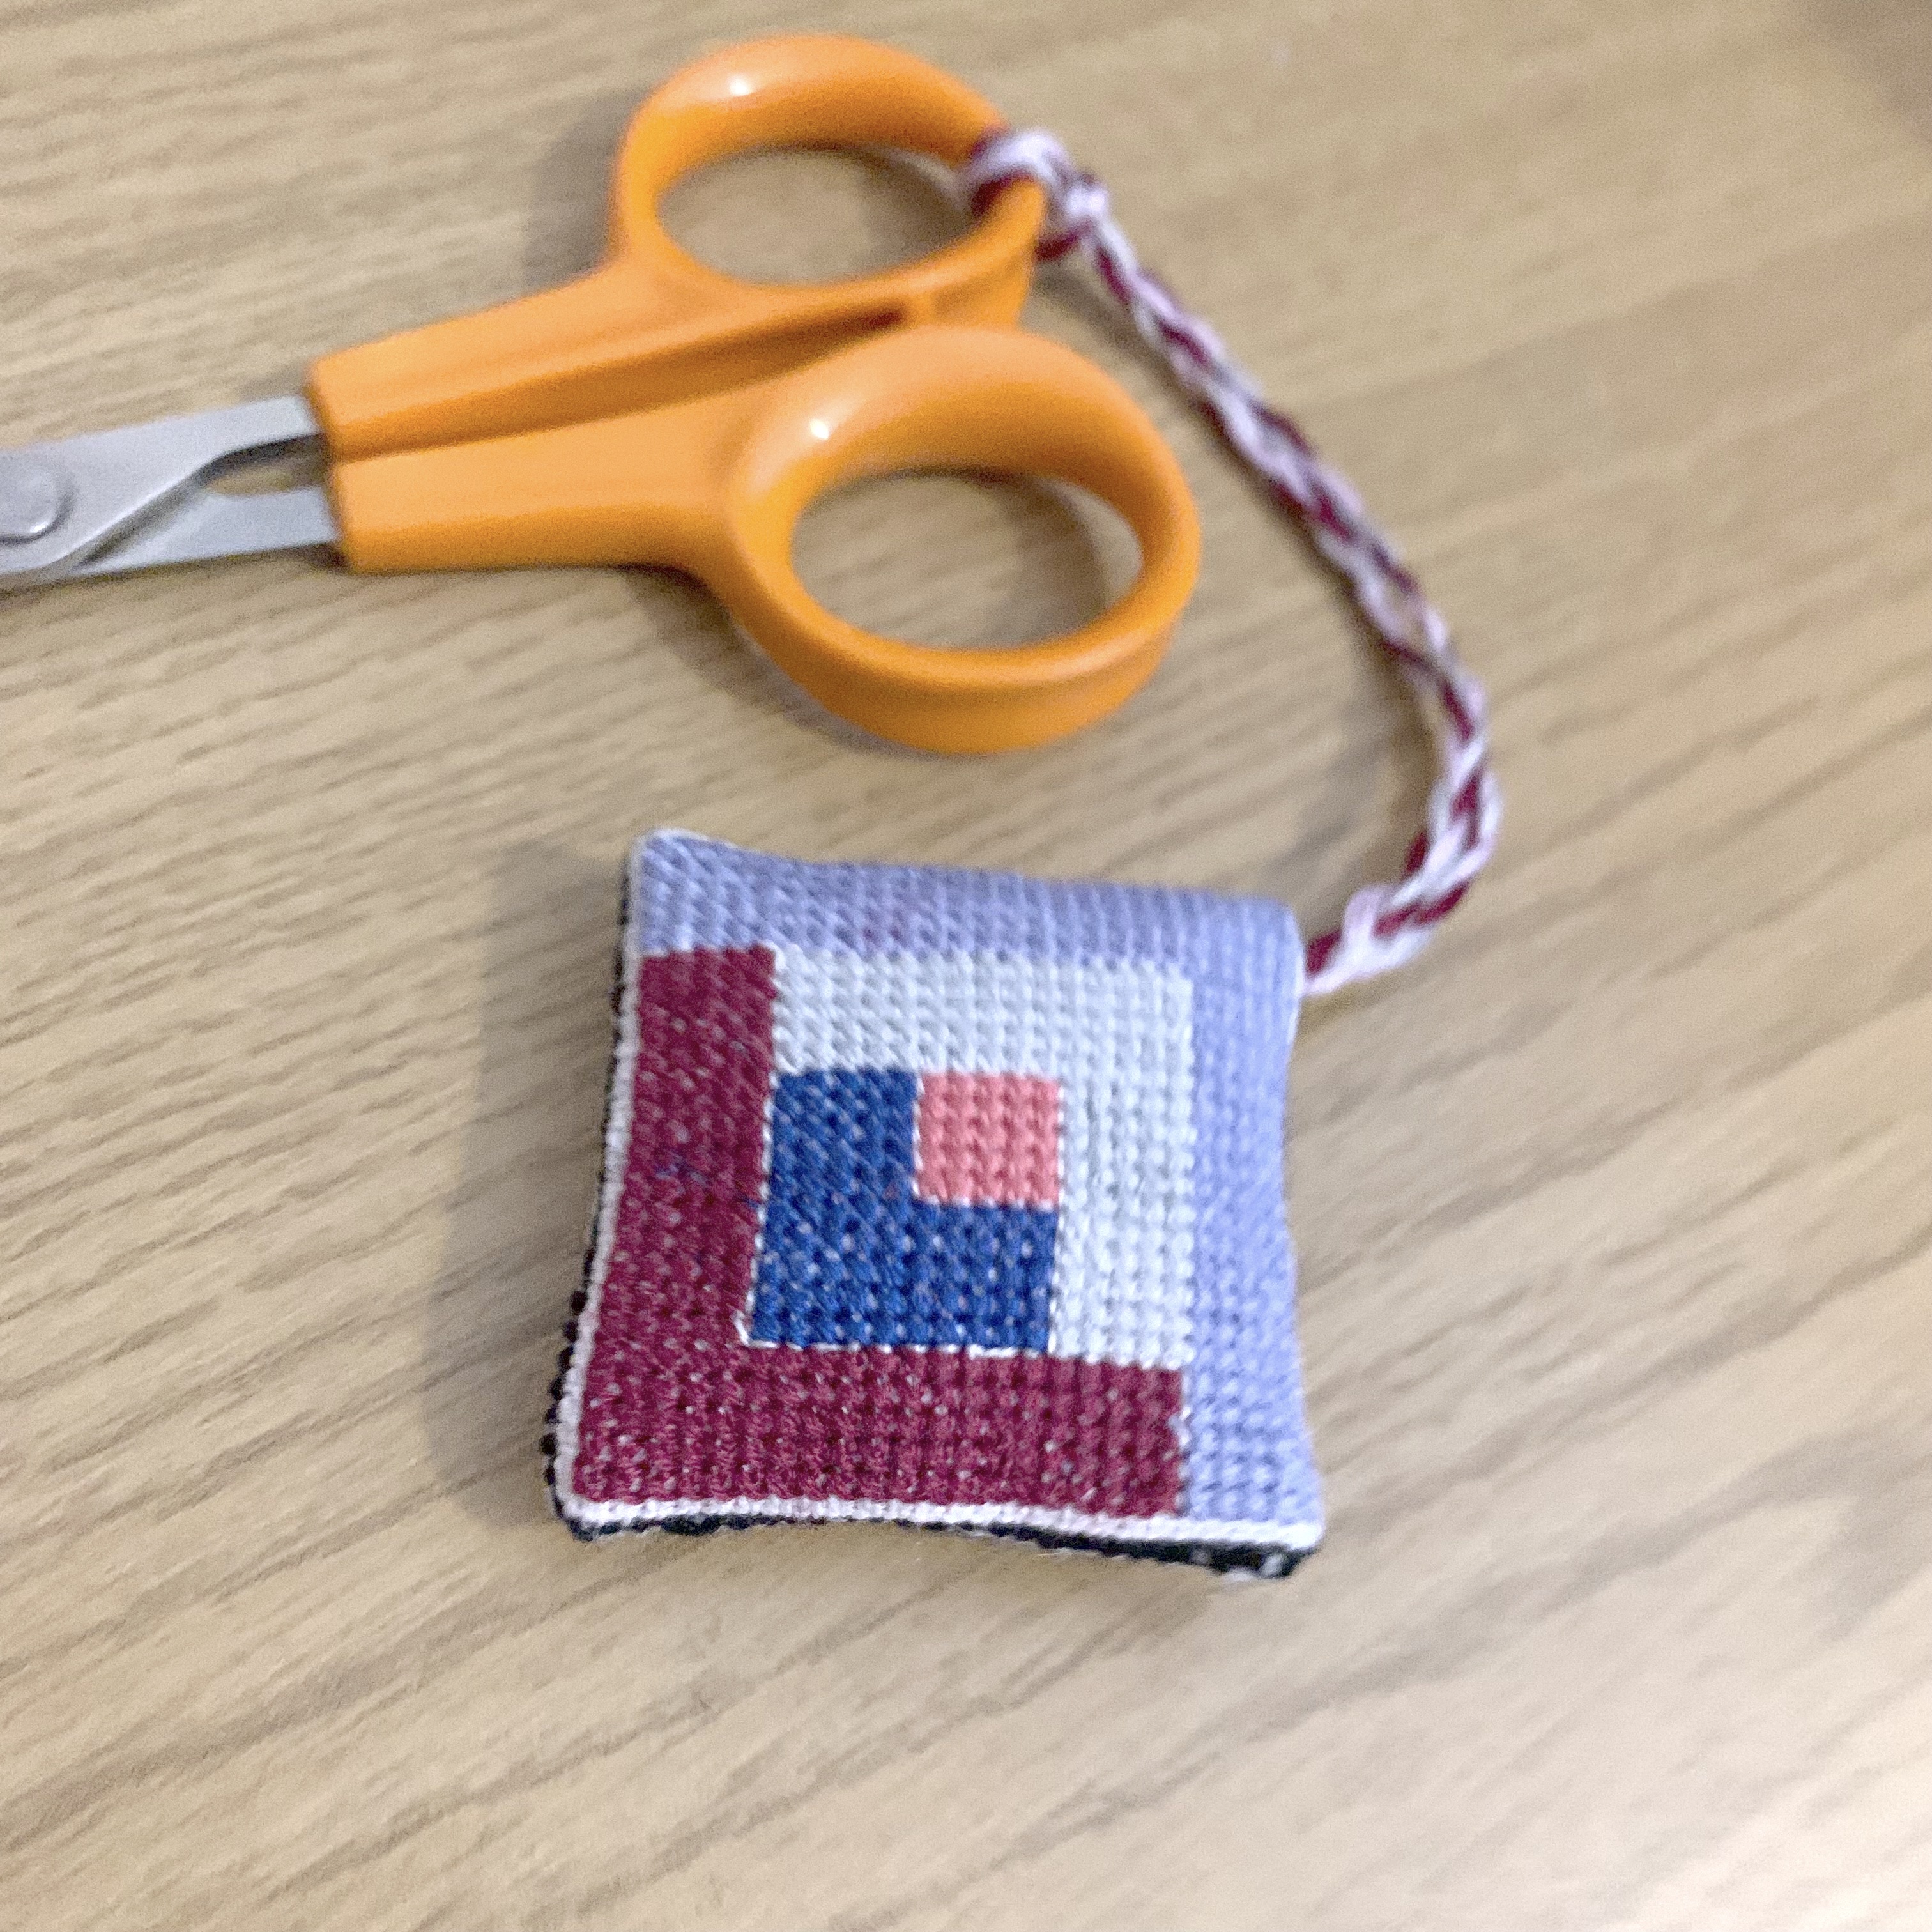
I have had an idea in mind for a scissor fob pattern for a while but have never managed to get one made, I had a bit of time last week and decided it was time to get one made, I couldn’t decide between 2 different designs I had in mind so ended making them both! The first is this log cabin quilt block design, a design which I always like to use when making quilts, and have also made a crochet granny stitch log cabin blanket pattern version too!.
Advertisements
Cross Stitch Scissor Fob Pattern: Log Cabin Quilt Block Design
Cross Stitch Scissor Fob Pattern: Log Cabin Quilt Block Design
Finished Size:
On 28 count evenweave fabric;
- 4x4cm.
Materials
- Embroidery thread (Colours I used are shown on the pattern):
- Light purple.
- Cream.
- White.
- Dark blue.
- Pink.
- Dark red.
- Black.
- Embroidery Needle.
- White Embroidery fabric (you can choose any colour you prefer):
- 28 count Evenweave or 14 count Aida.
- Toy stuffing.
Cross Stitch Scissor Fob Pattern: Log Cabin Quilt Block Design – Pattern
- Make 2 – one for the front and one for the back.

Cross Stitch Scissor Fob Pattern: Log Cabin Quilt Block Design – Assembly
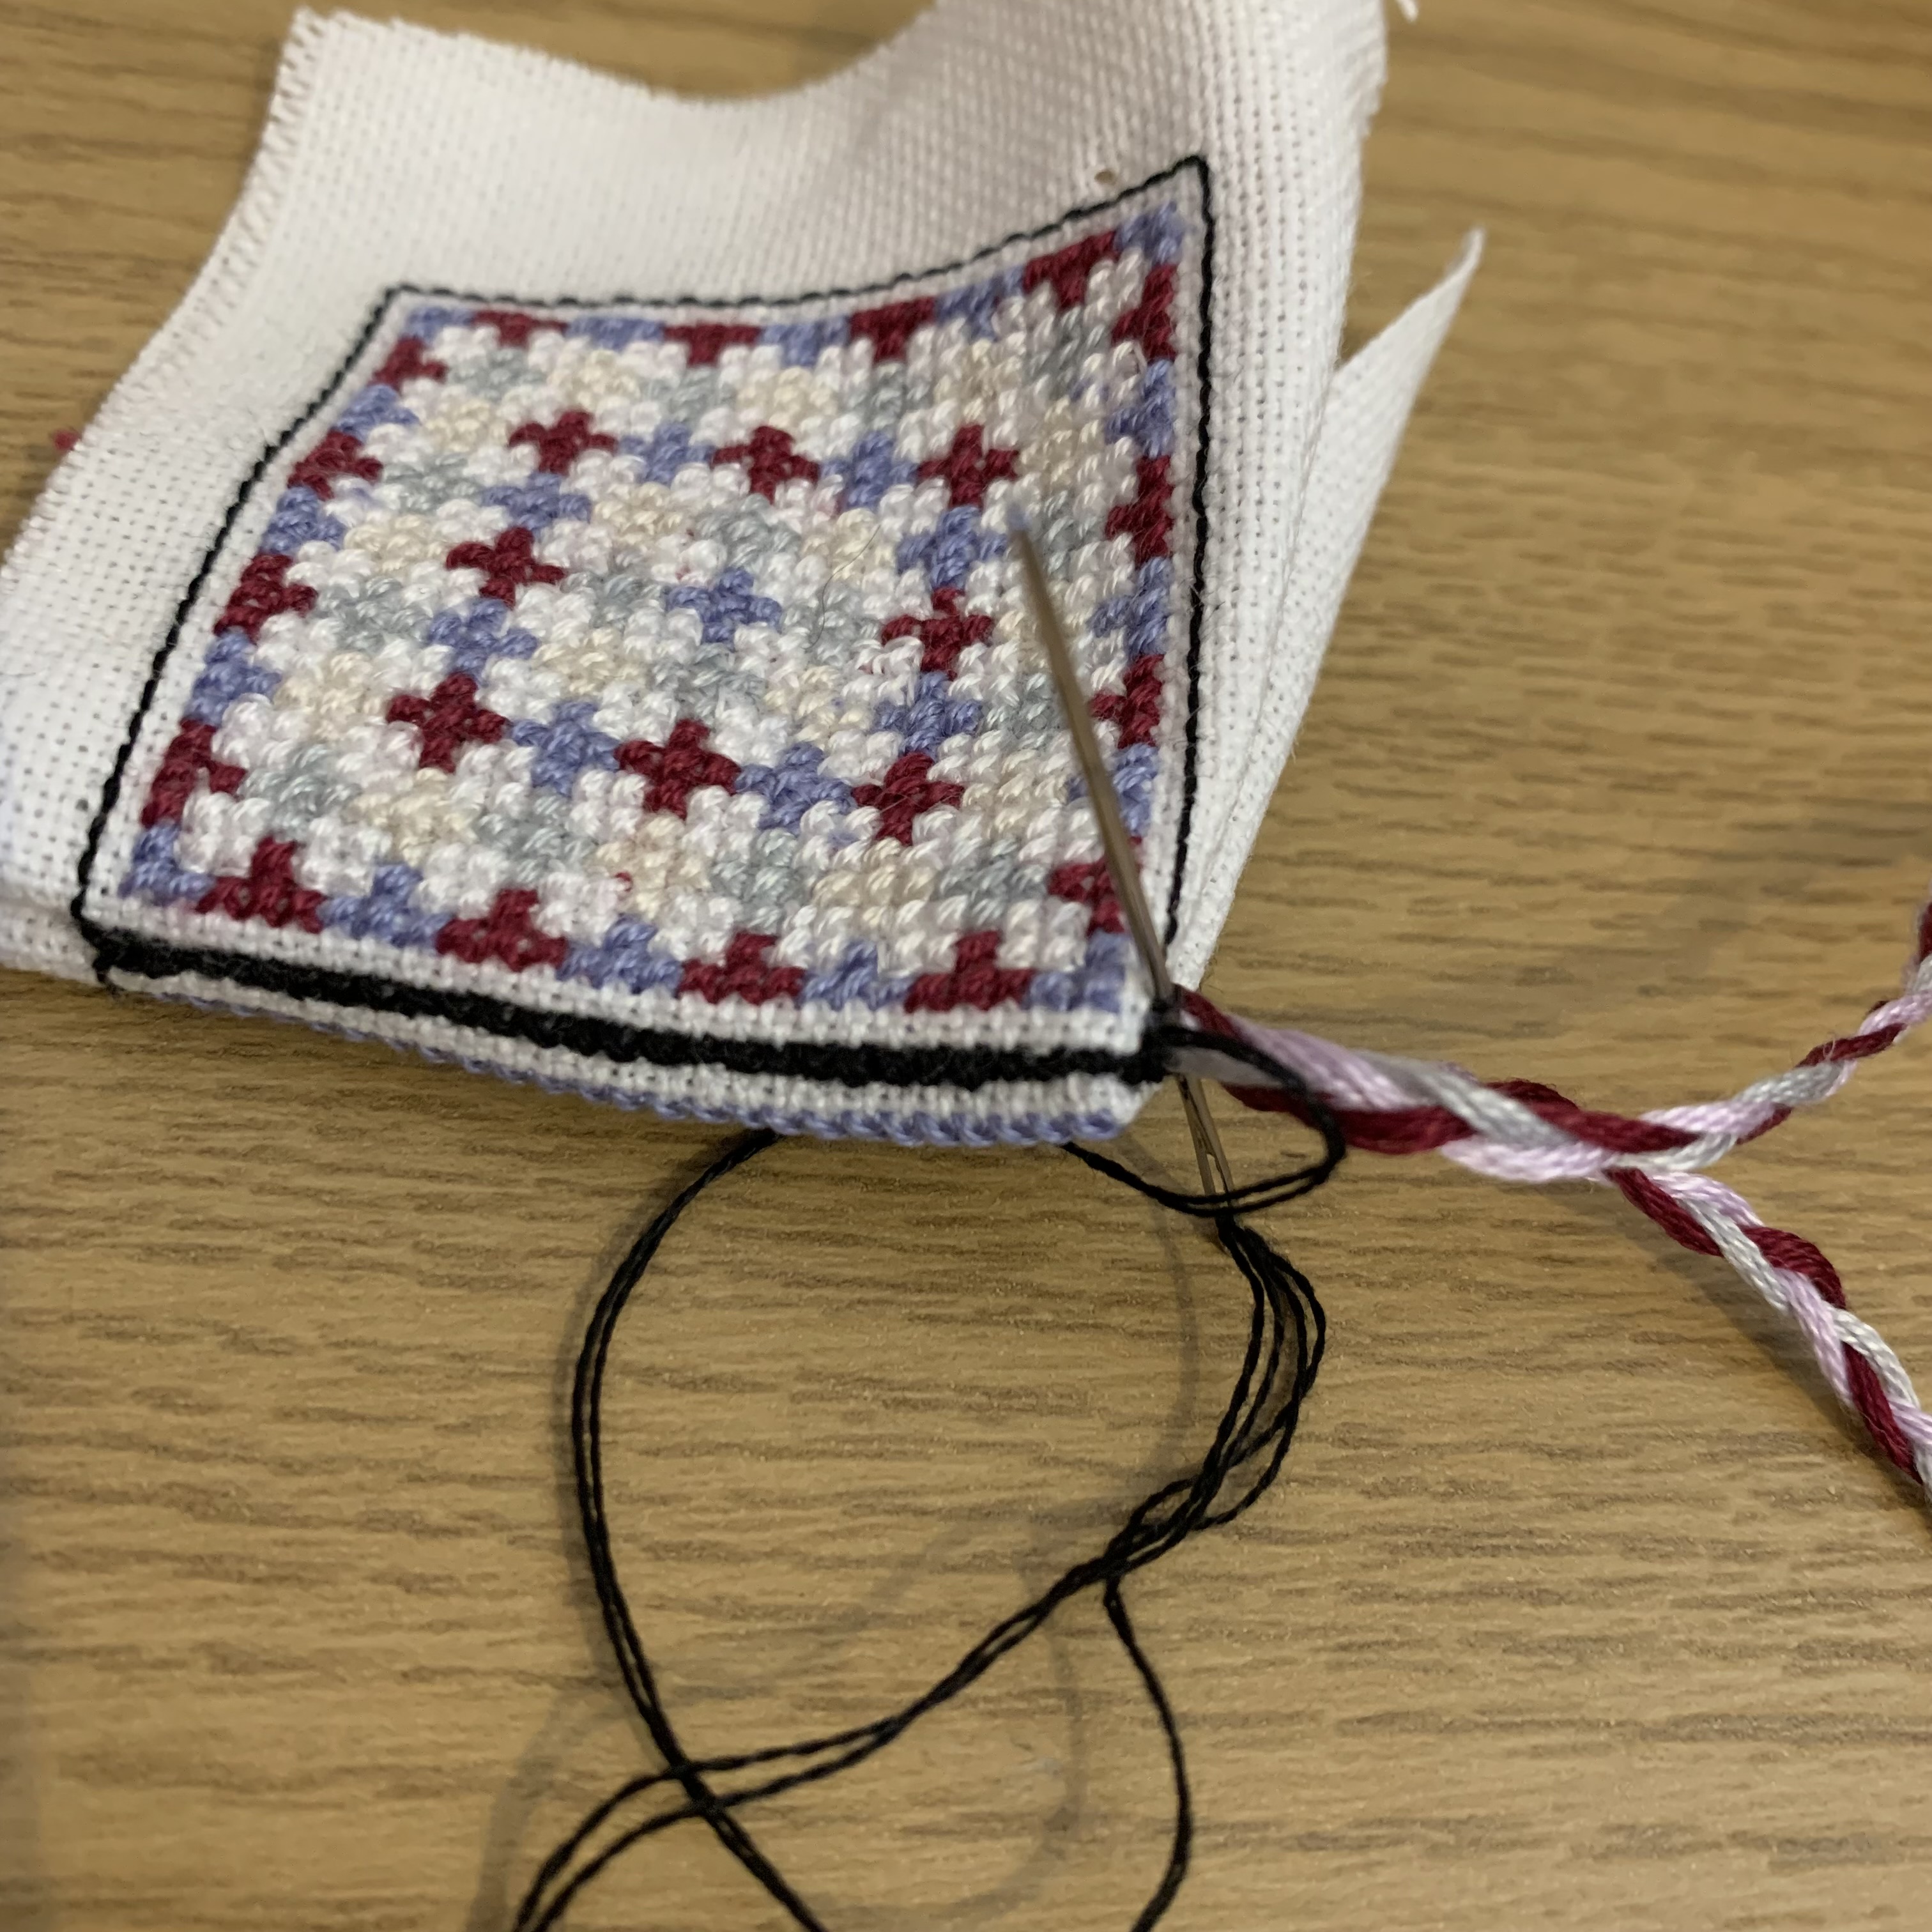
- Cut a 30cm long strand from 3 of the embroidery threads used.
- Tie a knot to join the 3 strands together at the top, and plait the full length of the threads. Tie a knot at the end to secure.
- Take the front and back pieces and cut out leave a 2cm gap around the edge of the sides.
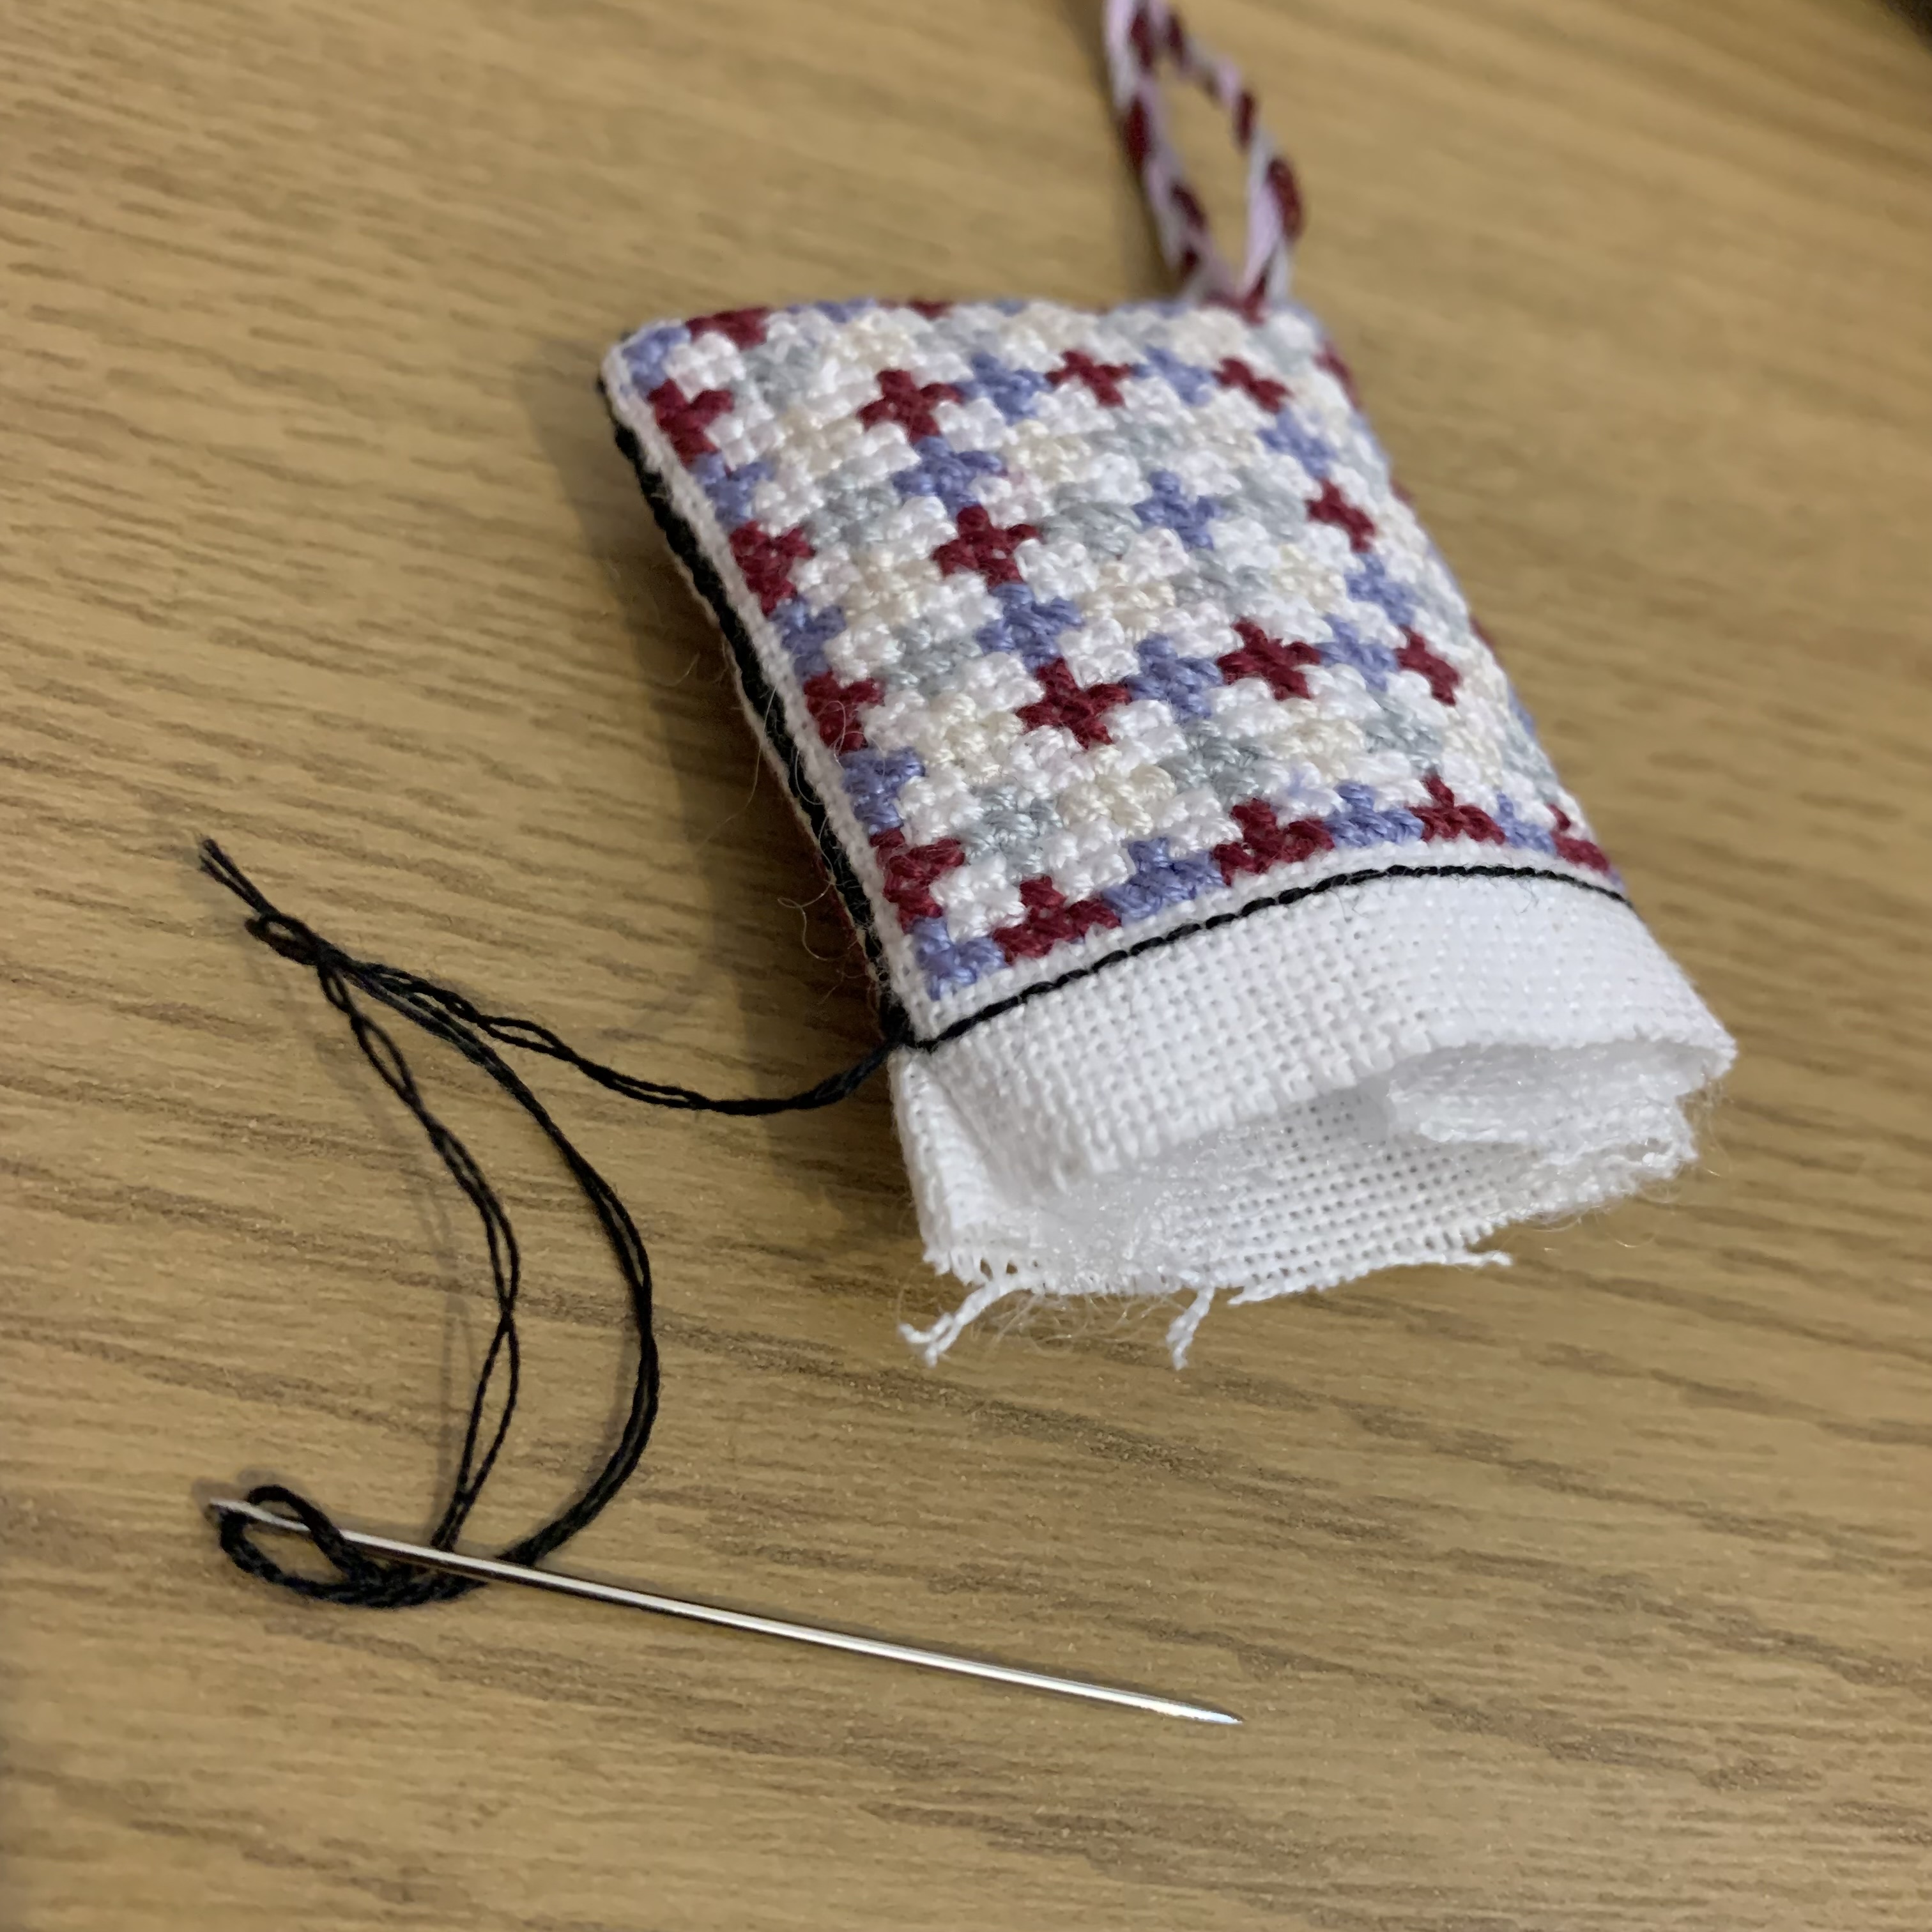
- Sew to join using 2 strands of black embroidery thread and by completing a whip stitch into each of the backstitches down one of the side edges. Insert the 2 ends of the plaited threads into the corner and continue joining the next side with the whip stitches securing the plaited strands at the same time.


- Complete whip stitches to join the 3rd side, then place in the stuffing before joining the final side closed.
- Attach to your scissors by putting the top of the thread loop into the scissor handle then threading the fob through and pulling to secure.


Leave a comment