
I completed this drawstring play mat tutorial for The Craft Cotton Company using their lovely balloon fabric. I have seen these about for a while and thought they were a brilliant idea, they make tidying up all those little tiny toy pieces that manage to get everywhere so much easier and anything that reduces the risk of standing on a stray piece of Lego is something that needs making! You could make this as big or as small as you wanted, so you can have one for taking toys out and about in the car and a big one for in the house.
I knew straight away that the hot air balloon Fabric by The Craft Cotton Company would be perfect for this, along with a plain blue cotton for the backing fabric. The blue ribbon I used was some from my stash.
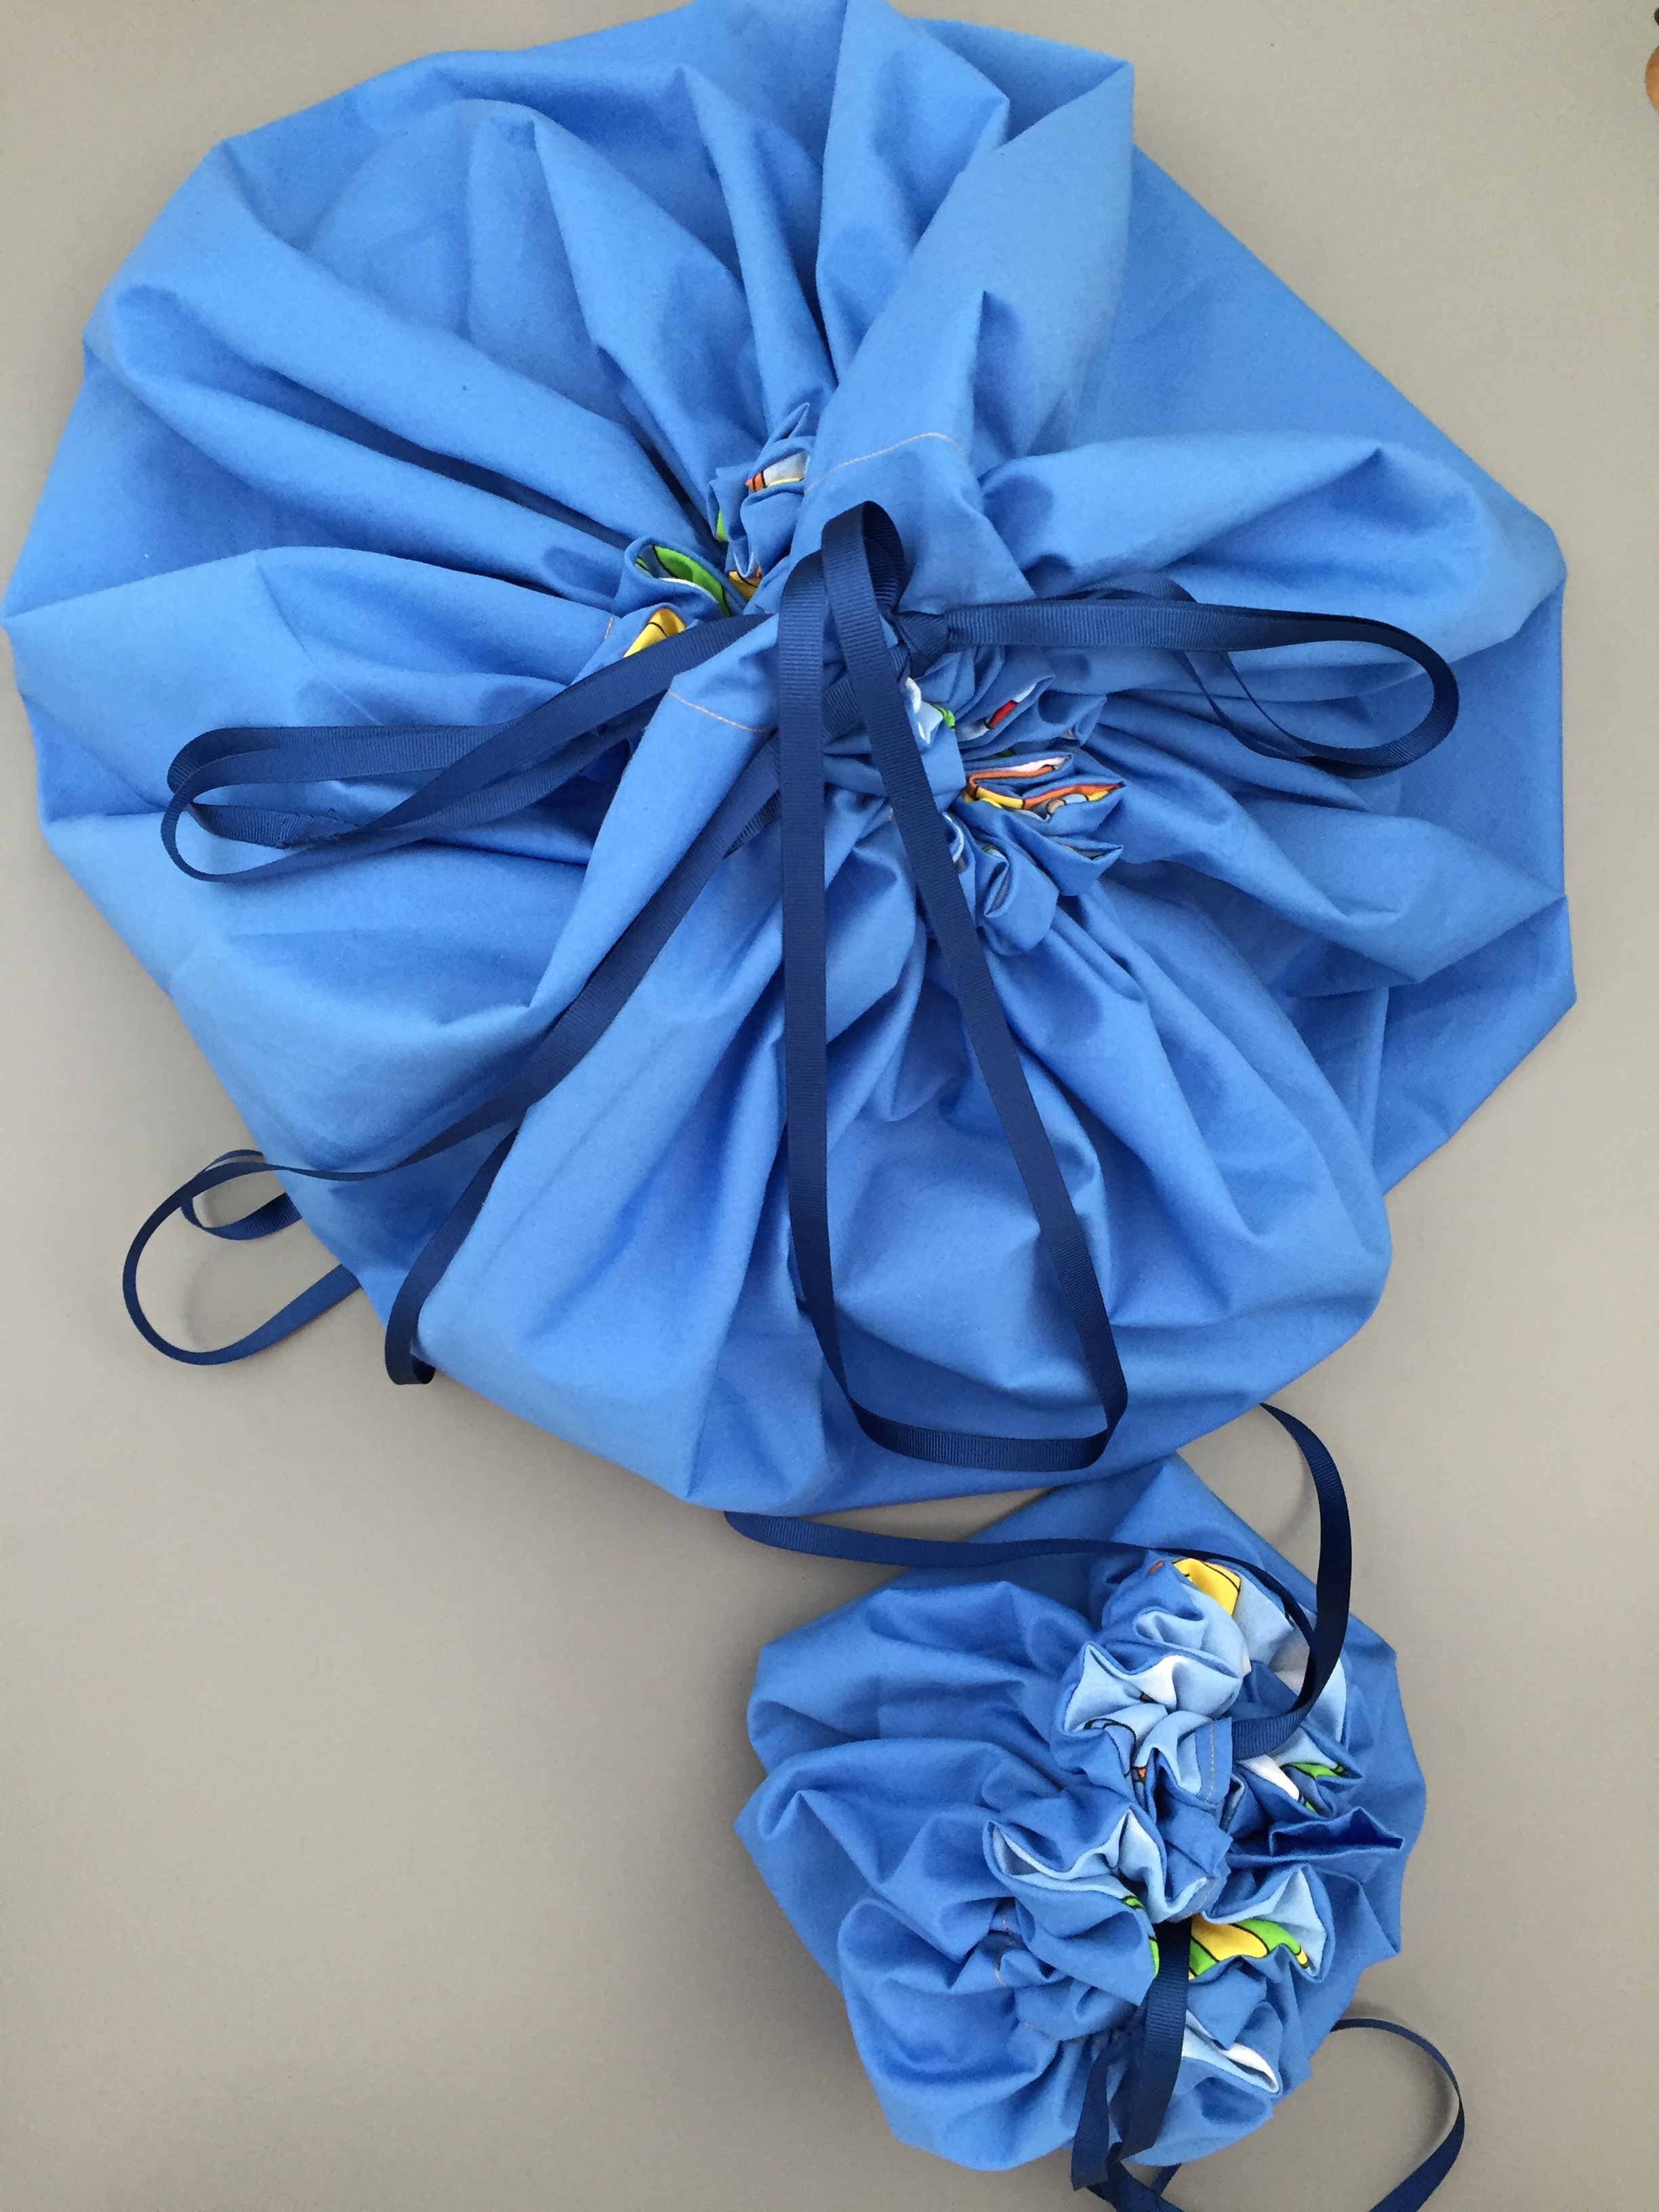
You can make these to any size you wish and can even make a mini version for taking toys out and about with you.
Fabric was gifted by The Craft Cotton Company.
This tutorial was originally uploaded in 2016, its now had a little makeover and is back!


Drawstring Play mat/Toy Storage Sewing Tutorial
Materials
- Pins.
- Paper.
- Thread.
- Scissors.
- Pencil.
- Wool or string.
- Fabric:
- Small play mat:
- Balloon fabric: 58x58cm
- Blue fabric: 58x58cm
- Binding pieces: Two pieces of blue fabric 22x4cm
- Big play mat:
- Balloon fabric: 110x110cm.
- Blue fabric: 110x110cm.
- Binding pieces: Two pieces of blue fabric 22x4cm.
- Small play mat:
- Ribbon:
- Small play mat: 2m.
- Big play mat: 4m.
Drawstring Play mat/Toy Storage
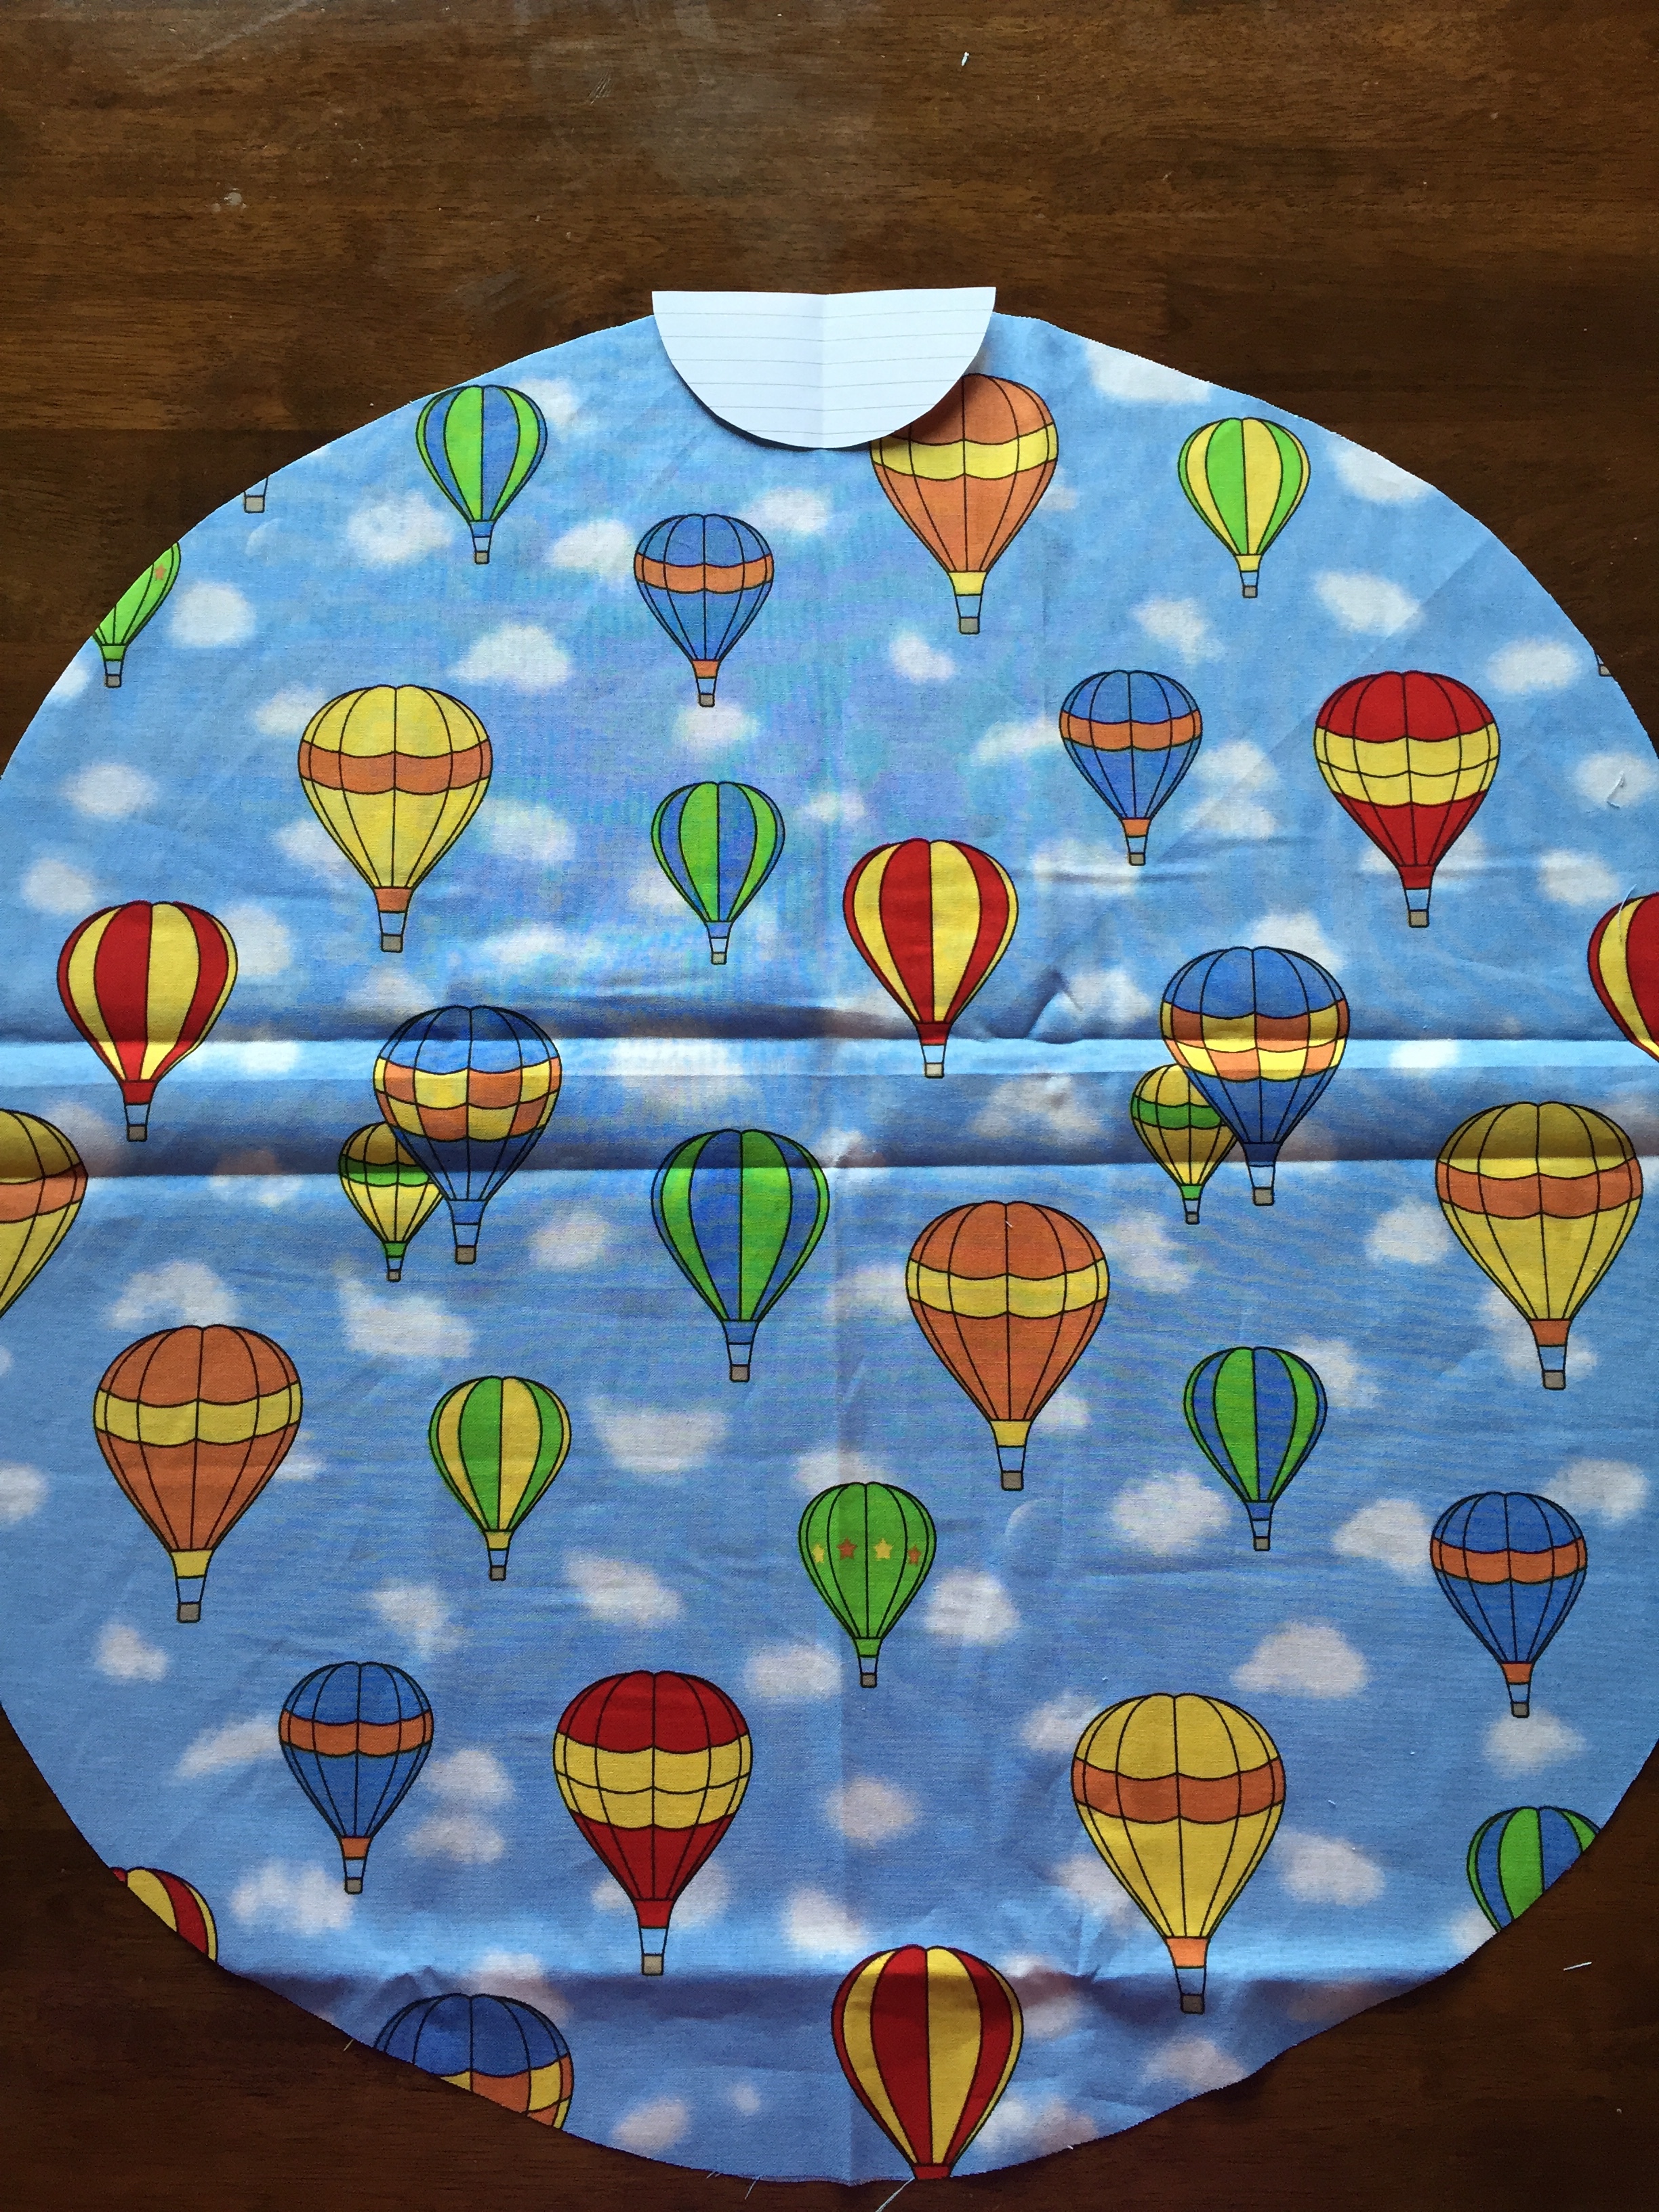
- Take the Balloon fabric piece and make sure the fabric is square, next fold the fabric into a quarter: first folding the top edge to the bottom edge then folding the left edge over to the right. Next take a piece of wool/string and pin one end to the middle of the folded corner, wrap the other end around a pencil so that the pencil lines up with the bottom edge. Drag from this bottom edge up to the top edge to make the curve. Cut out and repeat for the blue fabric piece.


- Draw and cut out an 11cm diameter circle on a piece of paper, then cut in half to give you a semi-circle. Place this circle at the top middle of the balloon fabric circle and cut out from the balloon fabric. Repeat at the bottom middle.

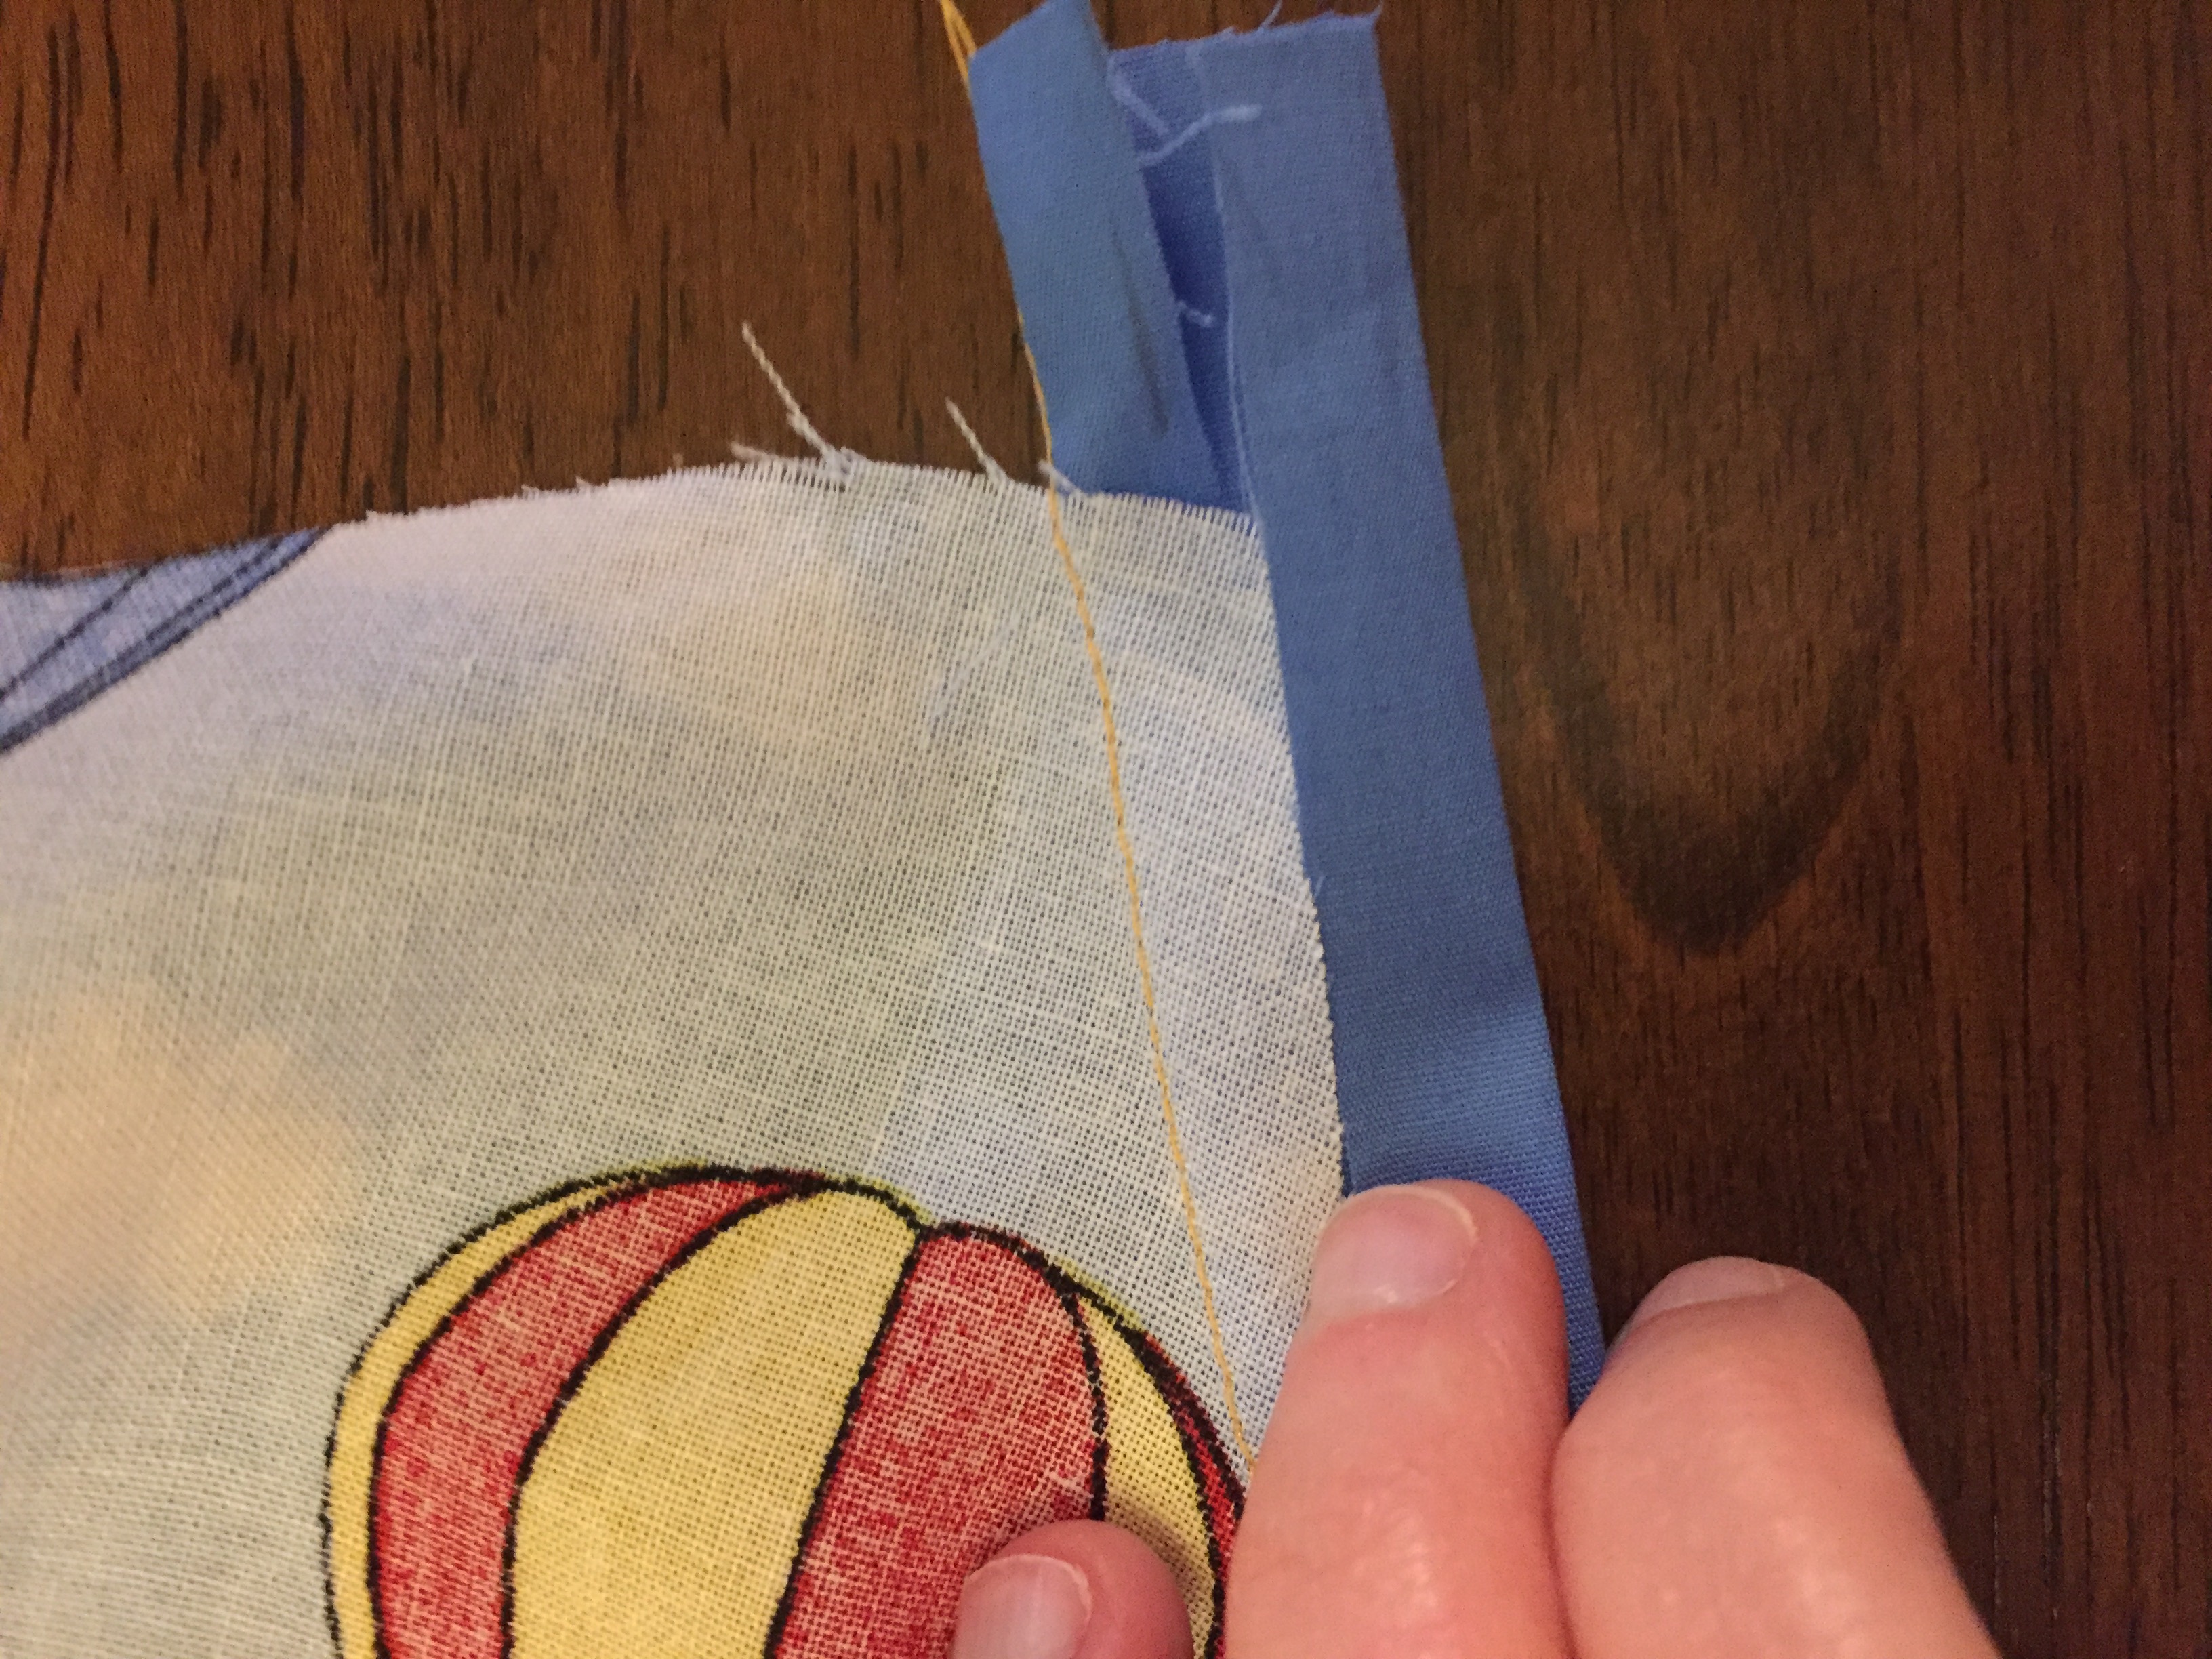
- Take one of the fabric binding strips and place right sides together against the balloon fabric with its bottom raw edge against the raw edge of the semi circle gap. Sew in place. Next fold this binding back over the raw edge to the back of the fabric and fold the raw edge under like a hem to hide the raw edge. Sew again 0.5cm from the edge of the raw edge of the binding. Repeat for the other semi circle.


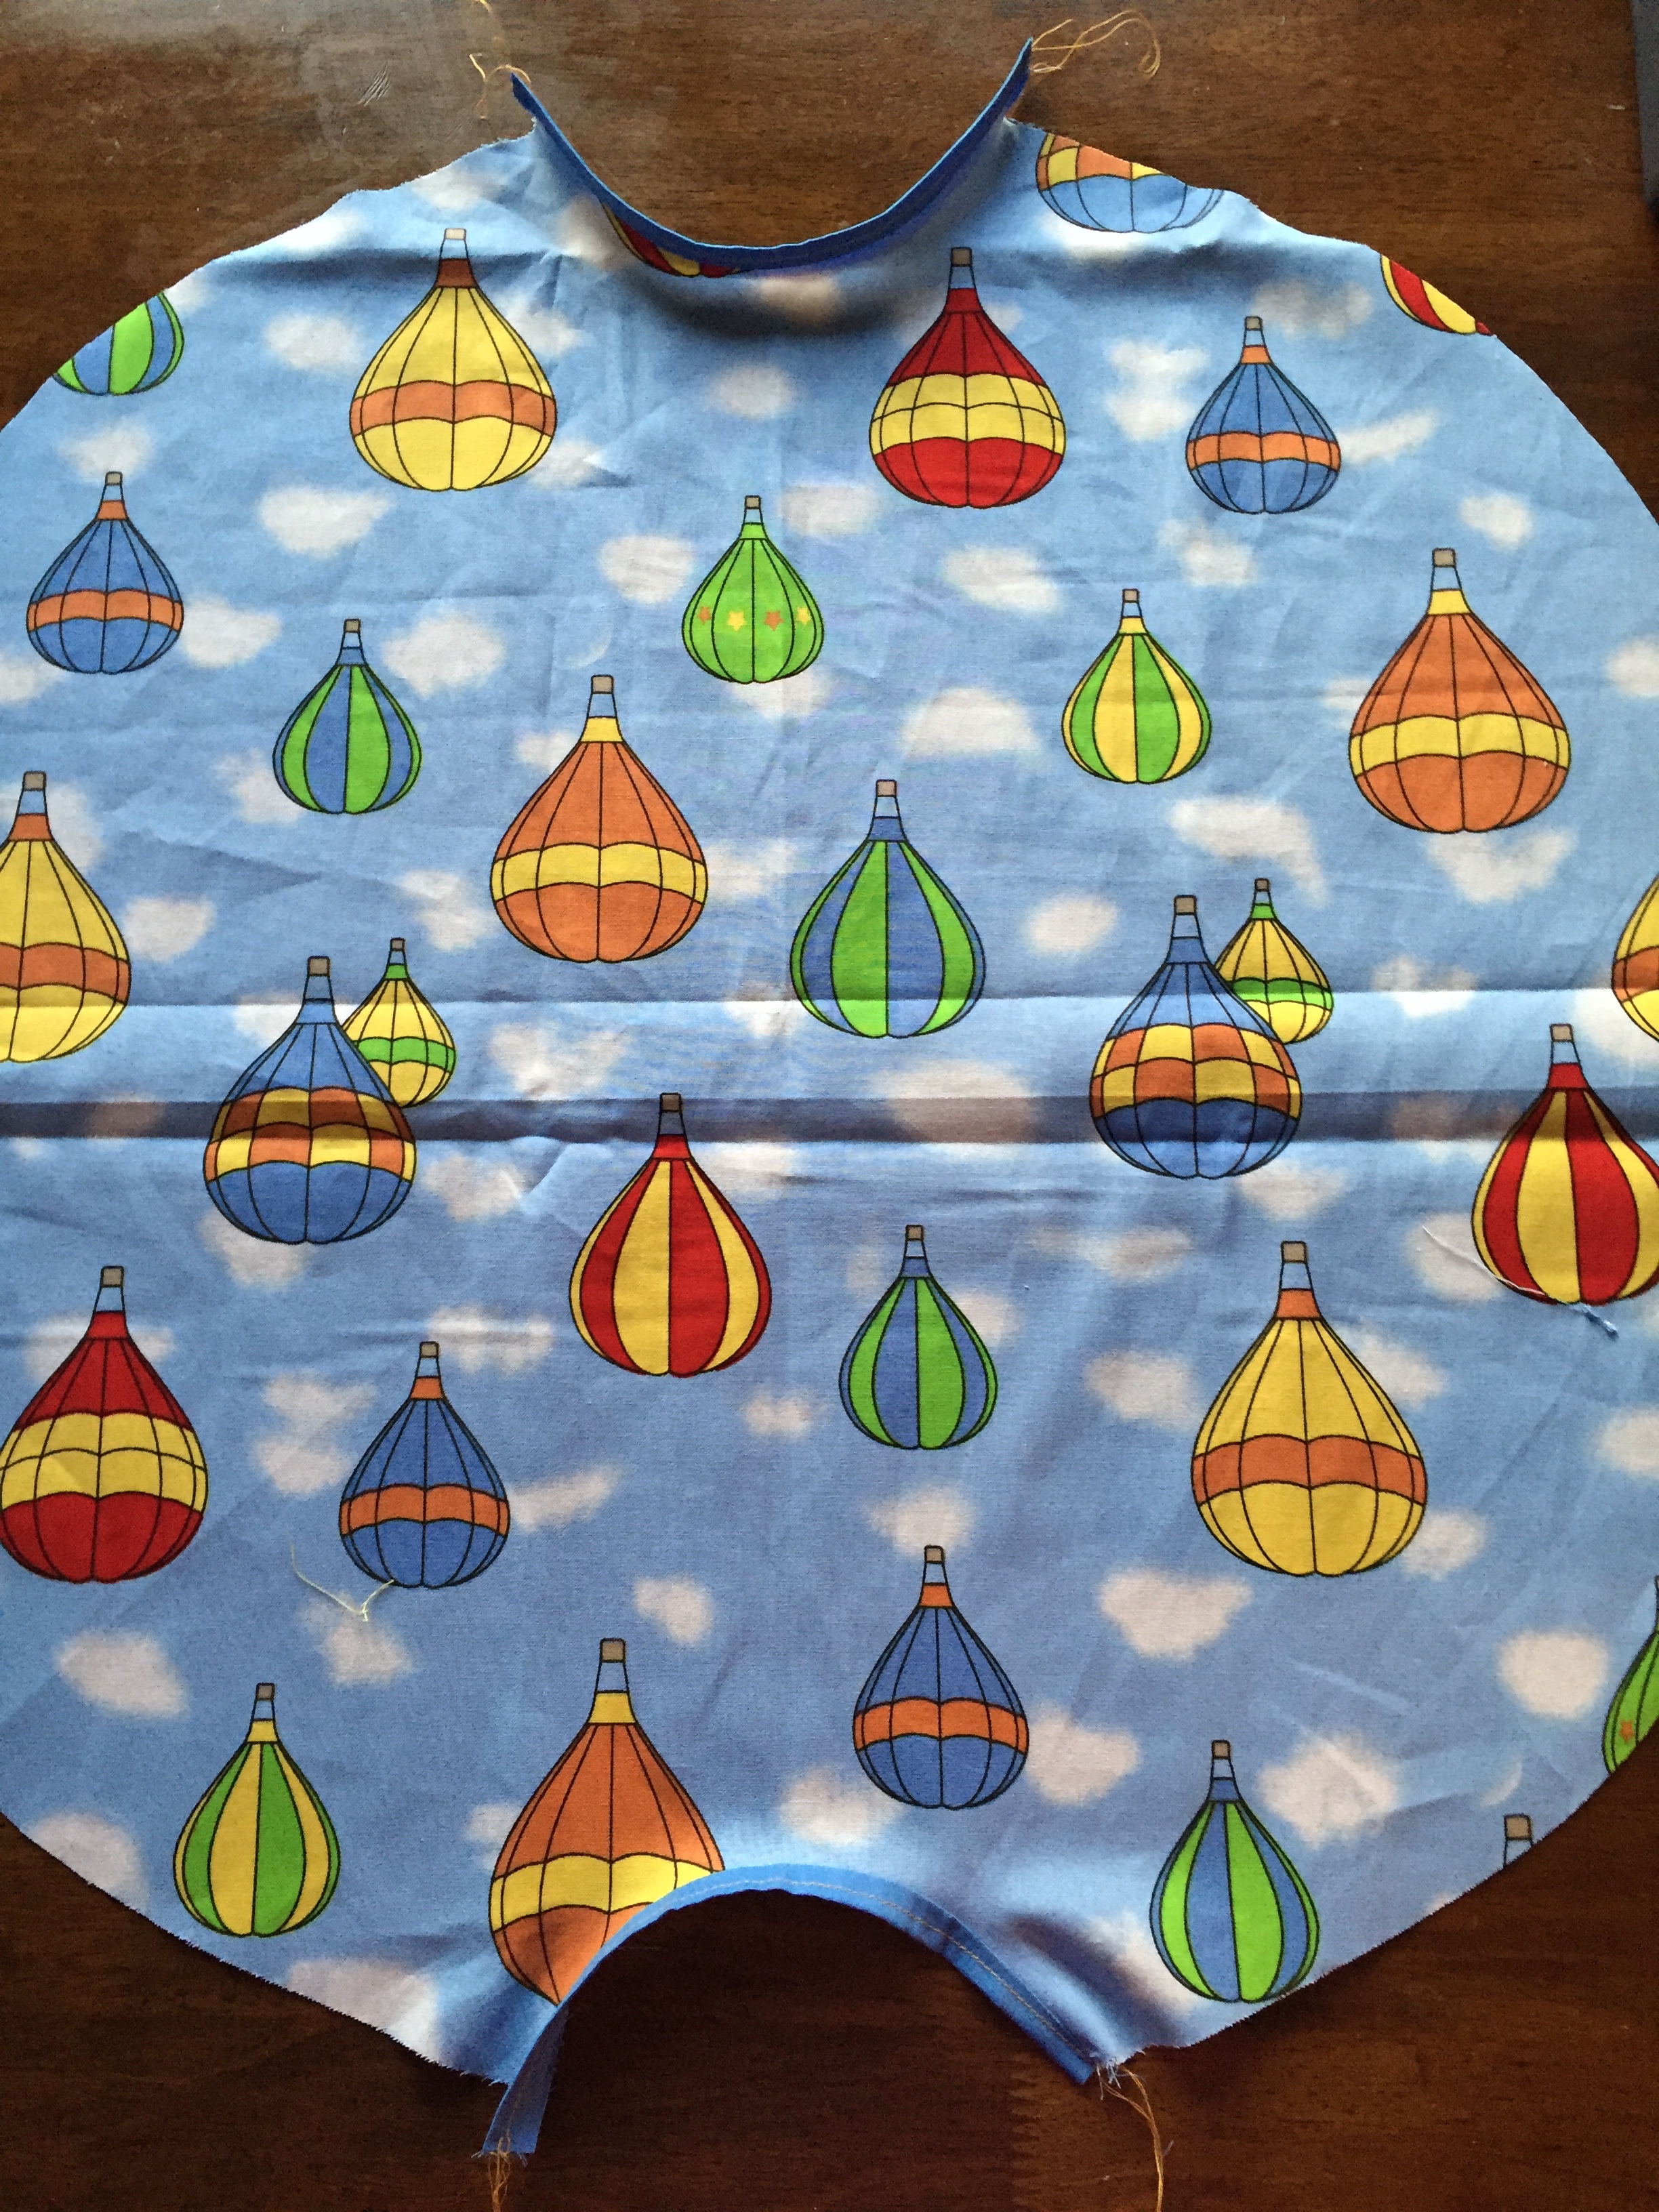
- Place the balloon and blue fabric right sides together, and sew starting from one semi circle and going round to the next – make sure you leave a 2cm seam allowance. Repeat this from the next semi circle around to the next. Turn the right way around. Now, where the raw edges meet the semi-circles, fold the raw edge inwards and fold under again like a hem and slip stitch to close.


- Sew a line of stitching the whole way around starting at the base of one of the semi circles and keeping the same distance from the edge of the fabric the whole way around.
- Take you ribbon and thread through. Fold over ends twice and sew to seal the loose ends. Then over lap the two ends and sew together.

Take a look over at this and other great ideas over on the Craft Cotton Company blog.

Leave a comment