
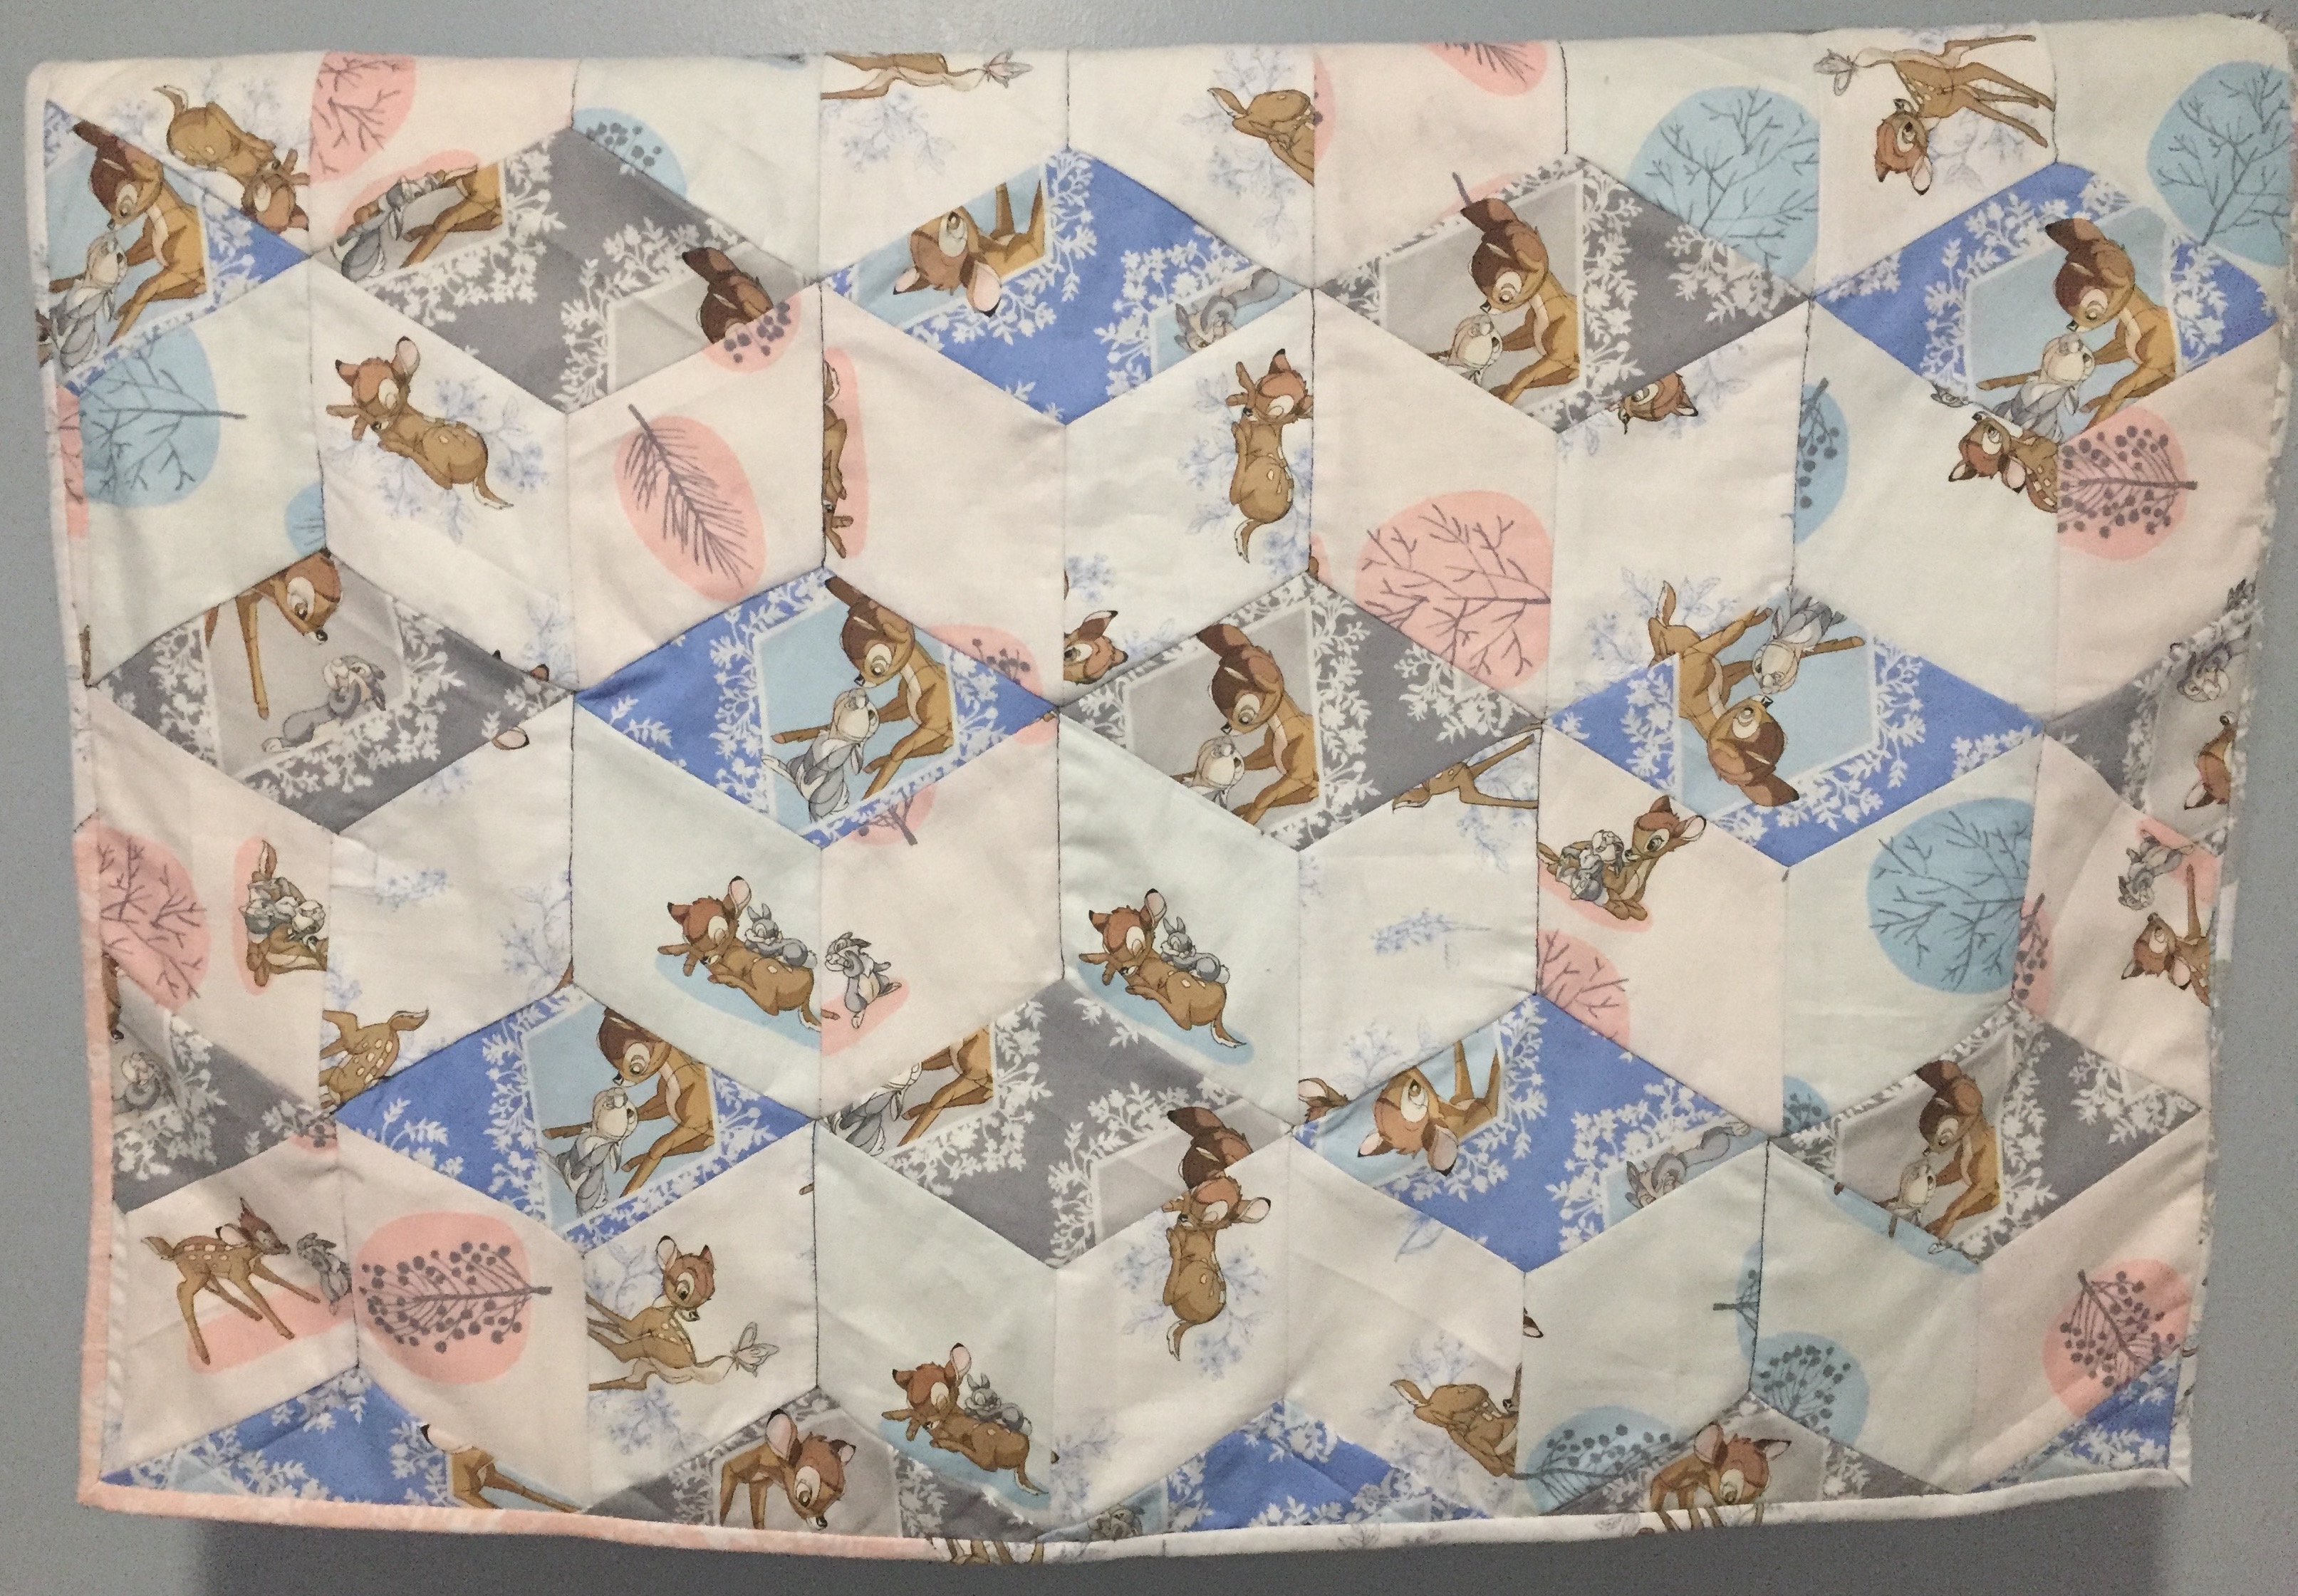
I have always stayed clear of tumbling blocks as they look a little tricky to get right, however, I finally decided to give them a try and am really pleased as I did as they look way more complicated than they are.
This tutorial will show you how to make a mini tumbling blocks quilt.
Fabric was gifted by The Craft Cotton Company.
Sewing Tutorial: Mini Tumbling Blocks Quilt
Materials
- Paper/card to make template.
- Ruler.
- Pencil.
- Scissors.
- Thread.
- Pins.
- Needle.
- Batting.
- 68x68cm.
- Backing fabric 68x68cm.
- 2 sets of fat quarters, this quilt uses 2 Bambi Fat quarters by The Craft Cotton Company one set of Pink and one set of Blue.
Note:
Sew together using a 1 cm seam allowance throughout, apart from the binding where a 0.5 cm seam allowance is used.
When sewing the cubes together make sure you leave a 1 cm gap at the top and bottom of each seam to keep the 1 cm seam allowance.
Sewing Tutorial: Mini Tumbling Blocks Quilt
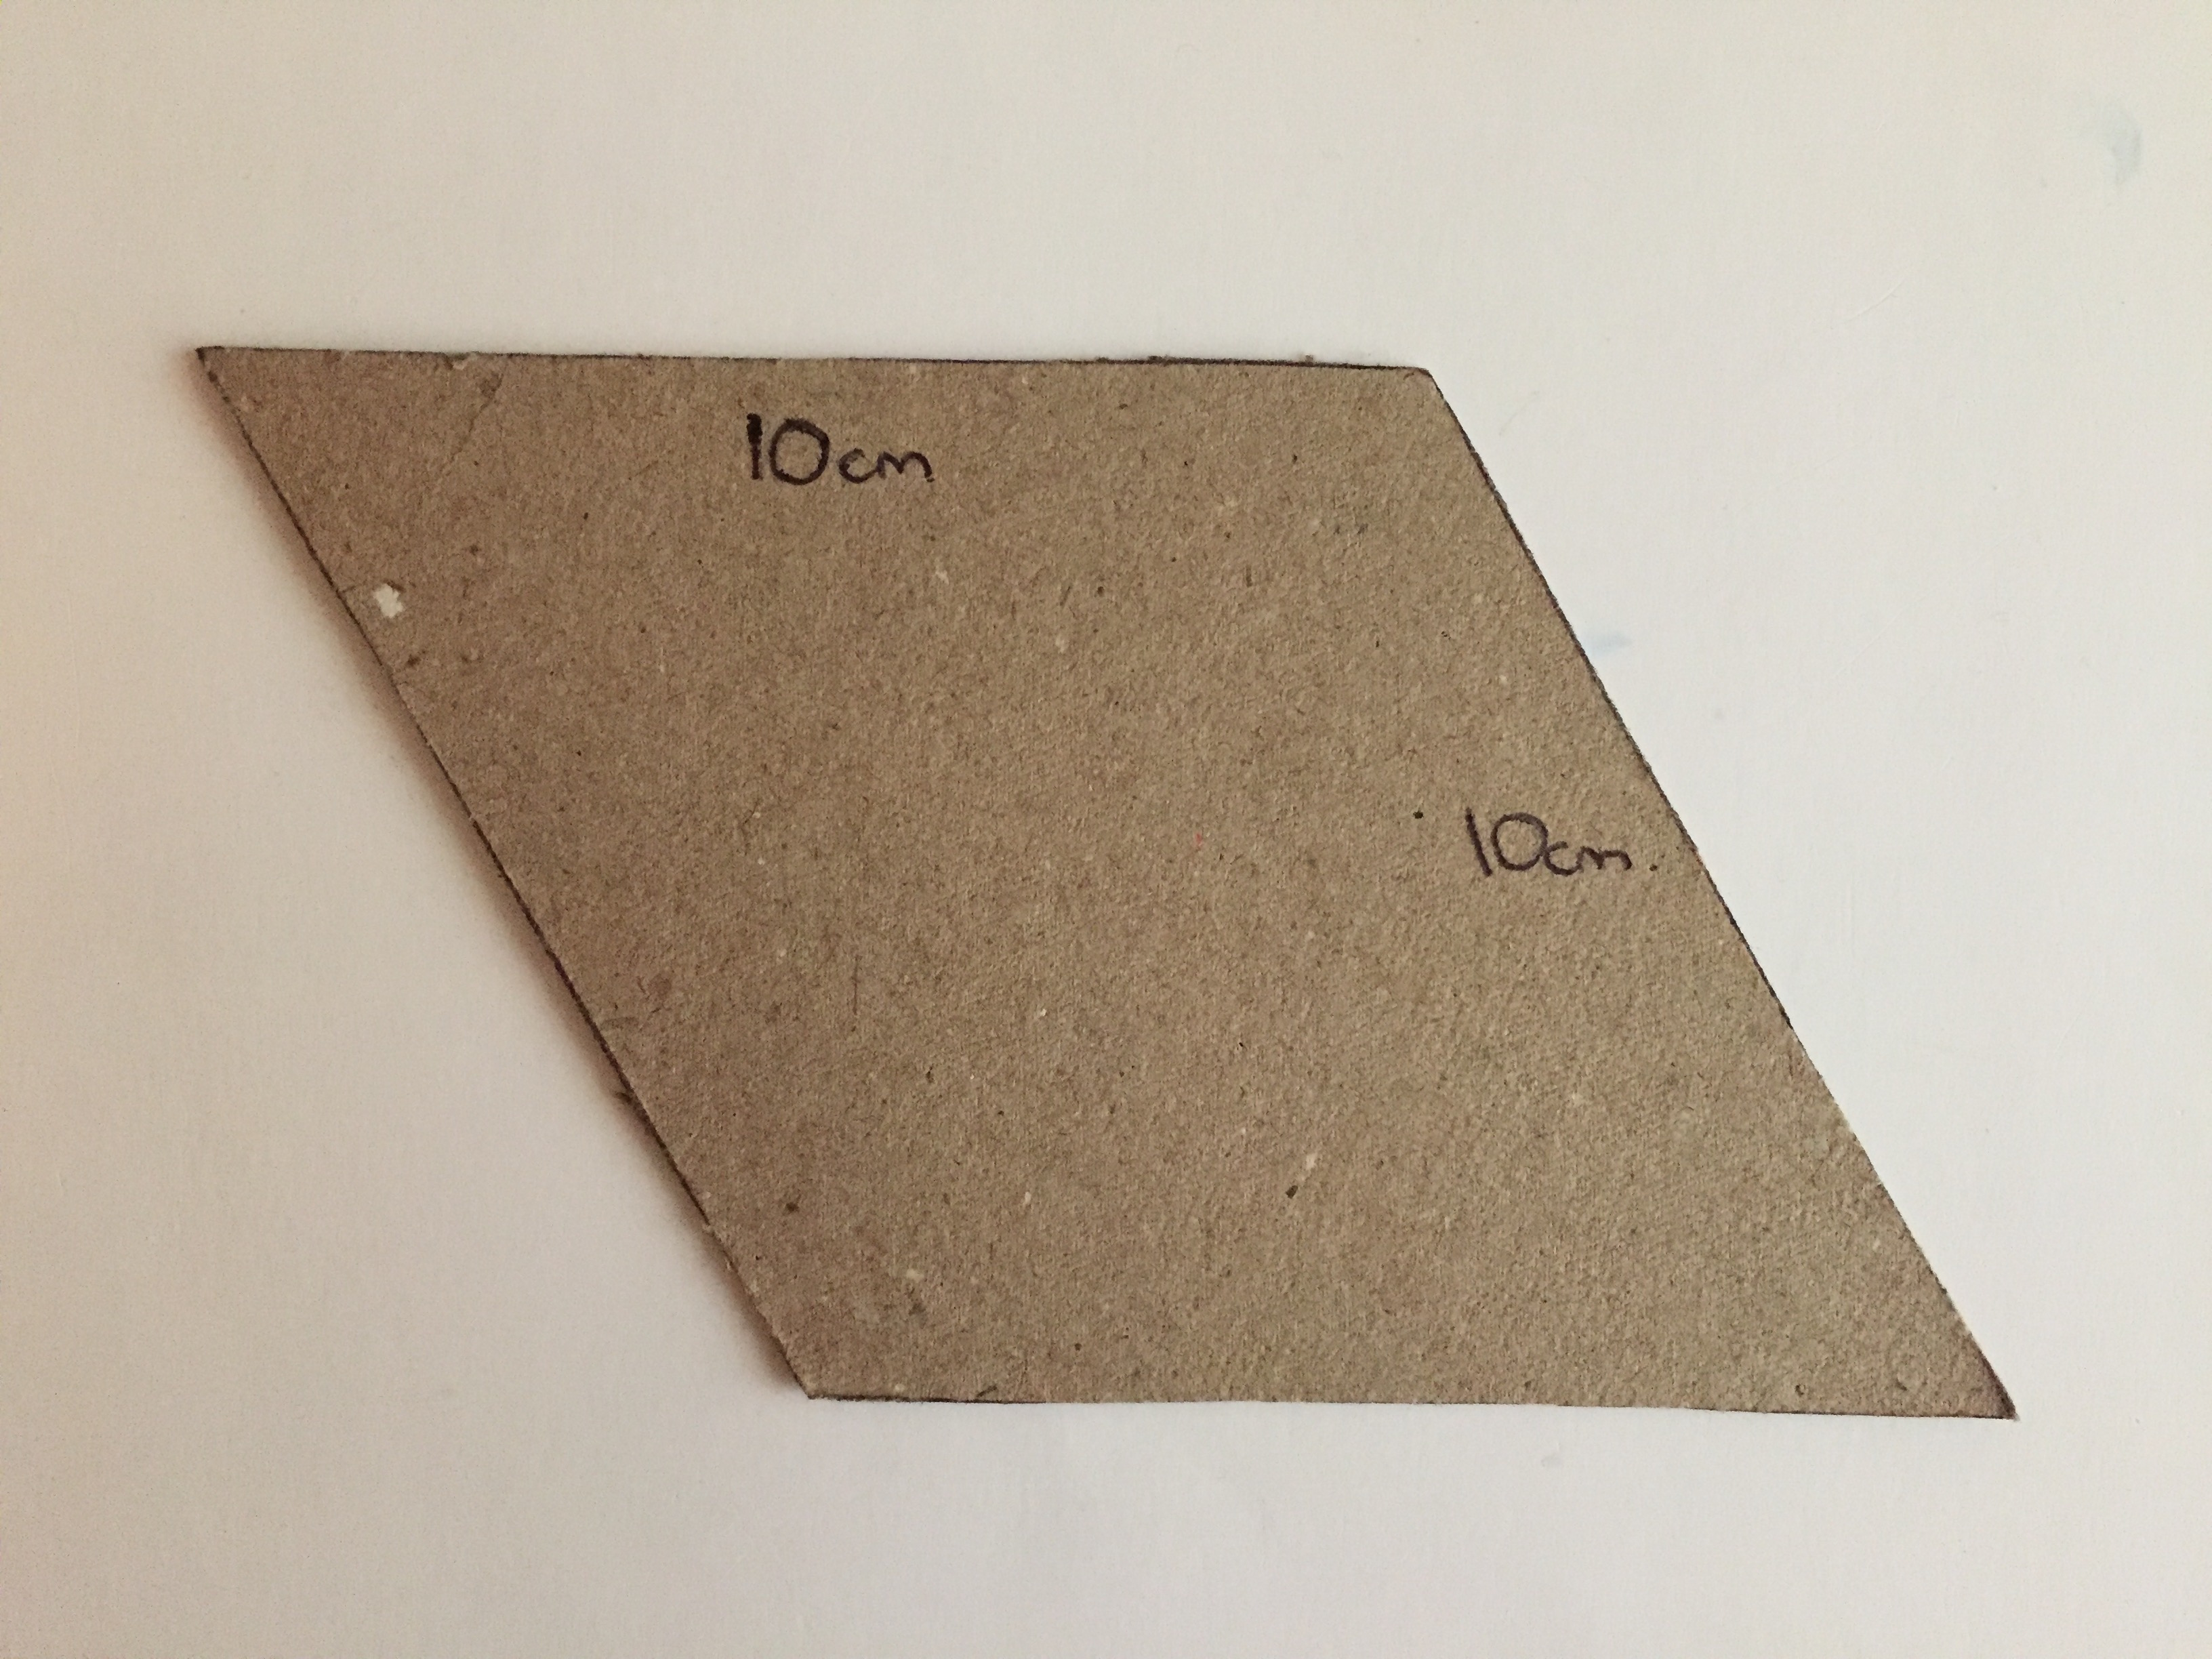
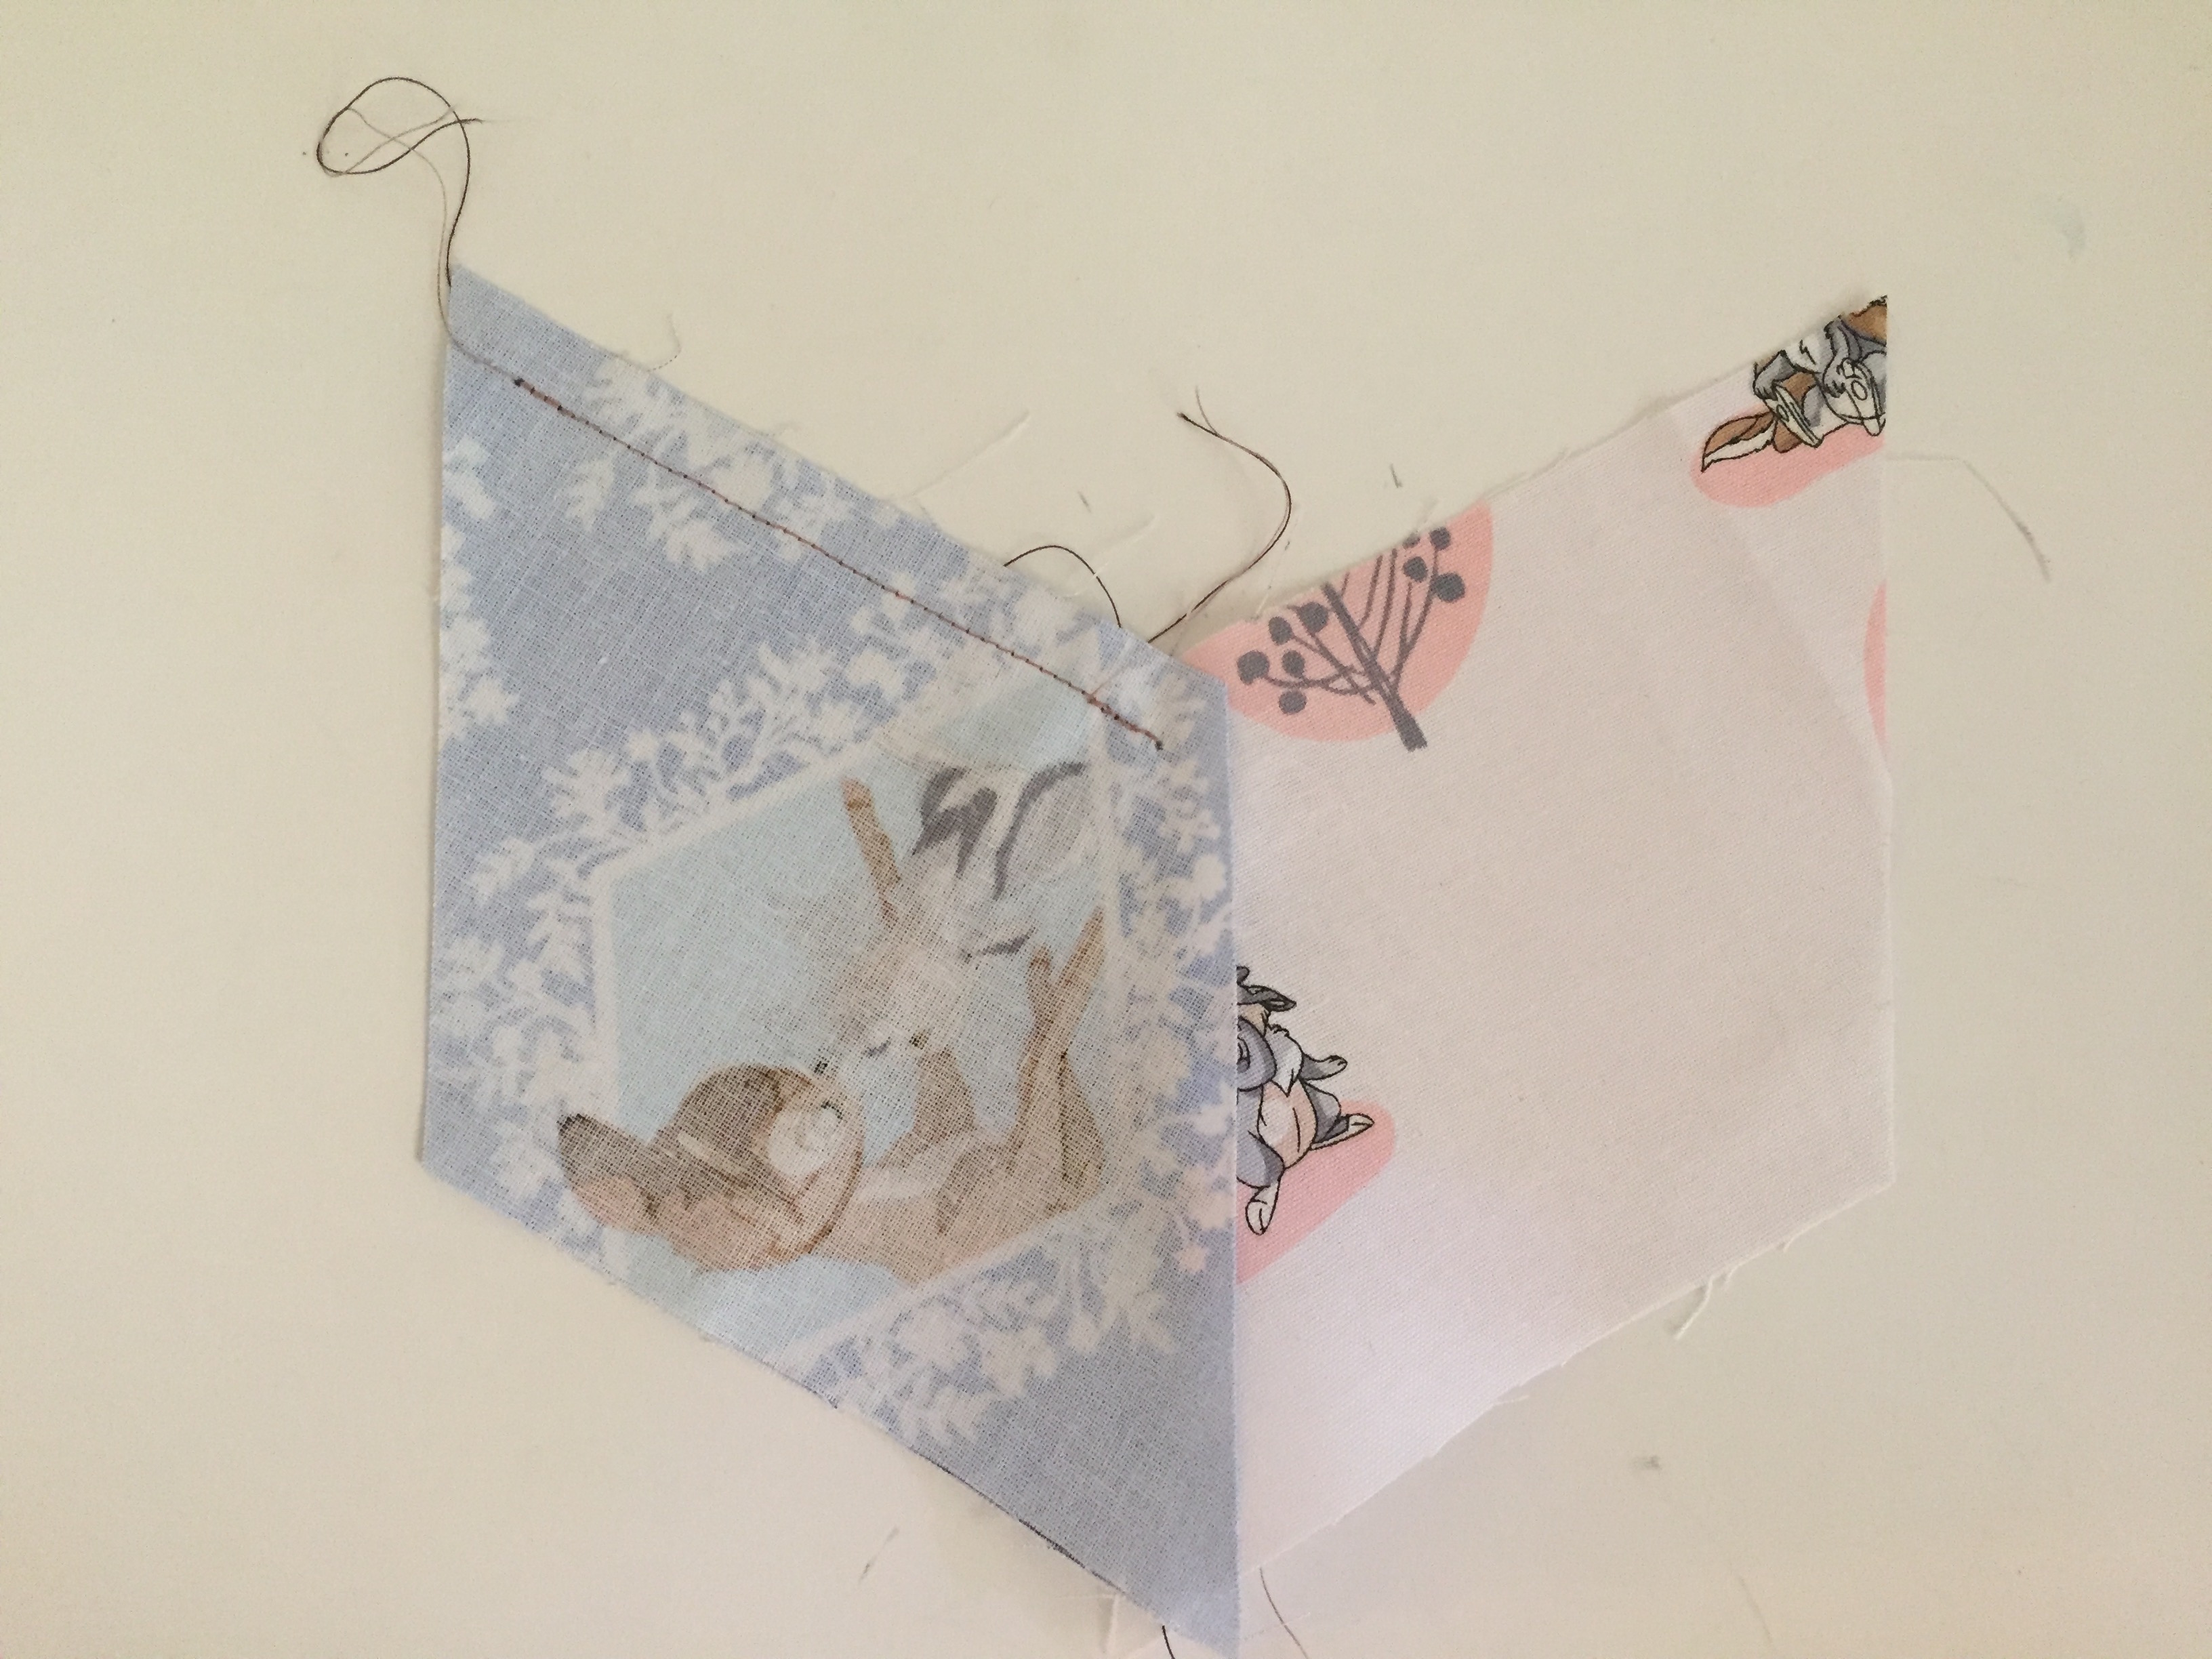
- Draw and cut out a diamond template from paper/card with 10cm long sides.
- Using this diamond template cut out the following:
- 15 from the blue and grey fabric with a diamond Bambi picture detail.
- 19 from the white background fabric with pink tree detail.
- 15 from the white background fabric with blue tree detail.
- 16 from the white background fabric with blue leaves detail.
- Using this diamond template cut out the following:

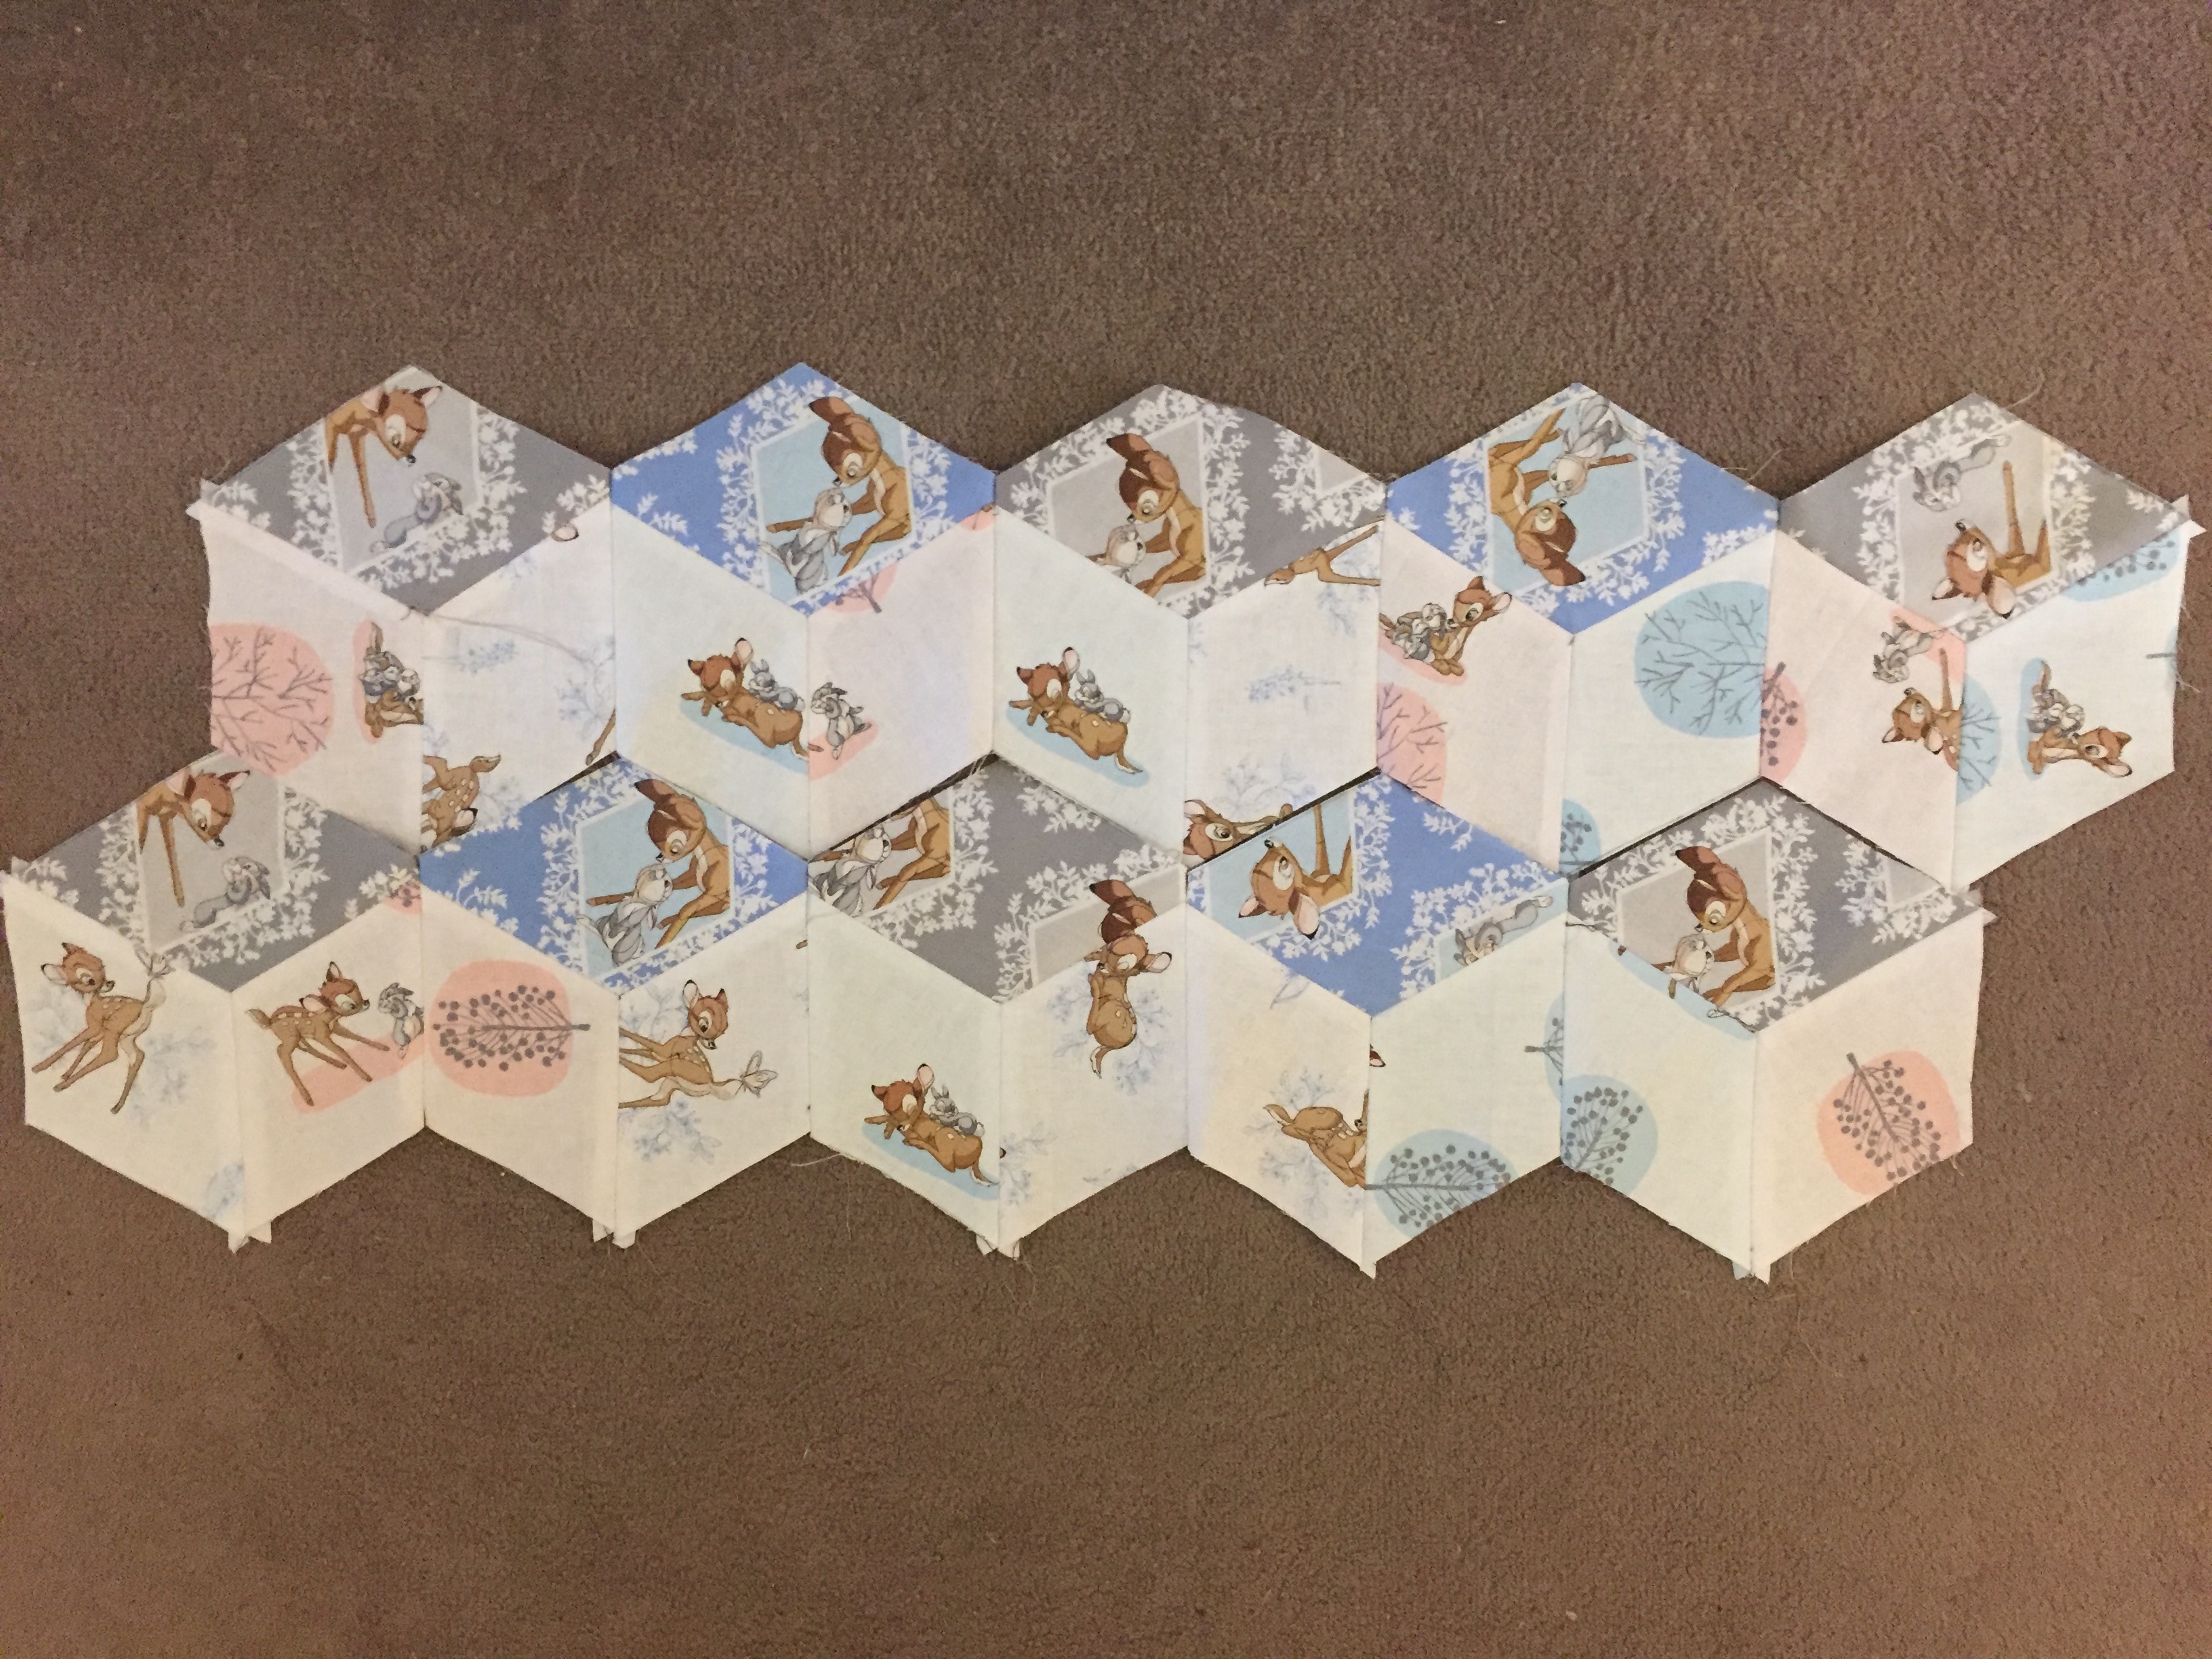
- Create blue topped blocks: Take one of the blue with diamond Bambi picture detail fabric pieces (the block top) and sew together with any two other pieces from the white background fabrics. Repeat this for 12 of the blue with diamond Bambi picture detail fabric pieces.
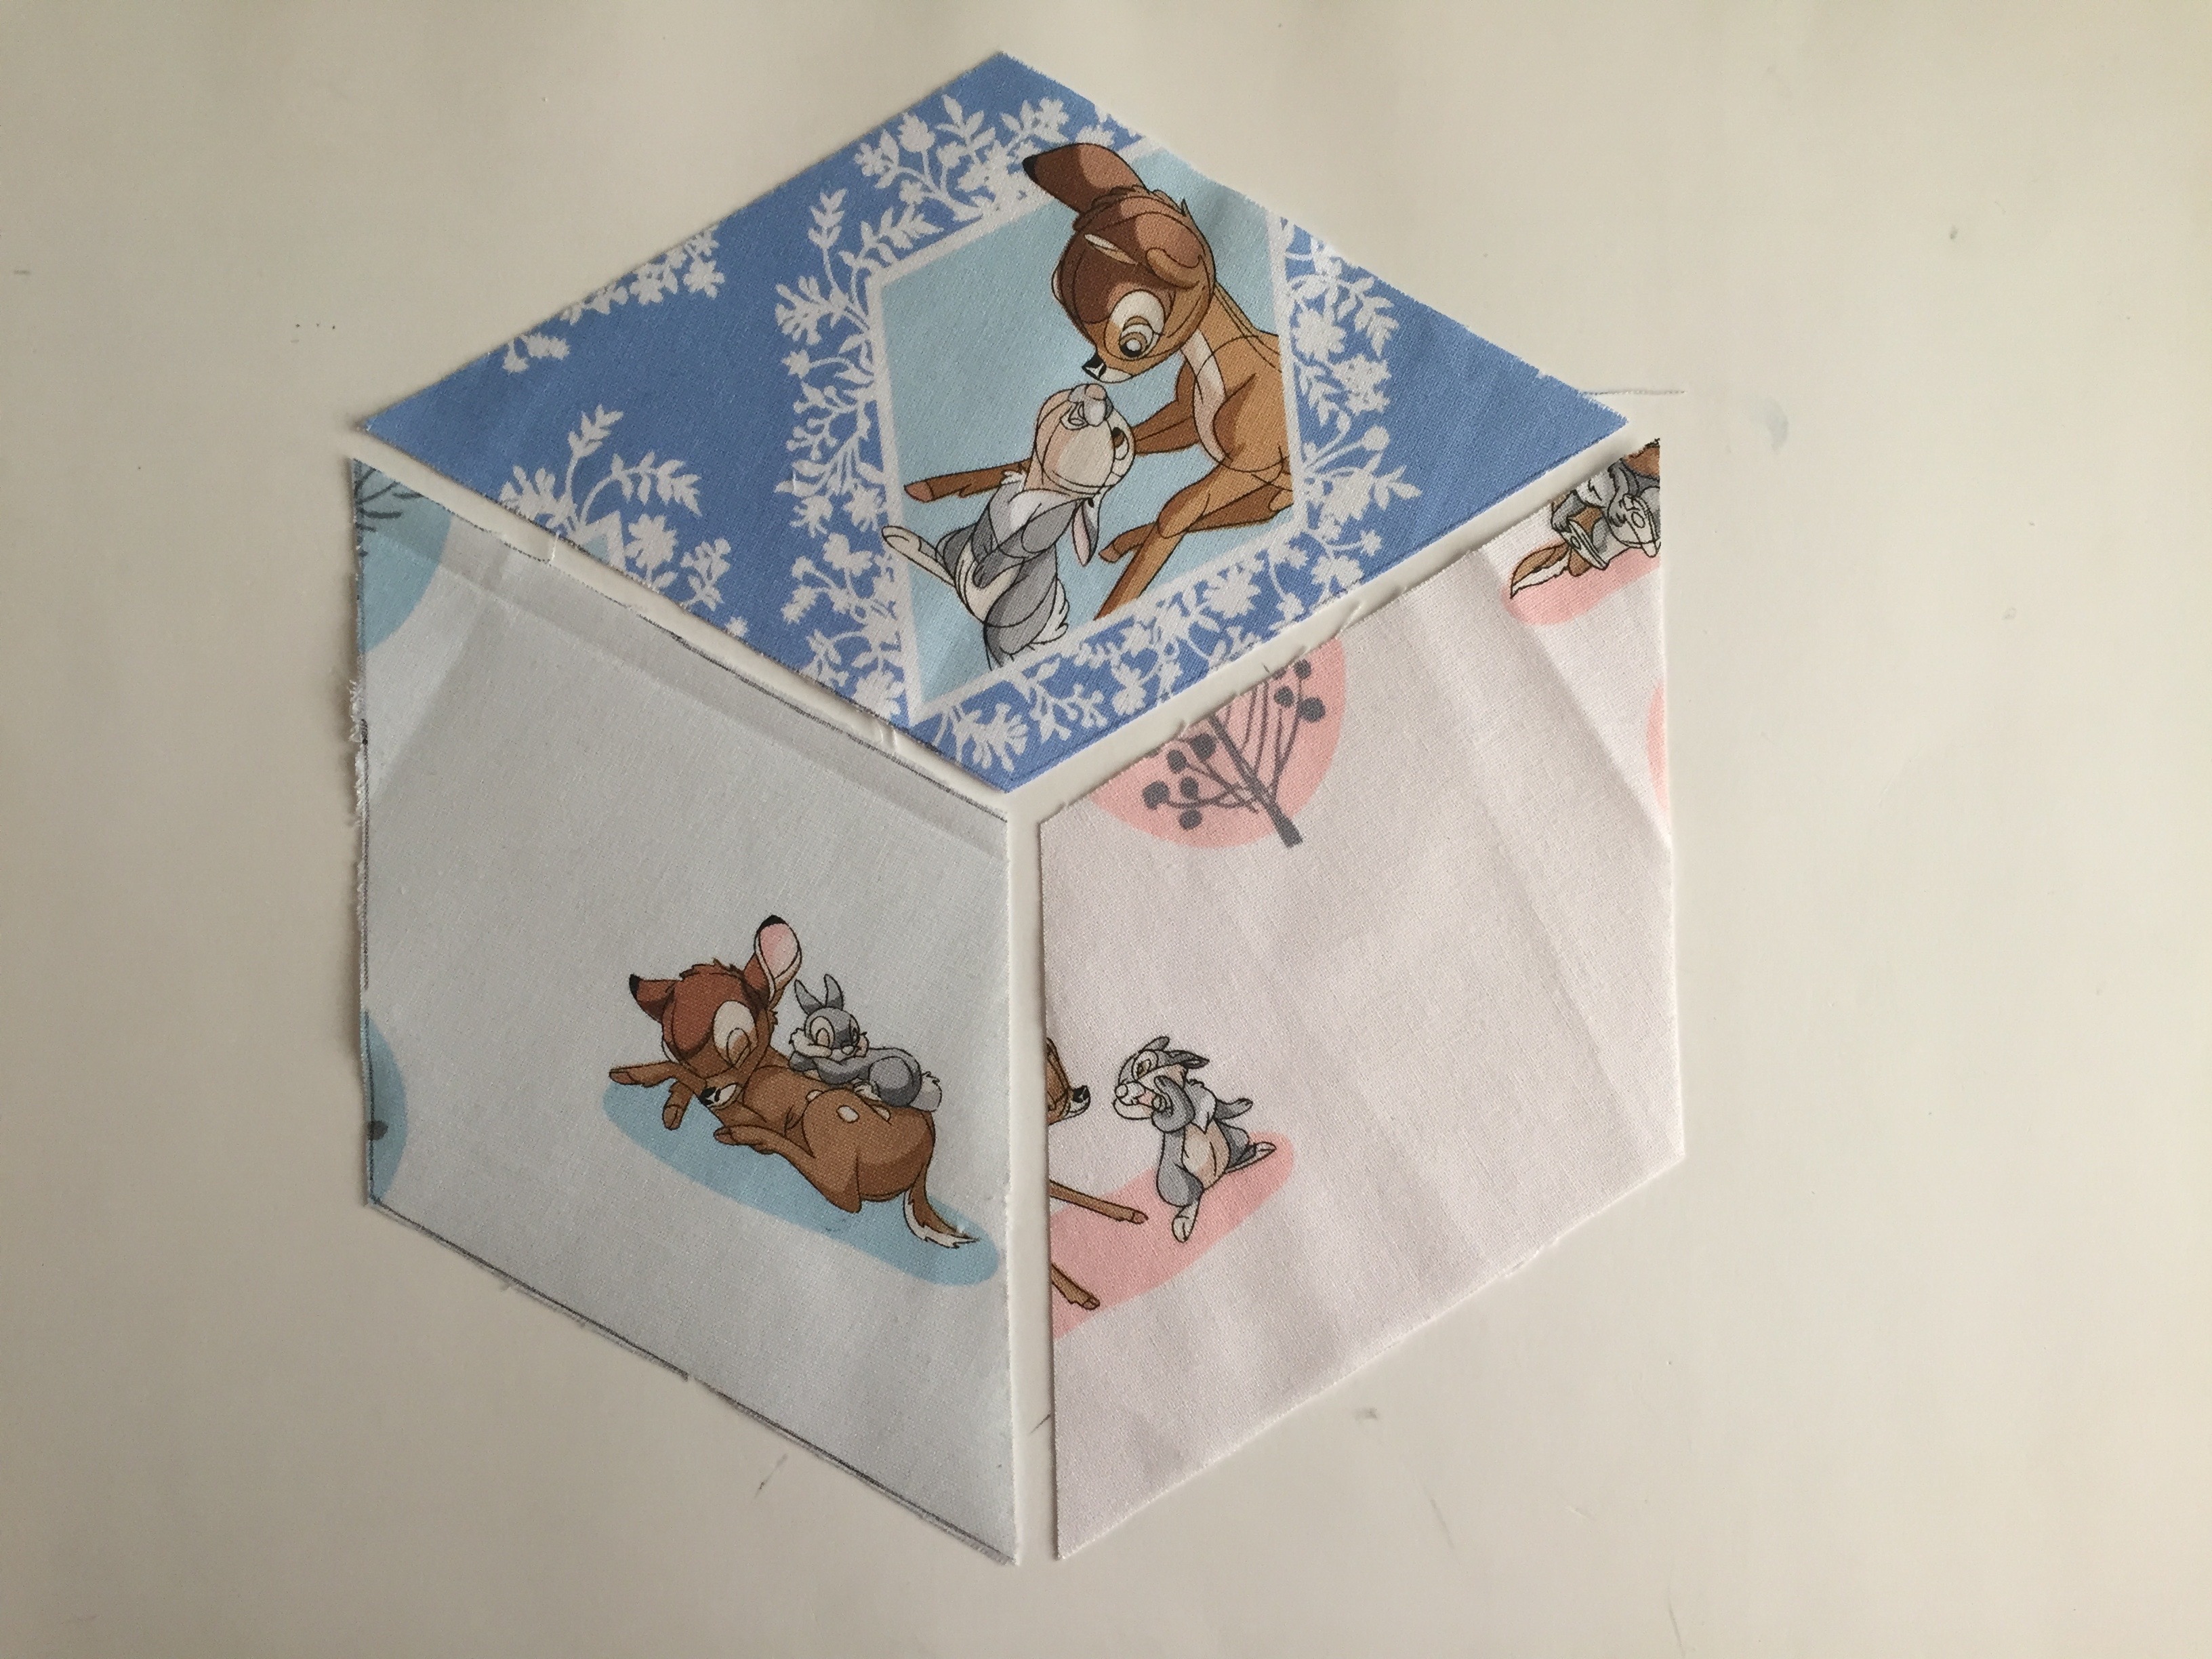
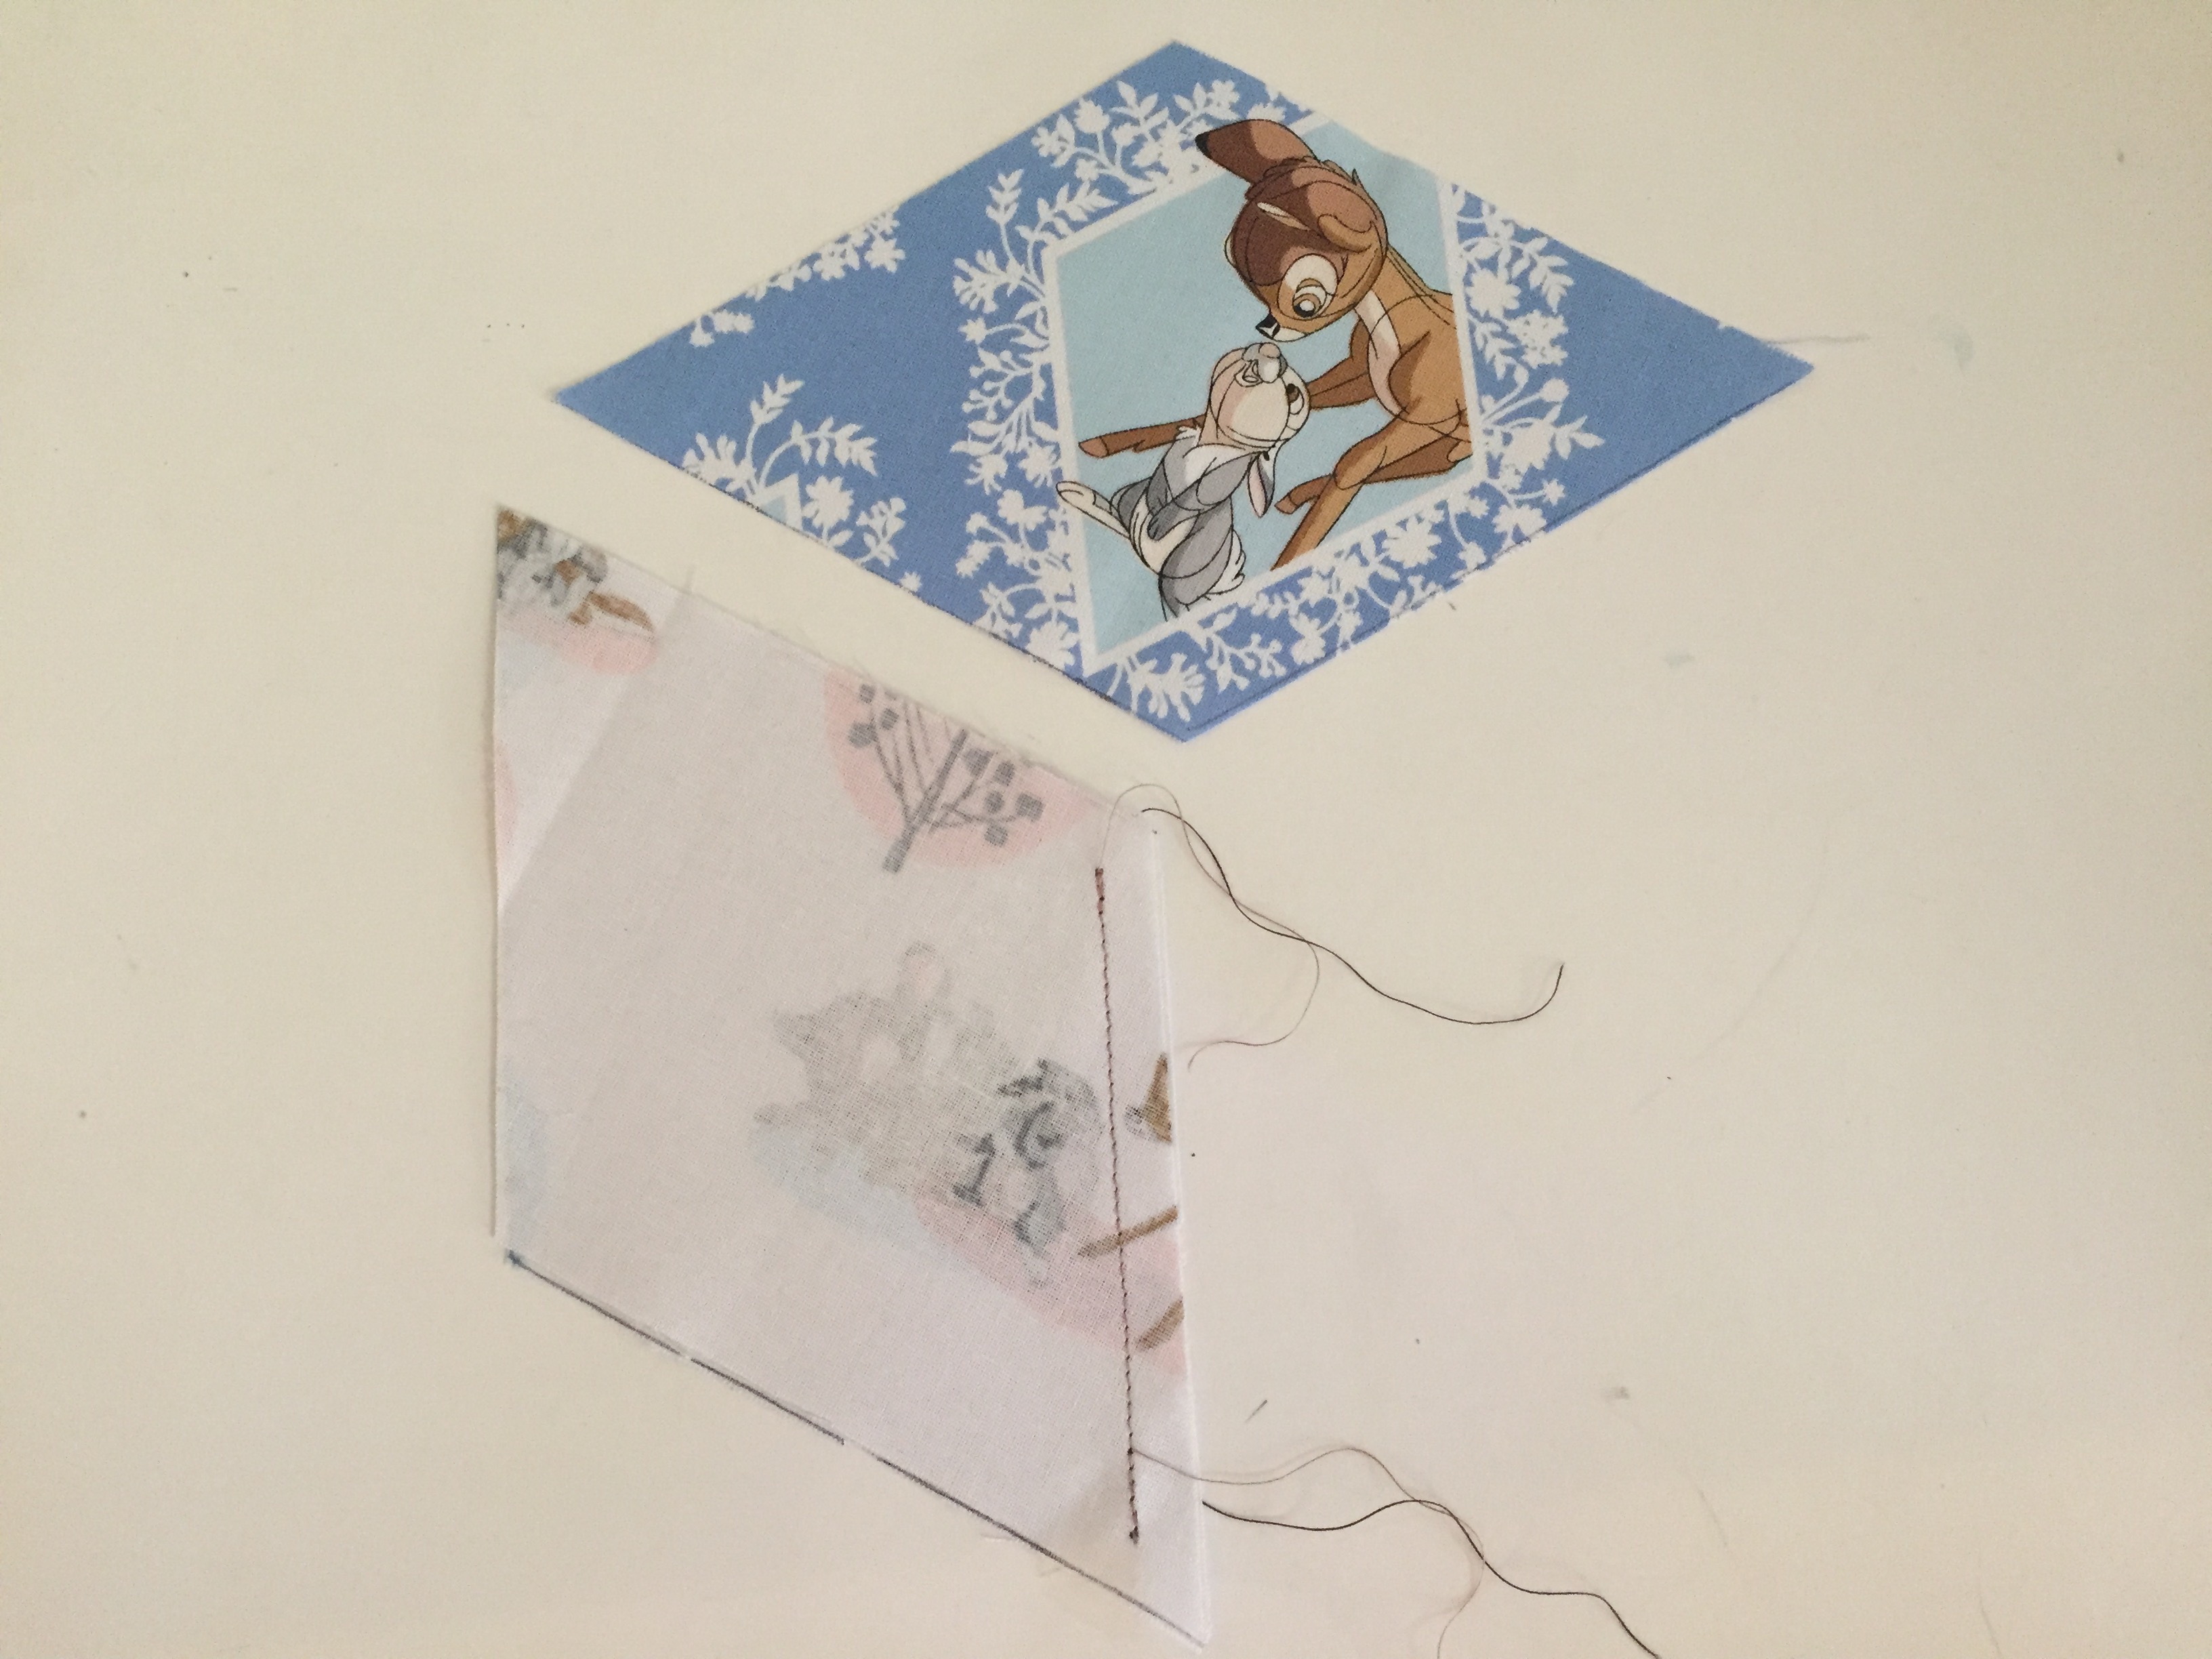
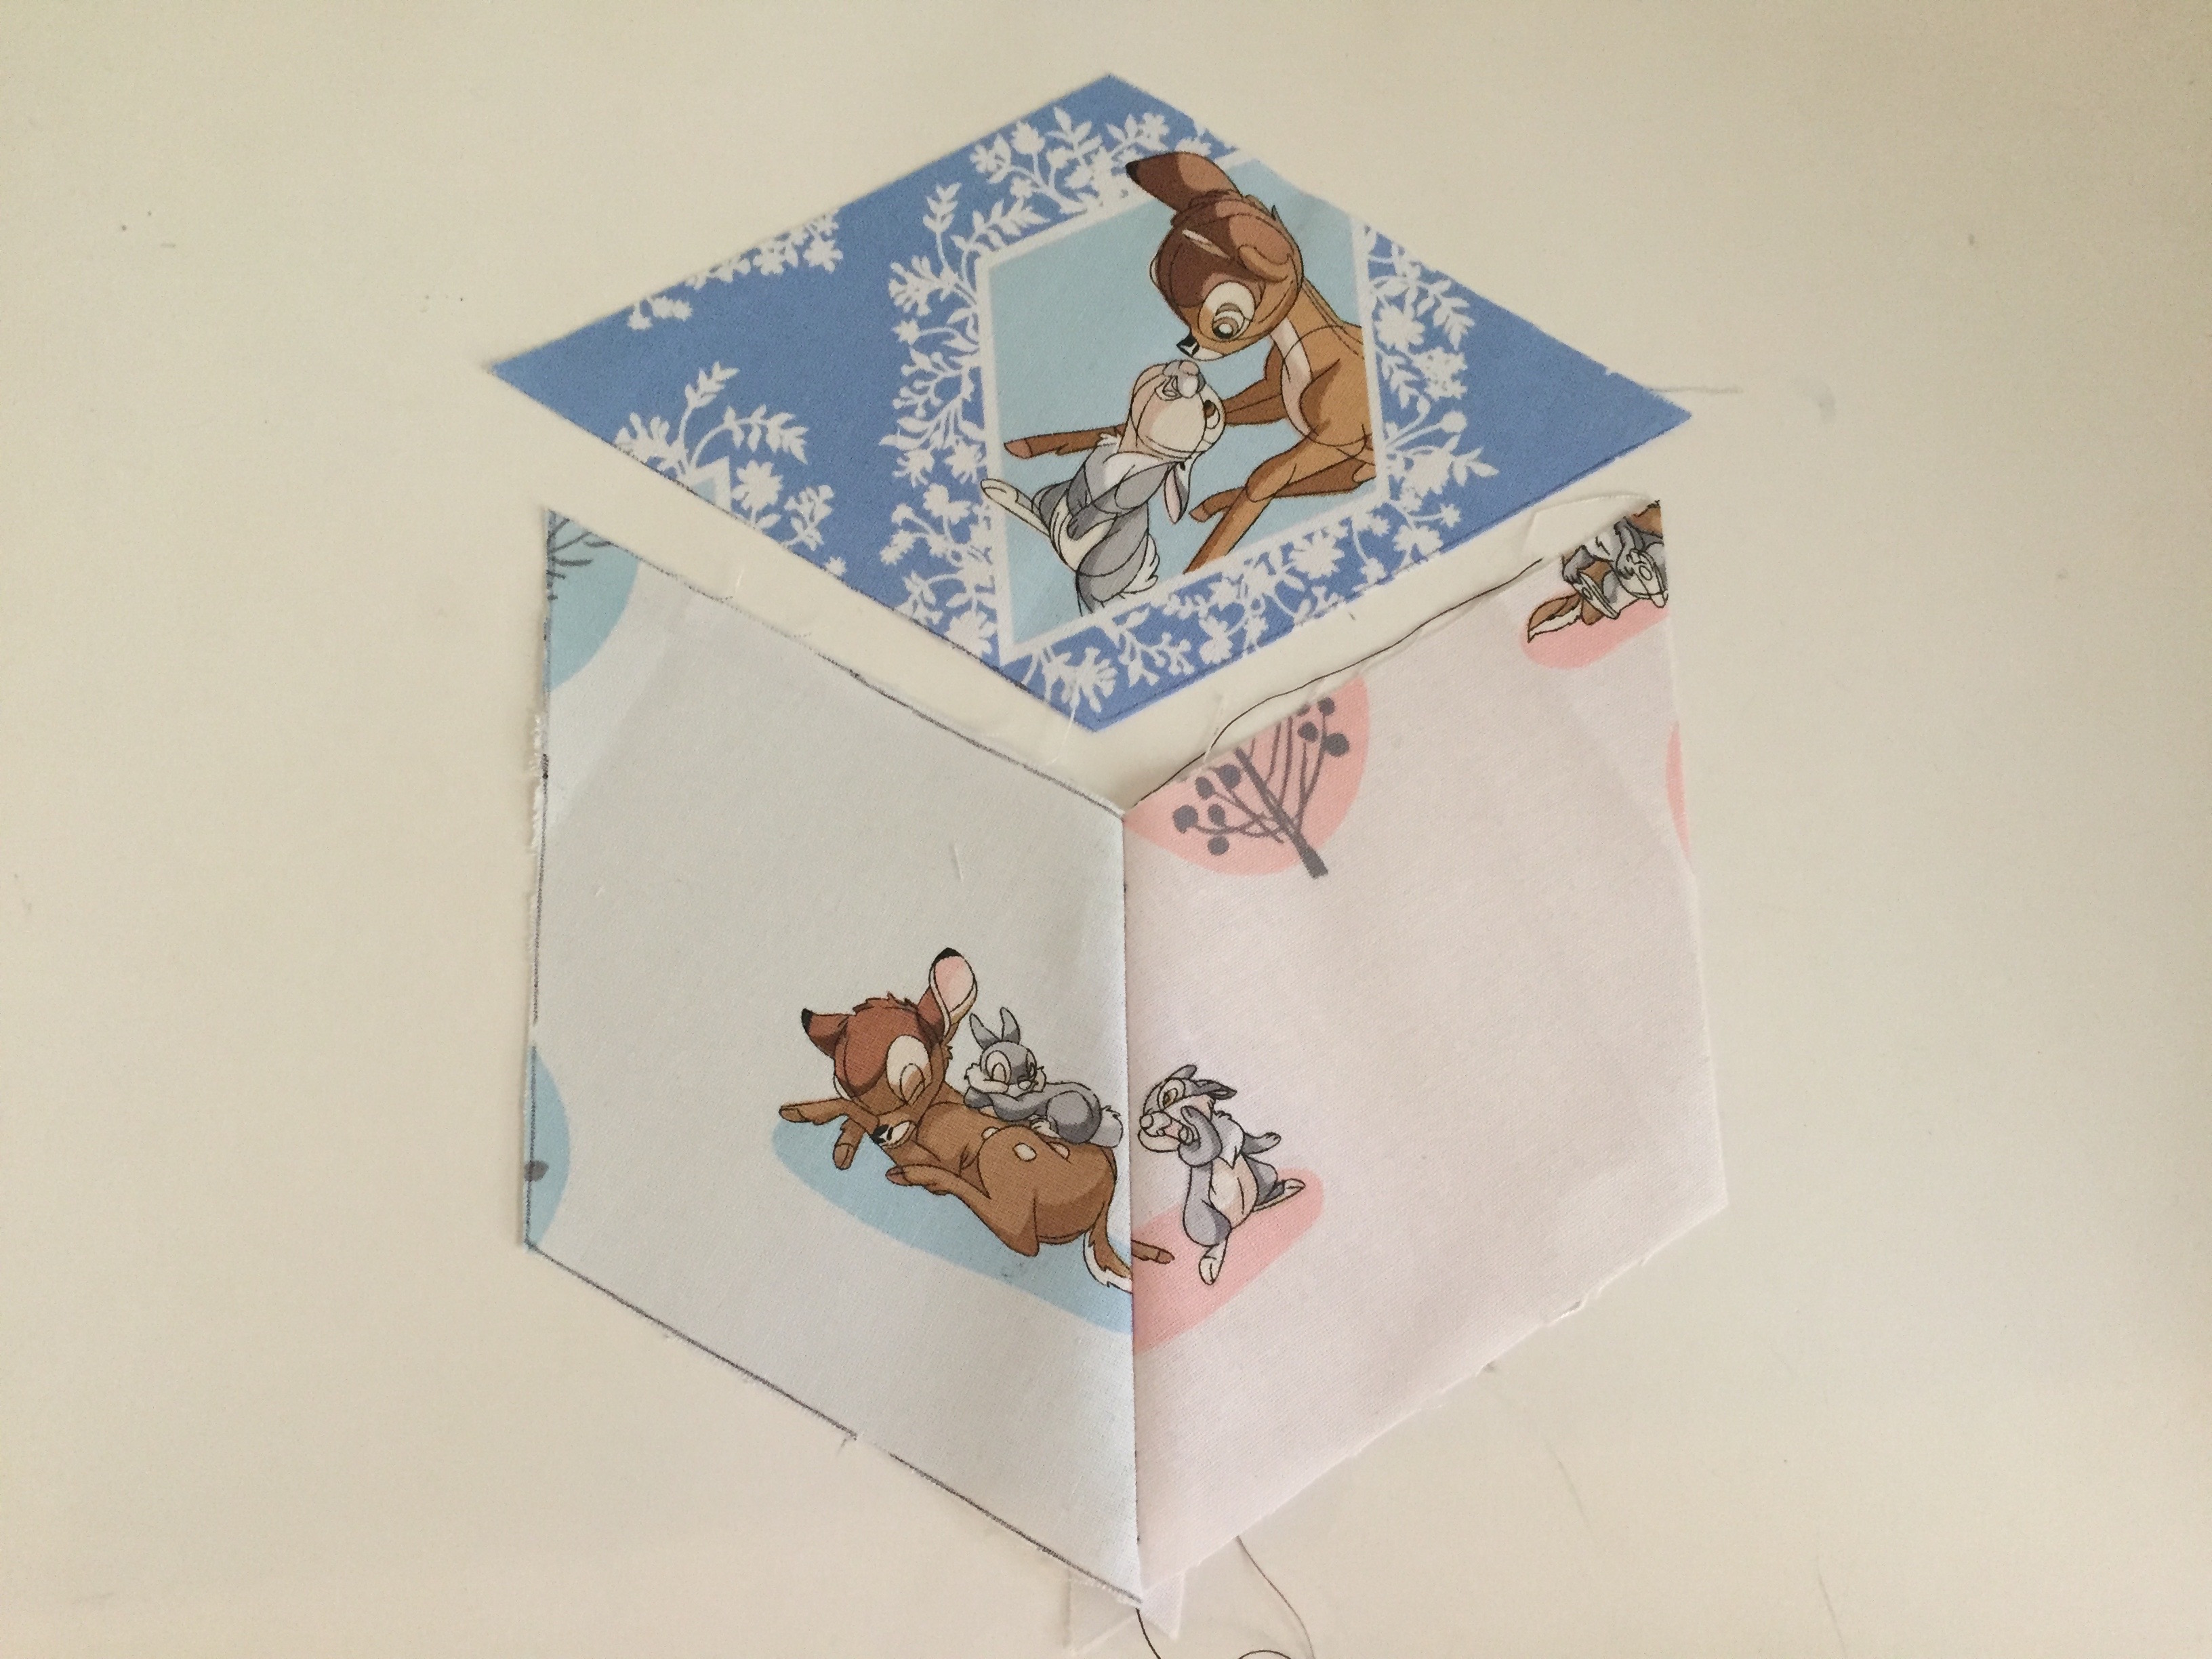
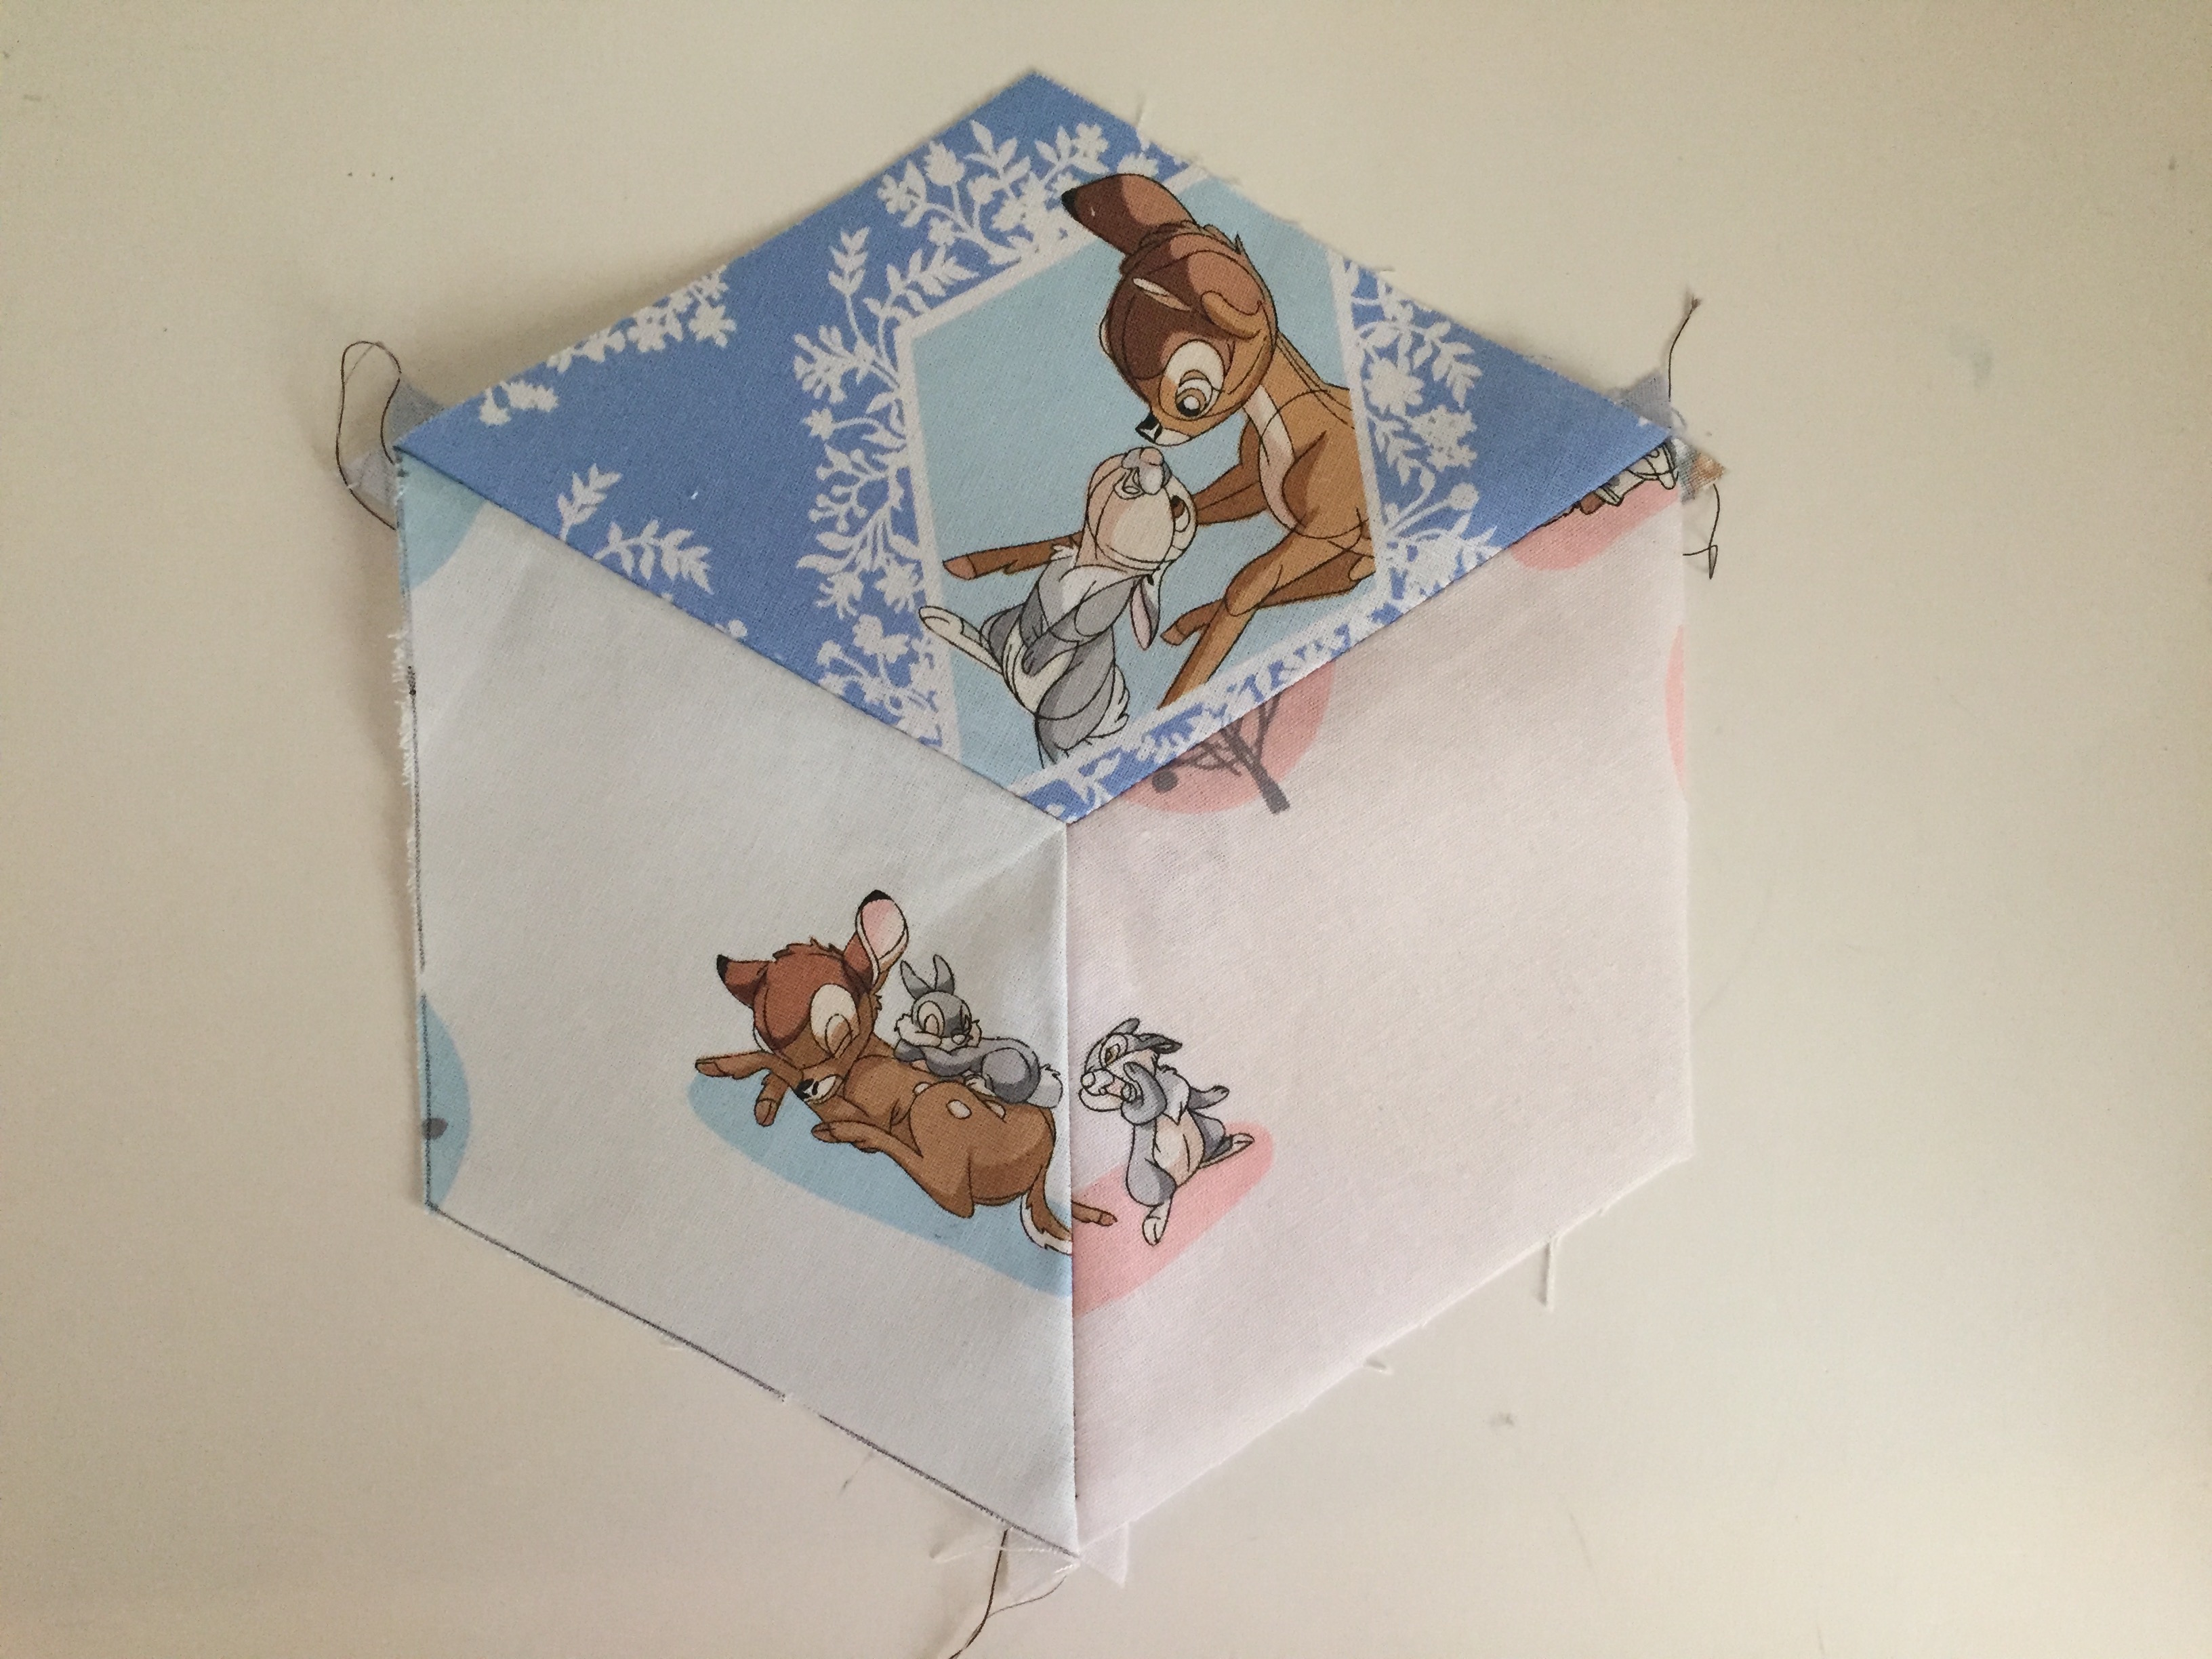
- Create grey topped blocks: Take one of the grey with diamond Bambi picture detail fabric pieces (the block top) and sew together with any two other pieces from the white background fabrics. Repeat this for 13 of all the grey with diamond Bambi picture detail fabric pieces.
- This will give a total of 12 blue topped blocks and 13 grey topped blocks and will leave 2 grey with diamond Bambi picture fabric pieces and 3 blue with diamond Bambi picture for later.
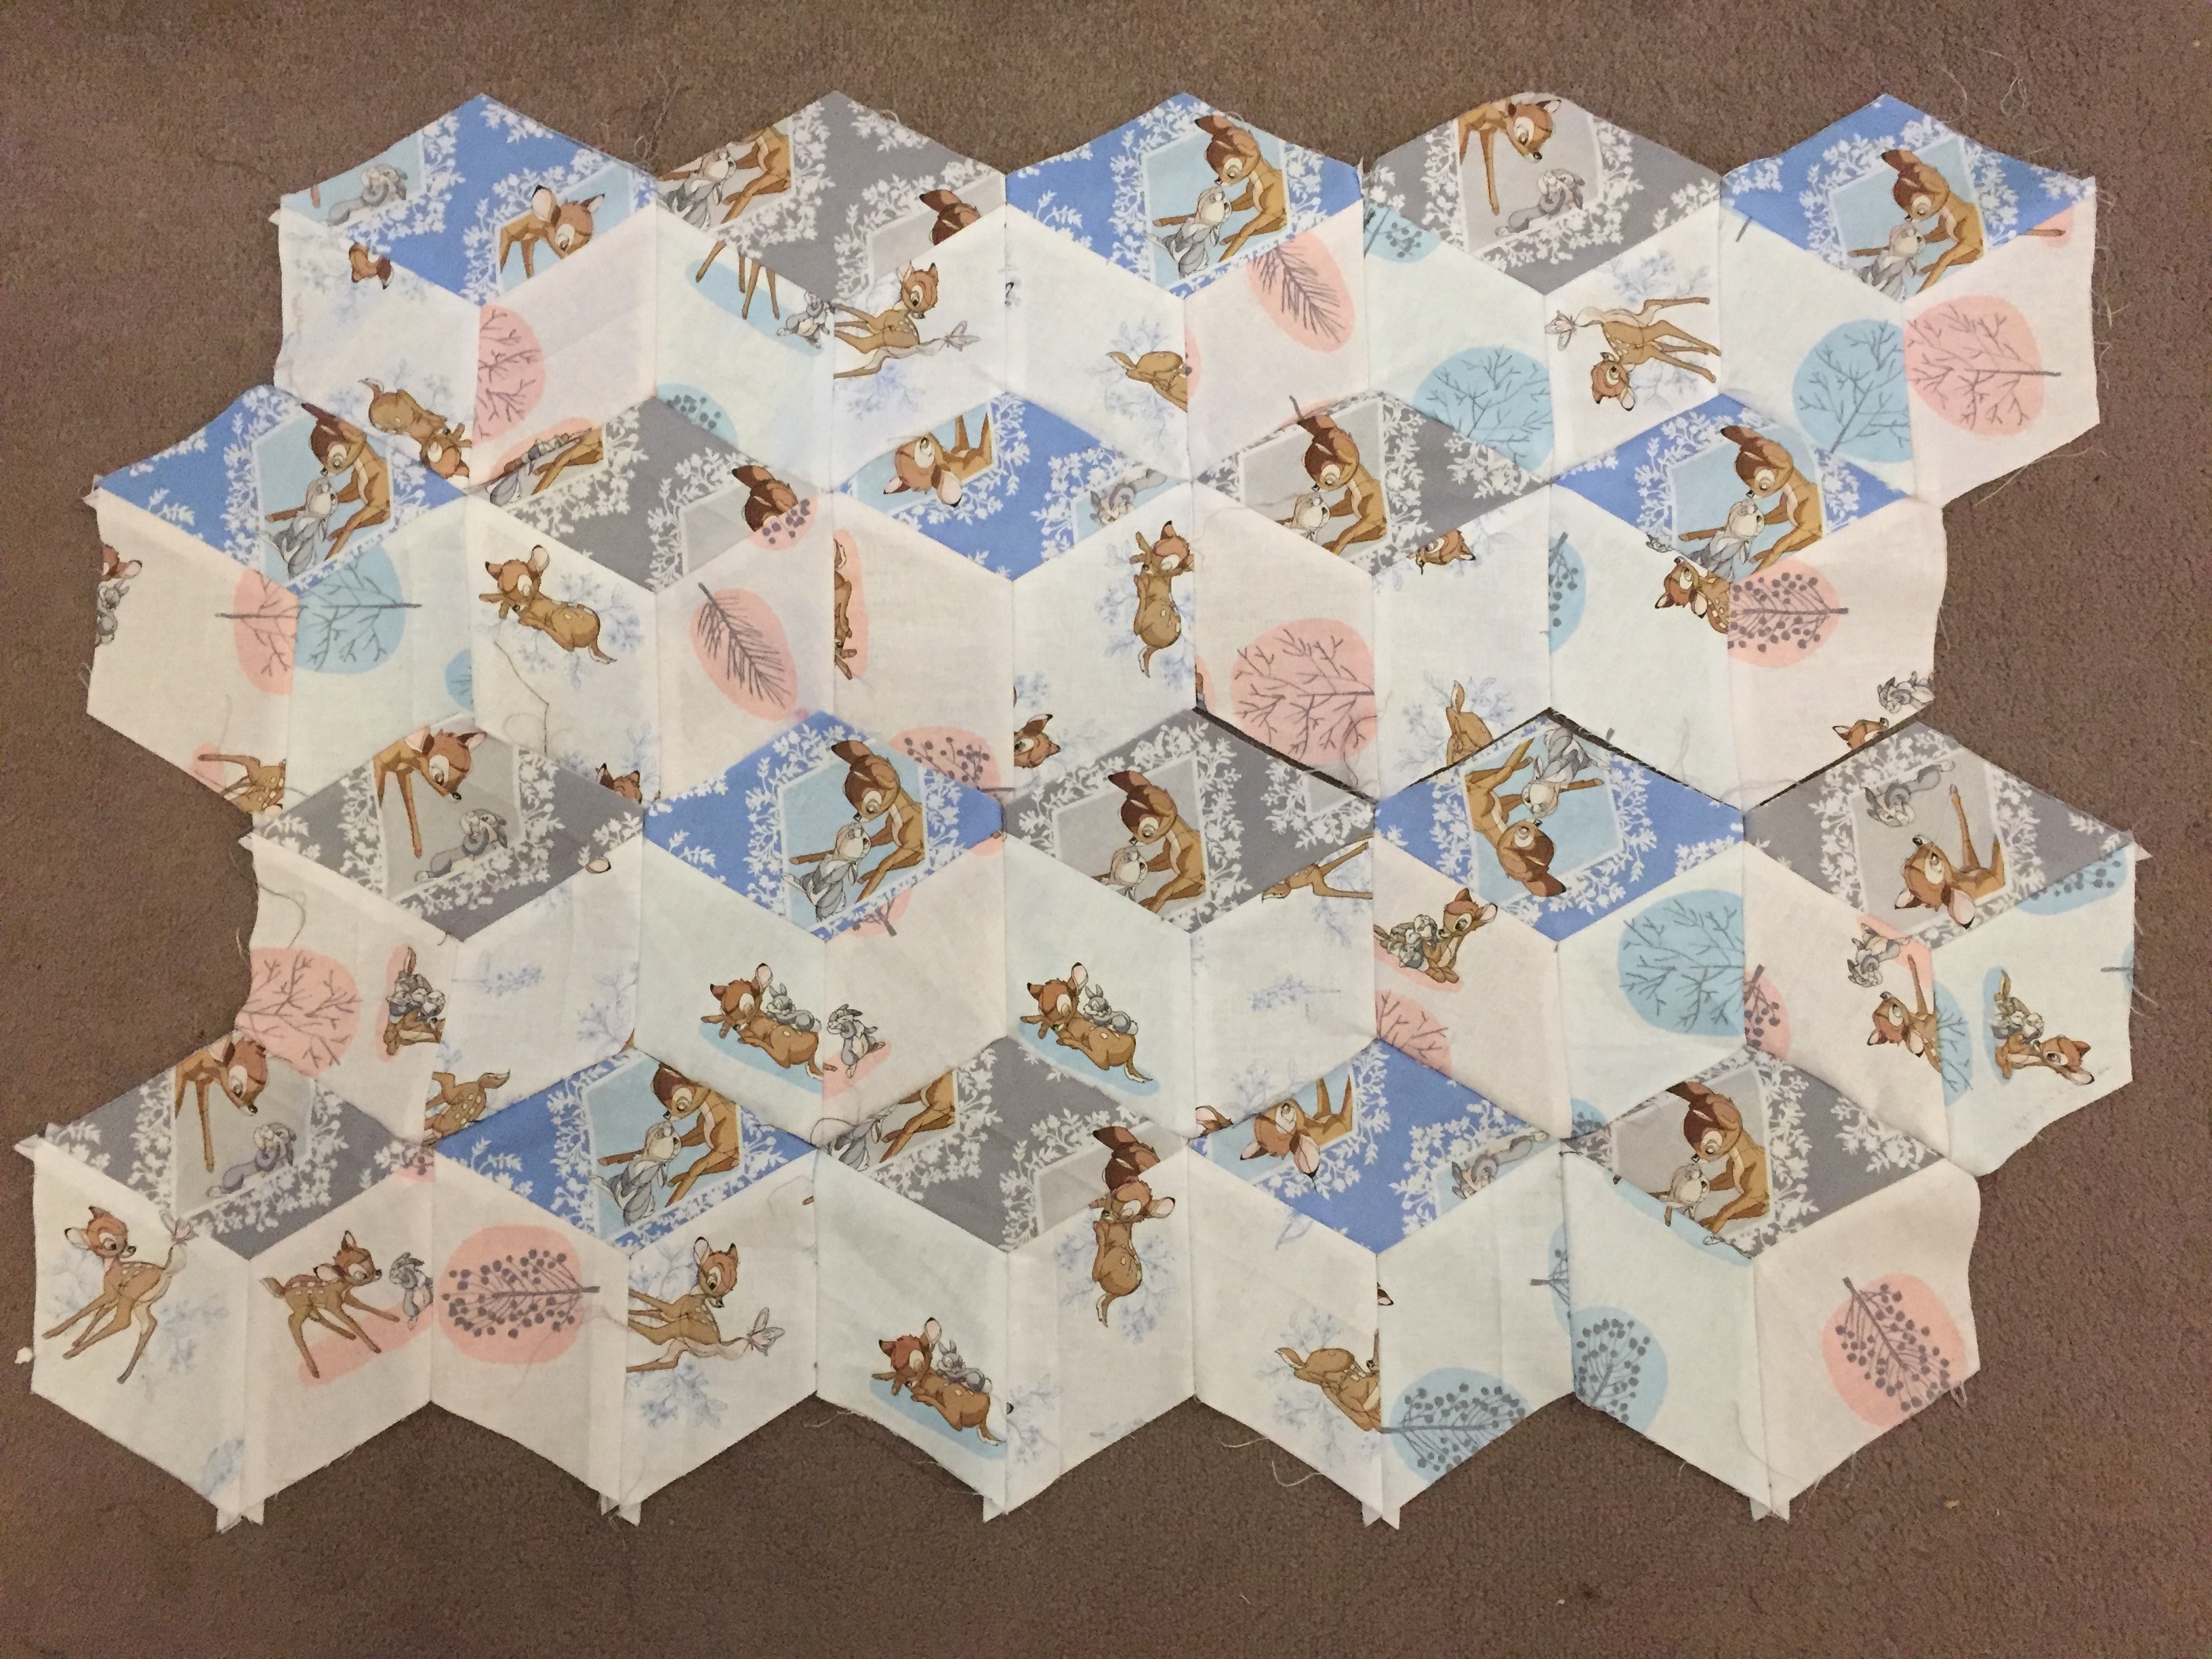
- Take 1 of the grey topped blocks and one blue and sew them together by placing the two blocks right sides together and sewing down the side seam. This will give a set of two. Join another grey topped block, a blue topped block, and a final grey topped block to give a row of 5. Repeat twice more to give three rows starting with a grey topped block.


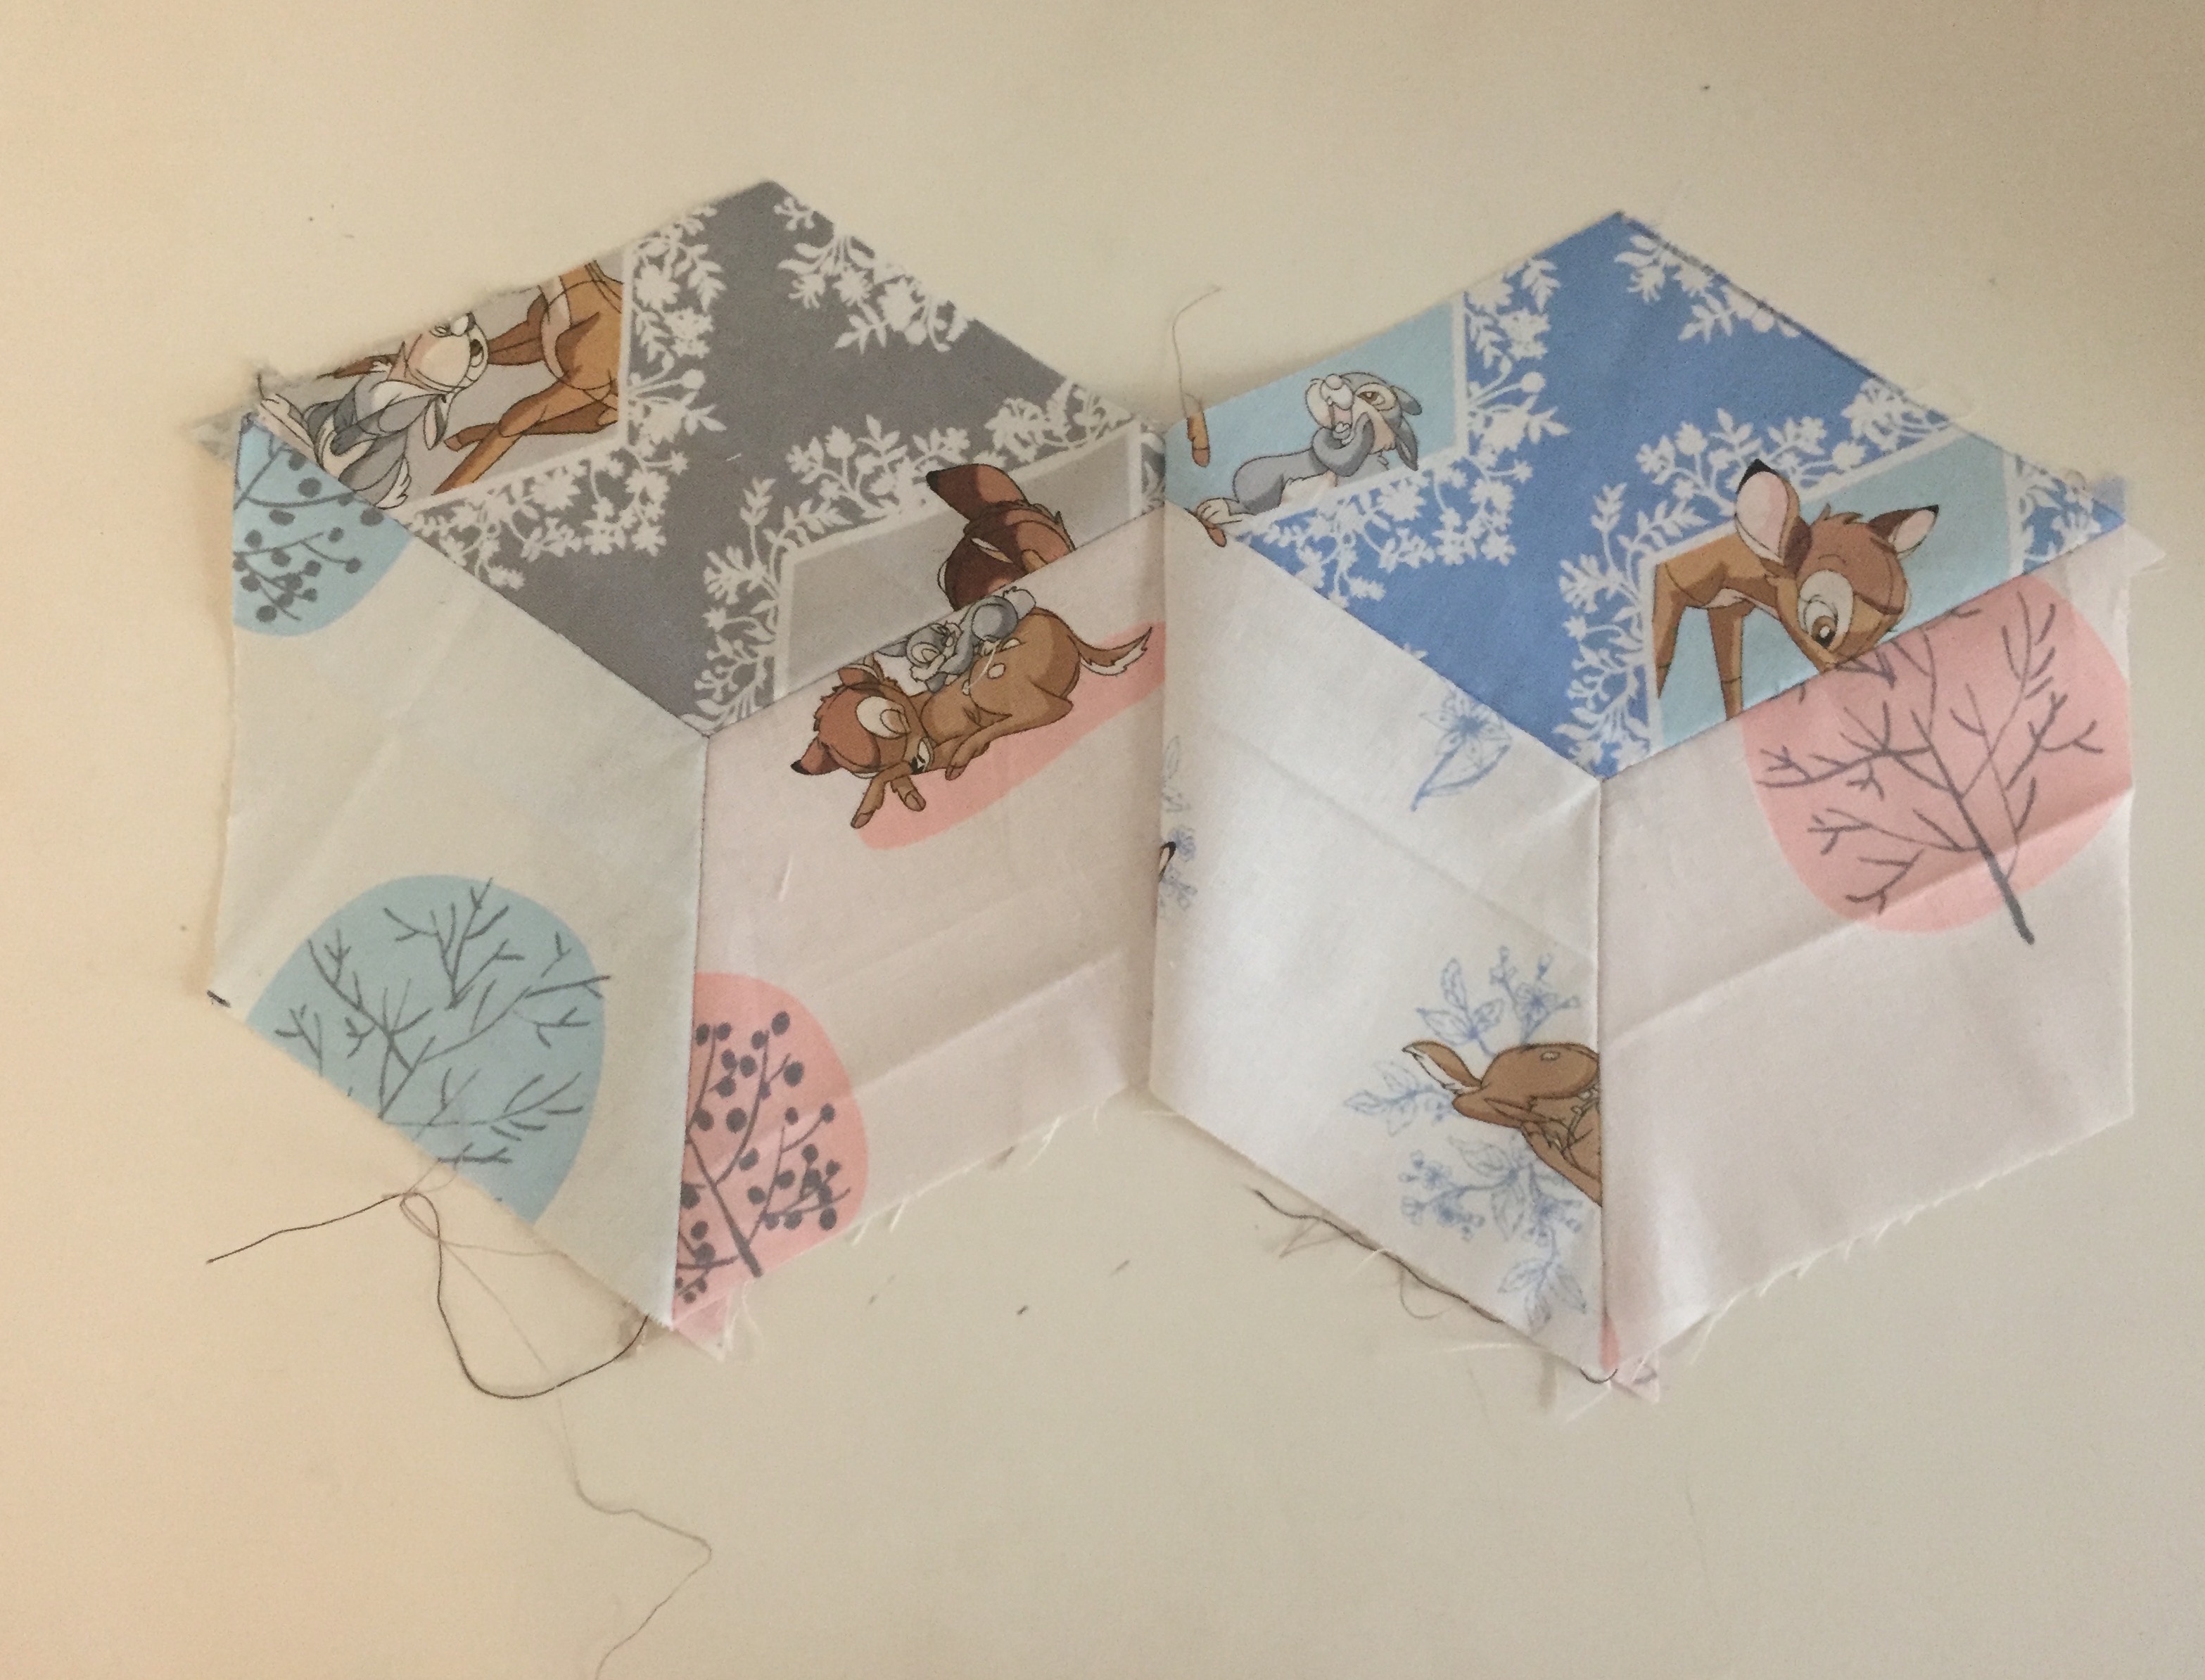

- Take 1 of the blue topped blocks and one grey and sew them together by placing the two blocks right sides together and sewing down the side seam. This will give a set of two. Join another blue topped block, a grey topped block, and a final blue topped block to give a row of 5. Repeat once more to give two rows starting with a grey topped block.
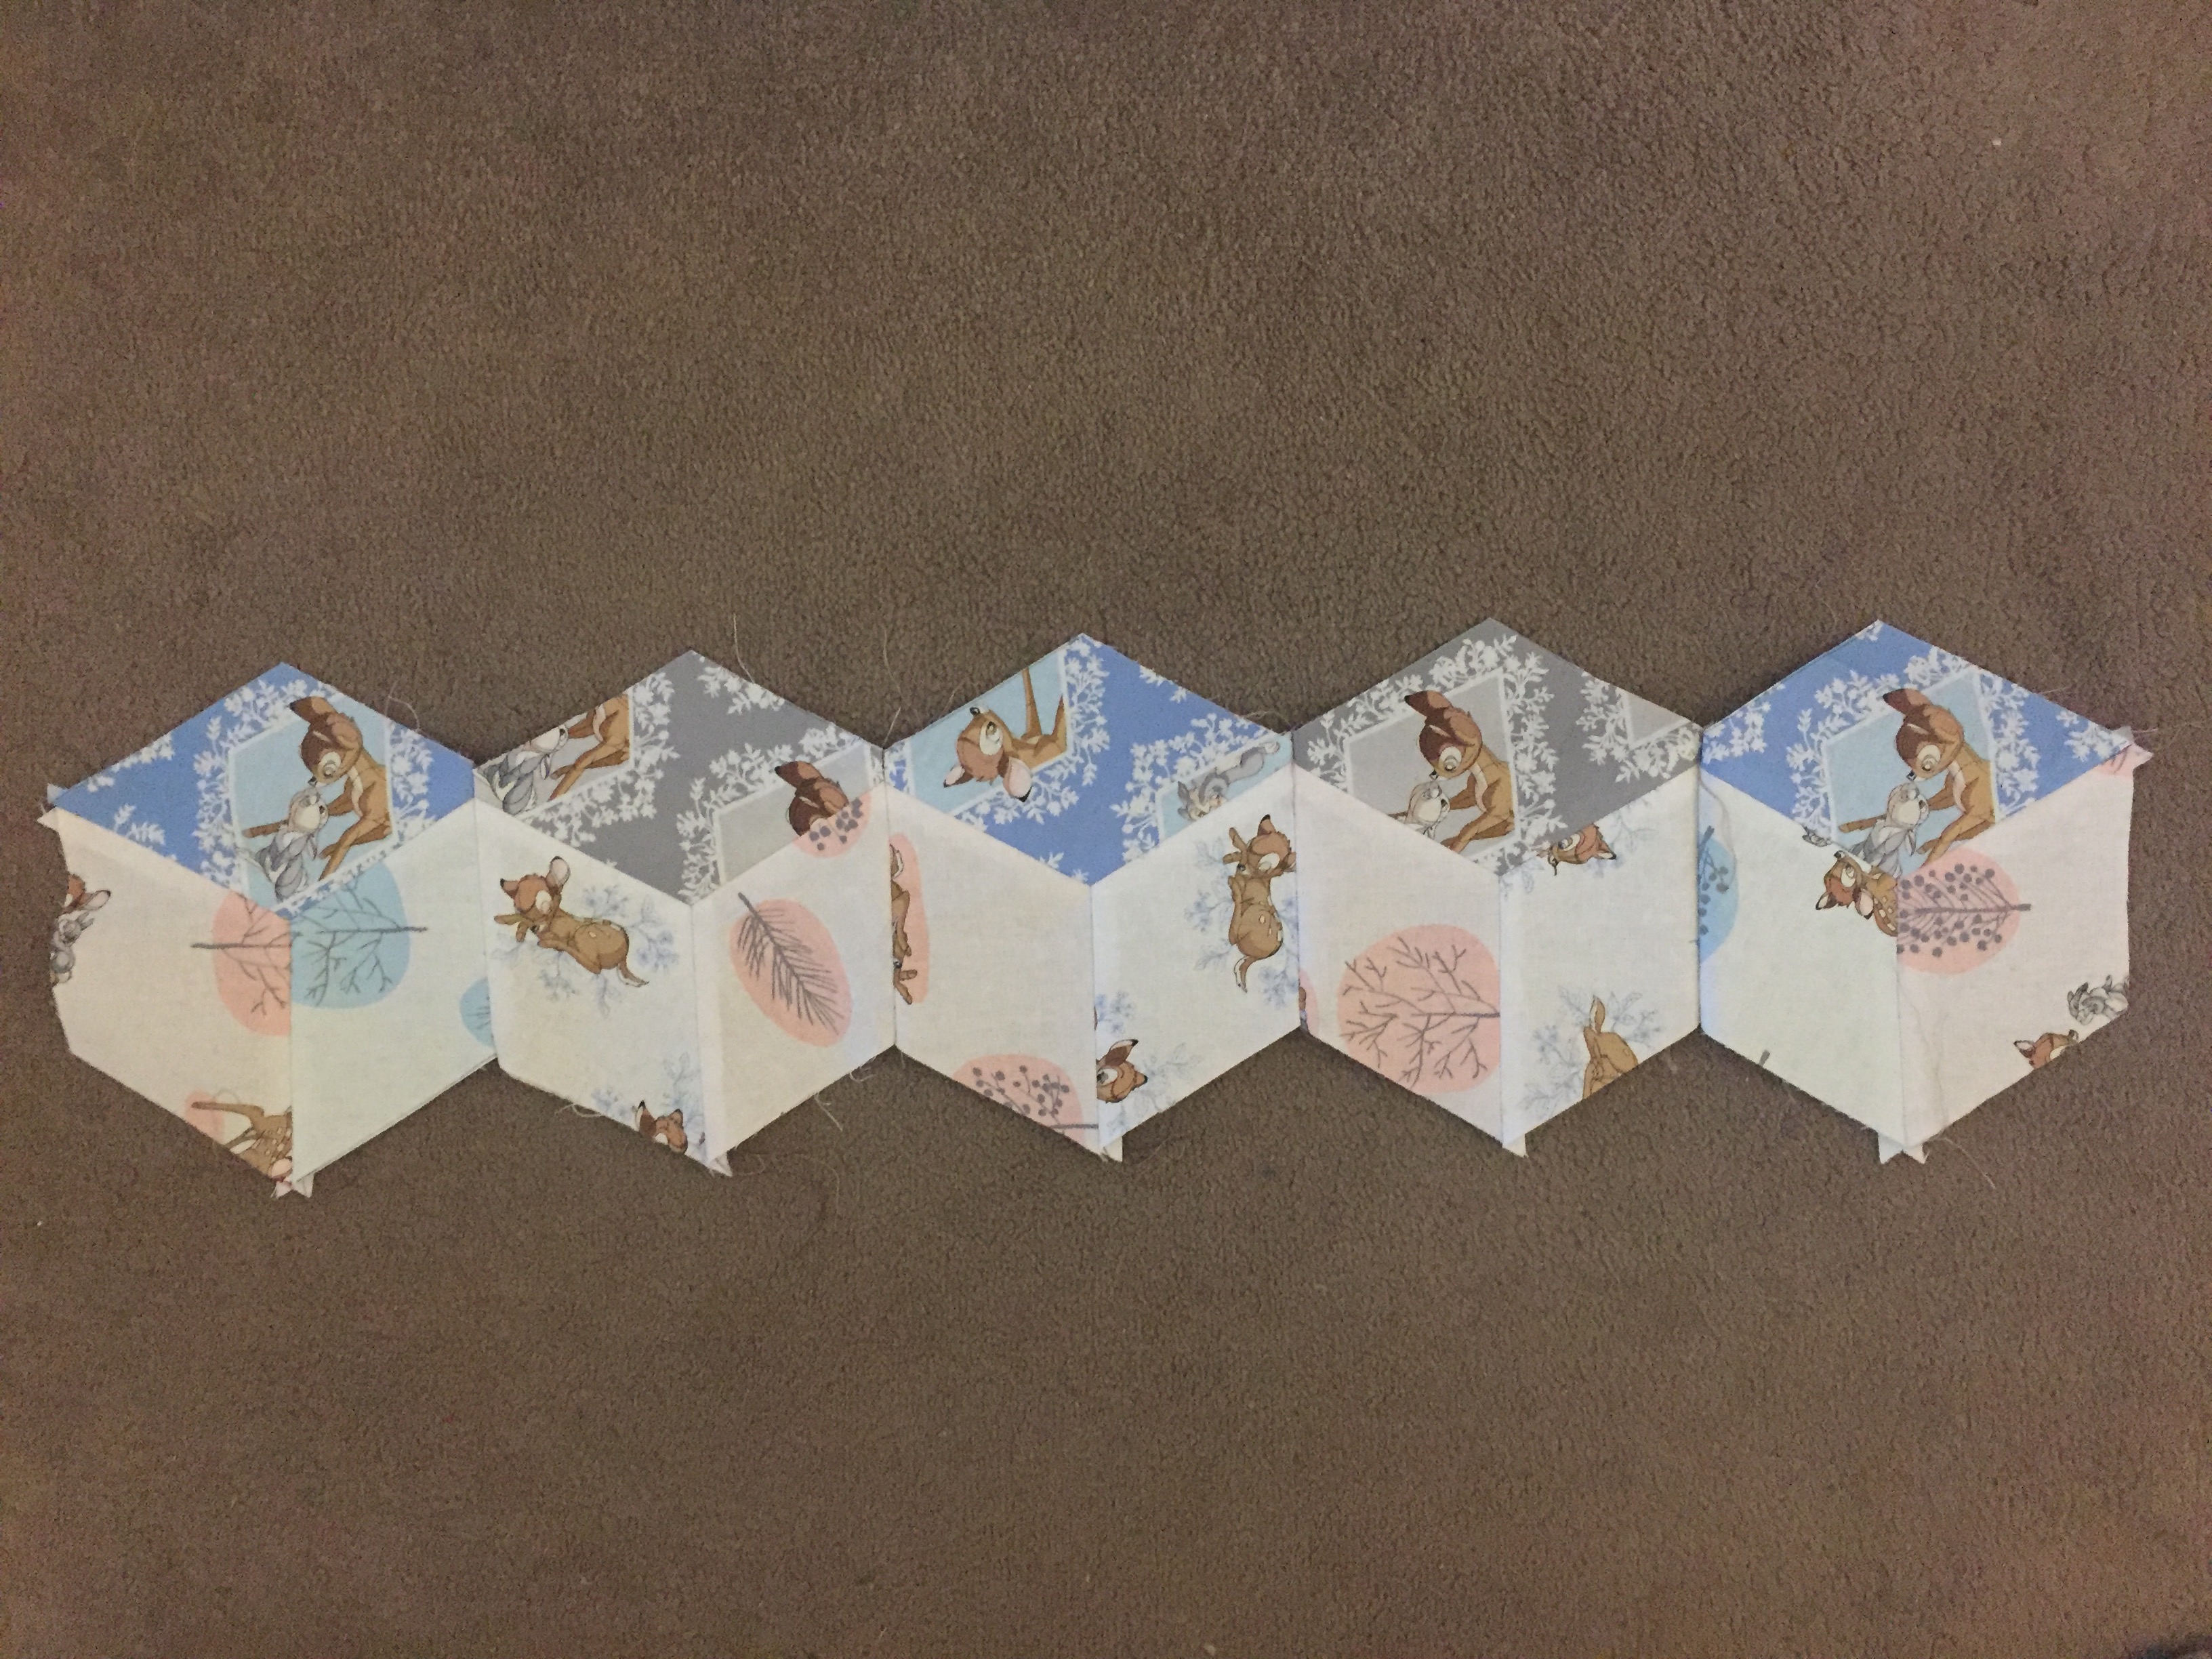
- Take two of the rows starting with a grey topped block and sew them together by placing right sides together and sewing along the top edges of all the blocks.
- Now sew together the two rows starting with a blue topped block.
- Next sew together the two rows of the blue topped and grey topped blocks to give 4 rows, to do this make sure you place the grey topped rows right side up then the blue topped rows right side down on top and sew along the top edge.
- Now sew the final grey topped row on above the blue topped rows, to do this make sure you place the 4 row piece with the blue topped rows at the top right side up and the final grey row right side down on top and sewing along the top edge.
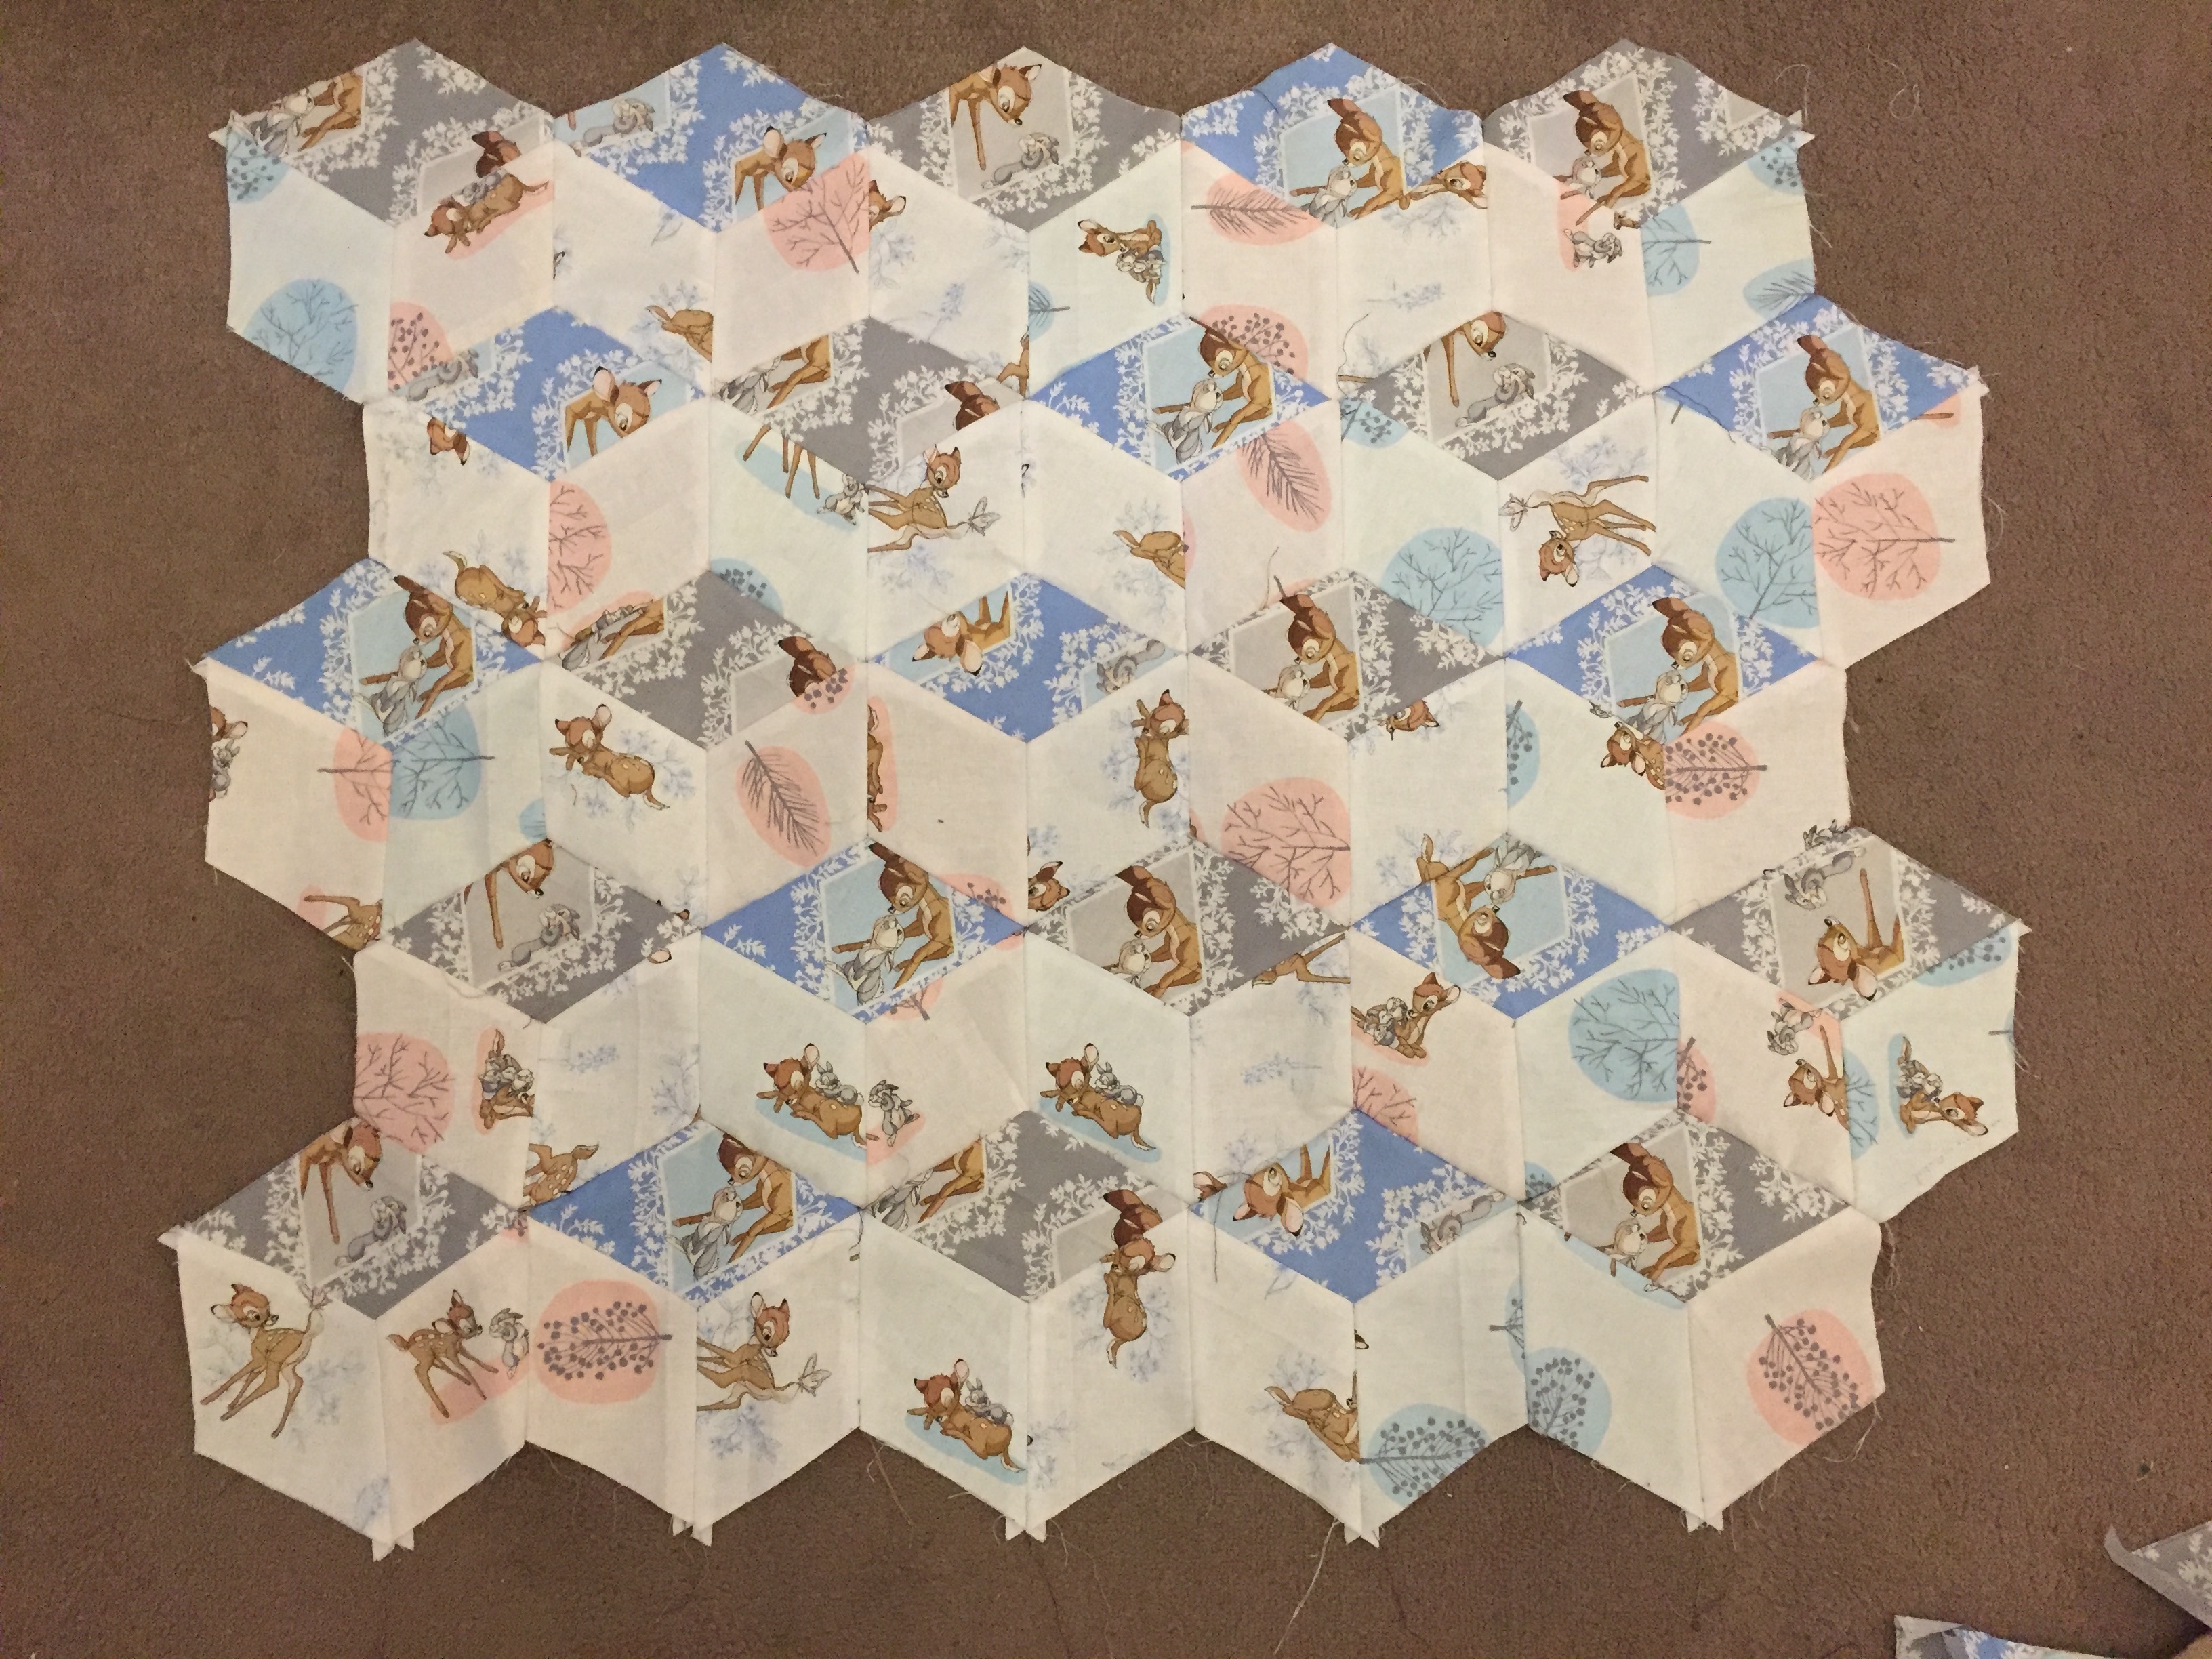
- Sew the remaining 2 grey and 3 blue diamonds along the bottom edge.


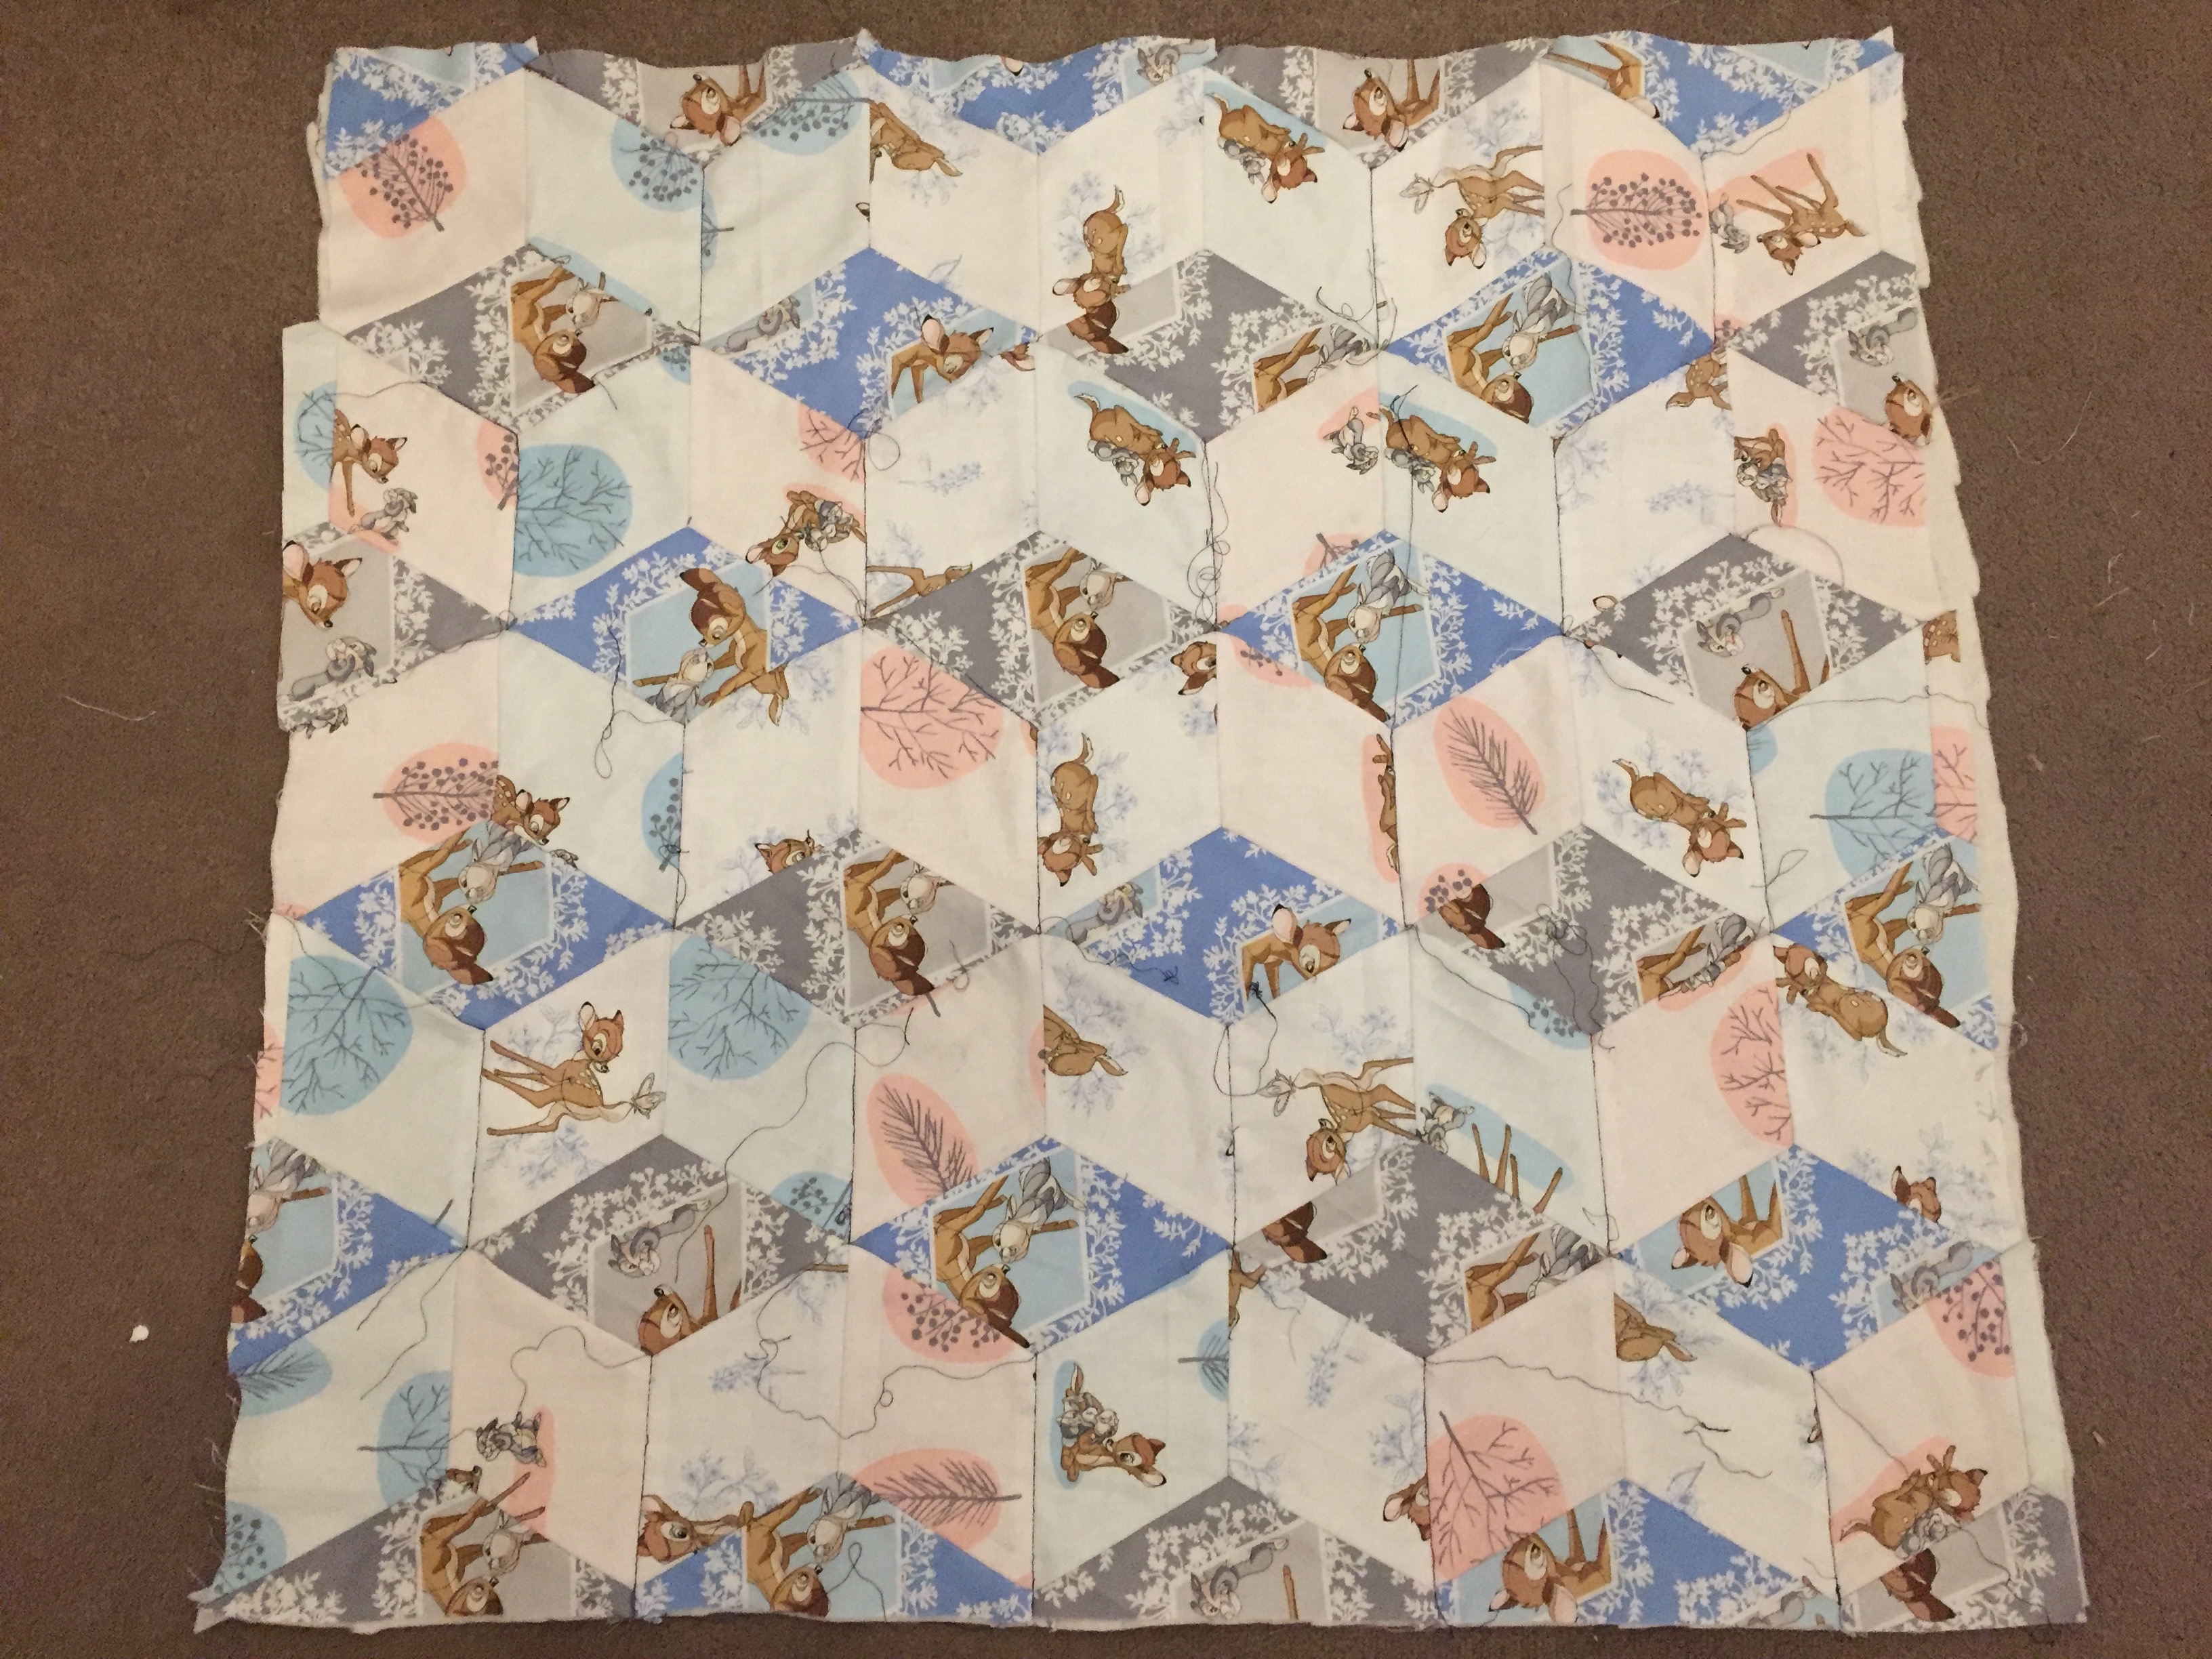
- Lay the backing fabric piece right side down, then place batting on top, then finally place the quilted front piece right side up, cut so all pieces are the same size.
- Add your quilted detail.
- Make fabric binding using the left over fabrics using 6cm wide strips, sewing them all together to make a 4m length of fabric binding. Fold over the top right edge to line up with the bottom edge to create a diagonal and press. Next fold the strip in half long ways and press.


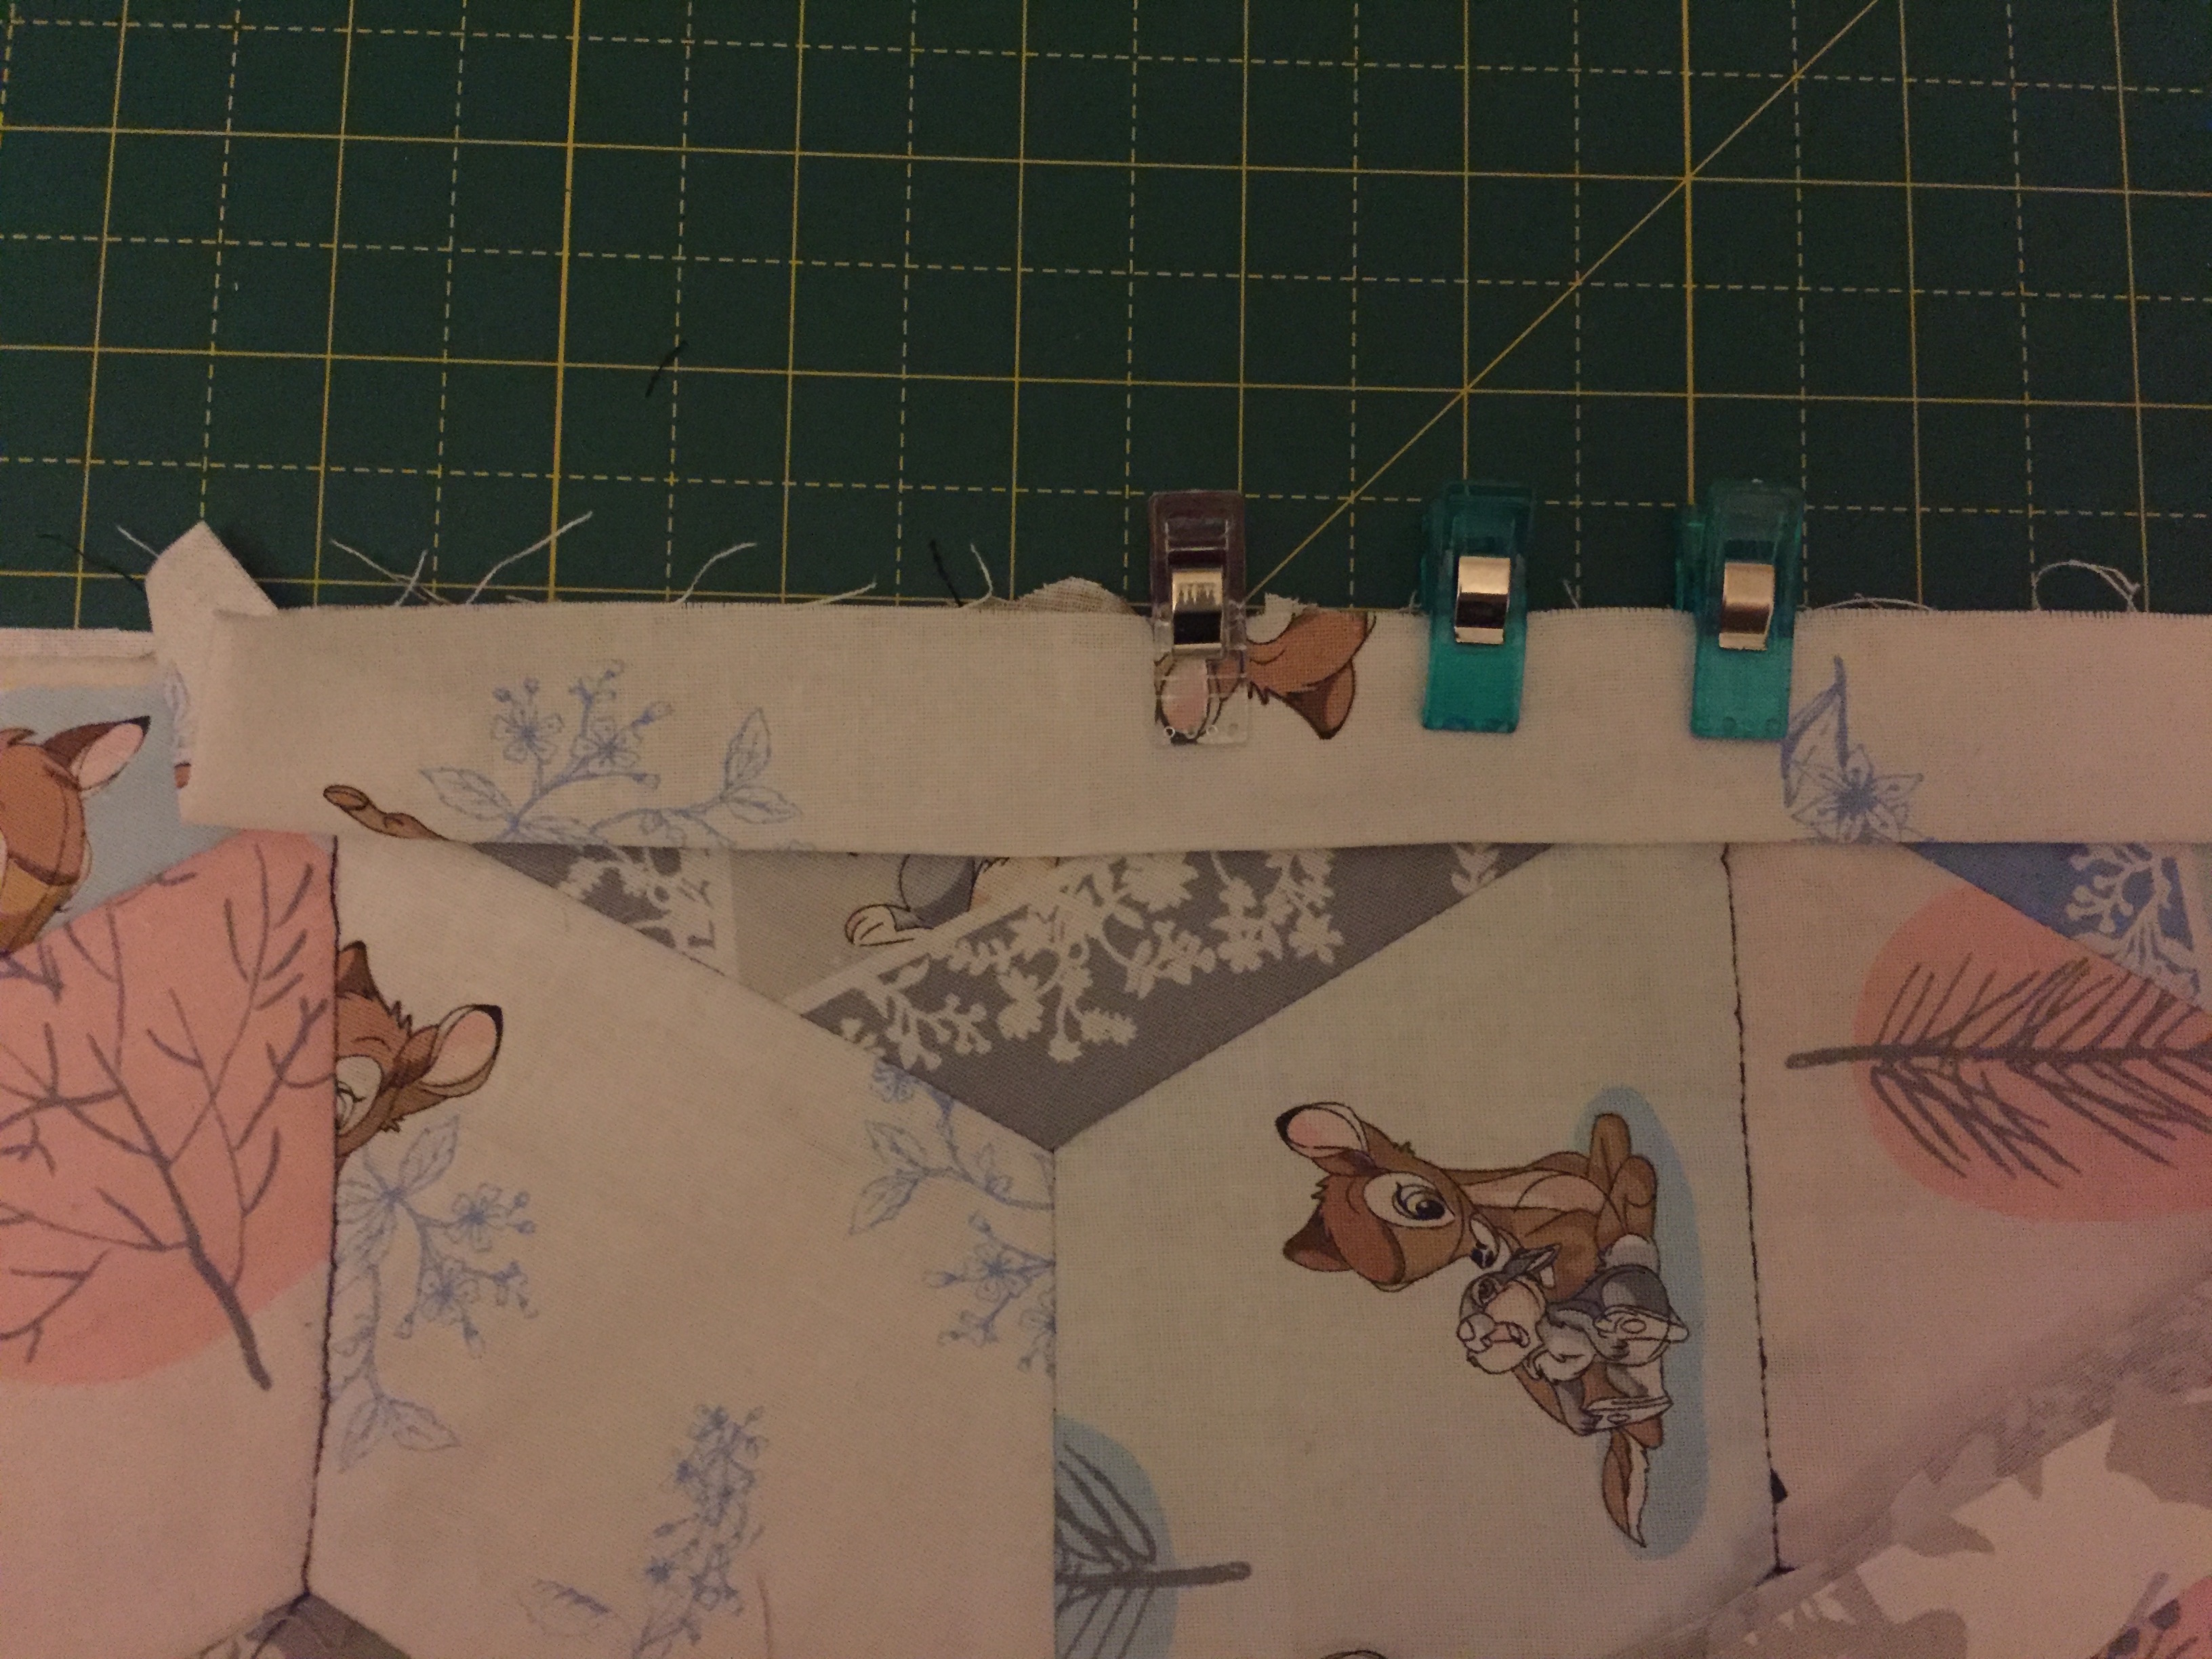
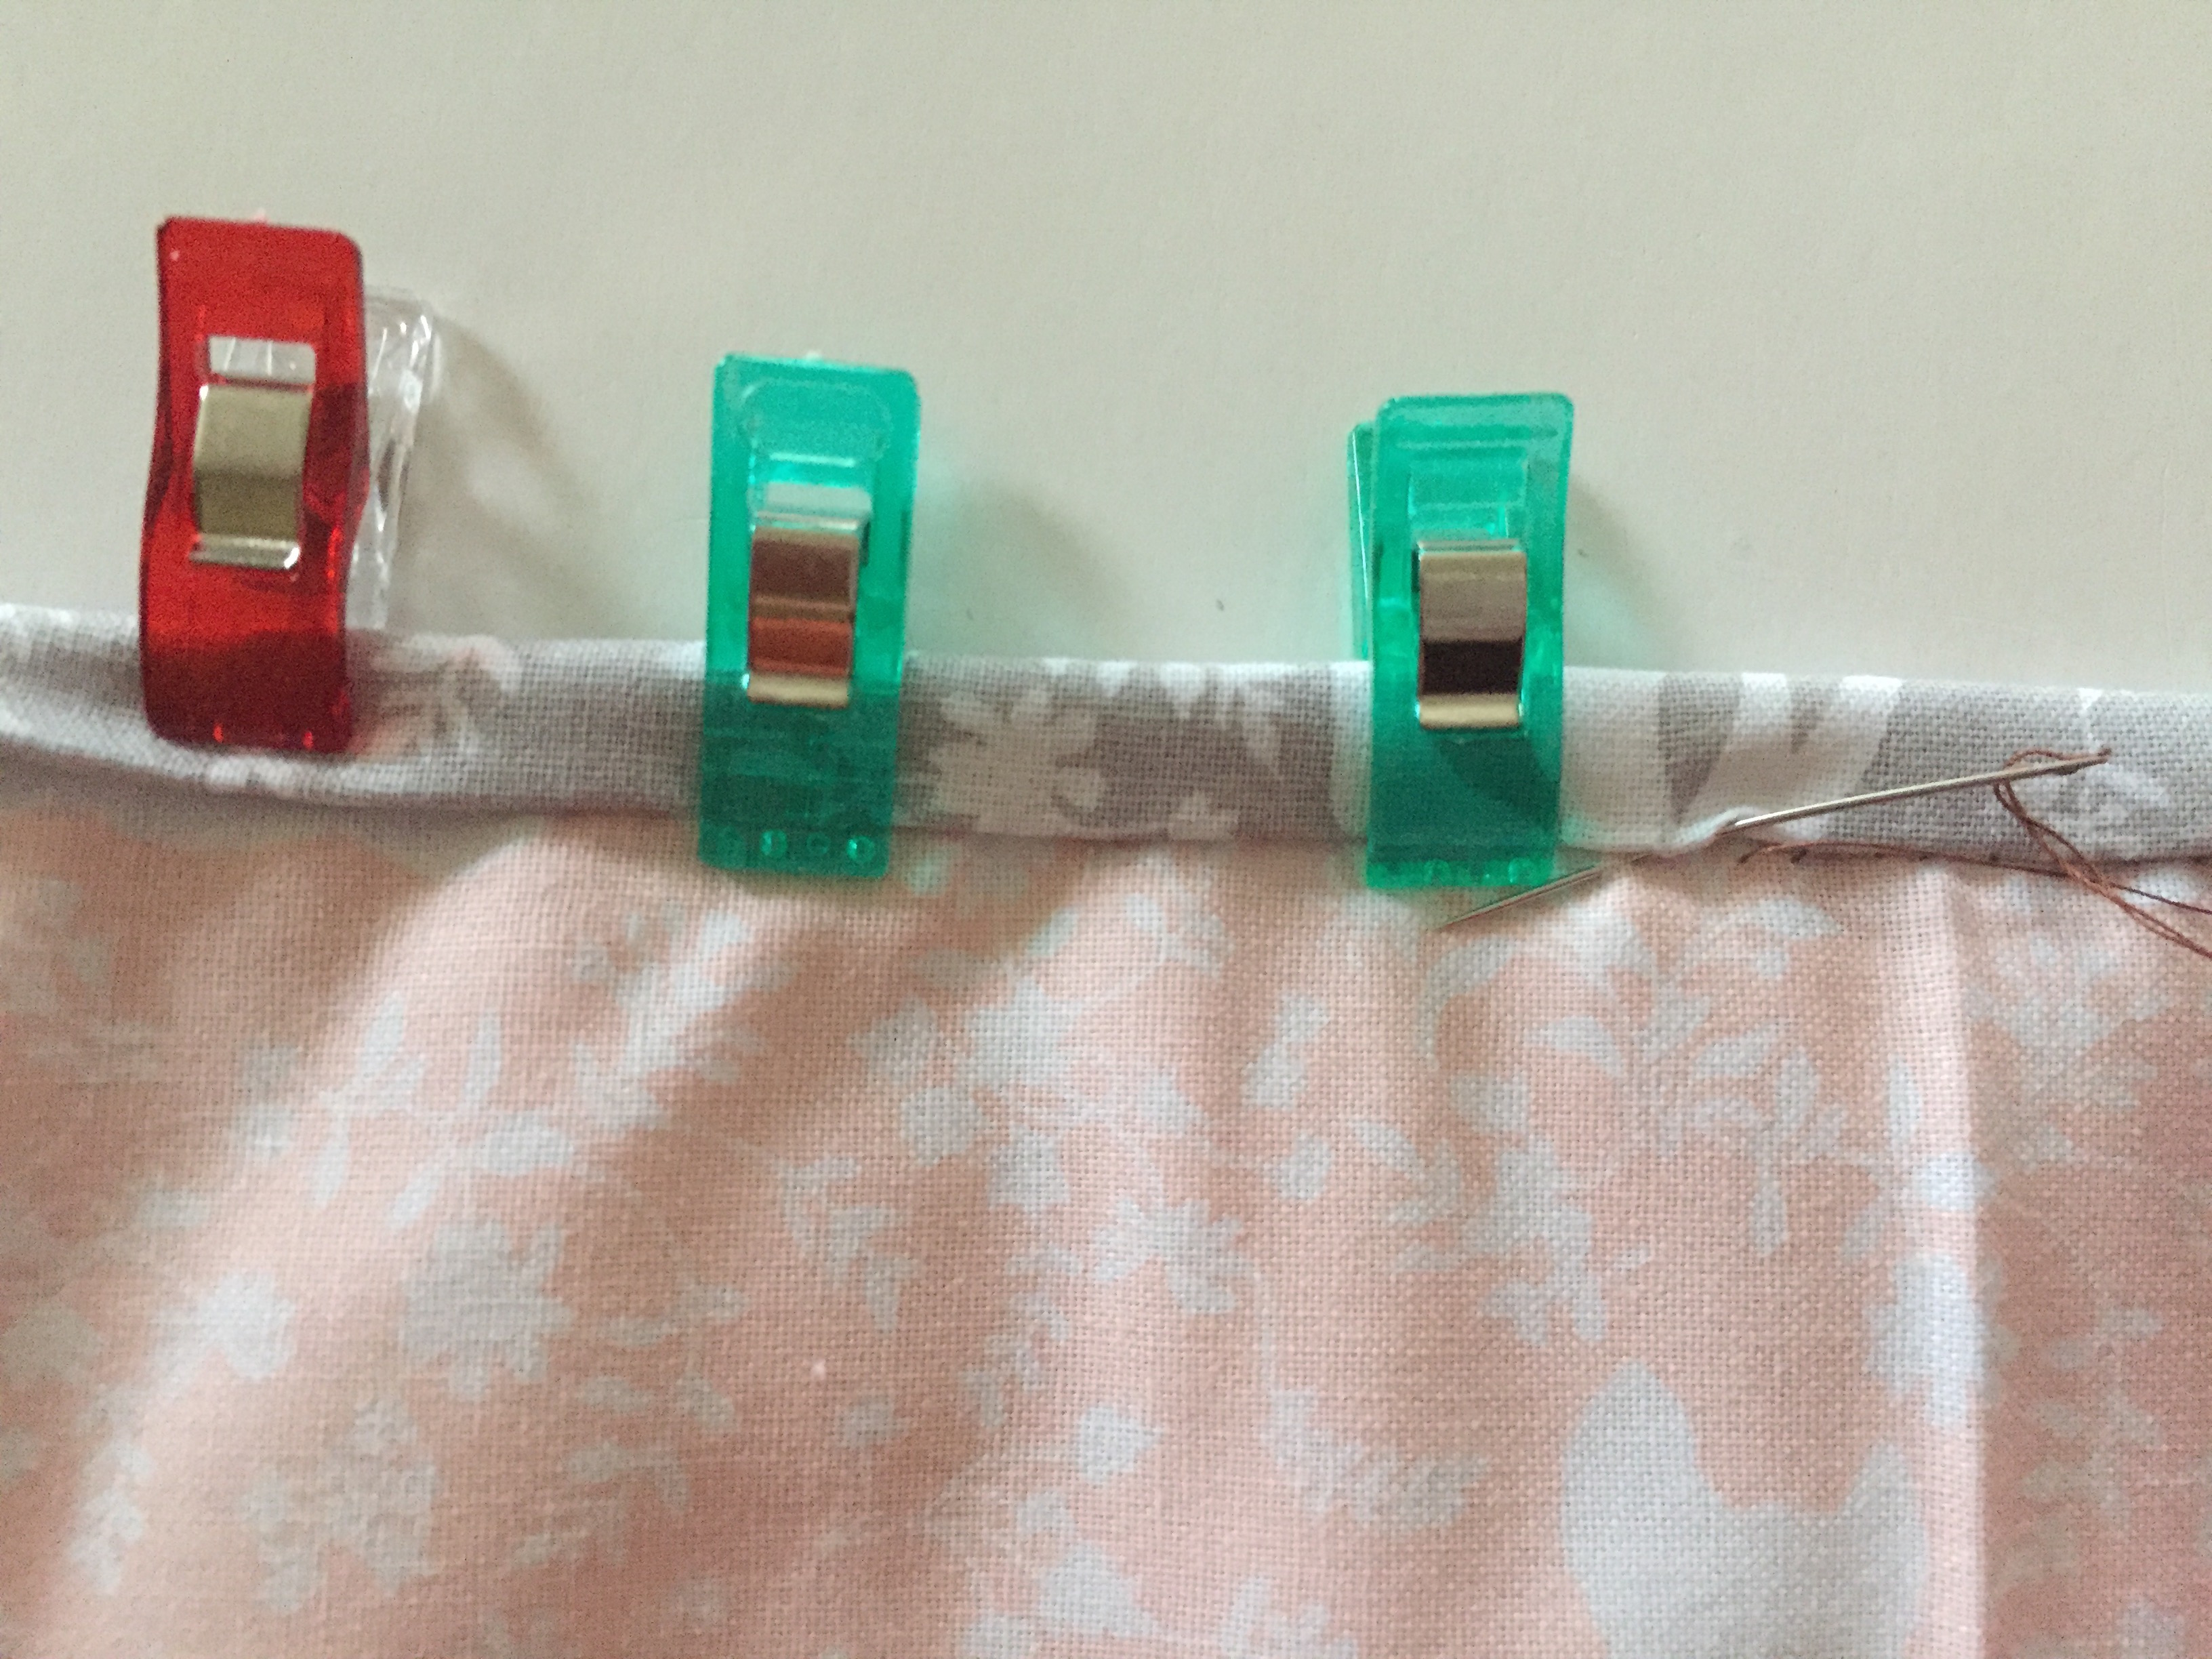
- Place the raw edges of the binding against the raw edges of the quilt and sew around 0.5 cm from the edge. Fold the binding over to the other side and slip stitch to hold.
The tutorial to make one of these quilts is also available over on The Craft Cotton Company blog

Leave a comment