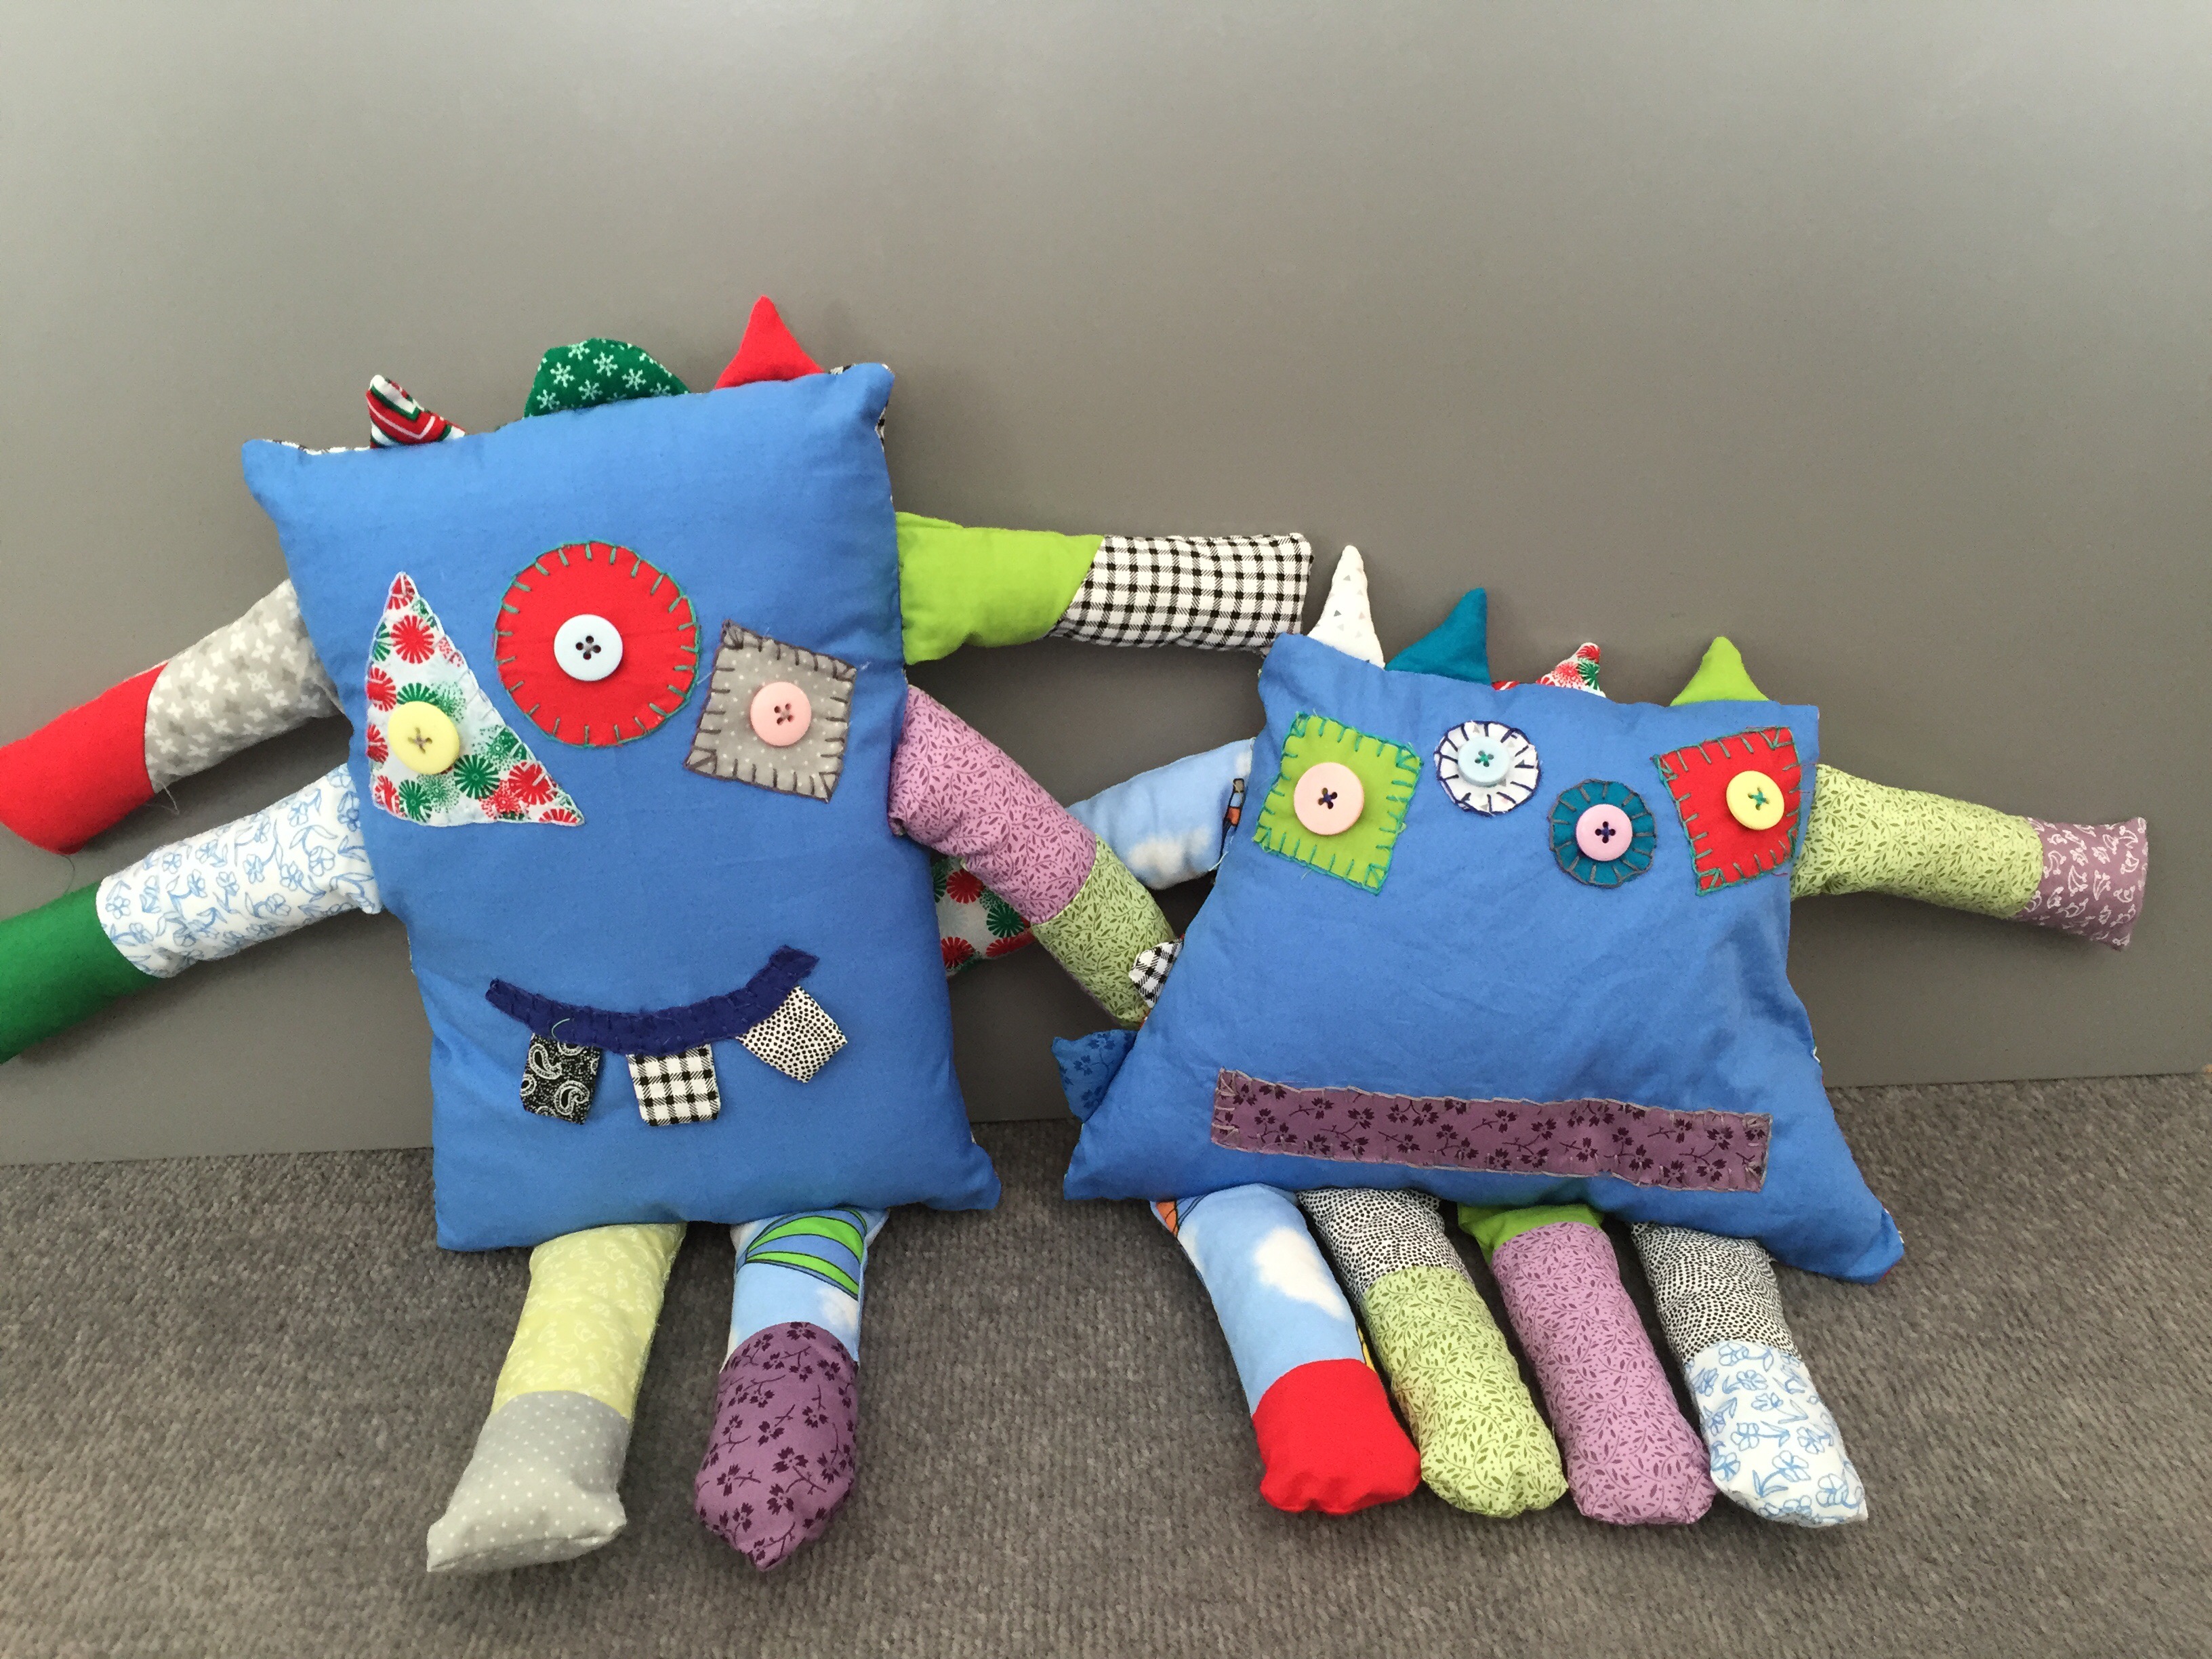
I’m still working my way through my fabric scraps (I think I will be for quite a while too!) and following the success of my previous scrappy monsters I have decided to make a few more. These 2 look very happy with their friends, and I think this little group of monsters will be multiplying very soon!
The tutorial below shows you how to make these two monsters, but if you like you could add a few more arms or legs or change their size.
These monsters used fabric scraps from materials by (and were gifted by) The Craft Cotton Company.
Scrappy patchwork monsters Sewing tutorial:
Materials
- Fabric scraps.
- Pins.
- Scissors.
- Thread.
- Embroidery thread.
- Buttons.
Sewing Tutorial Scrappy Patchwork Monsters -Assembly:
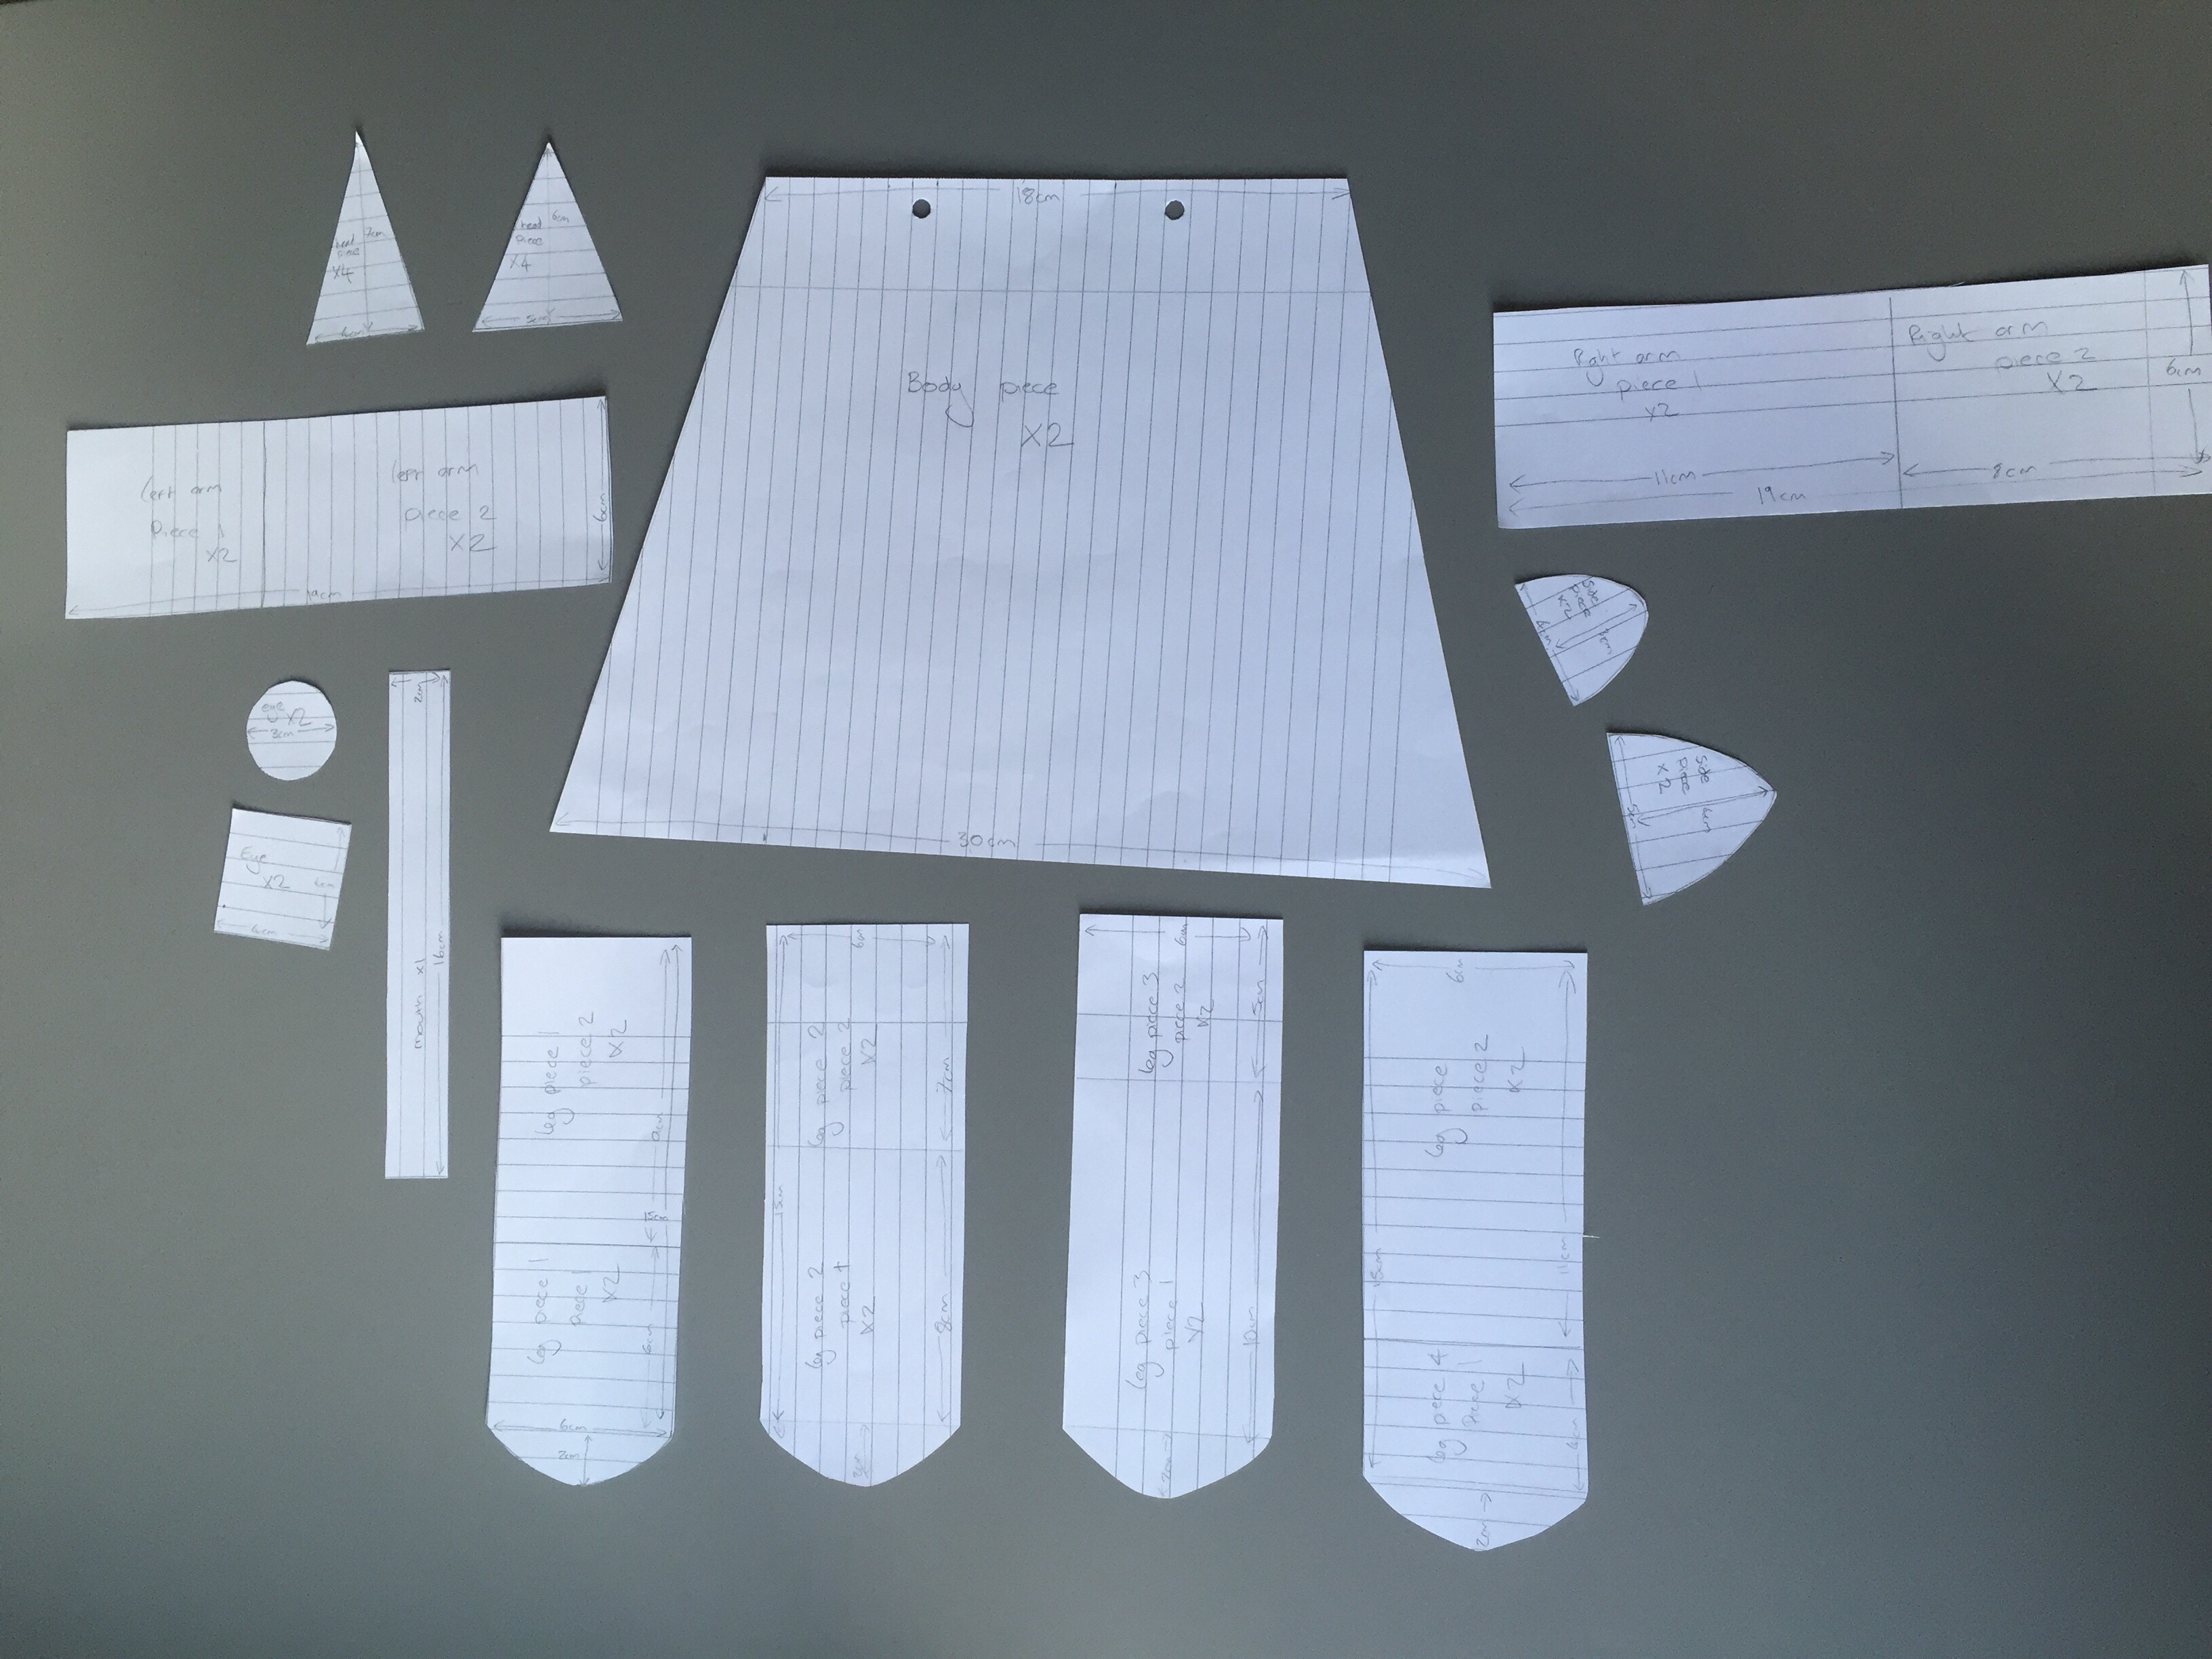
- Draw out paper templates
- If your doing the same monsters as me the monster parts and size of the templates used are on the photo below, these measurements include a seam allowance. If you are doing your own, sketch out your monster then draw out your paper pattern pieces. Cut out these paper templates.

- Cut out your fabrics
- Using whatever fabric scraps you have cut out the fabrics for each body part, the more random the better!
- Sewing the body parts
- For arms and legs: starting with the front pieces place the first two pieces right sides together and sew down the edge to attach them together, repeat for piece 3 if applicable. Repeat for the back pieces. Now place the front and back pieces together and sew down the side along the bottom and up the other side, leaving the last edge unsewn, turn the right way and stuff.
- Head and body details: place the fabric pieces right sides together and sew around the edges leaving bottom edge unsewn, turn the right way and stuff.


- Making the teeth
- Fold the fabric in half with wrong sides together, and sew down the two sides leaving the top open. Turn the right way, and place on the back of the mouth and sew to hold in place.


- If you are machine appliquéing the eyes and mouth details sew then onto the front piece now using a zig zag stitch. If you are hand sewing later ignore this step.
- Sewing the body together
- To sew the arms and legs and bits and body together, place the back body piece down right side facing up then place all the pieces in there correct locations with their bottom edges hanging over the edge of the back body piece, place the front piece on top right side down and sew around leaving a 10cm gap for turning. Turn and stuff then slip stitch closed.


- Hand sewing the face details
- Sew on the face details using blanket stitch.
- Add buttons for eyes


Leave a comment