These Folded Fabric With Cross Stitch Design Christmas tree decorations are a perfect quick Christmas sewing make.

Now that Halloween is finished it is now time to get started on the Christmas makes for this year – otherwise I am going to run out of time for all the makes I have planned!. The first Christmas make complete this year is a twist on one of my favourite Christmas sewing makes – a folded fabric Christmas tree decoration and the twist I have added is instead of using just fabric for the front and back of the squares I have used fabric on one side and have completed. cross stitch design for the other. A sewing tutorial for the original version of this folded fabric Christmas tree I made is also available if you don’t want to add the twist of cross stitch details. I opted to use a different cross stitch design for each of the folded squares but you could choose to use just one of the designs on all of the squares or choose a different colour scheme for the designs if you would like to use different colours to those I have chosen.
These decorations make great gifts and are ideal as gift tags on bags – you could use a different colour for each recipient.
This project is a great fabric scraps buster too – I made these using fabric scraps from fabrics by The Craft Cotton Company.
Fabric was gifted by The Craft Cotton Company.
If you want to make another folded fabric Christmas tree decoration I have an alternative version for this Folded Christmas tree decoration with cross stitch details available too. There is also another tutorial available for a smaller fabric version of these trees – fabric Christmas trees take 2! As well as one for fabric tree bunting and also a crochet version too!
Other Christmas Makes:
Fabric Christmas Tree Decorations With Cross Stitch Christmas Design Details – Part 1
Materials
To make one tree you will need:
- 1 piece of fabric for the 5 squares (to make the back of each square):
- 2x2cm, 3x3cm, 4x4cm, 5x5cm, 6x6cm.
- 1 piece of 14 count aida or 28 count evenweave for the 5 squares (to make the front of each square):
- 2x2cm, 3x3cm, 4x4cm, 5×5 cm, 6x6cm.
- 2 pieces of fabric for the trunk:
- 3x7cm.
- 10cm embroidery thread/ribbon for the top loop.
- 5 buttons.
- Sewing Thread.
- Sewing Needle.
- Embroidery Needle.
- Scissors.
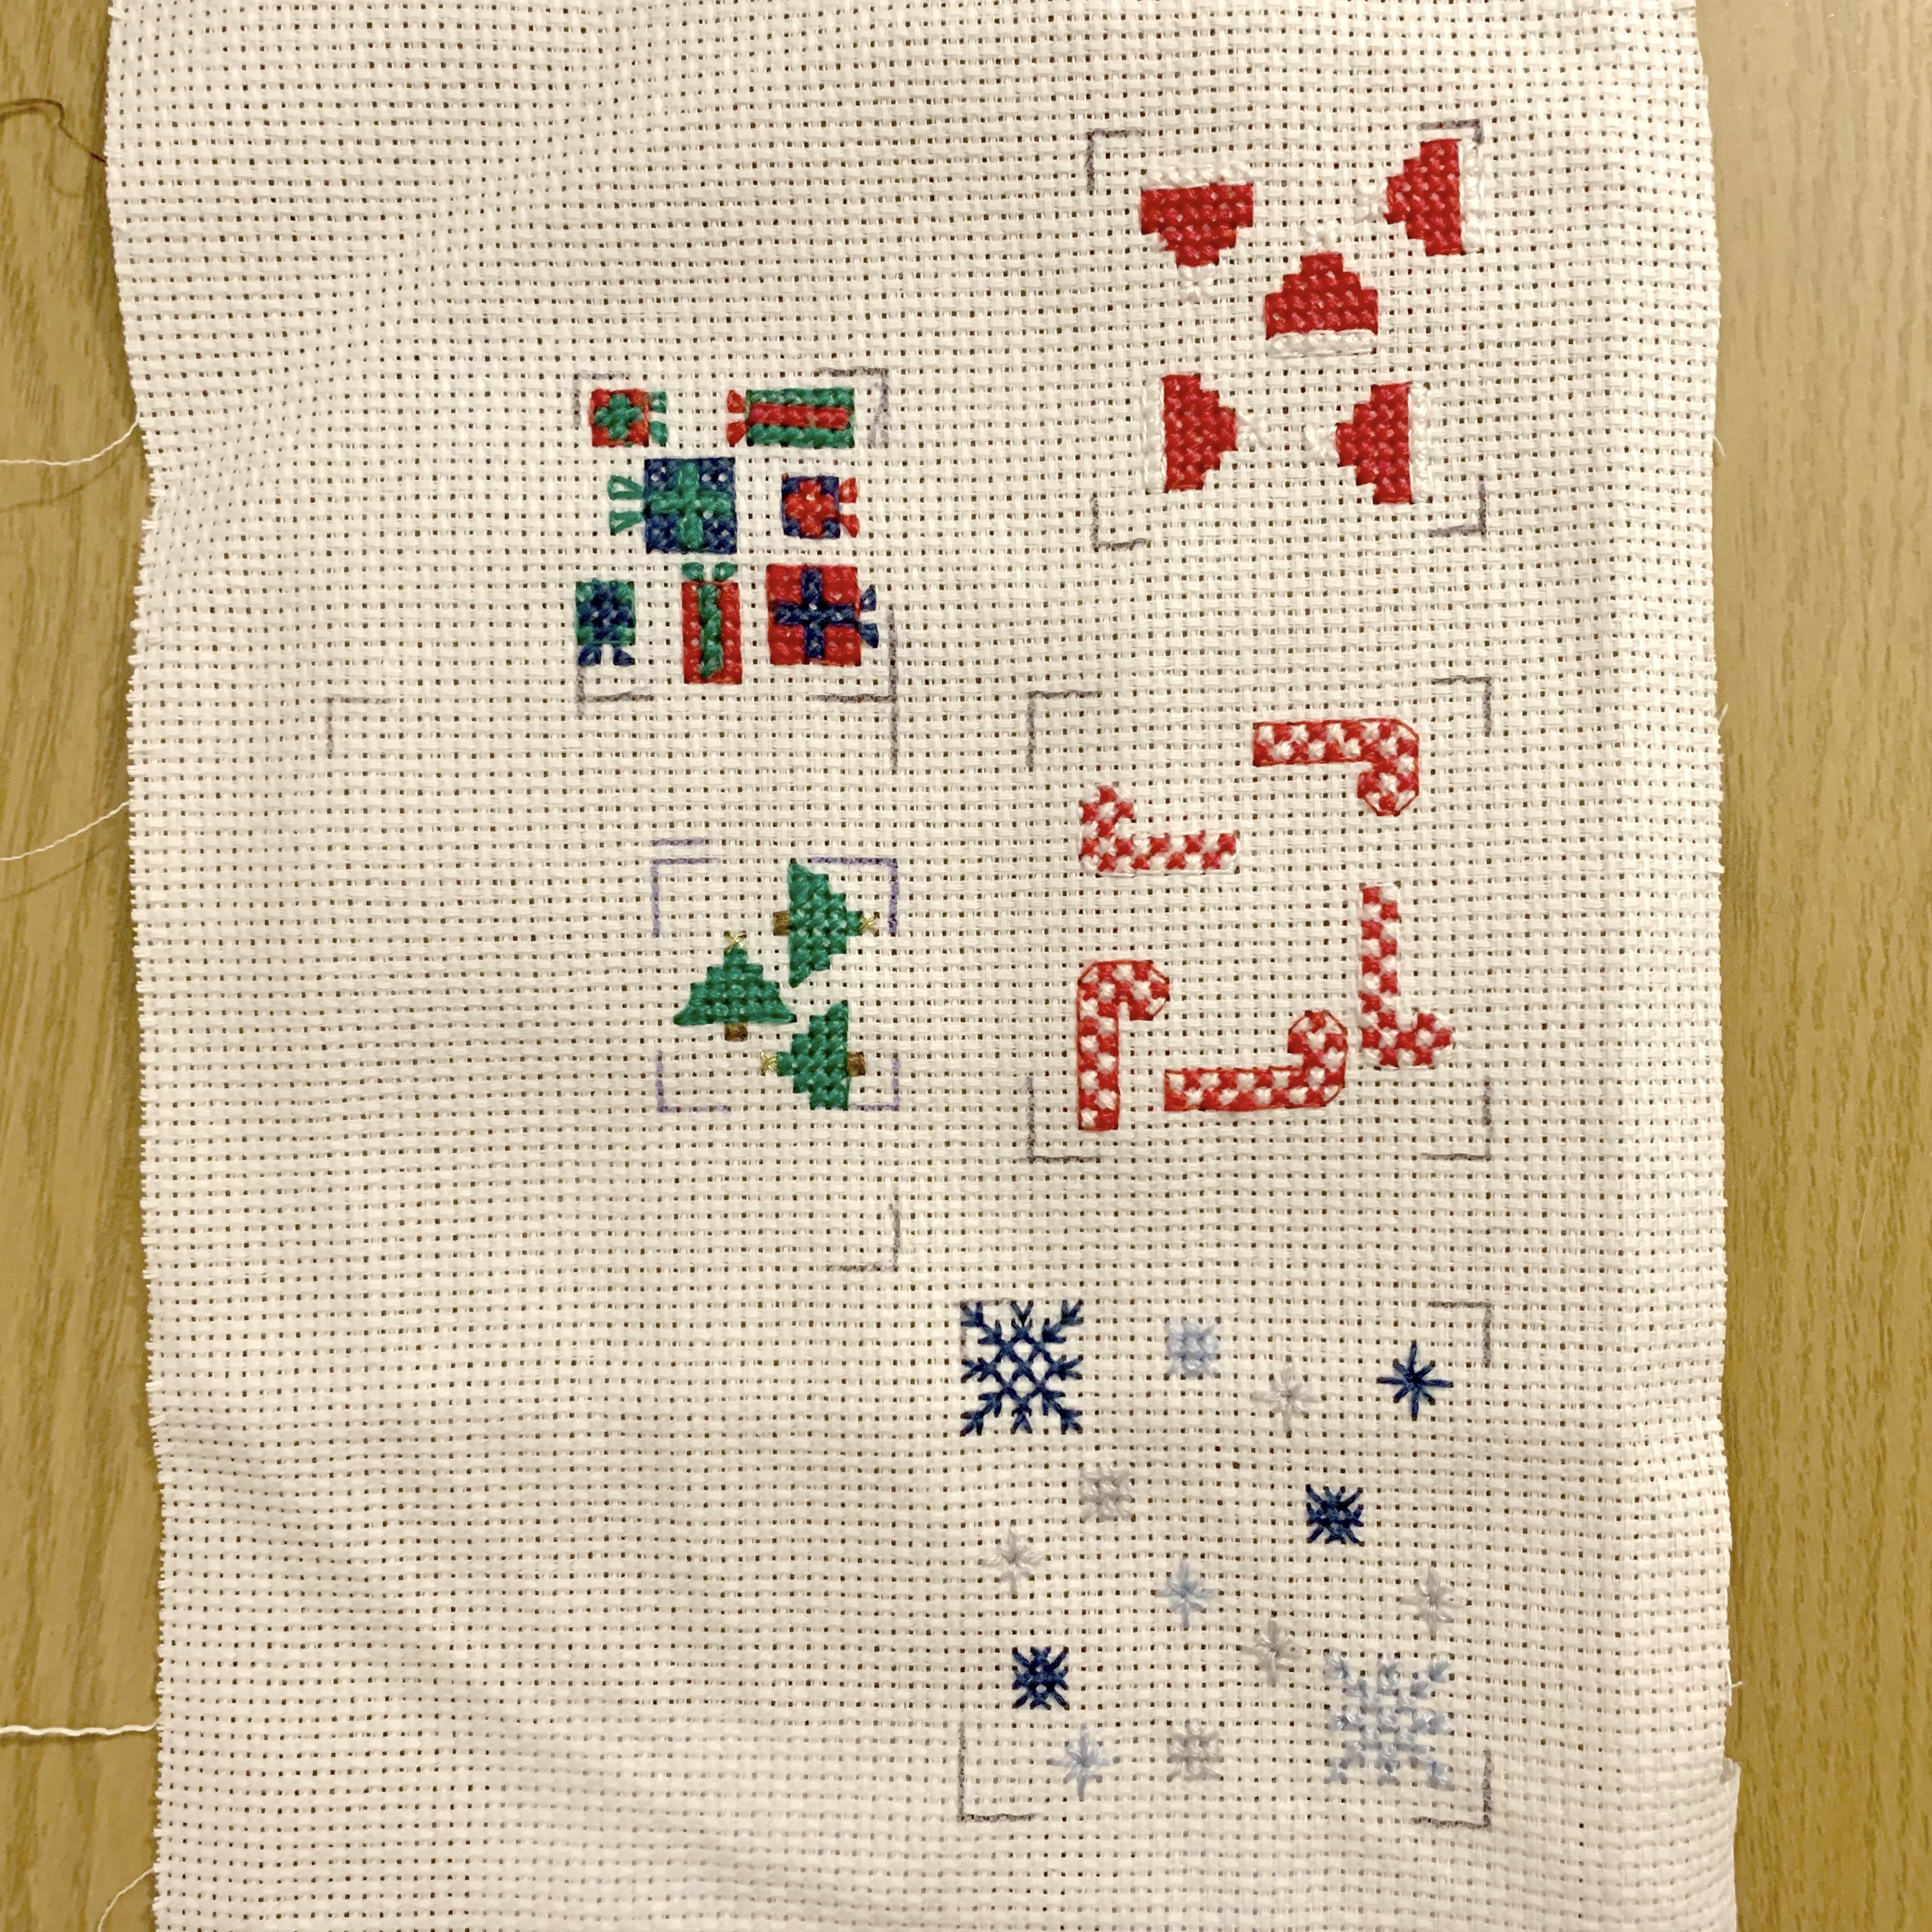
Fabric Christmas Tree Decorations With Cross Stitch Christmas Design Details: Cross Stitch Designs
Christmas Trees (2x2cm square):

Christmas Presents (3x3cm square):

Santa Hats (4x4cm square):
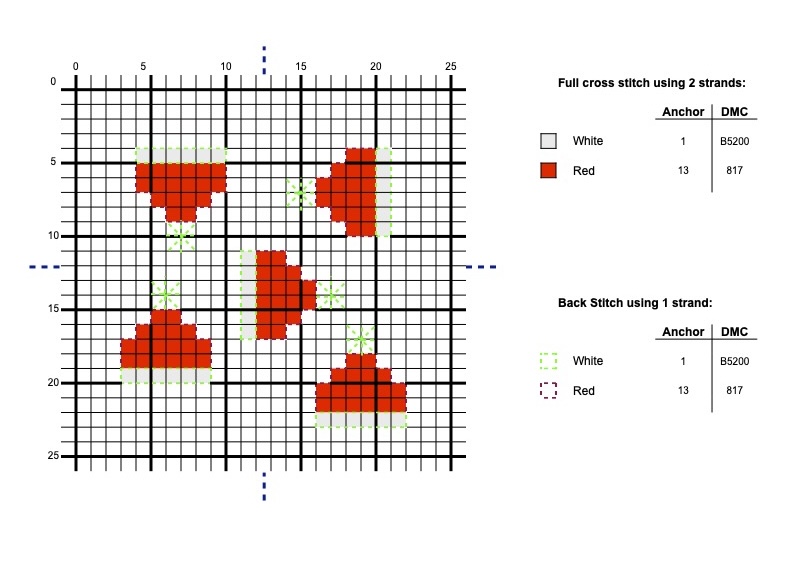
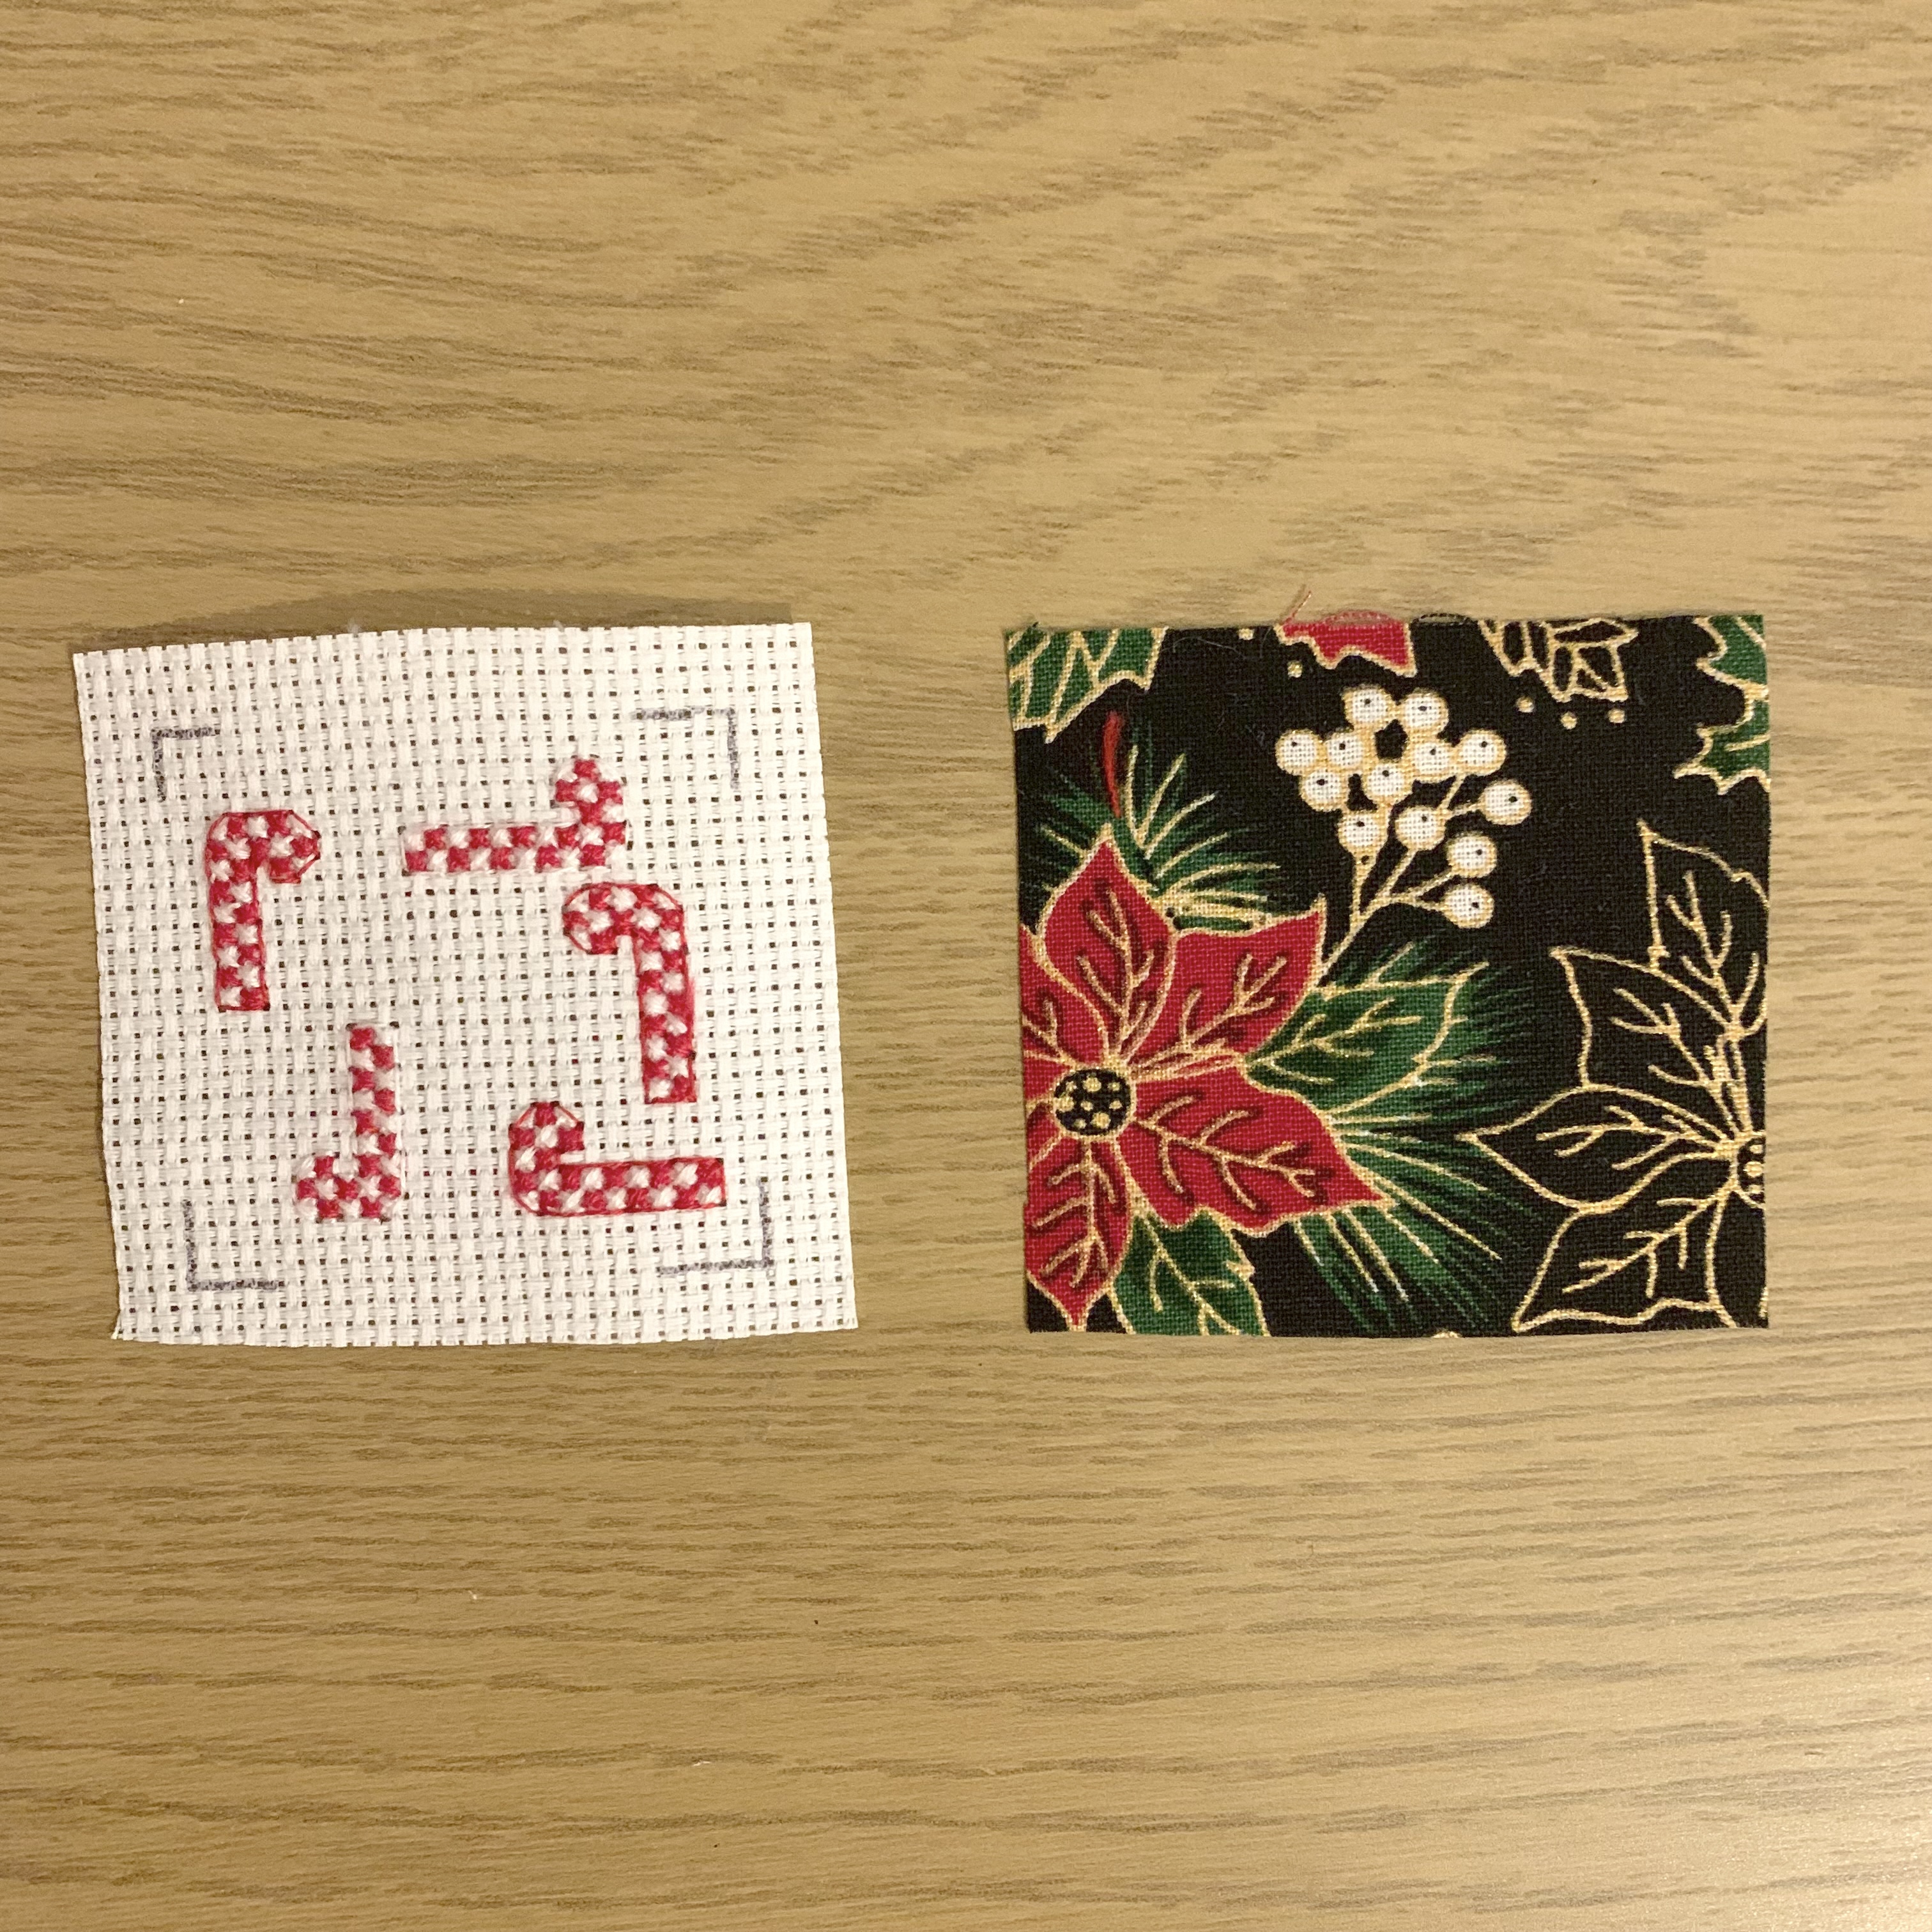
Candy Canes (5x5cm square):
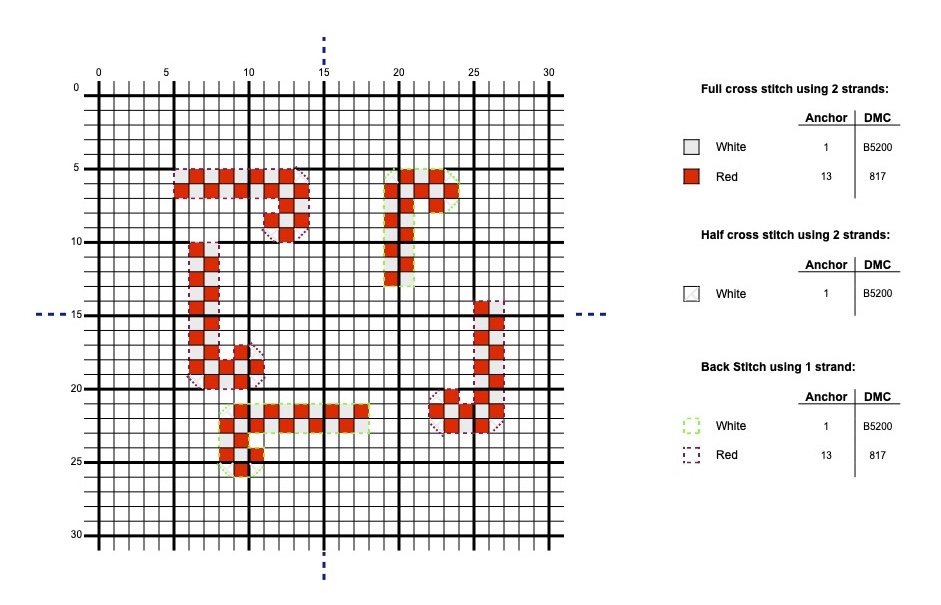
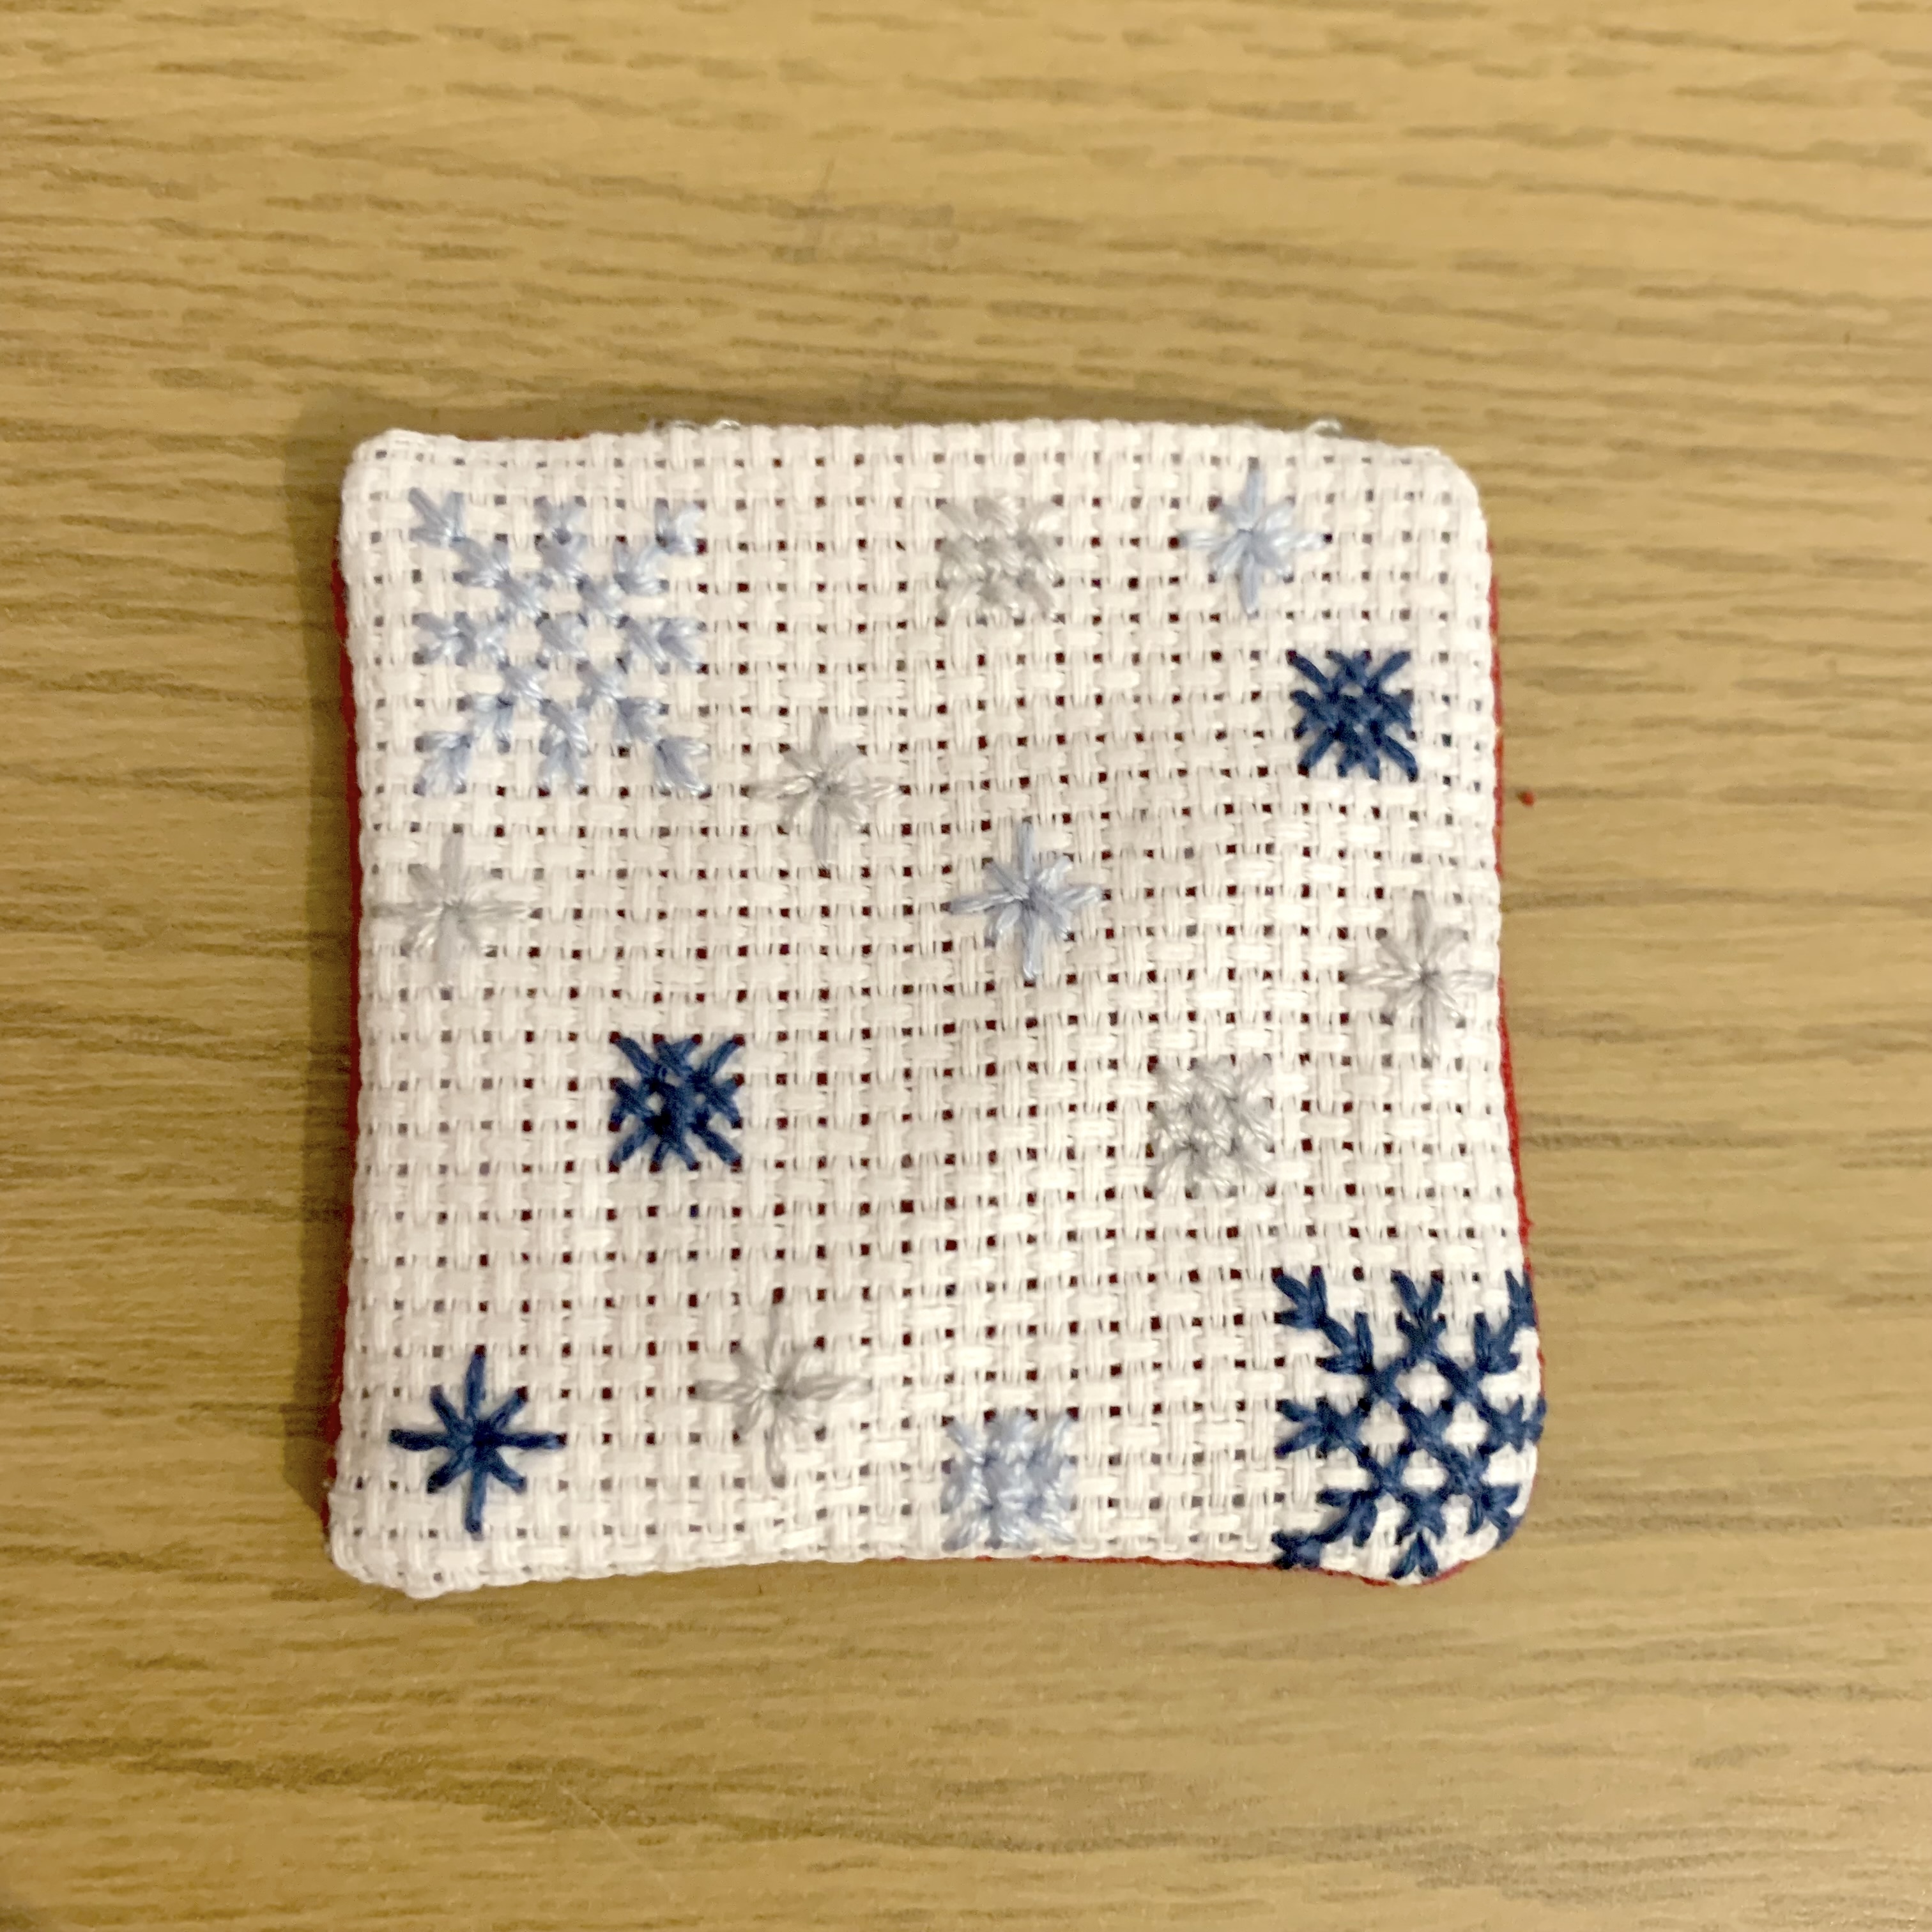
Snowflakes (6x6cm square):

Fabric Christmas Tree Decorations With Cross Stitch Christmas Design Details: Assembly
- Complete the cross stitch designs on the Aida/Evenweave. Cut out the cross stitched designs leaving a 1cm seam allowance. I drew a line around the completed designs as a guide.

- Take the two trunk fabric pieces, and placing right sides together sew down the side, along the bottom and up the other side leaving the top edge unsewn. Turn out the right way, press and slip stitch the gap closed.


- Cut out squares of the corresponding sizes from the fabric for the backing piece of each cross stitched square.
- Take a fabric back piece and place right side facing up, then take the cross stitched front piece and place right side facing down. Sew around leaving a gap for turning. Turn out the right way and slip stitch the gap closed.

- Repeat with the remaining fabric and cross stitched squares.

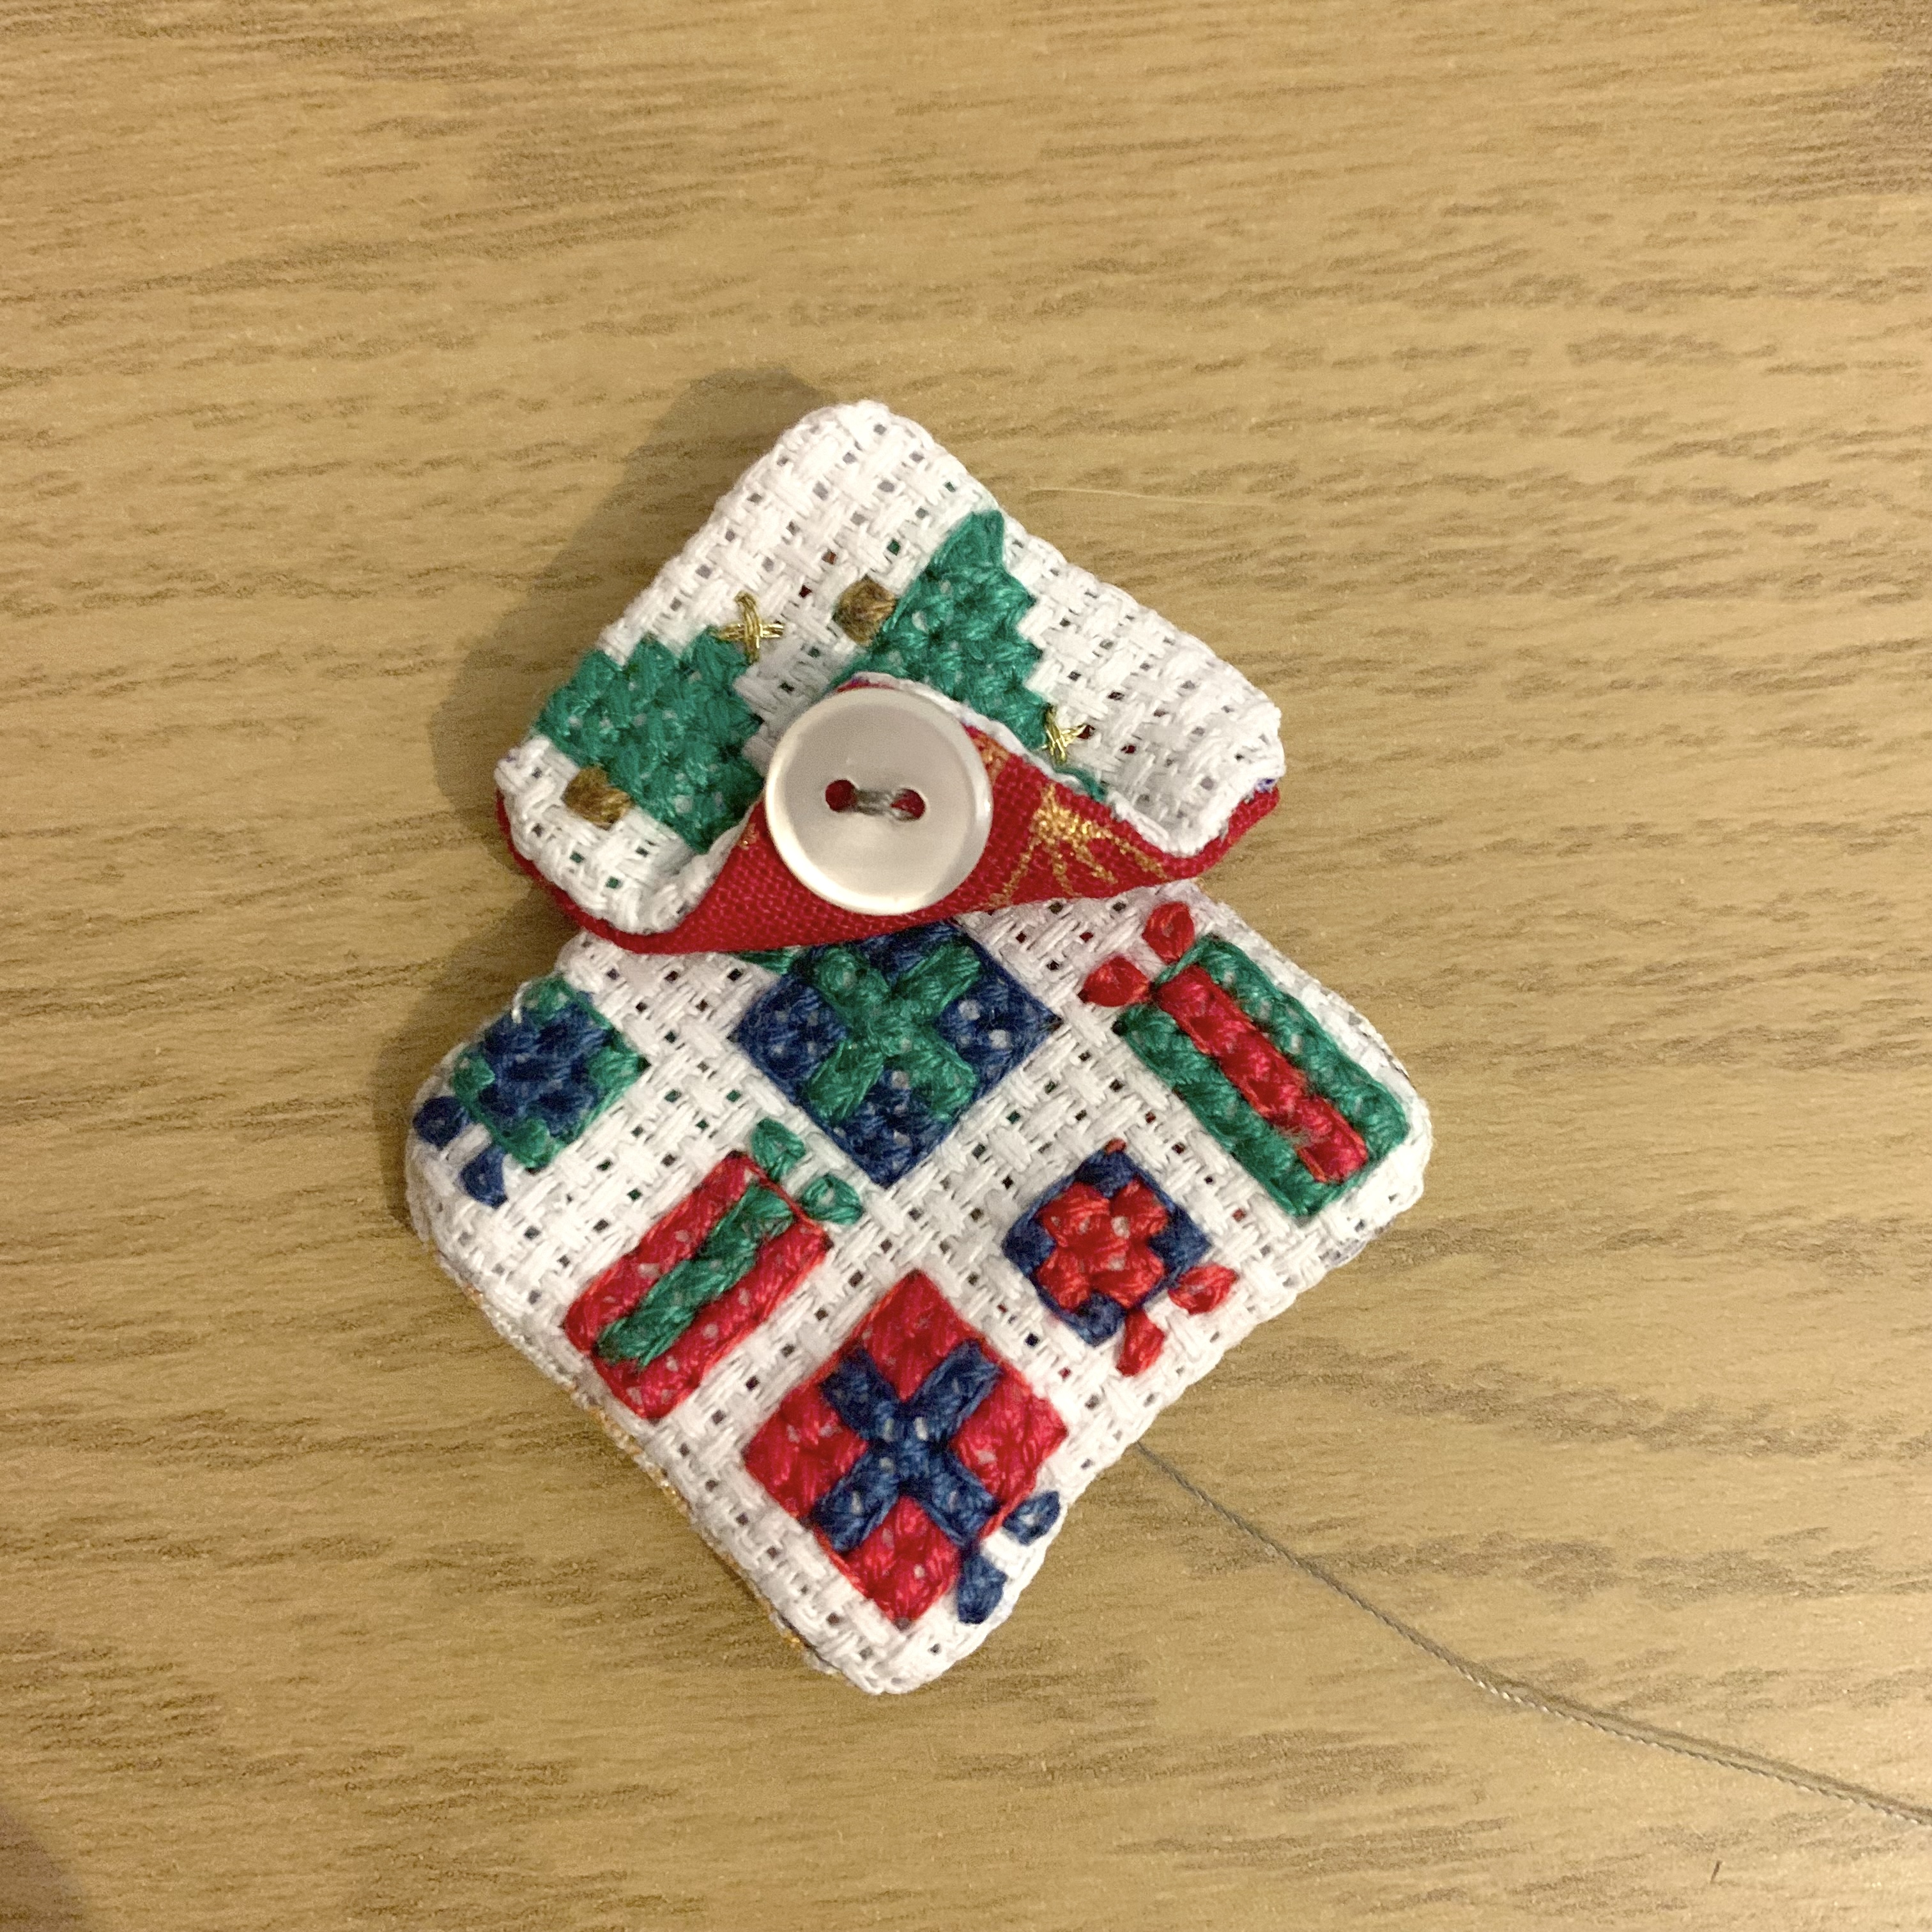
- Lay out the squares on top of each other in size order from largest to smallest.

- Starting with the smallest square fold up the bottom point and sew to secure, next sew a button onto the folded part of the square. Repeat with the remaining squares.

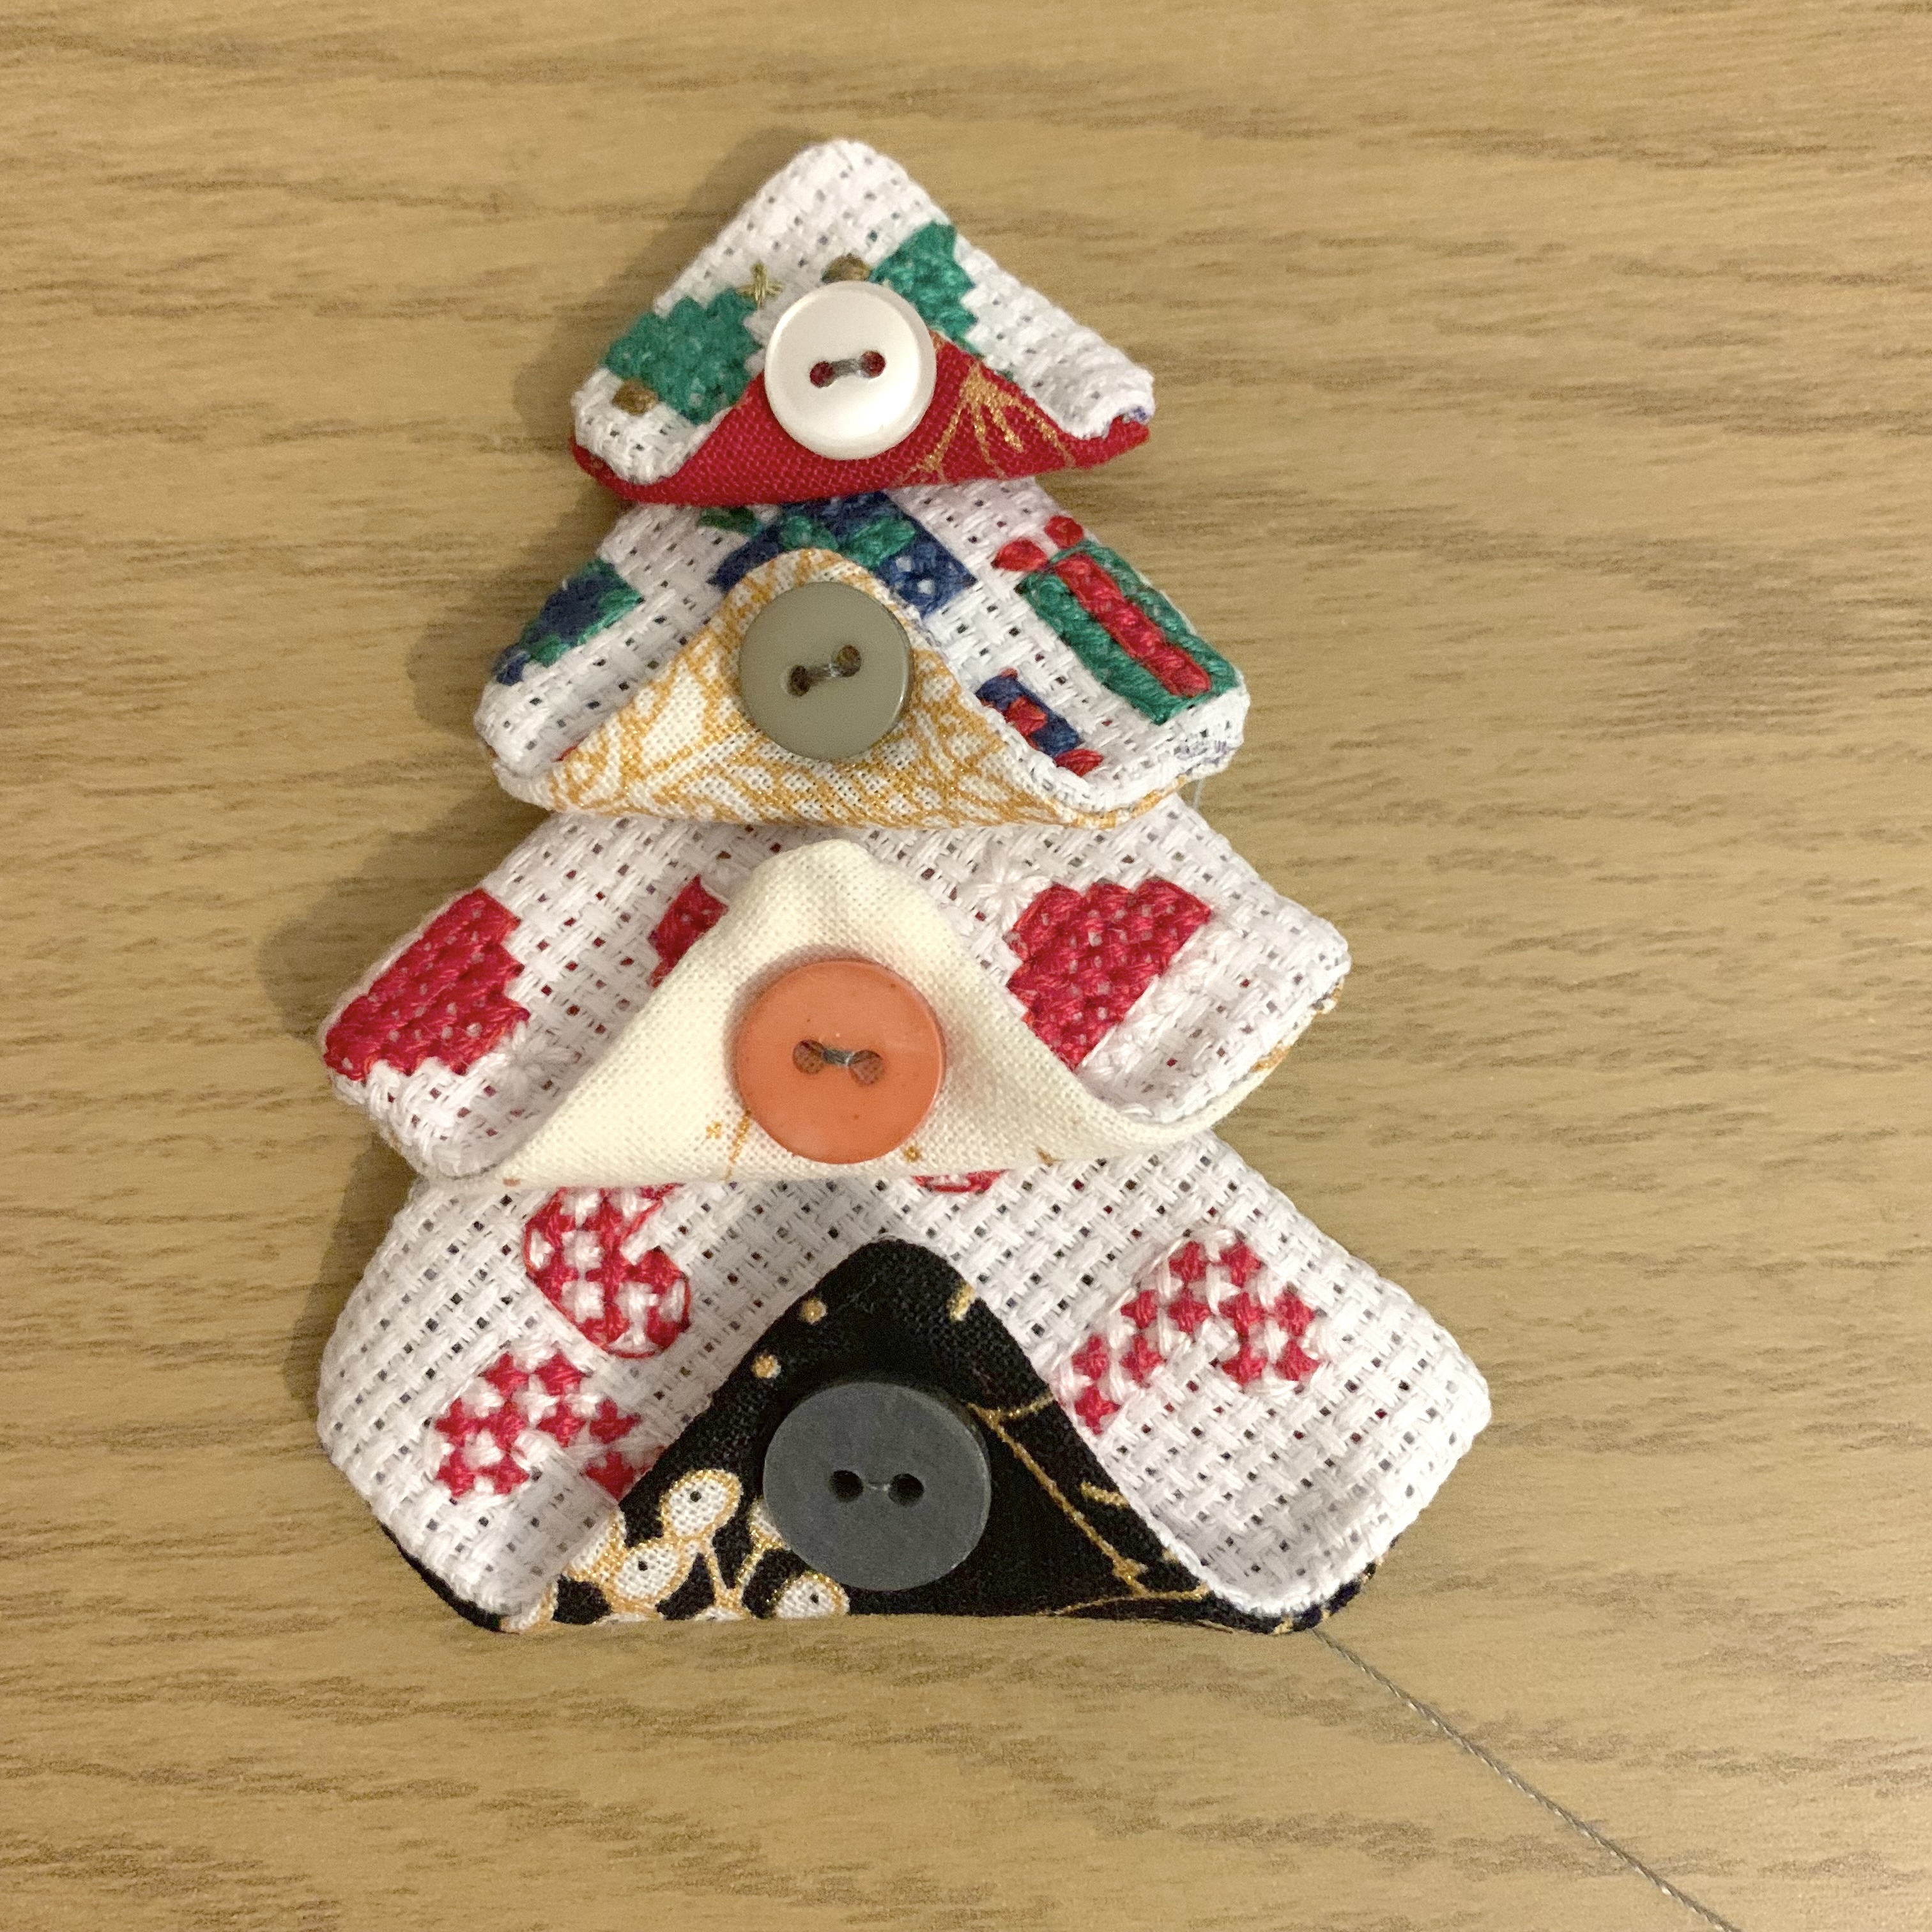

- Sew the trunk onto the back of the largest square 1cm up from the bottom edge.

- Take the 10cm of embroidery thread/ribbon and fold in half, place on the back of the smallest square 1cm down from the top of the square and sew to secure.


Leave a comment