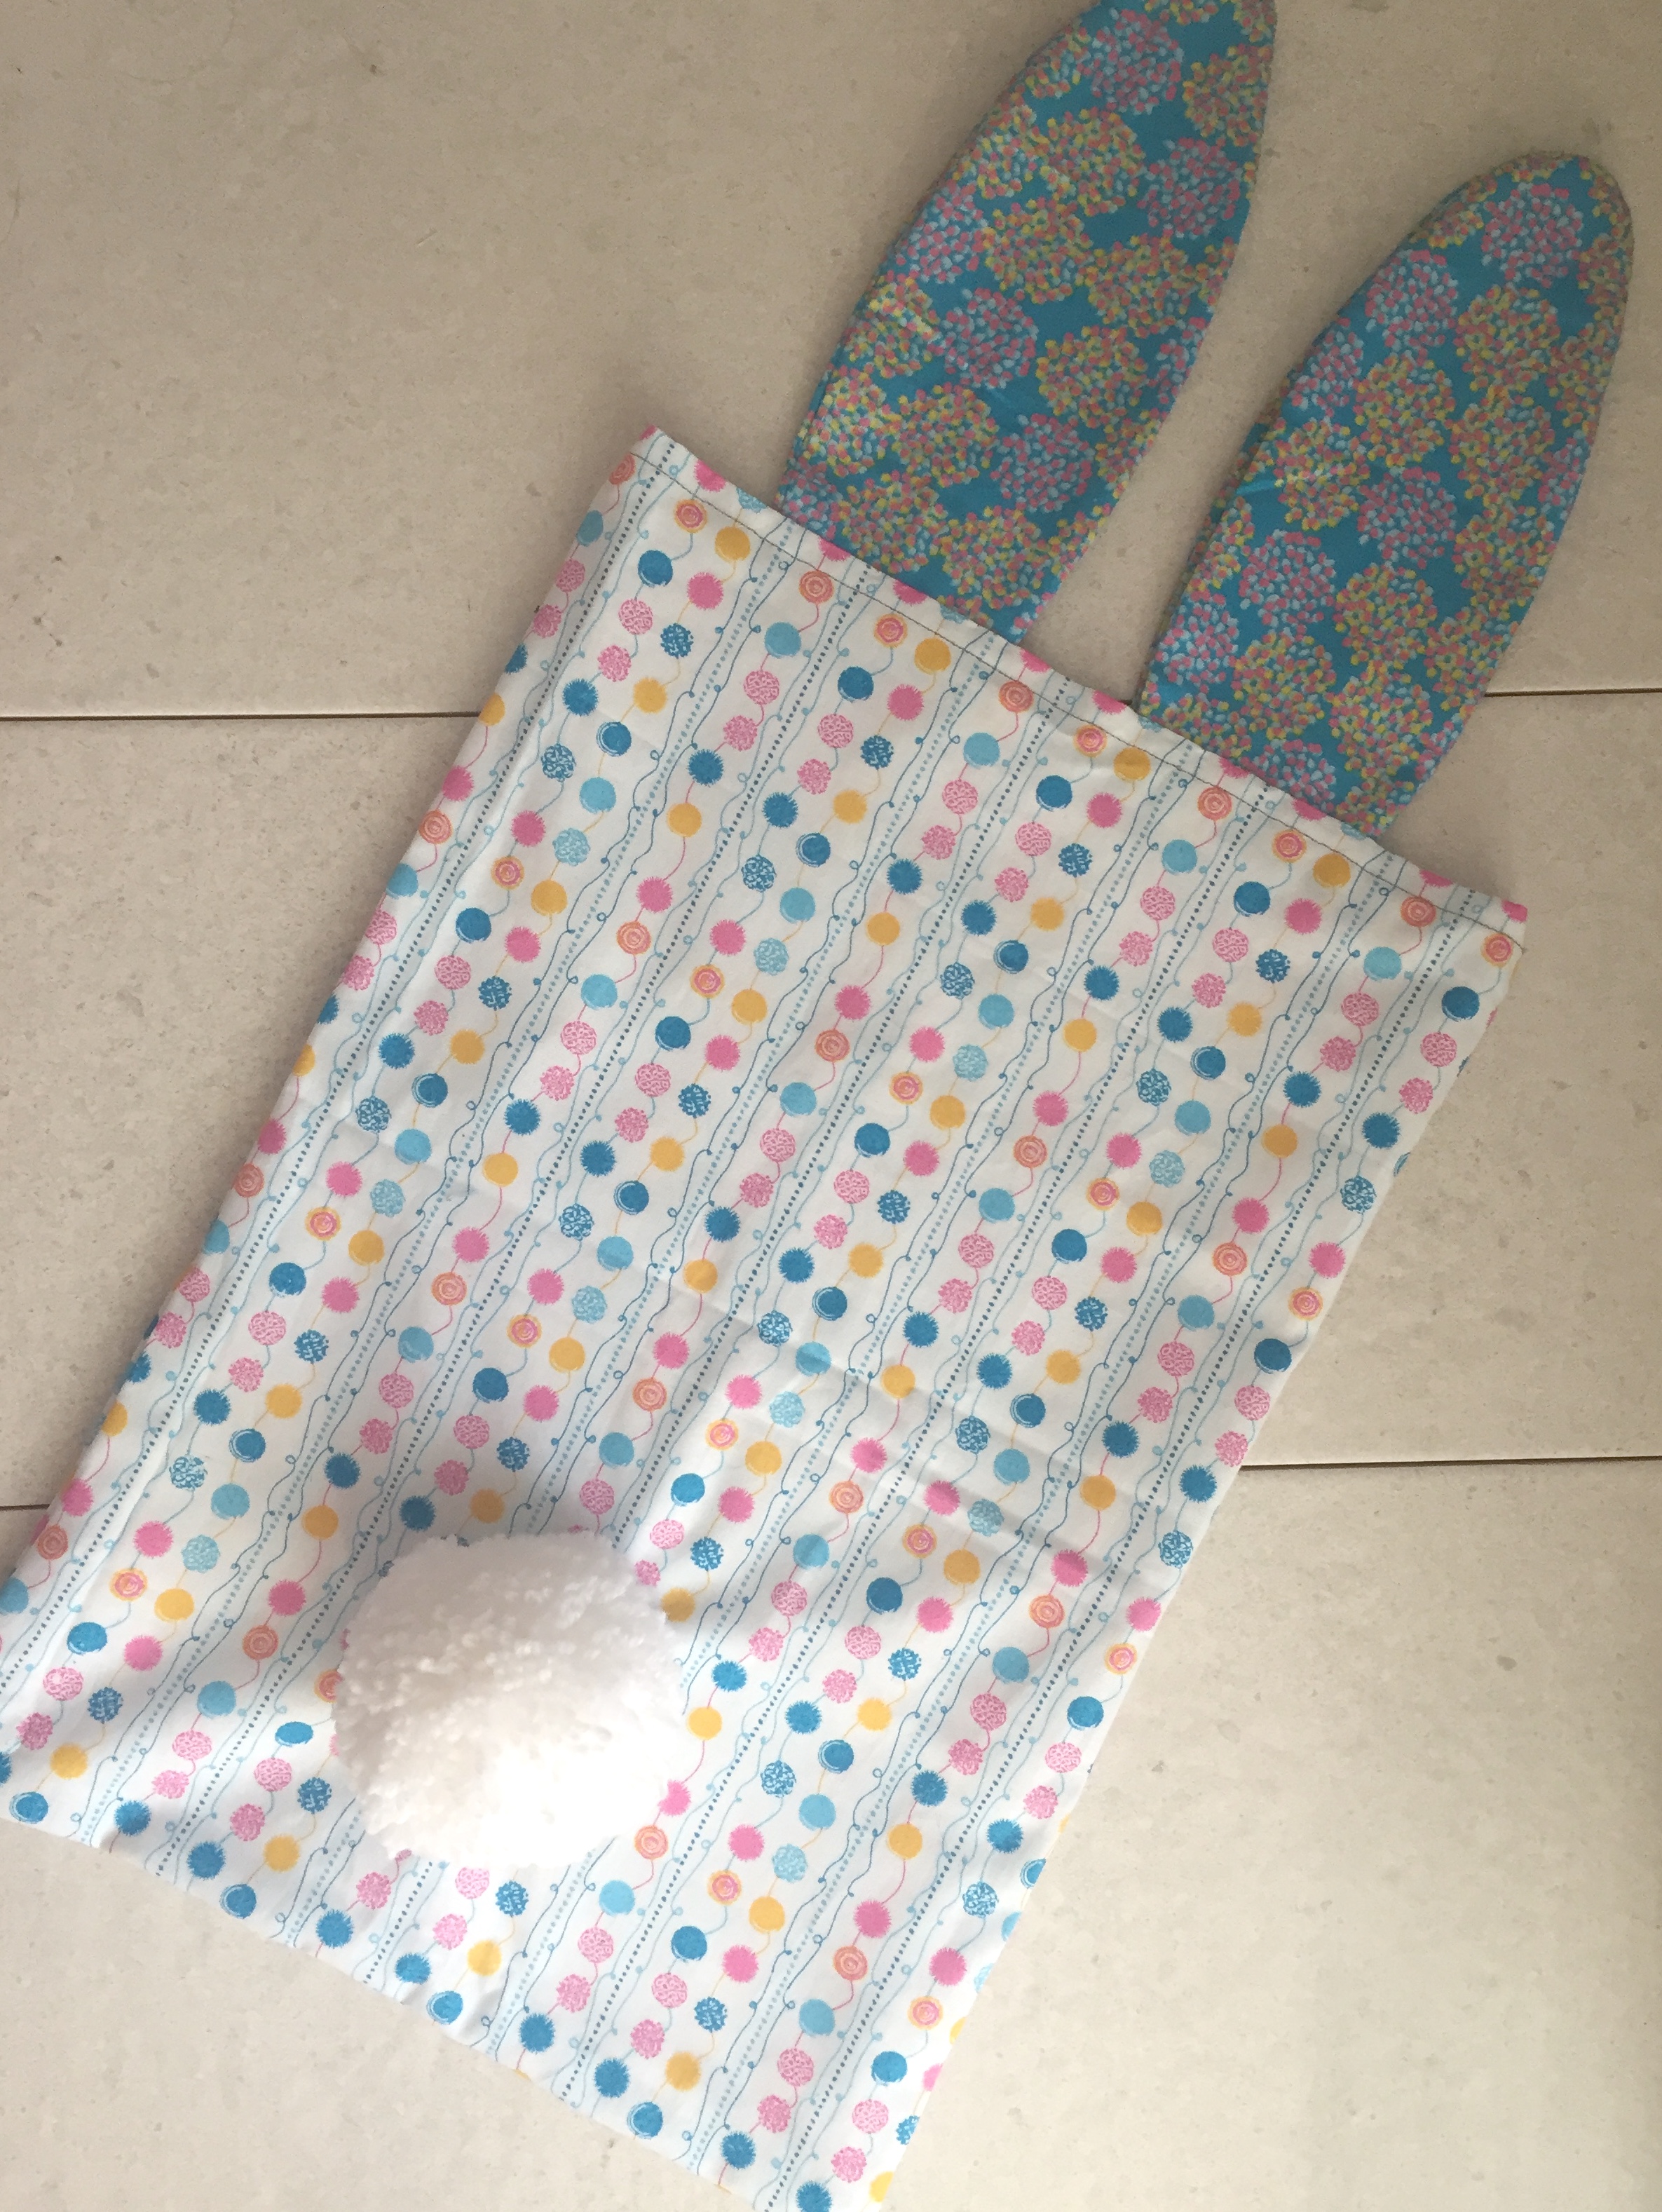
Keep your eggs safe this Easter with a bunny ears tote bag
I wanted to make a bag for putting some Easter eggs in and wanted to do something a bit different to a plain tote bag, then I had an idea of using bunny ears instead of normal handles and a bunny handle tote bag was born!
Once I had got the bag made I knew it was missing something – a fluffy tail! So I made a Pom Pom tail to add to the back of the back and I think it really finishes it off well.
Now to go find some eggs!
Fabric gifted by The Craft Cotton Company.
Bunny Ears Tote Bag Tutorial:
Materials
- Pom Pom Collection fabric by The Craft Cotton Company.
- One colour for the bag with two pieces measuring 30x42cm.
- One colour for the lining of the bag with two pieces measuring 30×41 cm.
- One colour for the ears.
- One colour for the inside ears.
- White wool.
- Pom Pom maker (7cm) or card circles 7cm in diameter.
- Needle.
- Scissors.
- Ruler.
- Pins.
- Paper.
- Pencil.
- Thread.
Easter Rabbit Ears Bag Assembly
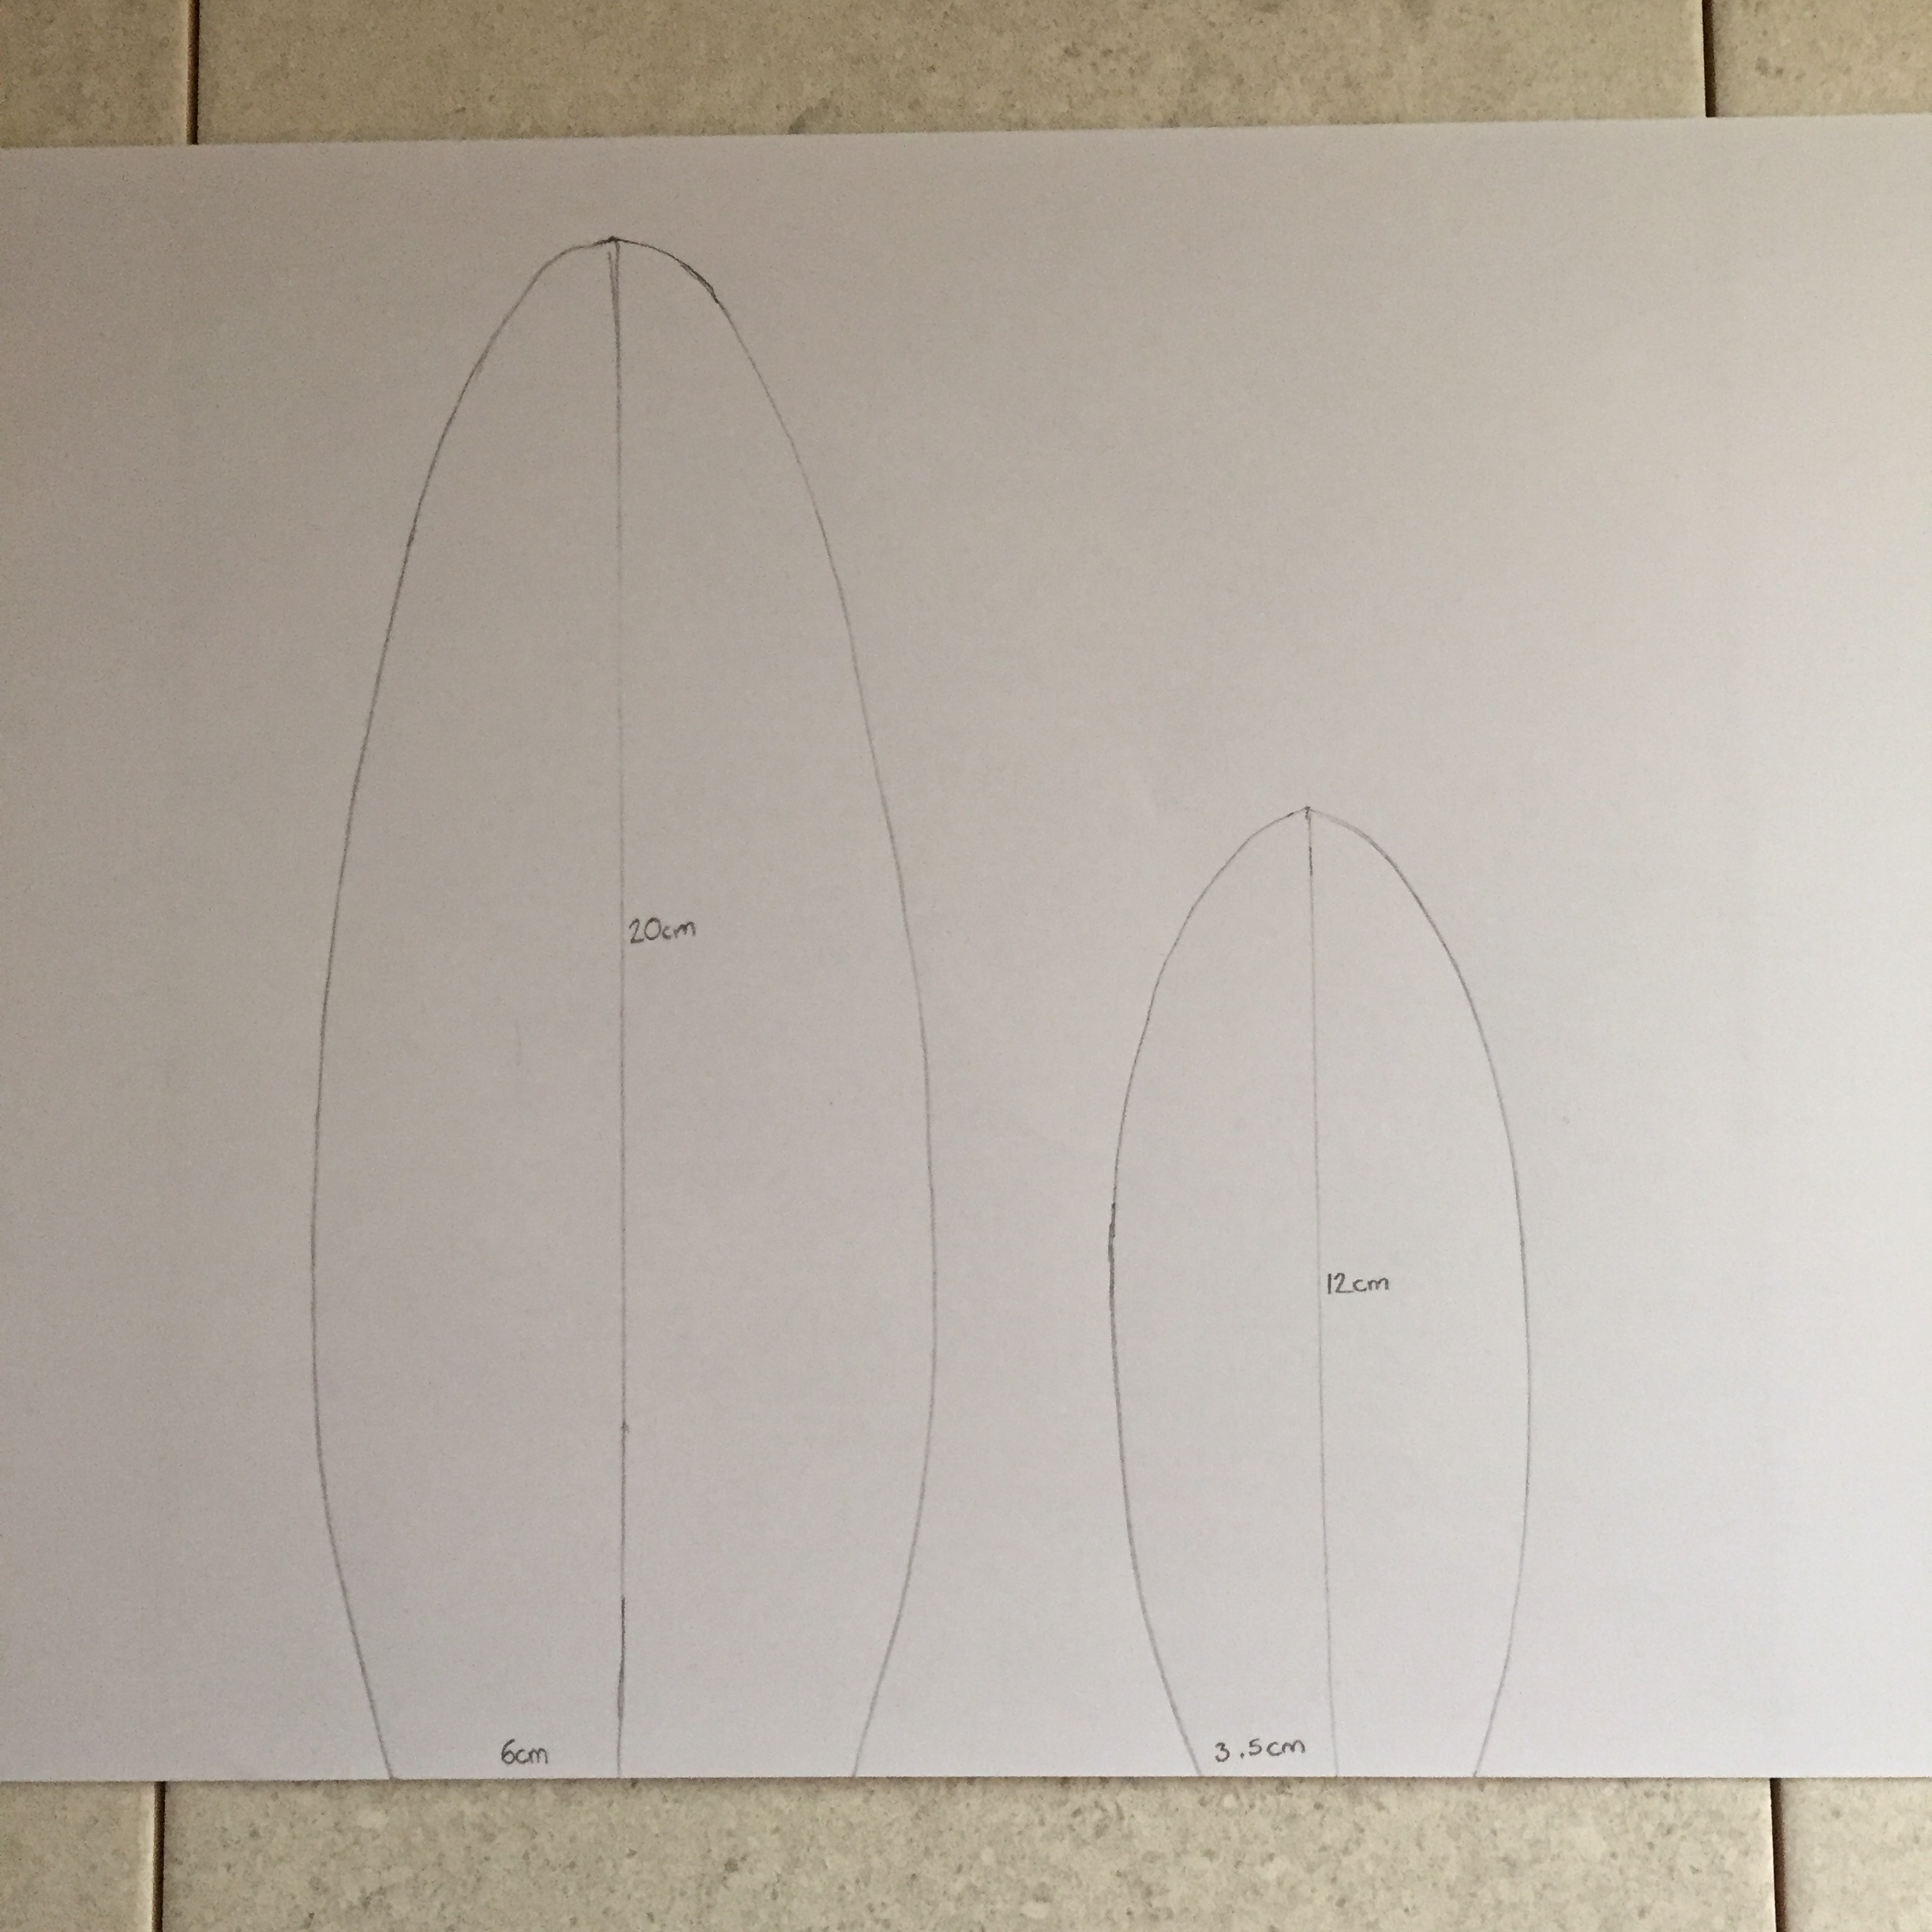
- Draw out a template on paper for the bunny ears, with one larger template piece for the outer ear and a smaller template for the inside ear detail.
- Cut out the templates and use them to cut out 8 large ear pieces leaving a 0.5cm seam allowance, and 2 smaller ear pieces leaving no seam allowance.
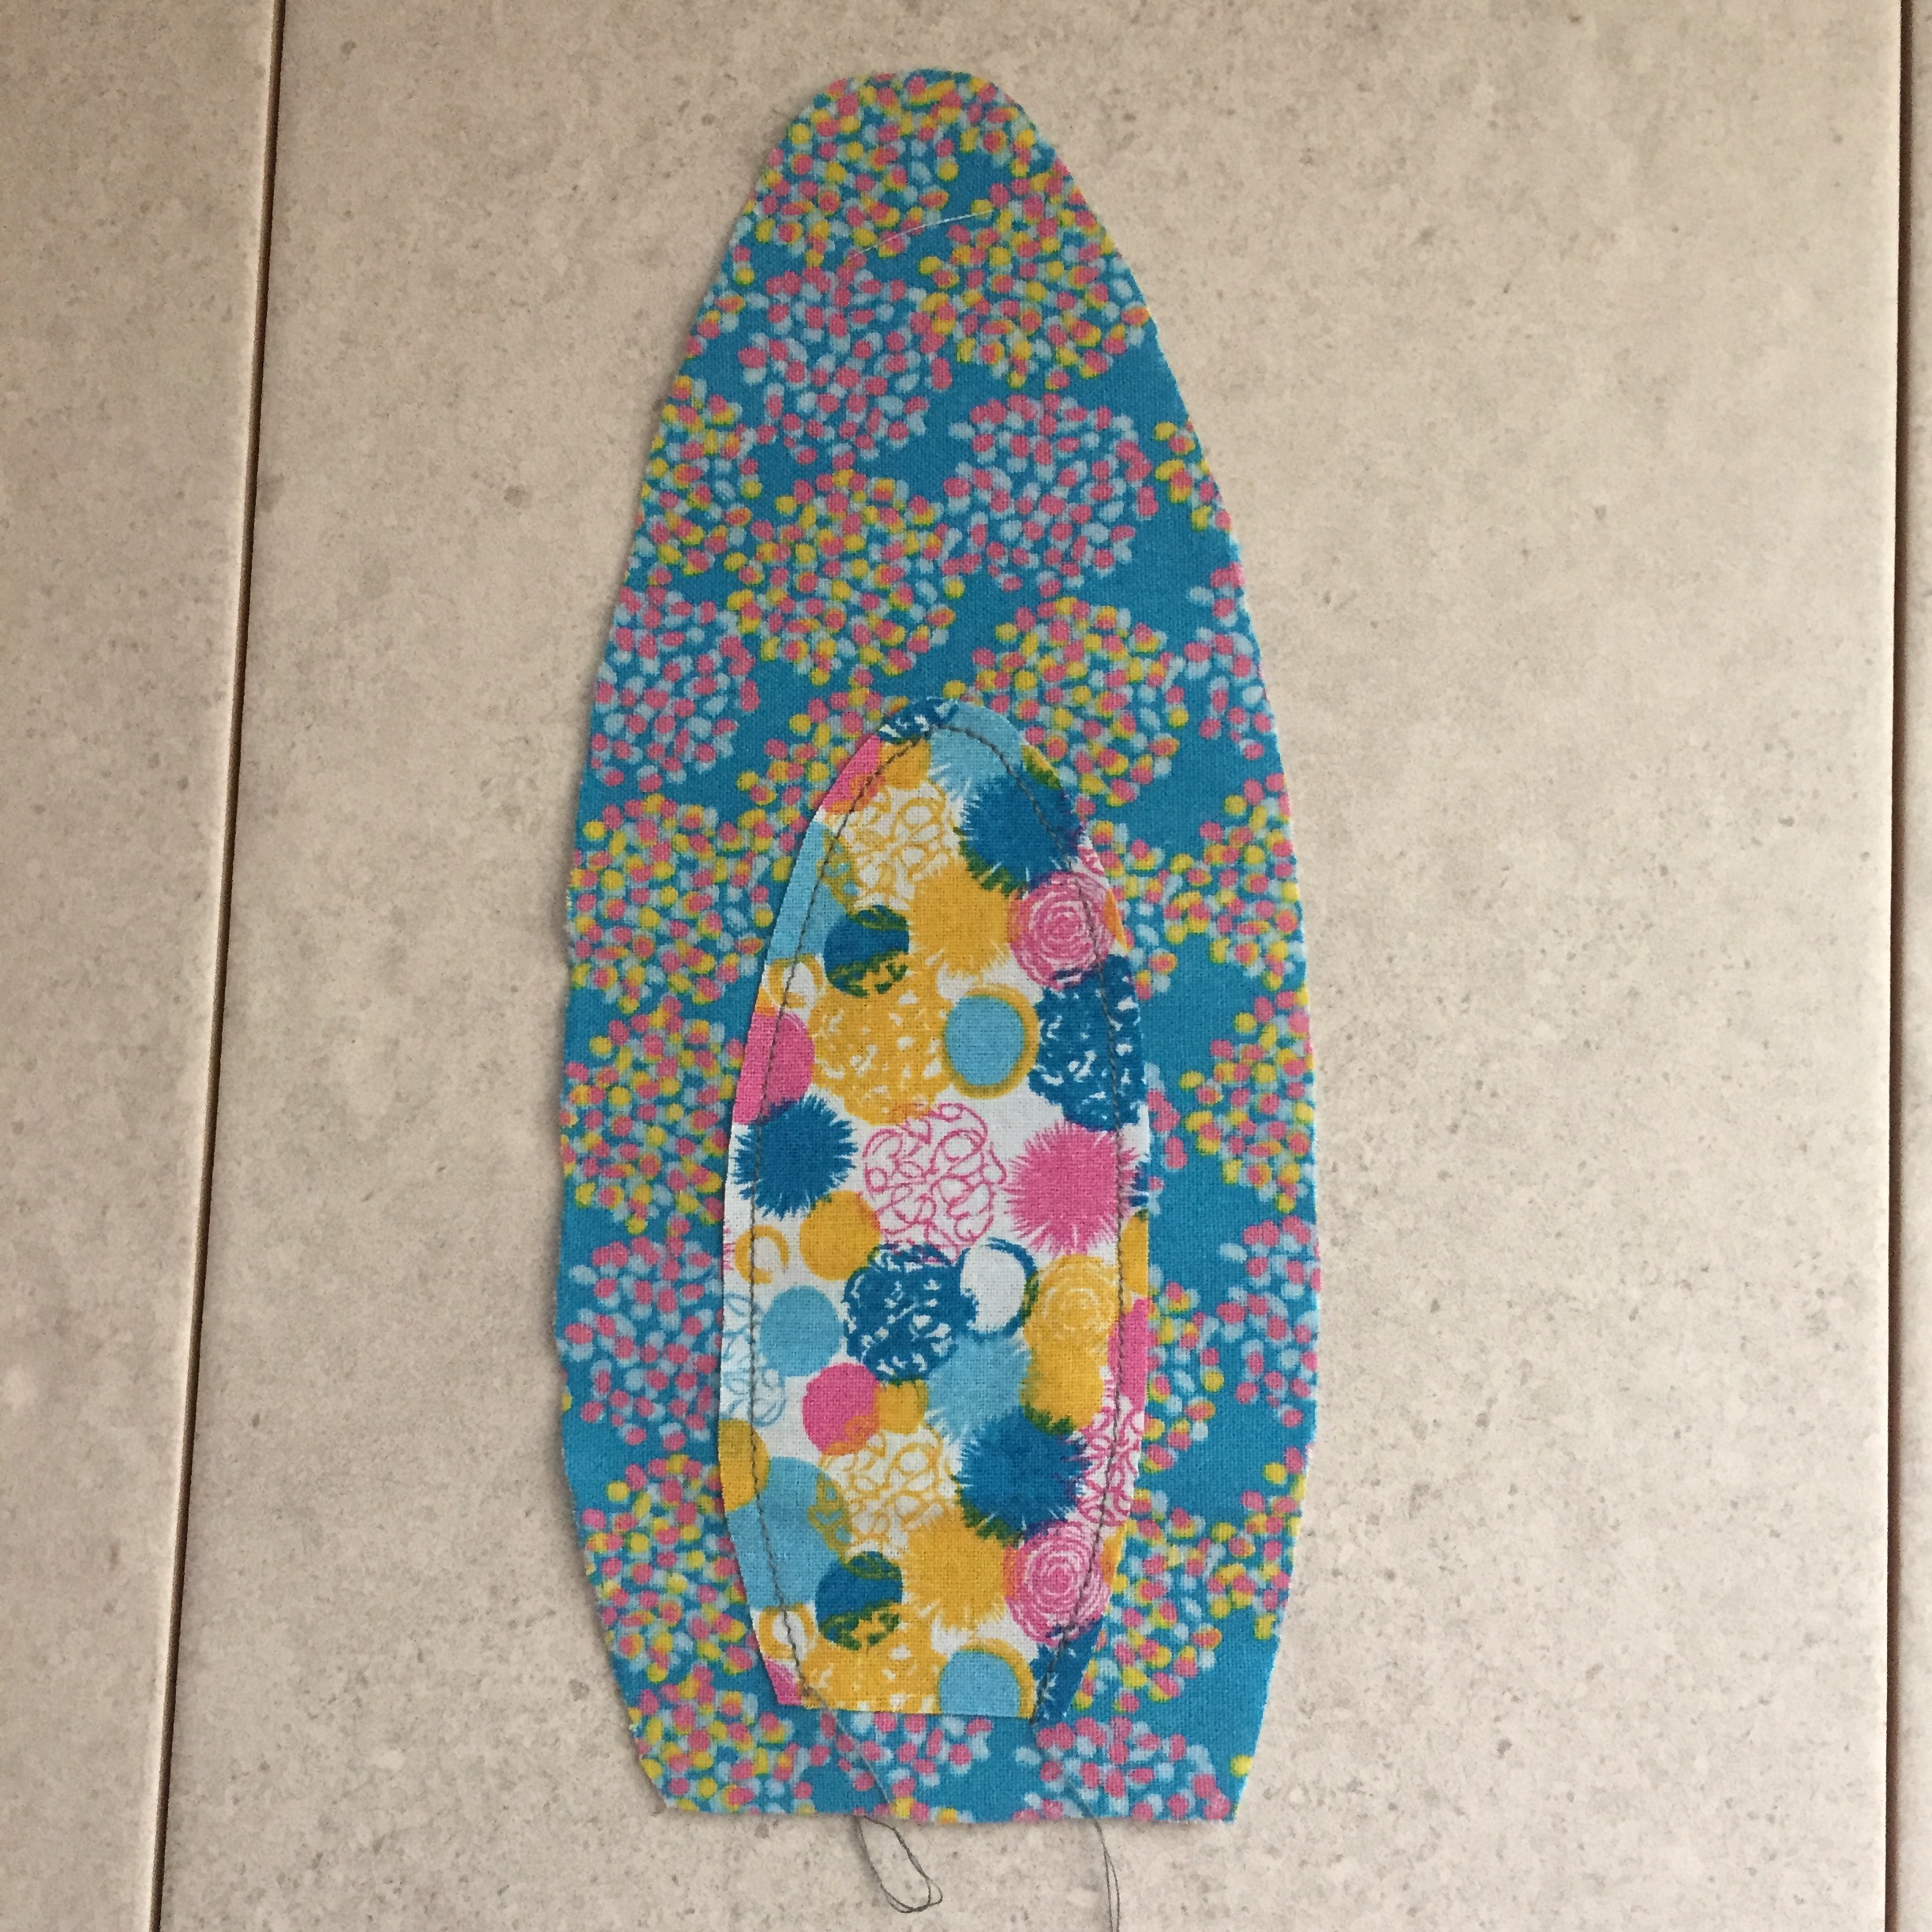
- Sew the smaller ear piece onto the front of one of the larger ear pieces 1cm up from the bottom edge.

- Place the front ear piece right sides together with another large ear piece and sew around to secure leaving the bottom edge unsewn, turn out the right way, press and repeat with the remaining smaller ear piece. Sew the remaining ear pieces together by placing two large ear pieces right sides together and sewing around leaving the bottom edge unsewn.
- Turn out the right way and press.
- Take one of the main bag fabric pieces (30x42cm) and fold the top edge over by 2cm, place the two rabbit ears with inside ear detail along the top edge with the bottom edge of the ear 1cm down from the top edge of the fabric and the inside ear detail facing out. Pin to secure then sew along the top edge. Repeat with the other main bag piece using the two remaining rabbit ears without inside ear detail.
- Place the front and back of the main bag right sides together and sew around to secure. Do not turn out the right way.
- Take one of the bag lining pieces (30x41cm) and fold the top edge over by 2cm and sew along the edge to secure. Repeat with the other lining piece. Take the two lining pieces and place wrong sides together and sew around to secure.
- Place the main bag inside the lining of the bag and sew around the top edge to secure using a slip stitch. Then turn out the right way.


- Sew the top edges of the bunny ears together using a slip stitch.
- Make a pom pom using white wool (how to make a pom pom guide can be found here) and attach to the middle of the back of the bag.

Leave a comment