Need some new Halloween decorations this year? Want to combine a Halloween theme with some bunting?
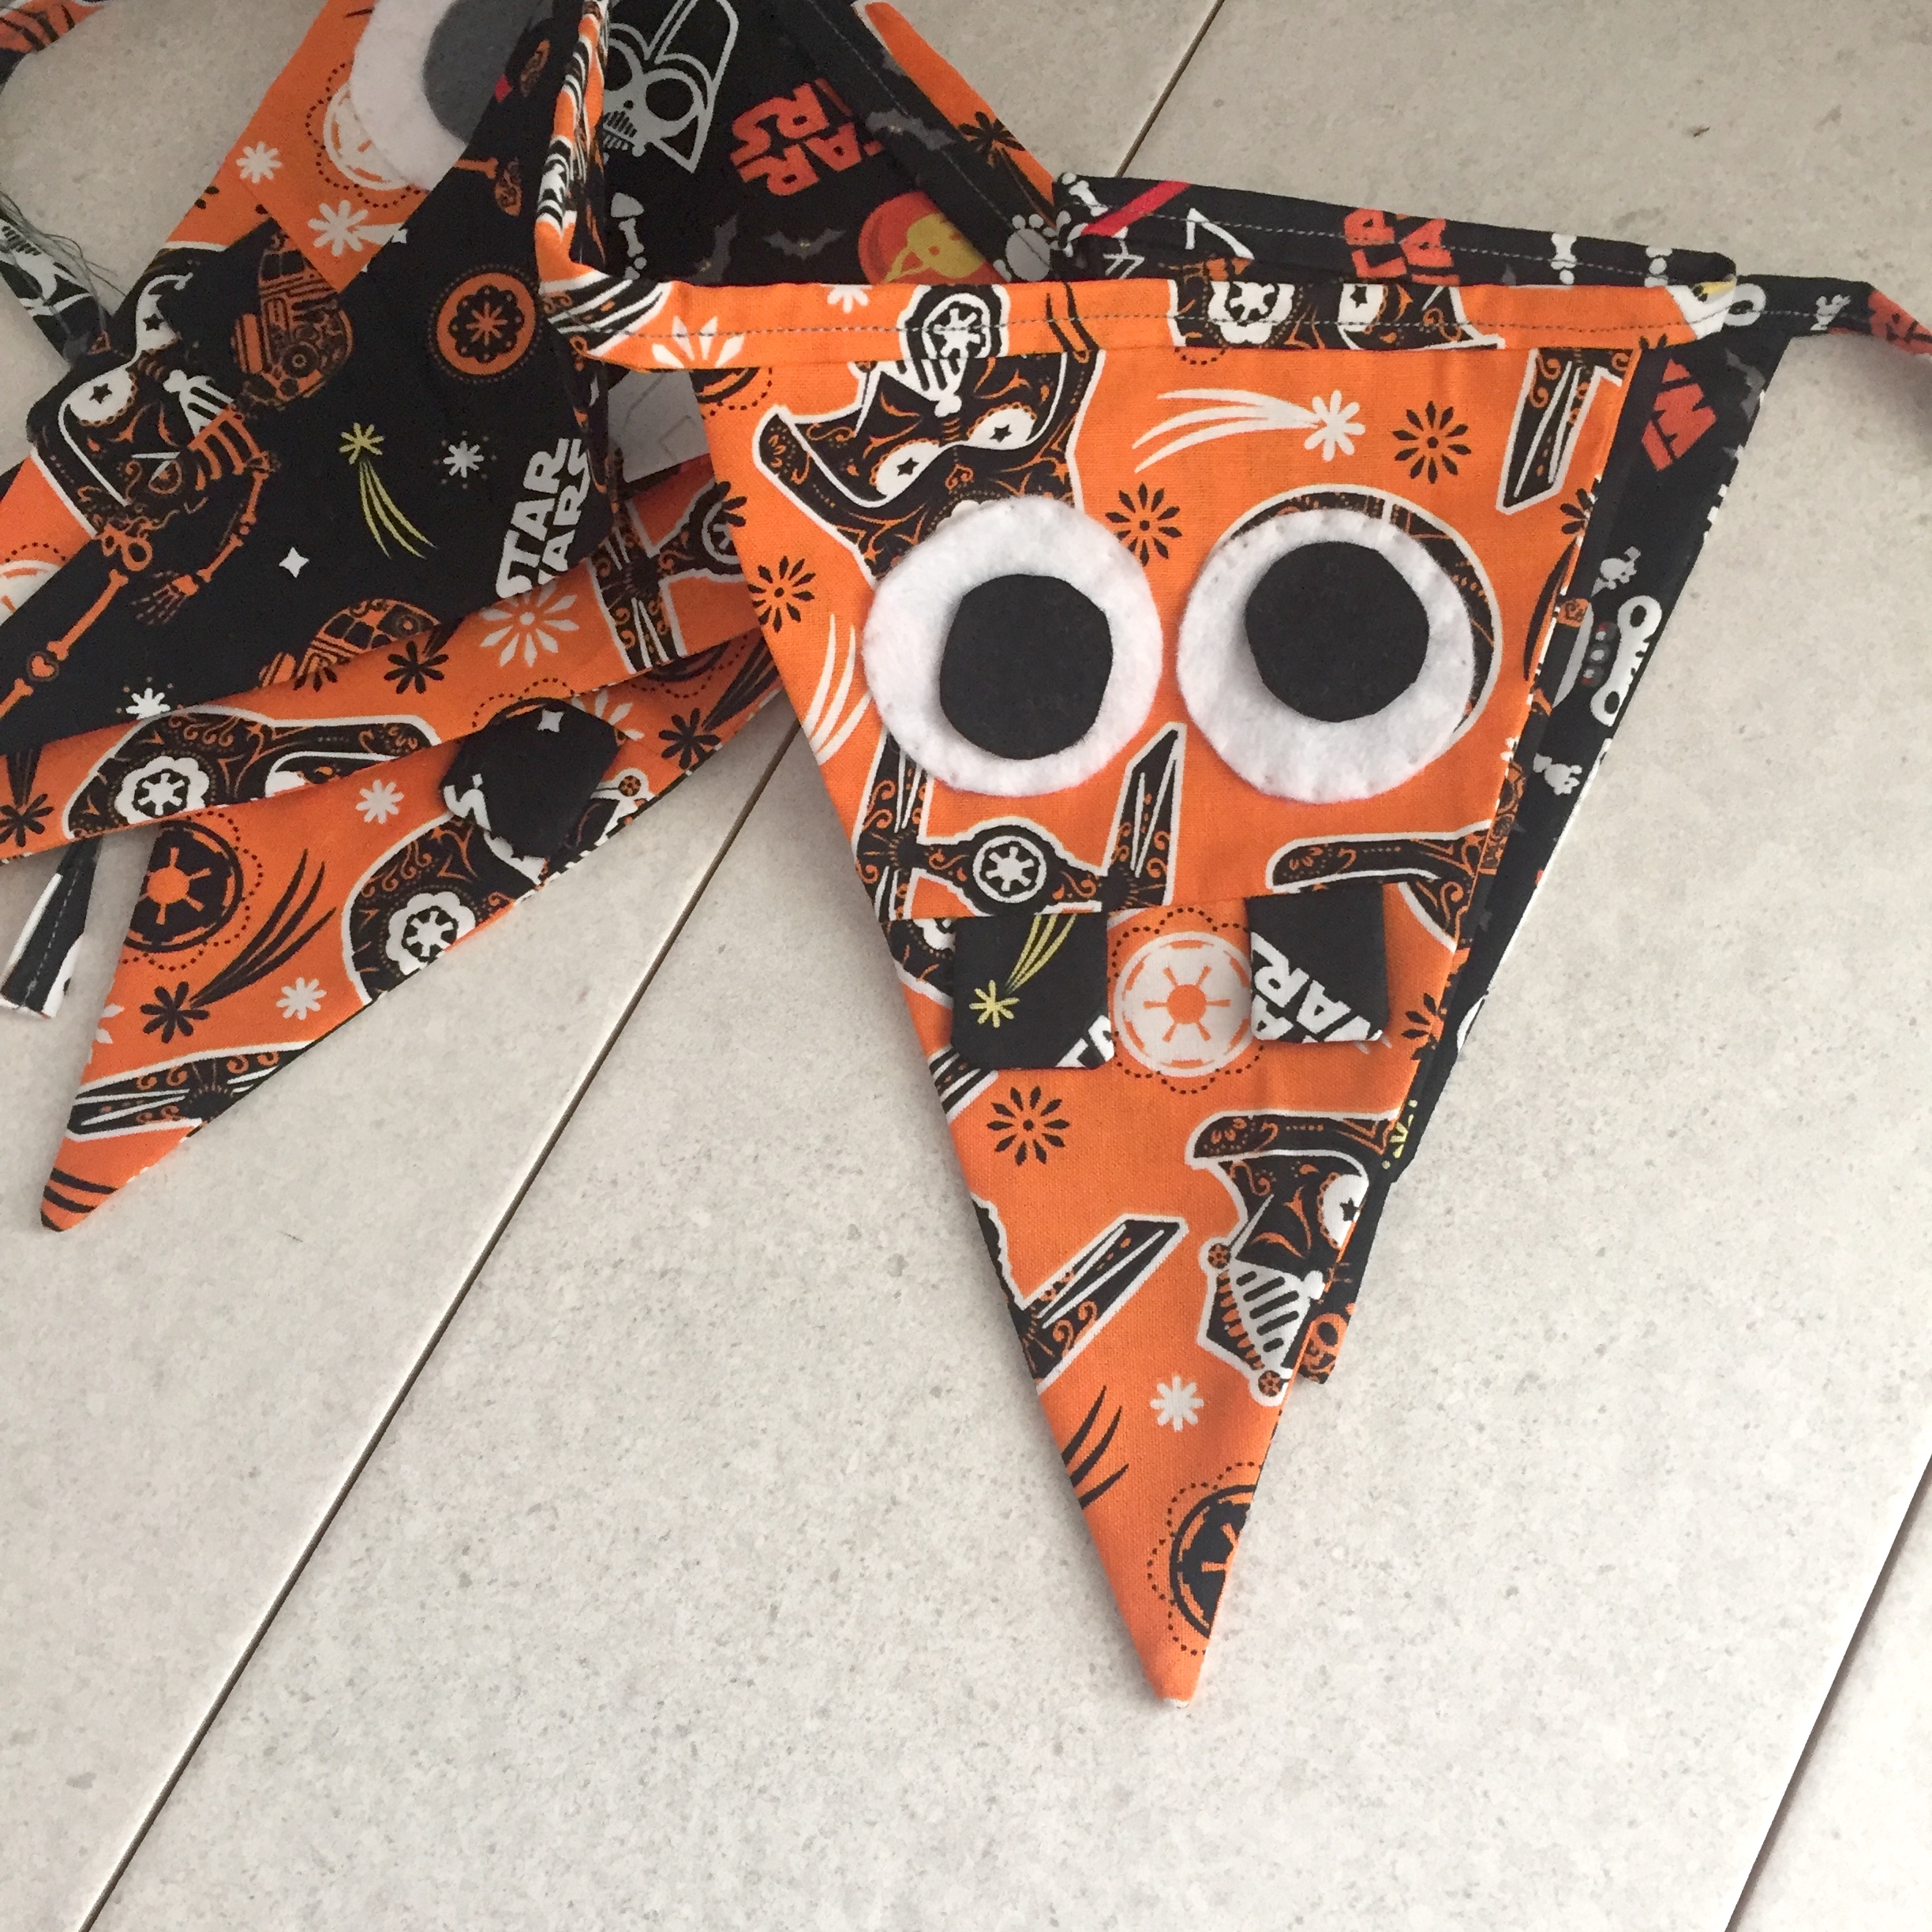
This Halloween Monster bunting is the perfect solution to decorate with this Halloween – and can be made as long or as short as your require.
This Halloween monster bunting is really quick to make – perfect for a last minute Halloween decoration, and can be made in any colour combinations that you like.
Fabric gifted by The Craft Cotton Company.
Advertisements
Sewing Tutorial: Halloween Monster Bunting
Materials
- Star Wars Halloween Fat quarter set by The Craft Cotton Company.
- Scissors.
- Paper.
- Ruler.
- Pencil.
- Thread.
- Pins.
- Felt – black, grey, and white.
- Needle.
Sewing Tutorial: Halloween Monster Bunting
- On a piece of paper draw out 2 different sized triangles.
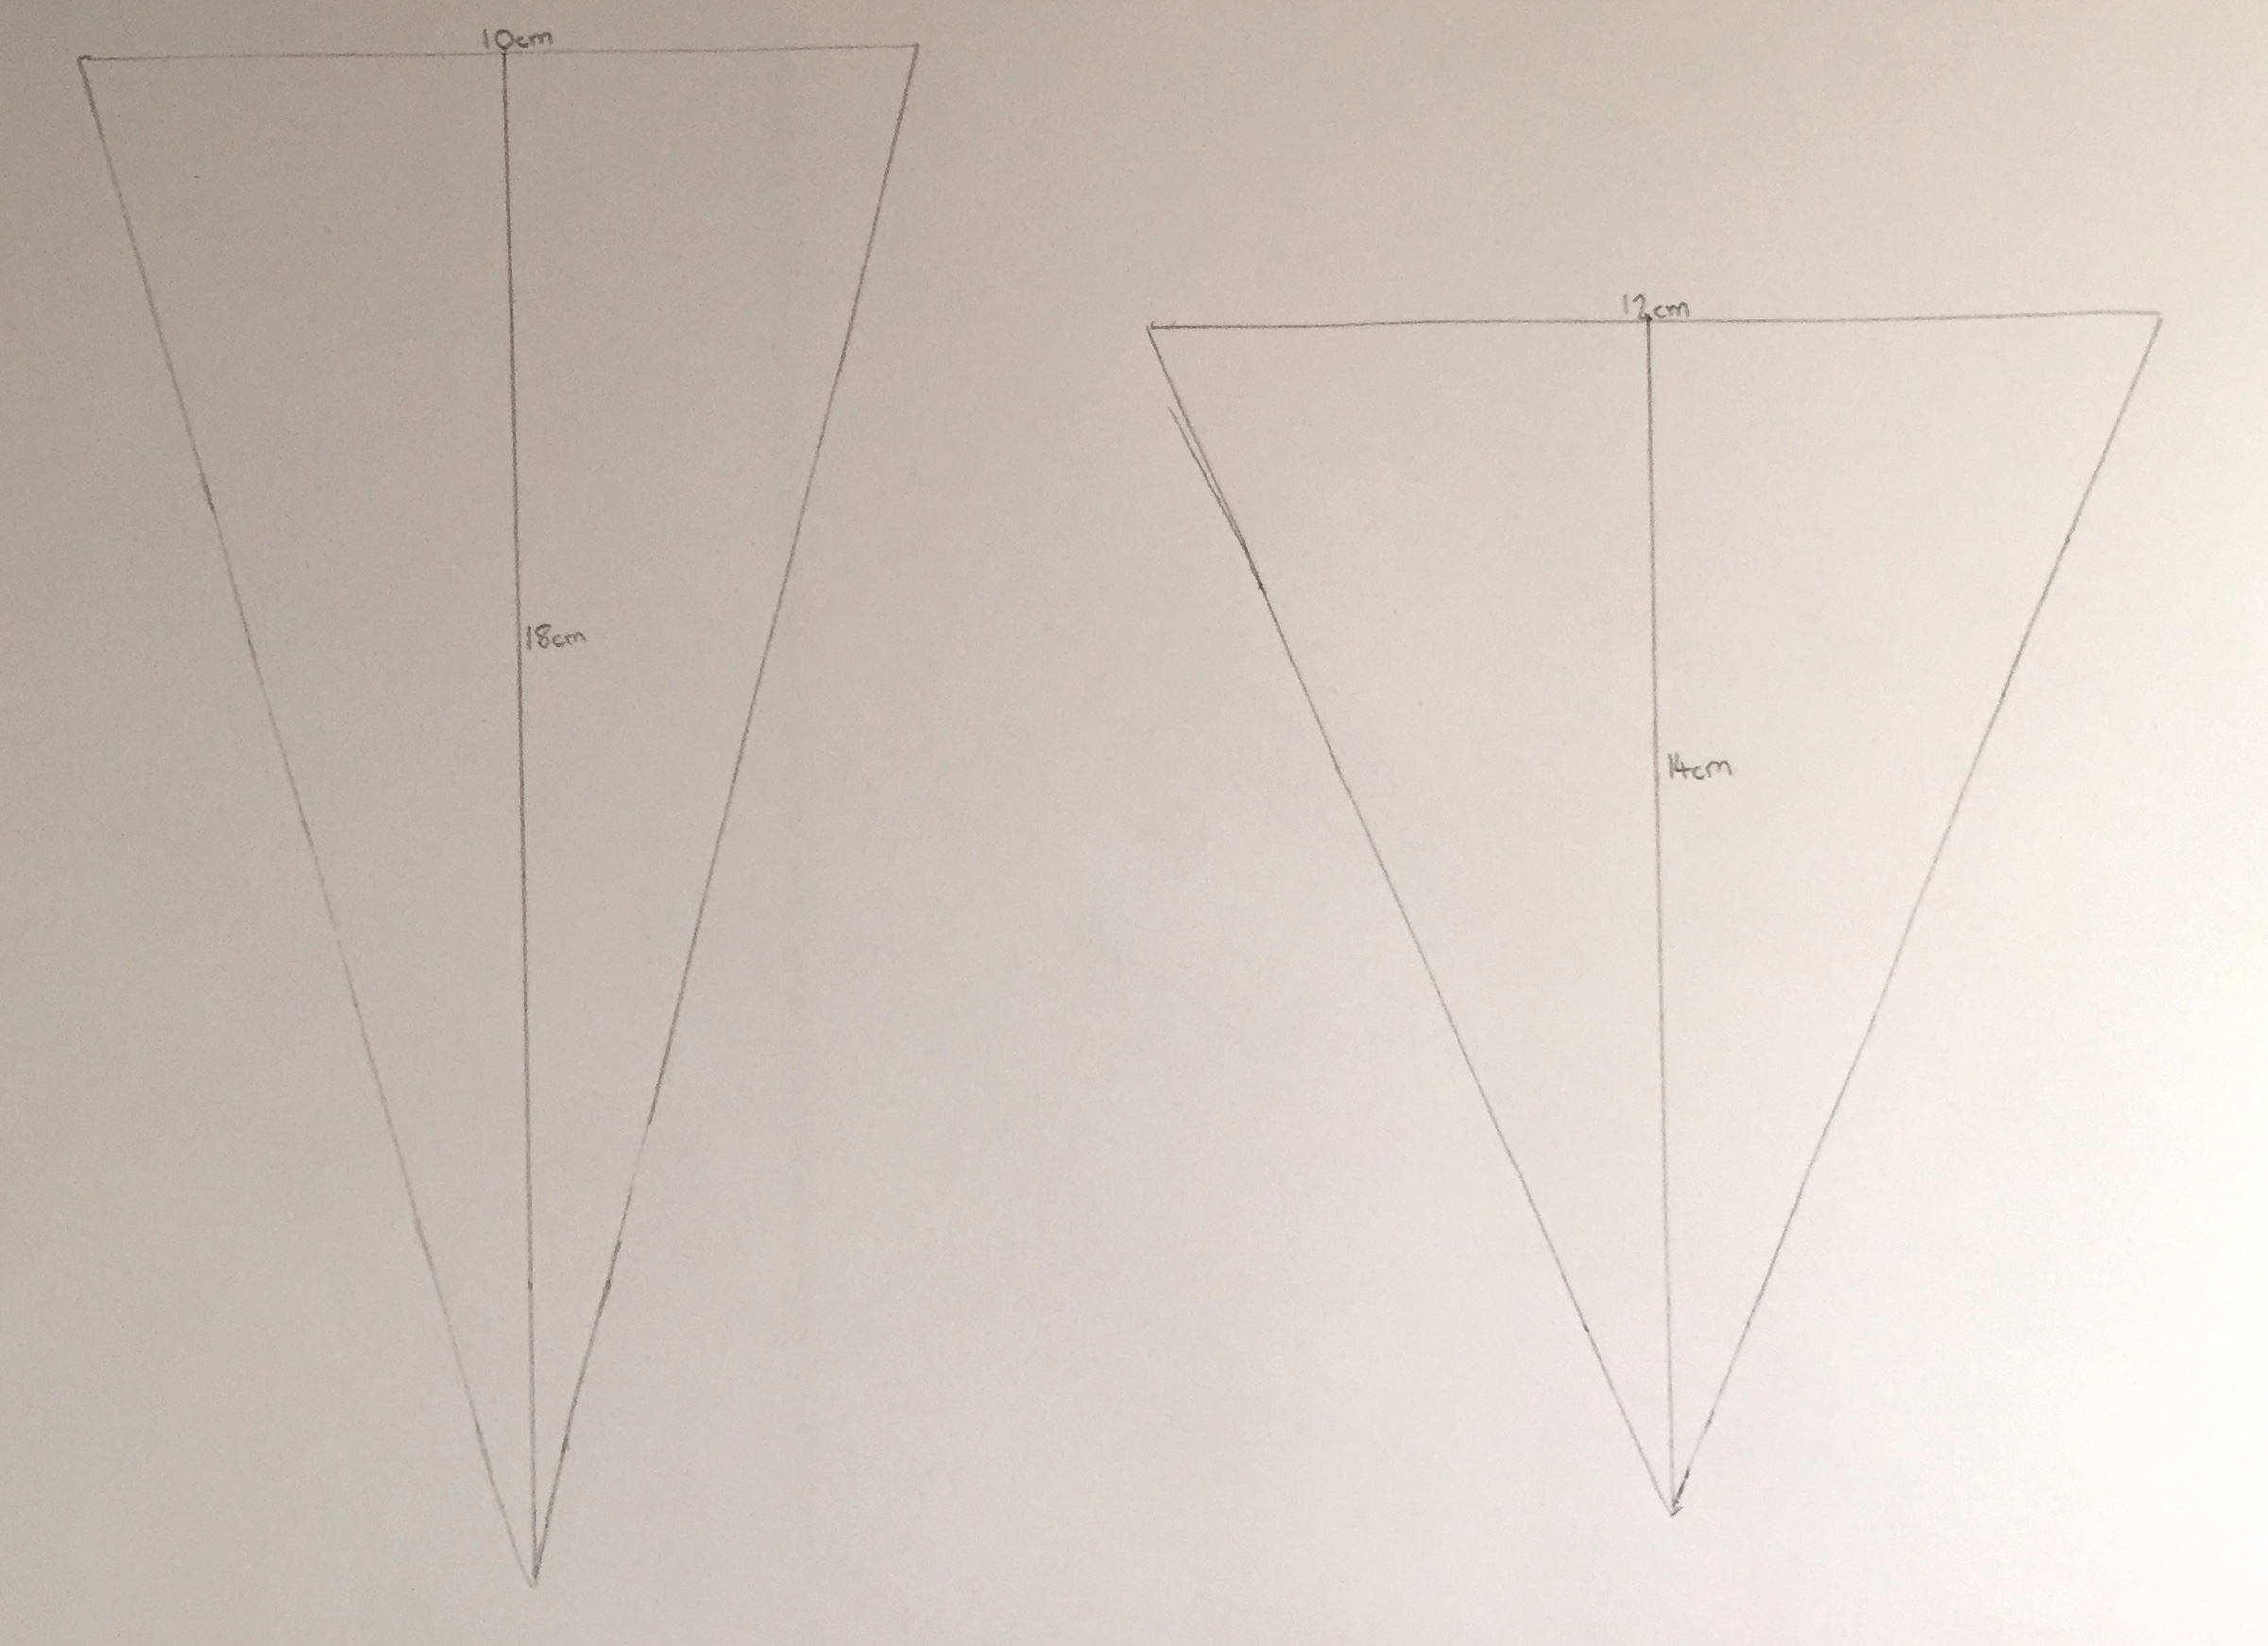
- Cut out the triangle paper bunting templates, then make a second paper template for the largest bunting triangle and cut along the dashed line – this will form the front bunting piece and the whole piece will make the back. Also draw a template for the monster teeth/eye details and cut out.

- Using the templates cut out the fabrics adding a 0.5cm seam allowance, you will require:
- A front and back piece for each plain smaller bunting triangle piece.
- The 2 triangle front parts, a whole back piece and 4 tooth pieces (a front and back for each tooth) for the larger monster face bunting pieces.
- Using the eye templates cut out the pupils from the black/grey felt and the white for the eyeballs.

- Take two of the tooth fabric pieces and place right sides together, sew around 3 sides leaving one edge unsewn. Turn out the right way . Repeat for all the remaining tooth pieces.

- Take two of the completed teeth and place on top of the top piece of the large bunting front with the raw edges of the teeth against the raw edges of the bunting. Place the bottom bunting front piece on top making sure right sides are together and sew along the bottom edge. Press flat.


- Take the front and back large bunting pieces, place right sides together and sew down the two side edge leaving the top edge unsewn, turn out the right way and press.

- Sew the remaining bunting pieces together placing rights sides together and sewing down the two side edges, turn out the right way and press.
- To make the bias binding for the bunting cut 4cm wide strips of fabric and join together to create a long strip. Then fold in the side edge, press, fold in the top and bottom edge so the meet in the middle and press, then fold the strip in half again and press.

- Place the bunting pieces in the bias binding and sew along the bottom edge of the binding to secure.


Leave a comment