

Following on from my first crochet Minecraft block corner to corner cushion pattern it’s time for a second cushion made using some more crochet Minecraft blocks – I got carried away making all the blocks for my first cushion block so had more than enough to make a second!.
I’ve got a bigger make in mind using all the crochet Minecraft blocks which I will hopefully have completed soon.
I have also made a crochet cushion using my Pokemon crochet blocks, If you’re a fan of Pokemon or want a gift for a Pokemon fan check it out.
I have made these blocks individually and joined them together to complete these makes, I have done this for two reasons, firstly, I wanted to make up the bocks separately as its a bit easier to work with the small individual blocks than one large piece when using a lot of different wool colours and, secondly, I like the effect you get when you join these blocks together as it creates a slight ridge effect and I think it makes the blocks really stand out.
If you would rather not join these blocks afterwards you can make up the cushion as a front and a back piece and then just join the front and back pieces together. I will add a chart for this as well – this will have a black border around each block to make each block stand since it wont have the join line you will have from joining individual pieces, I will also include the links to the individual charts.
You can also choose which Minecraft block and the layout you like for your cushion using the available block patterns if you would rather not use the layout I have chosen. All available crochet Minecraft block patterns can be found on the crochet Minecraft makes page.
Minecraft Crochet Block Series: Crochet Corner To Corner Minecraft Block Cushion Pattern – Part 2
These blocks use corner to corner crochet with htr(UK)/hdc(US) stitches, and I have a how to guide on corner to corner crochet with htr(UK)/hdc(US) available.
Materials:
- DK wool – Colours depend upon the Minecraft blocks used.
- 3.5mm hook will give a block size of 17x17cm (for a bigger cushion use a bigger hook).
- Toy stuffing or cushion.
Finished Size (Approx.):
- Using a 3.5mm crochet hook (a bigger sized hook will give a larger cushion).
- If individual blocks are used and joined separately: 36x36cm.
- If the front and back pieces are made then joined: 39x39cm.
Special Stitches:
Mini Bobble (B):
B: Ch2, [(yo, insert hook, yo, pull up, yo, pull through 2 loops) x2, yo, pull through all loops], htr(UK)/hdc(US), [(yo, insert hook, yo, pull up, yo, pull through 2 loops) x2, yo, pull through all loops].
Individual Crochet Minecraft Block Patterns:
Links to the individual patterns I have used can be found below, check out the Minecraft crochet makes page for other Minecraft Blocks to choose from.
- Crochet Minecraft Rabbit Block.
- Crochet Minecraft Stone Golem Block.
- Crochet Minecraft Steve Block.
- Crochet Minecraft Glass Block.
- Crochet Minecraft Chicken Block.
- Crochet Minecraft Squid Block.
- Crochet Minecraft Piglin Block.
- Crochet Minecraft Bee Block.
Joining The Individual Crochet Minecraft Blocks:
Using a 3.5mm crochet hook and black wool (or a different colour if you prefer).
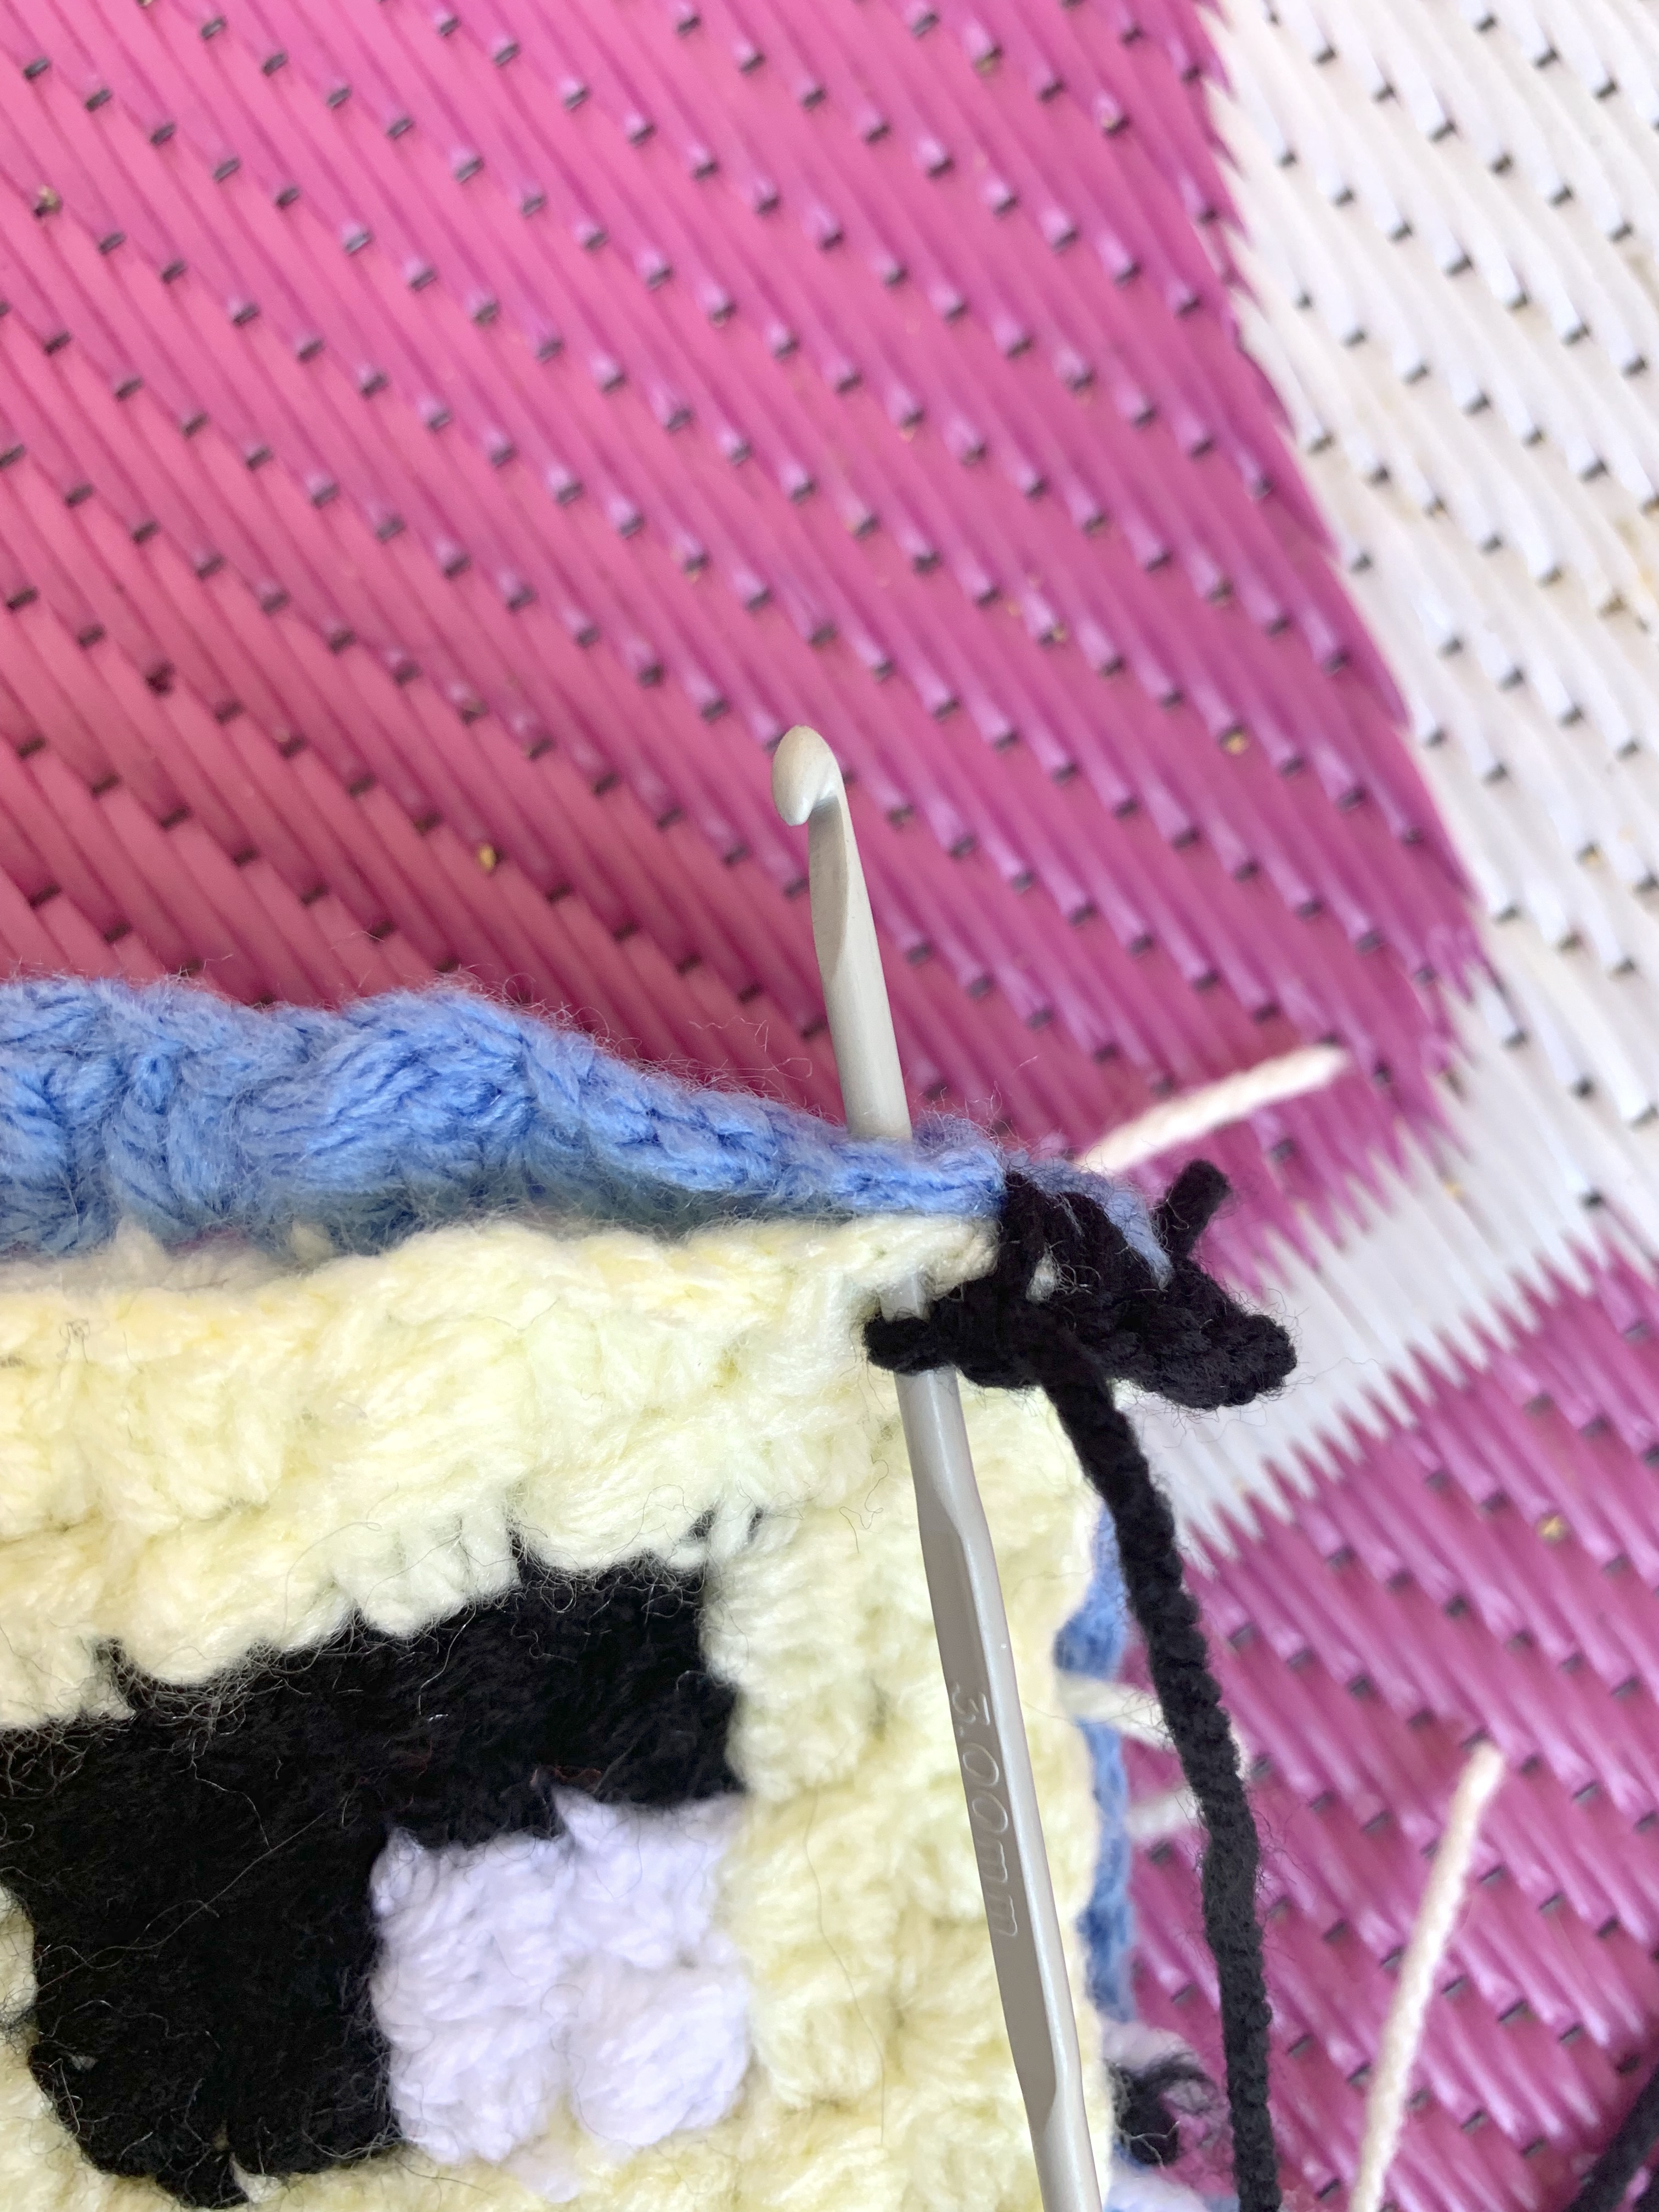
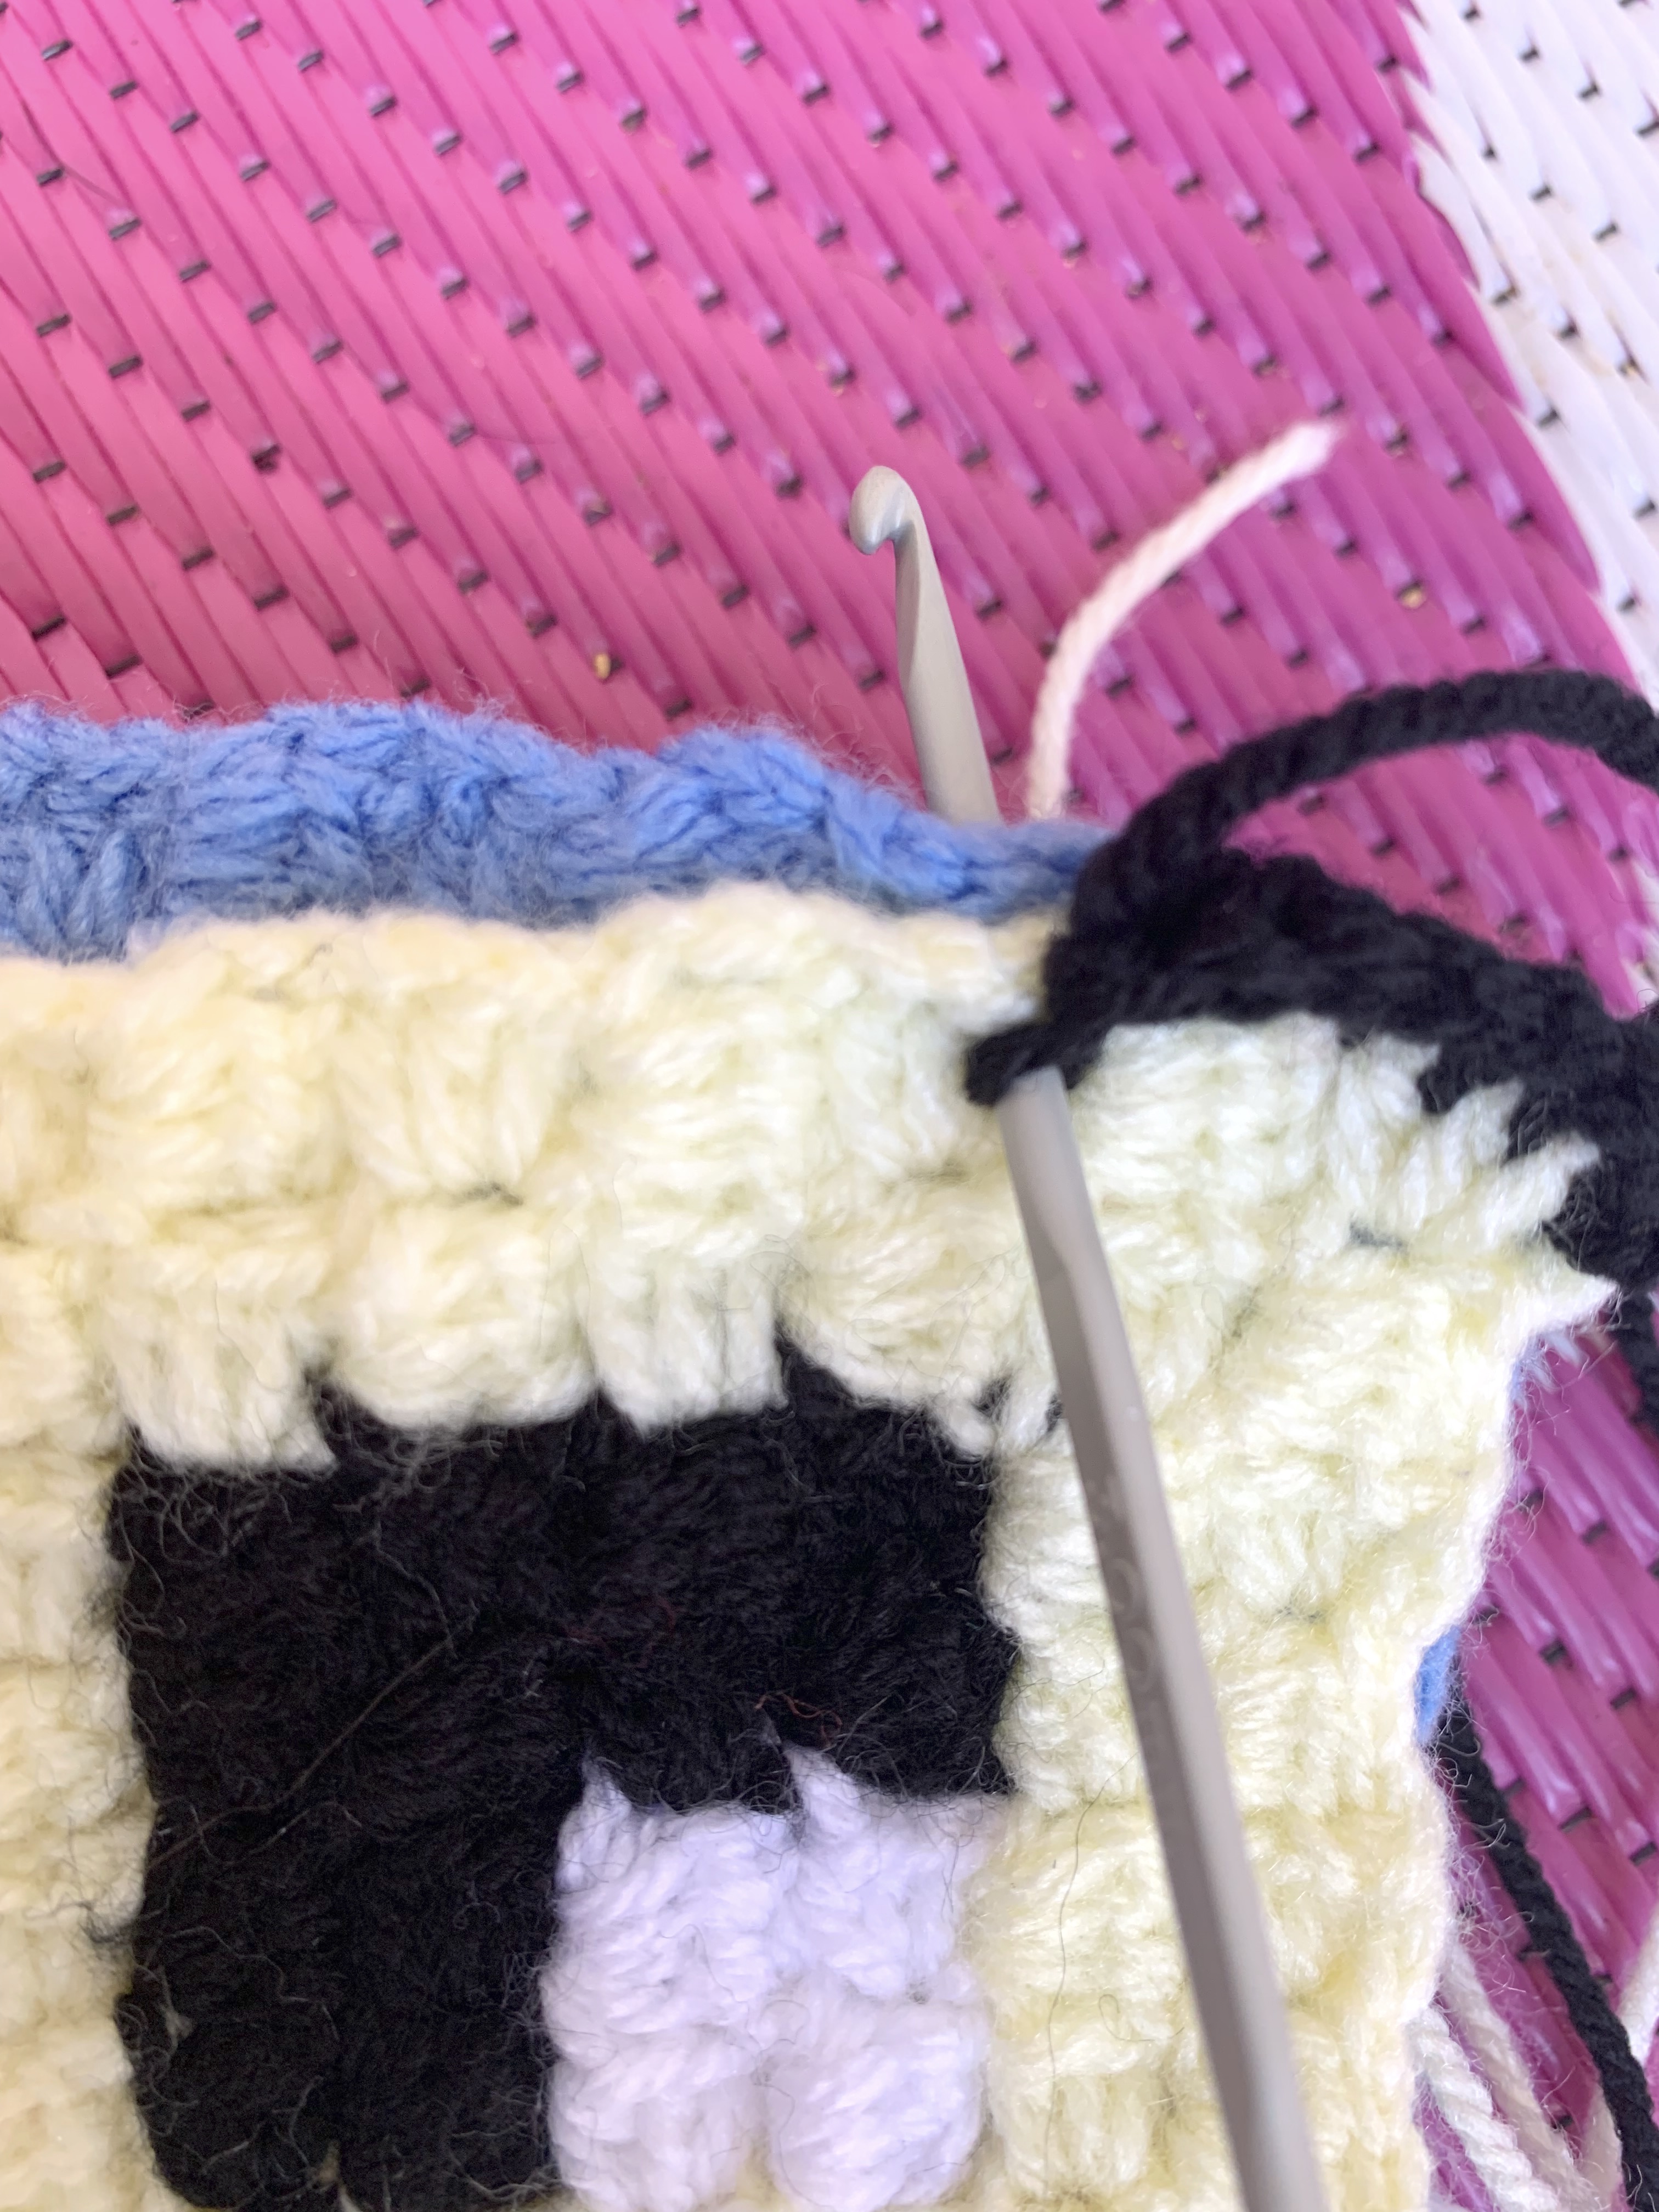
- Take two of the blocks, place wrong sides together and complete sc stitches down the right hand side through both of the pieces side to join:
- To start the join – insert hook into the ch3 gap at the end of the row, pull up loop, ch1 and sc into the same stitch.


-
- To complete the row: complete 3sc stitches into the ch3 gap at the end of the rows and sc stitch into the gaps to the left of the htr(UK)/hdc(US) stitches when 3htr(UK)/hdc(US) are at the ends of the rows.
- Fasten off at the end of the row.


- Repeat to attach the next block.
- Repeat again so you have 4 joined pieces, this will form the top row of the cushion.
- Repeat with the remaining 4 blocks, giving you 2 rows of 4 joined blocks.

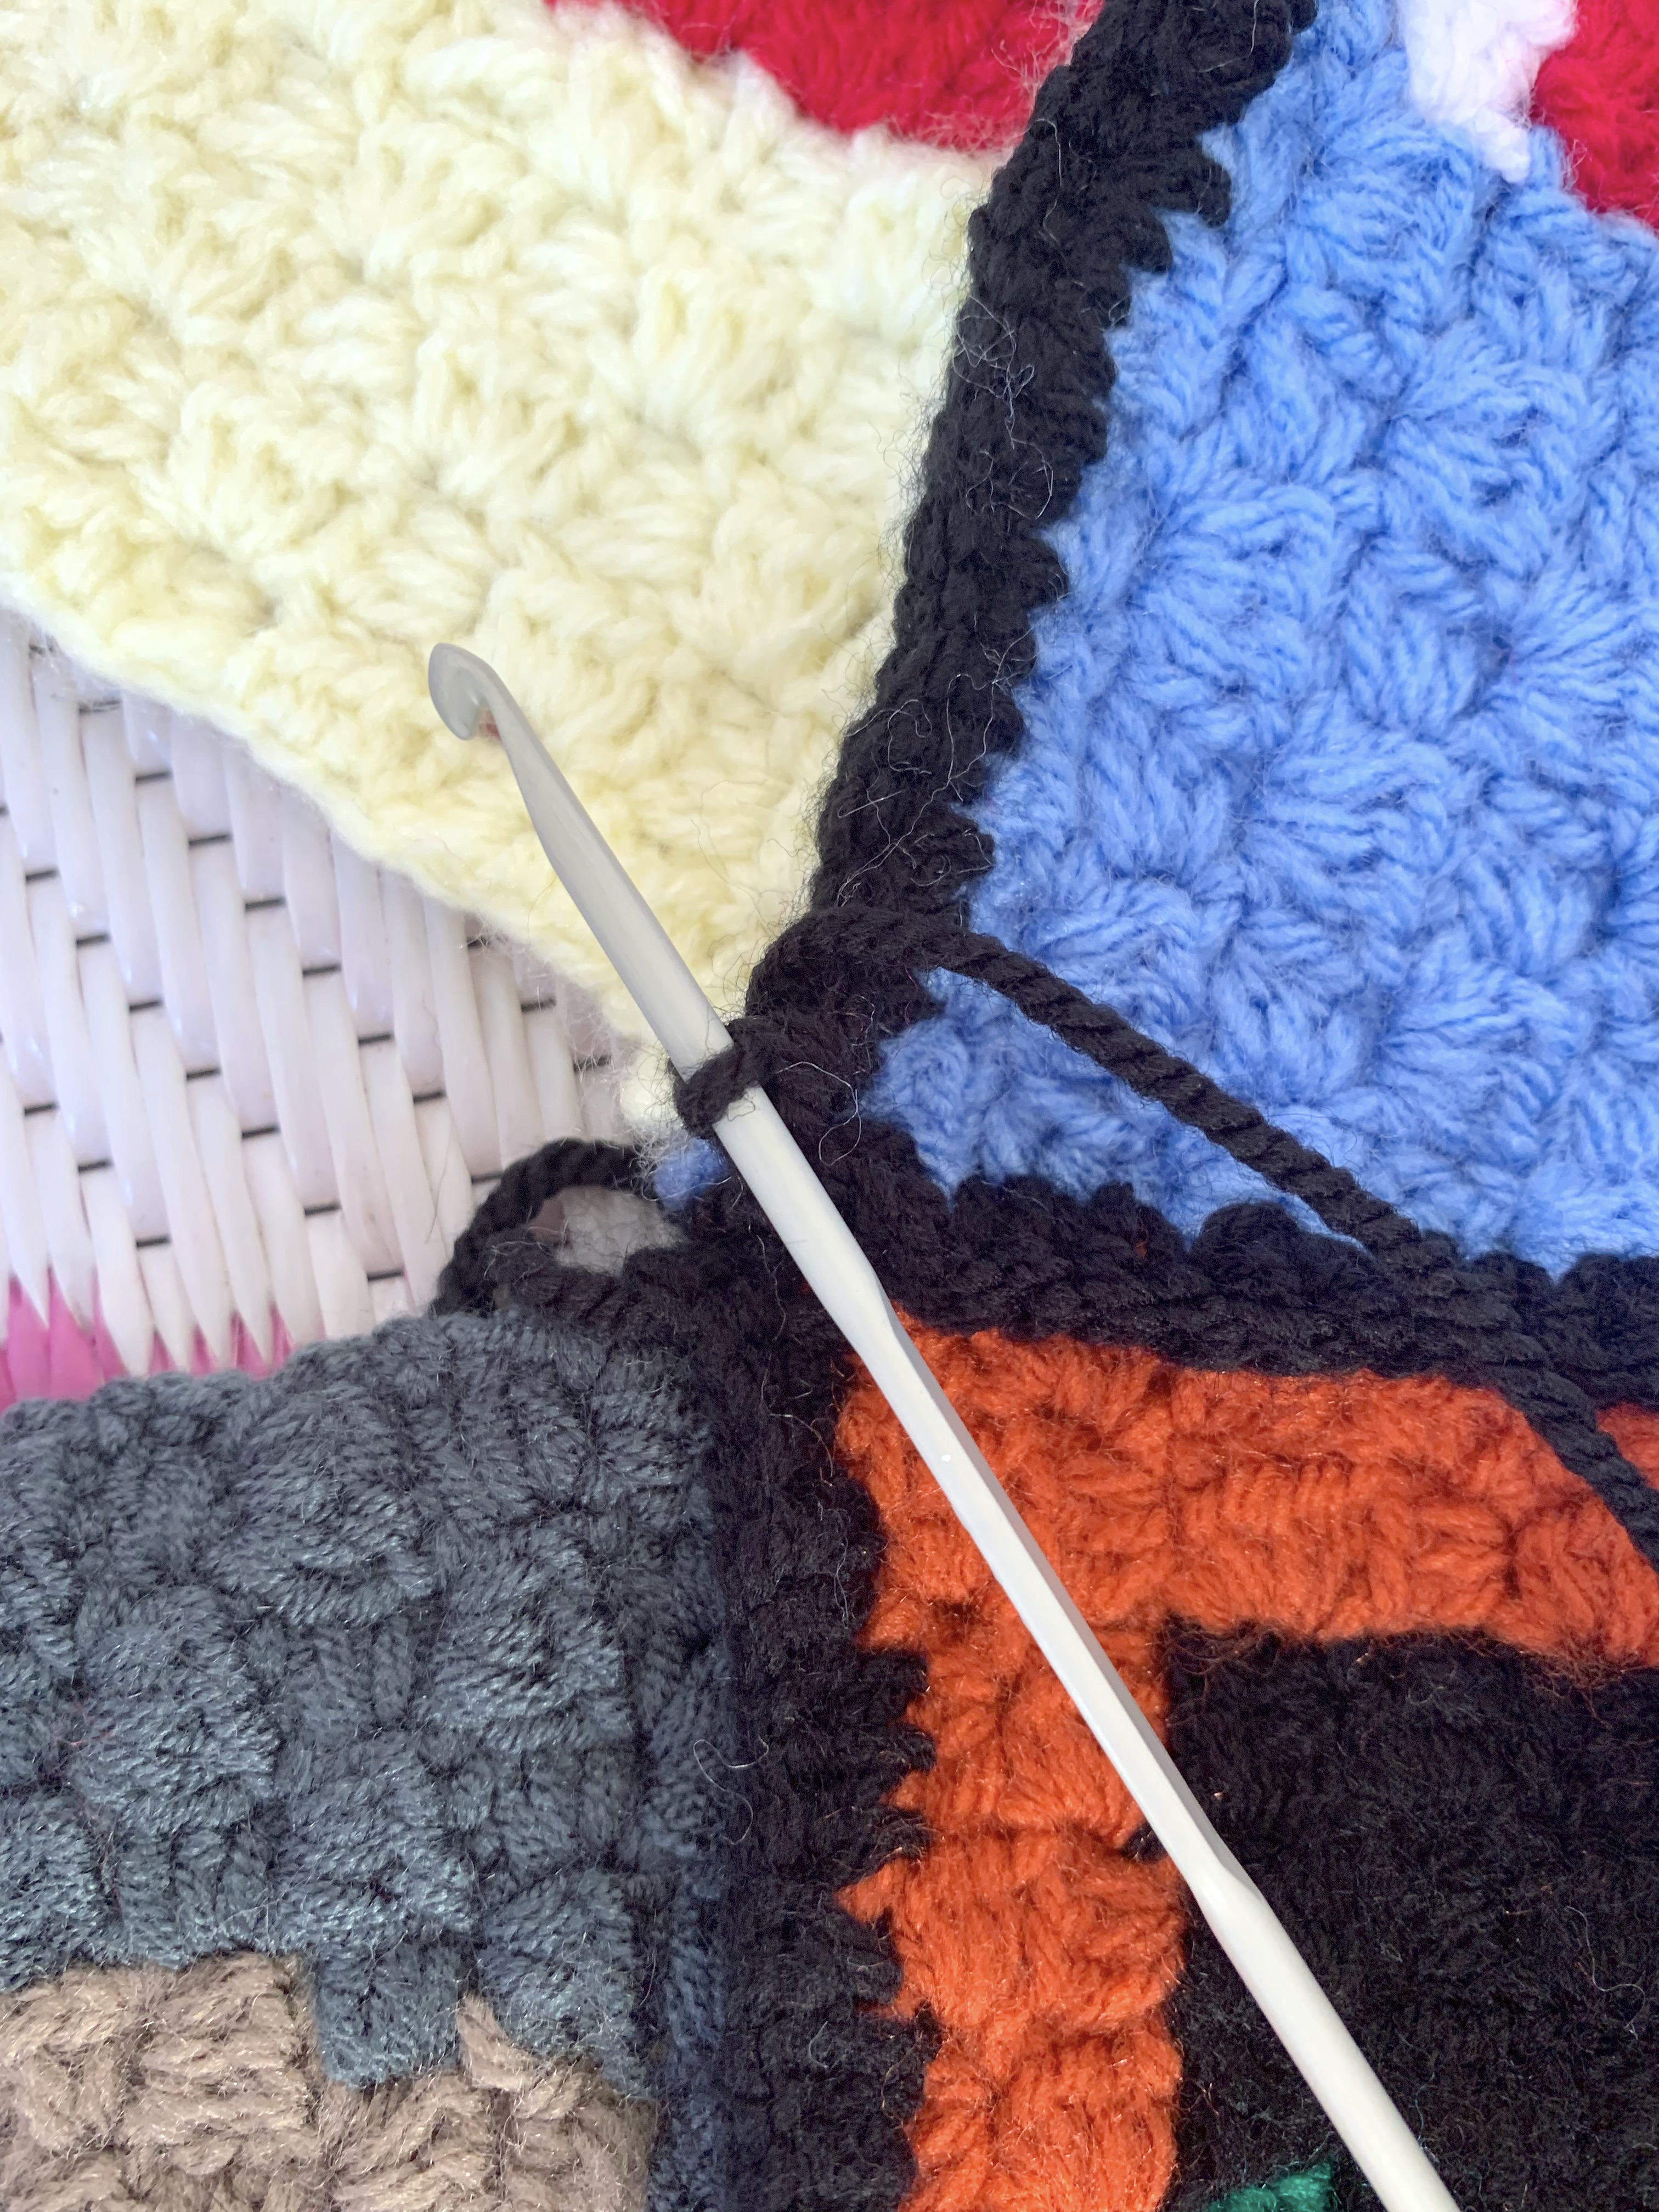
- Take the 2 joined rows and place wrong sides together with the bottom row of the top piece and top row of the bottom piece aligned. sc along to join.
- Complete 3sc stitches into the ch3 gap at the end of the rows and sc stitch into the gaps to the left of the htr(UK)/hdc(US) stitches when 3htr(UK)/hdc(US) are at the ends of the rows.
- When reaching a vertical join complete a ss stitch into the top row vertical join last sc and then complete a ss into the bottom row vertical join first sc then continue along the row.


- Once all blocks are joined fold in half with wrong sides together then complete sc stitches around the side edges to join, place in stuffing before completing sc stitches along the final side edge.
- Complete 3sc stitches into the ch3 gap at the end of the rows and sc stitch into the gaps to the left of the htr(UK)/hdc(US) stitches when 3htr(UK)/hdc(US) are at the ends of the rows.
Pattern For The Complete Minecraft Block Cushion:
As these are not being joined individually I have added in a black boarder around each of the blocks so they stand out. You could use a different colour If you would prefer.
- These blocks use corner to corner crochet with htr(UK)/hdc(US) stitches, and I have a how to guide on corner to corner crochet with htr(UK)/hdc(US) available.

Once the front and back pieces have been completed place wrong sides together and complete sc stitches around the side edges to join. Place in stuffing before completing sc stitches along the final side edge.
- Complete 3sc stitches into the ch3 gap at the end of the rows and sc stitch into the gaps to the left of the htr(UK)/hdc(US) stitches when 3htr(UK)/hdc(US) are at the ends of the row.


Leave a comment