
Pumpkins are a must have at Halloween and I don’t think you could ever have too many of these cute little fabric ones…
Fabric was gifted by The Craft Cotton Company.
Fabric Halloween Pumpkins (With Button And LAce Detail) Tutorial
Materials
- Orange fabric 50×50 cm (18 cm diameter circle, 28 cm diameter).
- Black net fabric 20×20 cm (18cm diameter).
- Sewing thread.
- Pins.
- Toy stuffing.
- Scissors.
- Needle.
- Buttons – black and green, 5 in varying sizes to make a pumpkin stalk and one small button for the base of the pumpkin.
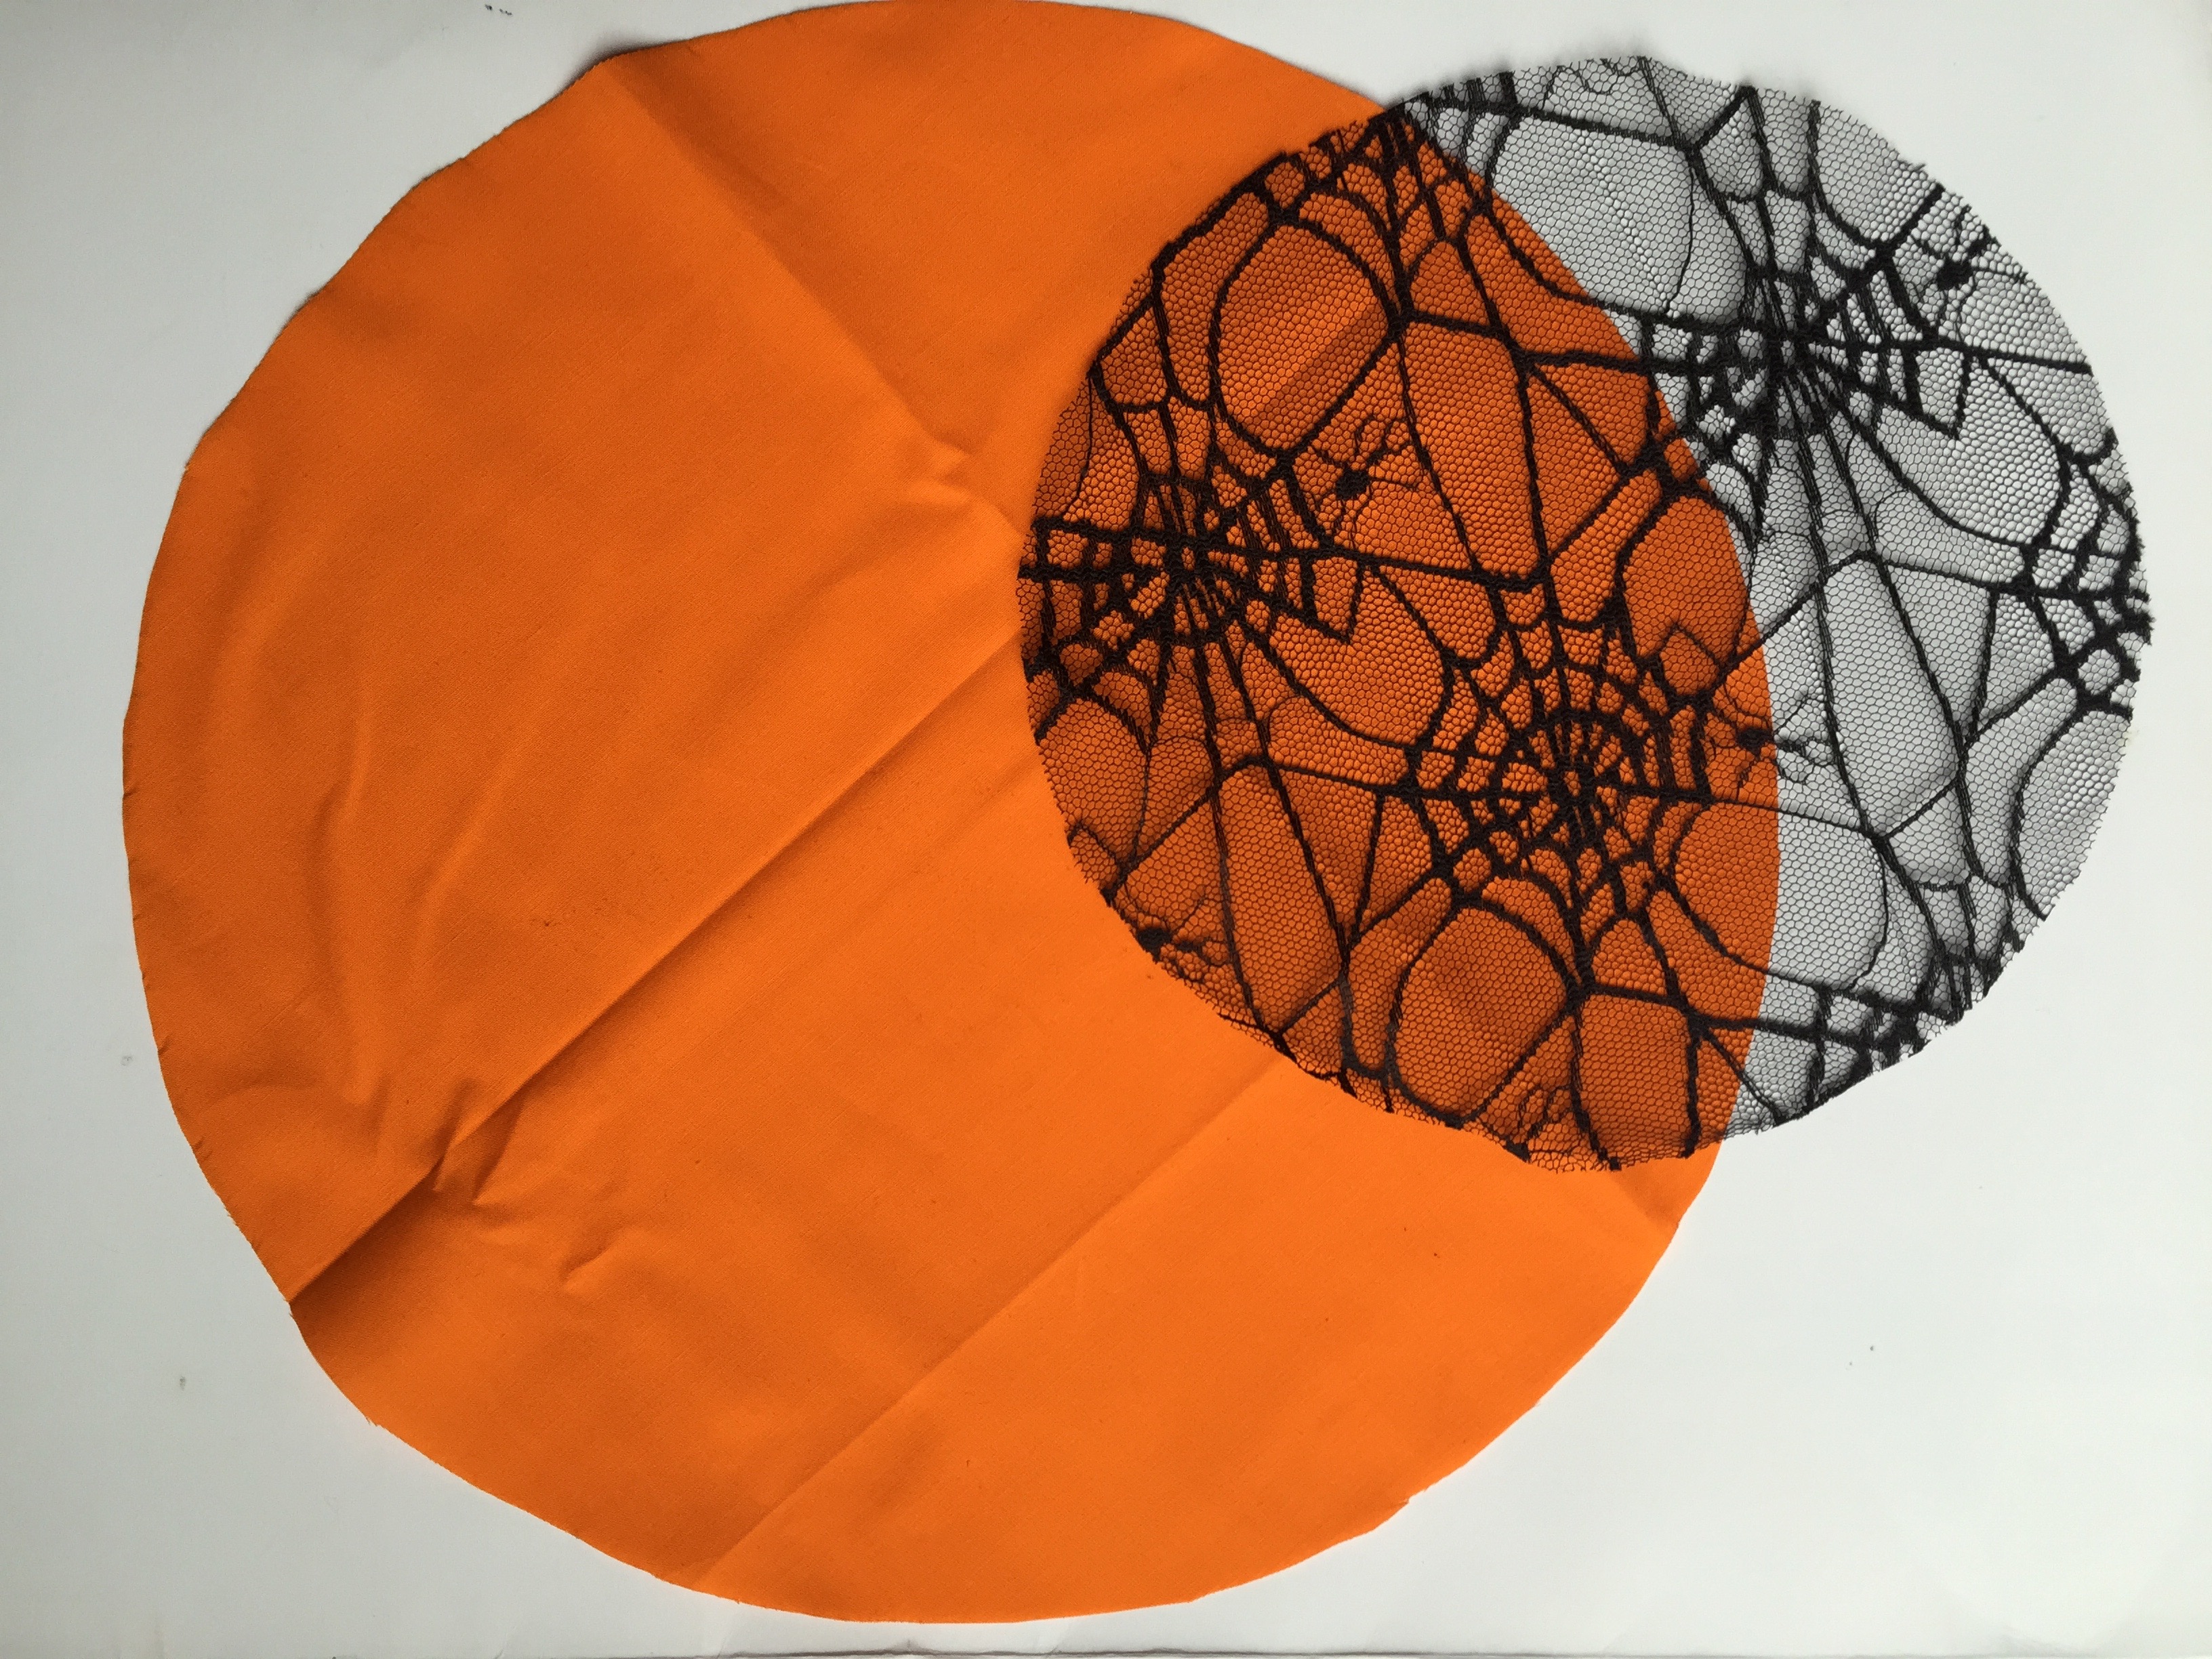
- Cutting out the pumpkin: Cut out a circle in Orange for your pumpkin. This can be any size you choose, I opted for two sizes: 28 cm diameter and 18 cm in diameter.
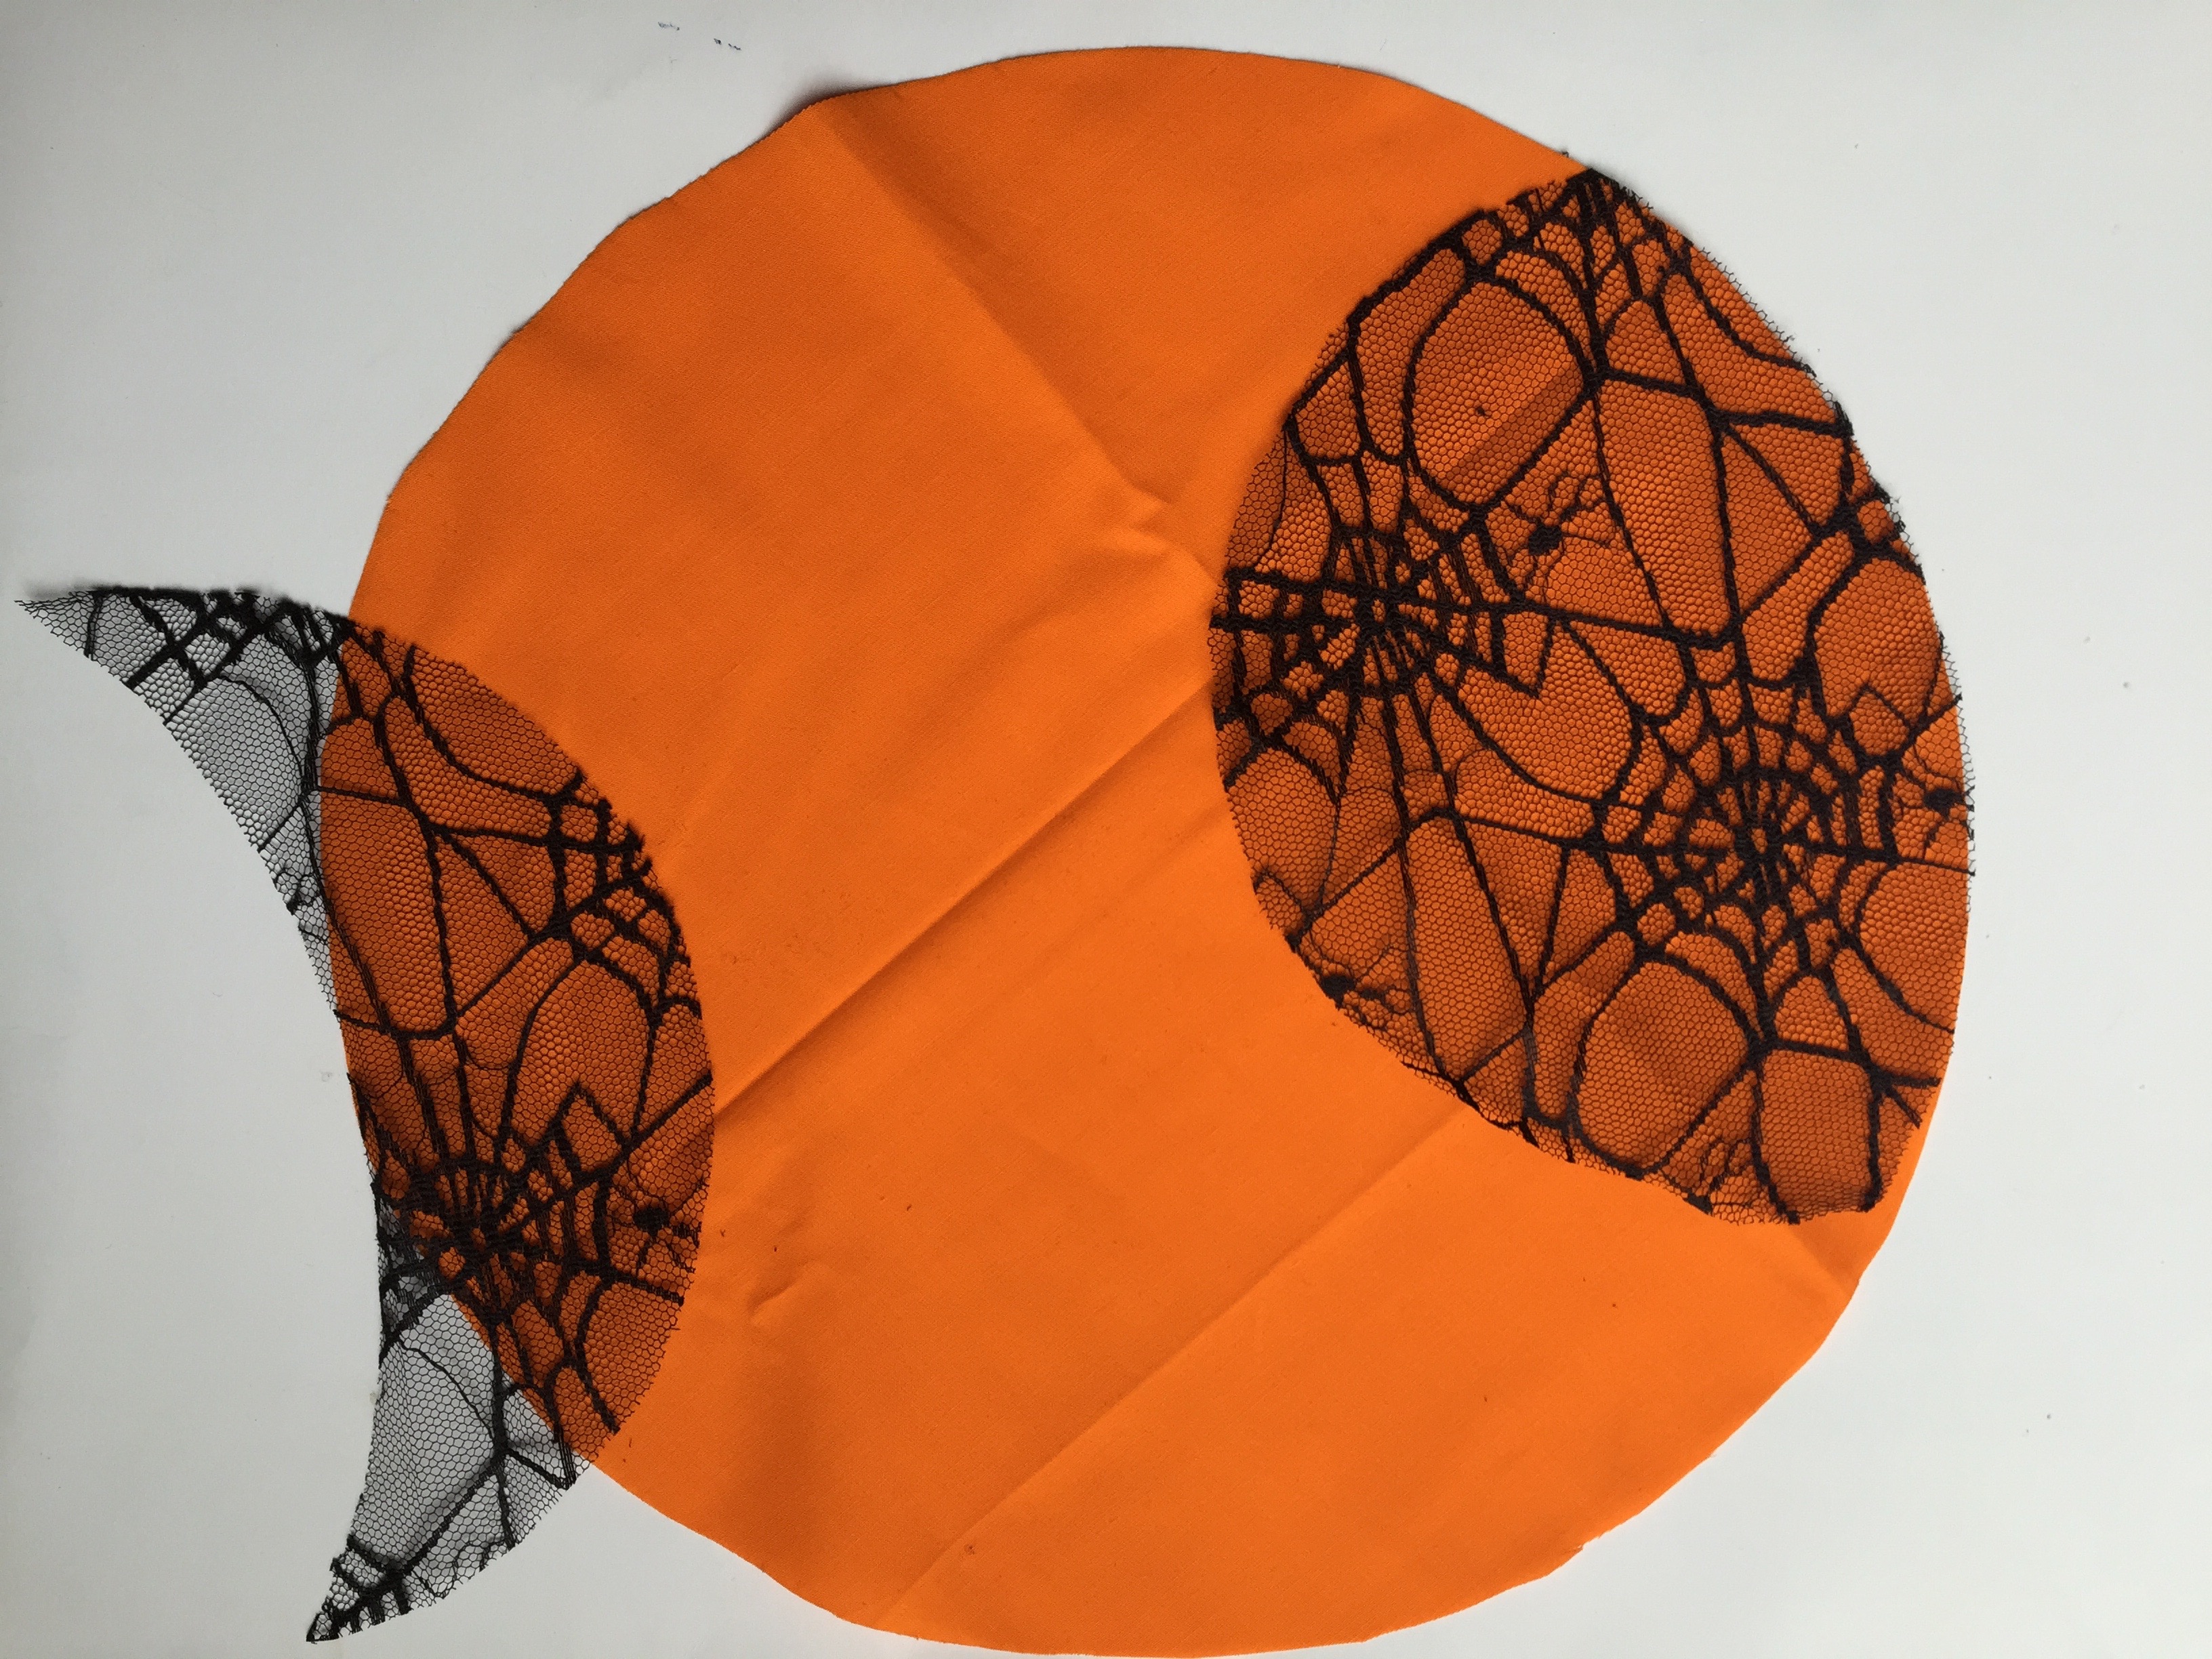
- Adding detail to the pumpkin: To add the net detail (I only added net detail to the larger pumpkin). Cut out a circle of netting fabric 18cm in diameter. Place the net piece onto the pumpkin with half on the pumpkin and half off, pin in place and cut. Take the cut off piece and place it on another part of the pumpkin and cut off the excess and sew around the edge of the net to secure.

- Sewing the pumpkin: Do a tacking stitch the whole way around 1 cm from the outside edge using 2 strands of sewing thread. Tie a knot in the end to start to hold the thread in place but do not fasten off at the end. Put stuffing into the pumpkin and pull the thread from the tacking stitch tight to close. Add more stuffing as it tightens when required. Complete a few stitches to secure the thread.

- Sewing pumpkin edges: Take three strands of black sewing thread and cast on at the top of the pumpkin, then sew into the pumpkin in the middle of the base pulling the needle back up through the middle to the top of the pumpkin, pull the thread so it tightens slightly and make a small stitch to secure. Repeat 4 more times.

- Stack your 5 buttons from smallest to largest sewing each one as you go to secure. Now sew the stack to the top of the pumpkin to cover the hole in the top. Sew the final button in place at the bottom middle of the pumpkin.


Leave a comment