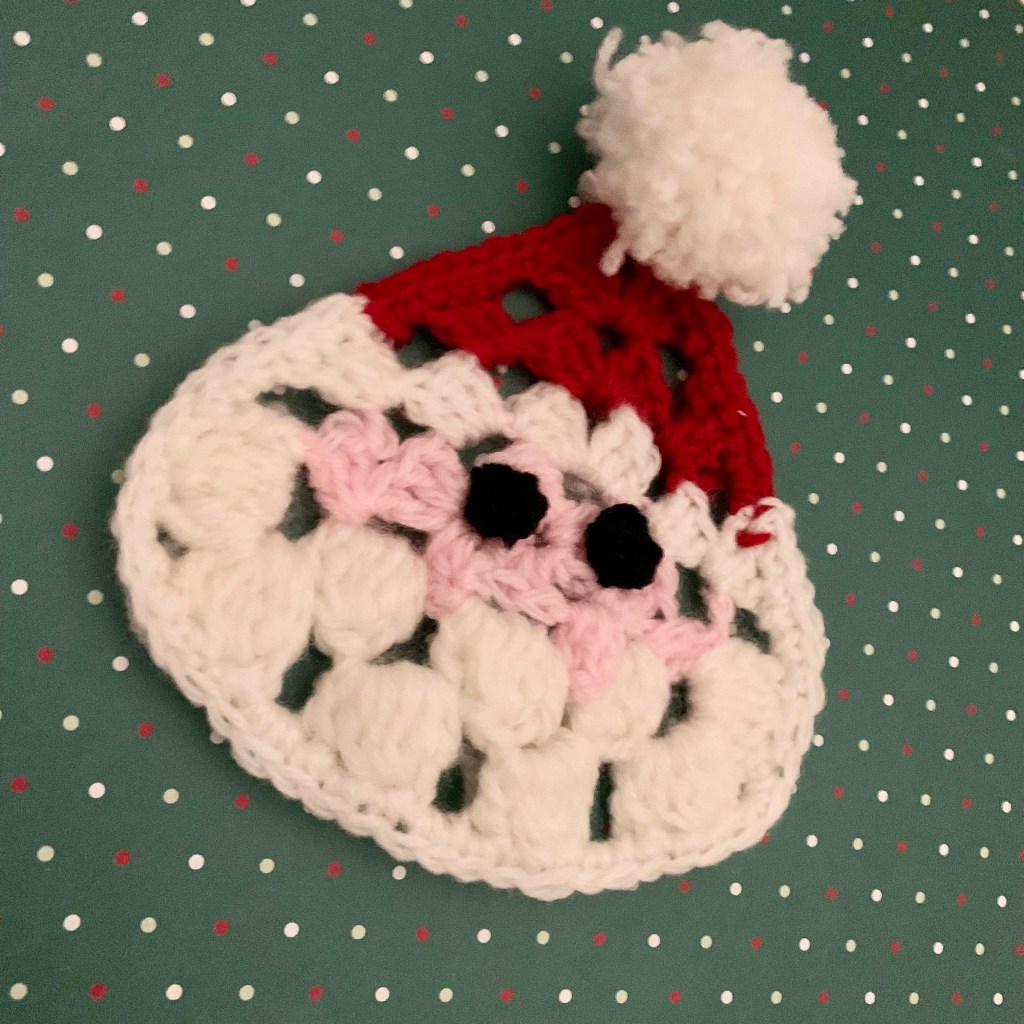
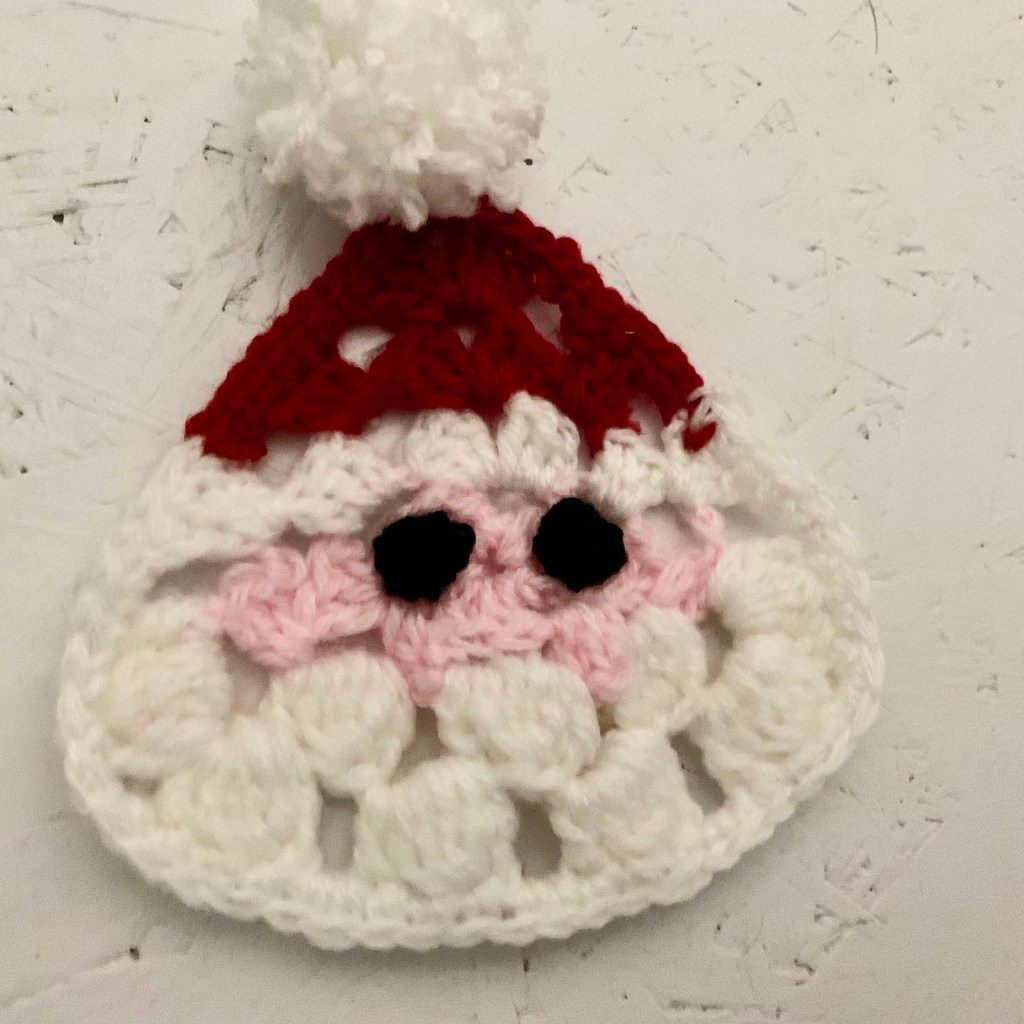
This little Santa decoration is quick and easy to make – perfect for decorating with this Christmas, it would also make a great mini gift or can even add a little extra Christmassy-ness to a gift.
I wanted to combine a Christmas themed make with a Granny square/triangle, and after a drawing out a couple of different ideas it became clear I was focussing towards something using a granny triangle shape. First up to be made was a Santa – complete with beard and pom pom detail, I made sure I added some extra texture to the beard sections so they stood out separately from the hat section!.
This make is perfect for using up leftover wool too.
I still have a few more ideas for these so keep and eye out for a couple more of these triangle decorations over the coming weeks!.
Crochet Granny Triangle Christmas Santa Decoration/Mat Instructions
Materials
- 4.5mm crochet hook.
- Wool, small amounts (around 25g) of:
- Pink.
- White.
- Black.
- 3.5cm pom pom maker/two pieces of card with a 3.5cm diameter.
Notes:
- Push bobbles out to the front after completion.
- Change wool colour on the last yo of the previous stitch.
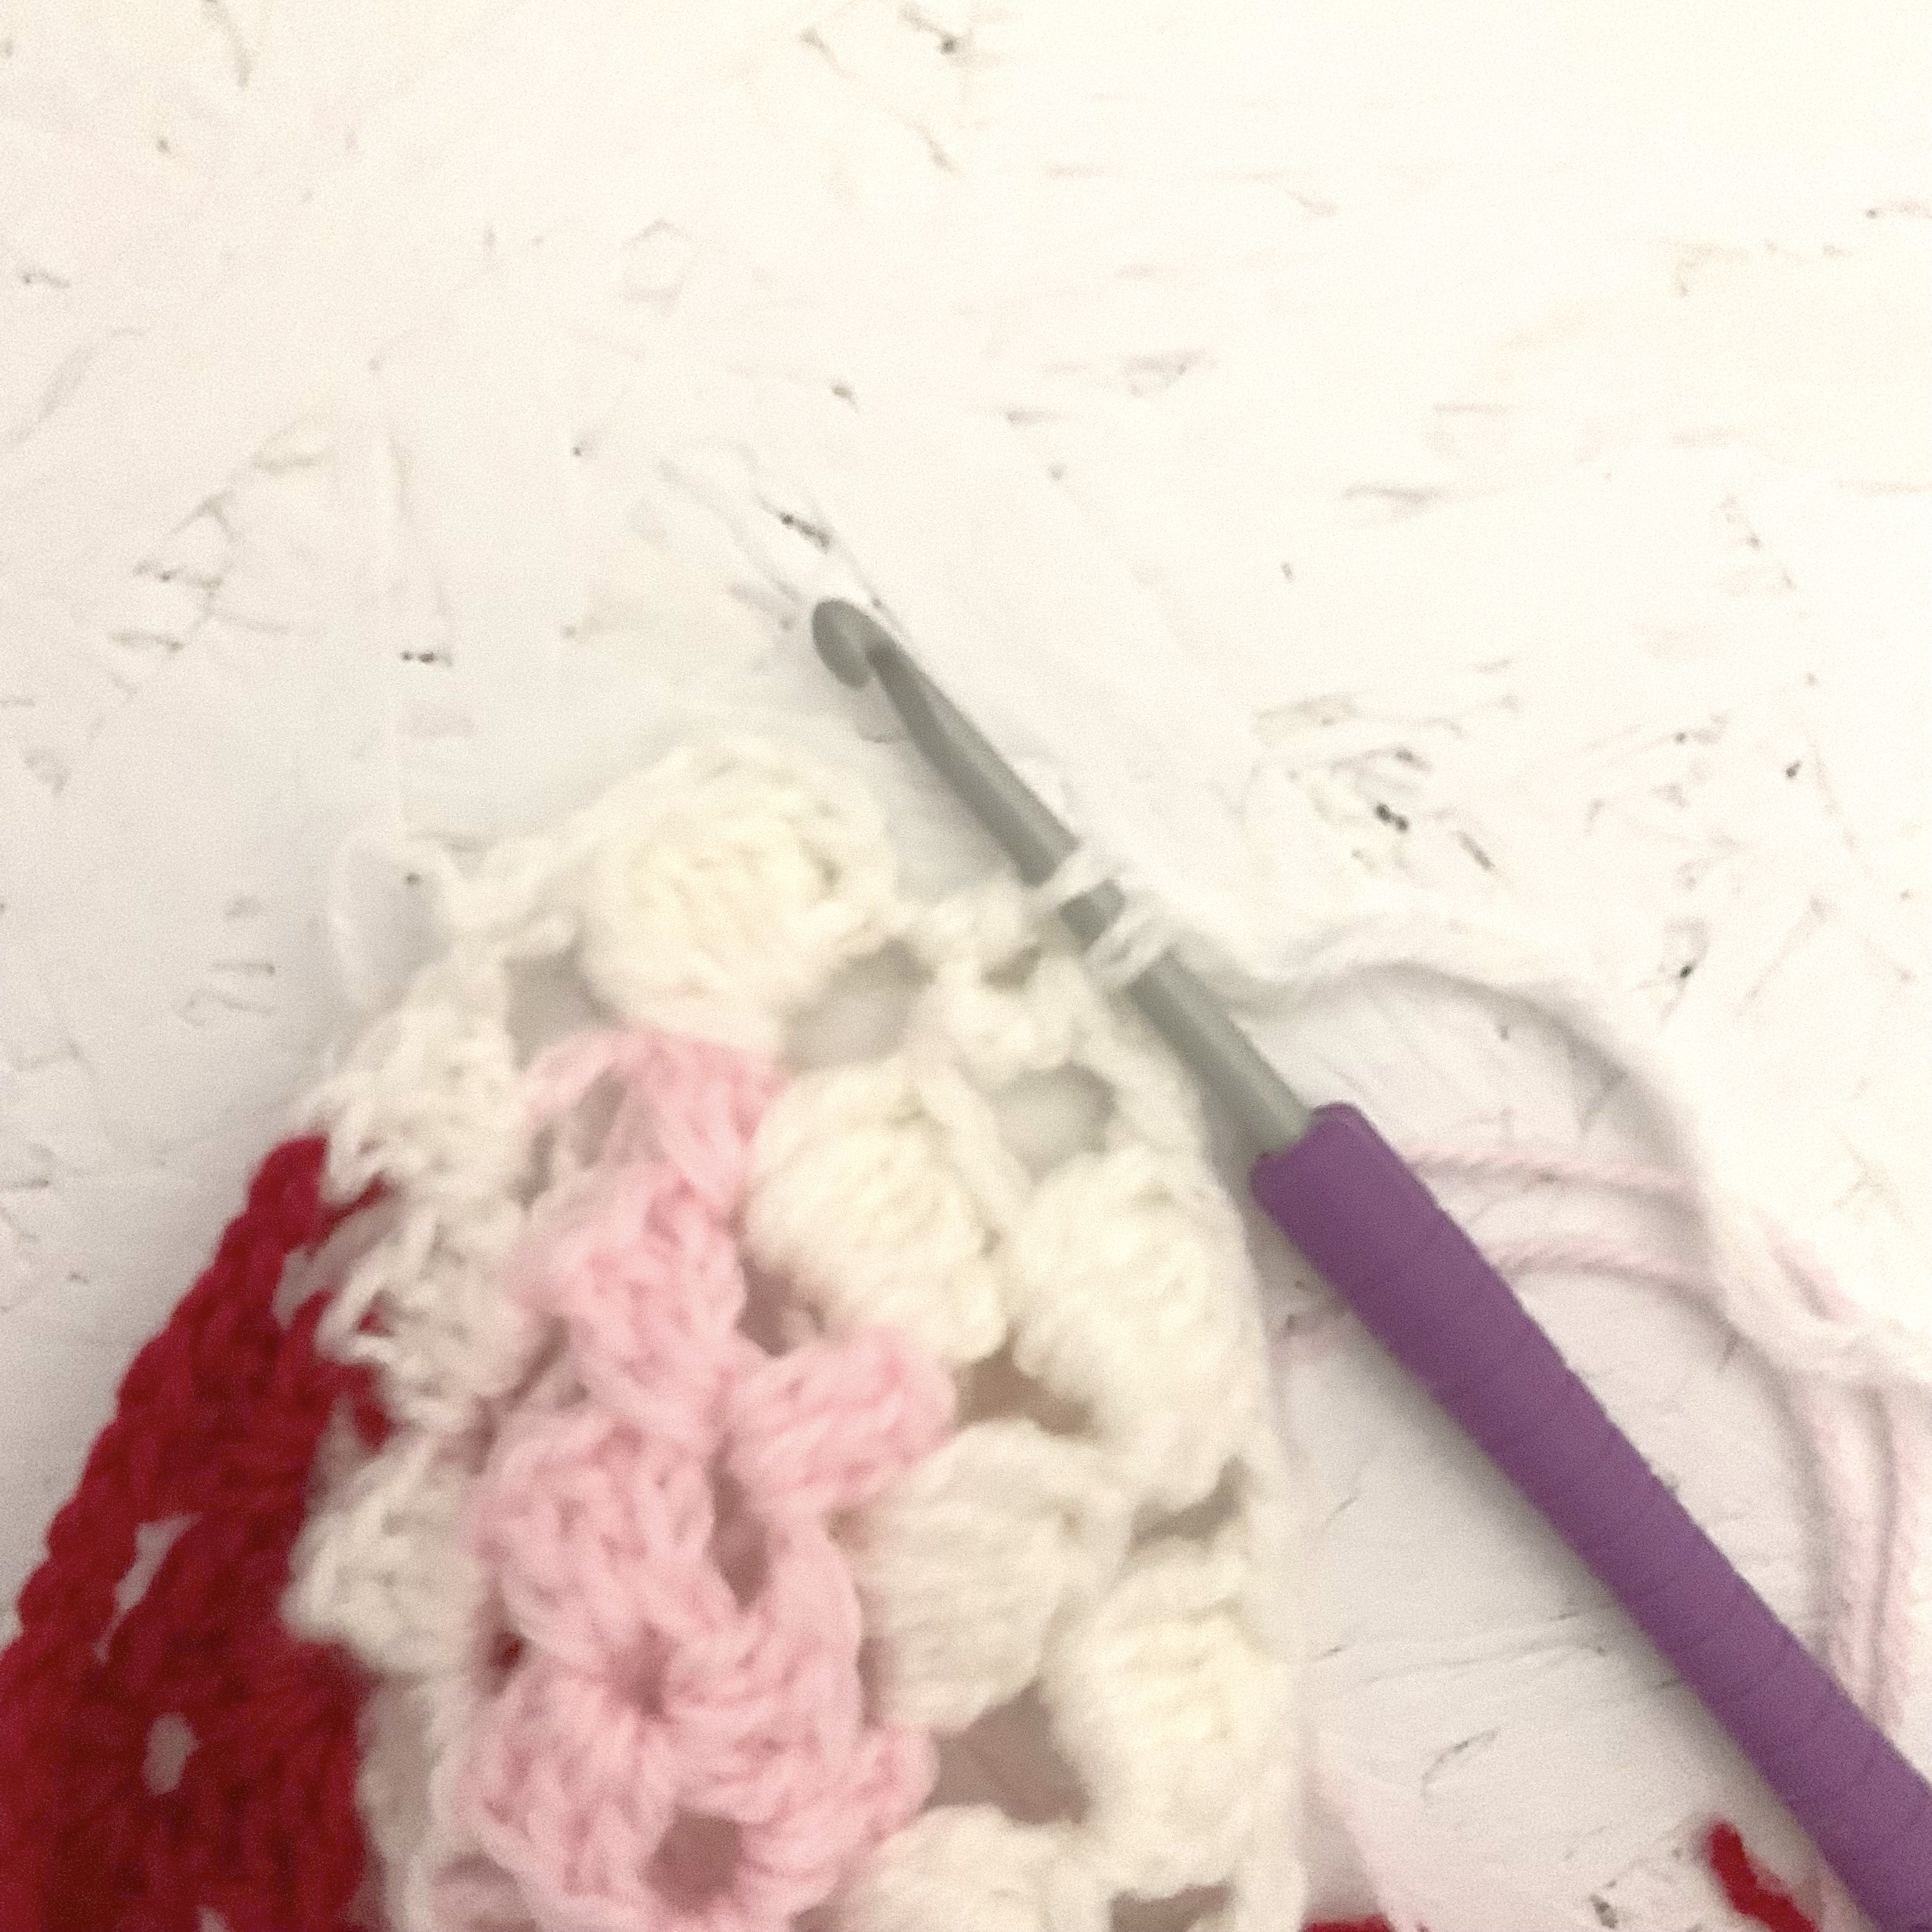
Bobble stitch (bob):
To make the bobble stitch (bob):
(yo, insert hook into ch2 gap, yo, pull up loop, yo, pull through 2 loops – picture 1) 4 times (picture 2), yo then pull through all loops on hook (picture 3).


Making the Christmas Santa decoration
Main decoration:
Starting in pink:
ch4, ss into sc at start of row to make a round.
Round 1: Into round: ch3 (counts at a stitch) 2tr/dc, [ch2, 3tr/dc] into next ch2 gap twice, ch2, ss into top of ch3 at start of round.
Round 2: ch3 (counts as a stitch) 2tr/dc into ch2 gap, ch2, change to white [3tr/dc, ch2, 3tr] in next ch2 gap, change to pink, ch2, [3tr/dc, ch2, 3tr/dc] into next ch2 gap, ch2, 3tr/dc into next ch2 gap, ss into top of ch3 at start of round.
Round 3: ch3 (counts as a stitch) 2tr/dc into ch2 gap, ch2, change to white, 3tr/dc into next ch2 gap, change to red, ch2, [3tr/dc, ch2, 3tr/dc] into next ch2 gap, ch2, change to white, 3tr/dc into next ch2 gap, change to pink, ch2, [3tr/dc, change to 2 strands white, ch2, tr/dc, bob, tr/dc] into next ch2 gap, [ch2, tr/dc, bob, tr/dc] into next ch2 gap twice, ch2, ss into top of ch3 at start of round.
Round 4: ch3 (counts as a stitch) [bob, tr/dc] into ch2 gap, change to 1 strand of white, ch2, 3tr/dc into next ch2 gap, change to red, ch2, 3tr/dc into next ch2 gap, ch2, [3tr/dc, ch2, 3tr/dc] into next ch2 gap, ch2, 3tr/dc into next ch2 gap, ch2, change to white, 3tr/dc into next ch2 gap, ch2, change to 2 strands of white, [tr/dc, bob, tr, ch2, tr/dc, bob, tr/dc] into next ch2 gap, [ch2, tr/dc, bob, tr/dc] into next ch2 gap three times, ch2, ss into top of ch3 at start of round.
Round 5: ch1 (counts as a stitch) sc into ch2 gap, sc around the edge – changing colours when needed so the sc colour matches the previous round colour, placing an sc into each tr/dc and 2sc into the ch2 gaps, ss into top of ch1 at start of round.
Fasten off.
Eyes:
Black wool:
Make a magic ring, ch1, 4sc into ring.
Fasten off, leaving long thread to attach.
Sew the eyes onto the decorations.
Pom pom:
Make a pom pom using white wool, then attach to the point at the top of the santa hat.

Leave a comment