Easter is rapidly approaching which means I really need to get a move on and get some more Easter gifts made! I have got a few completed so far but will be running out of time soon.
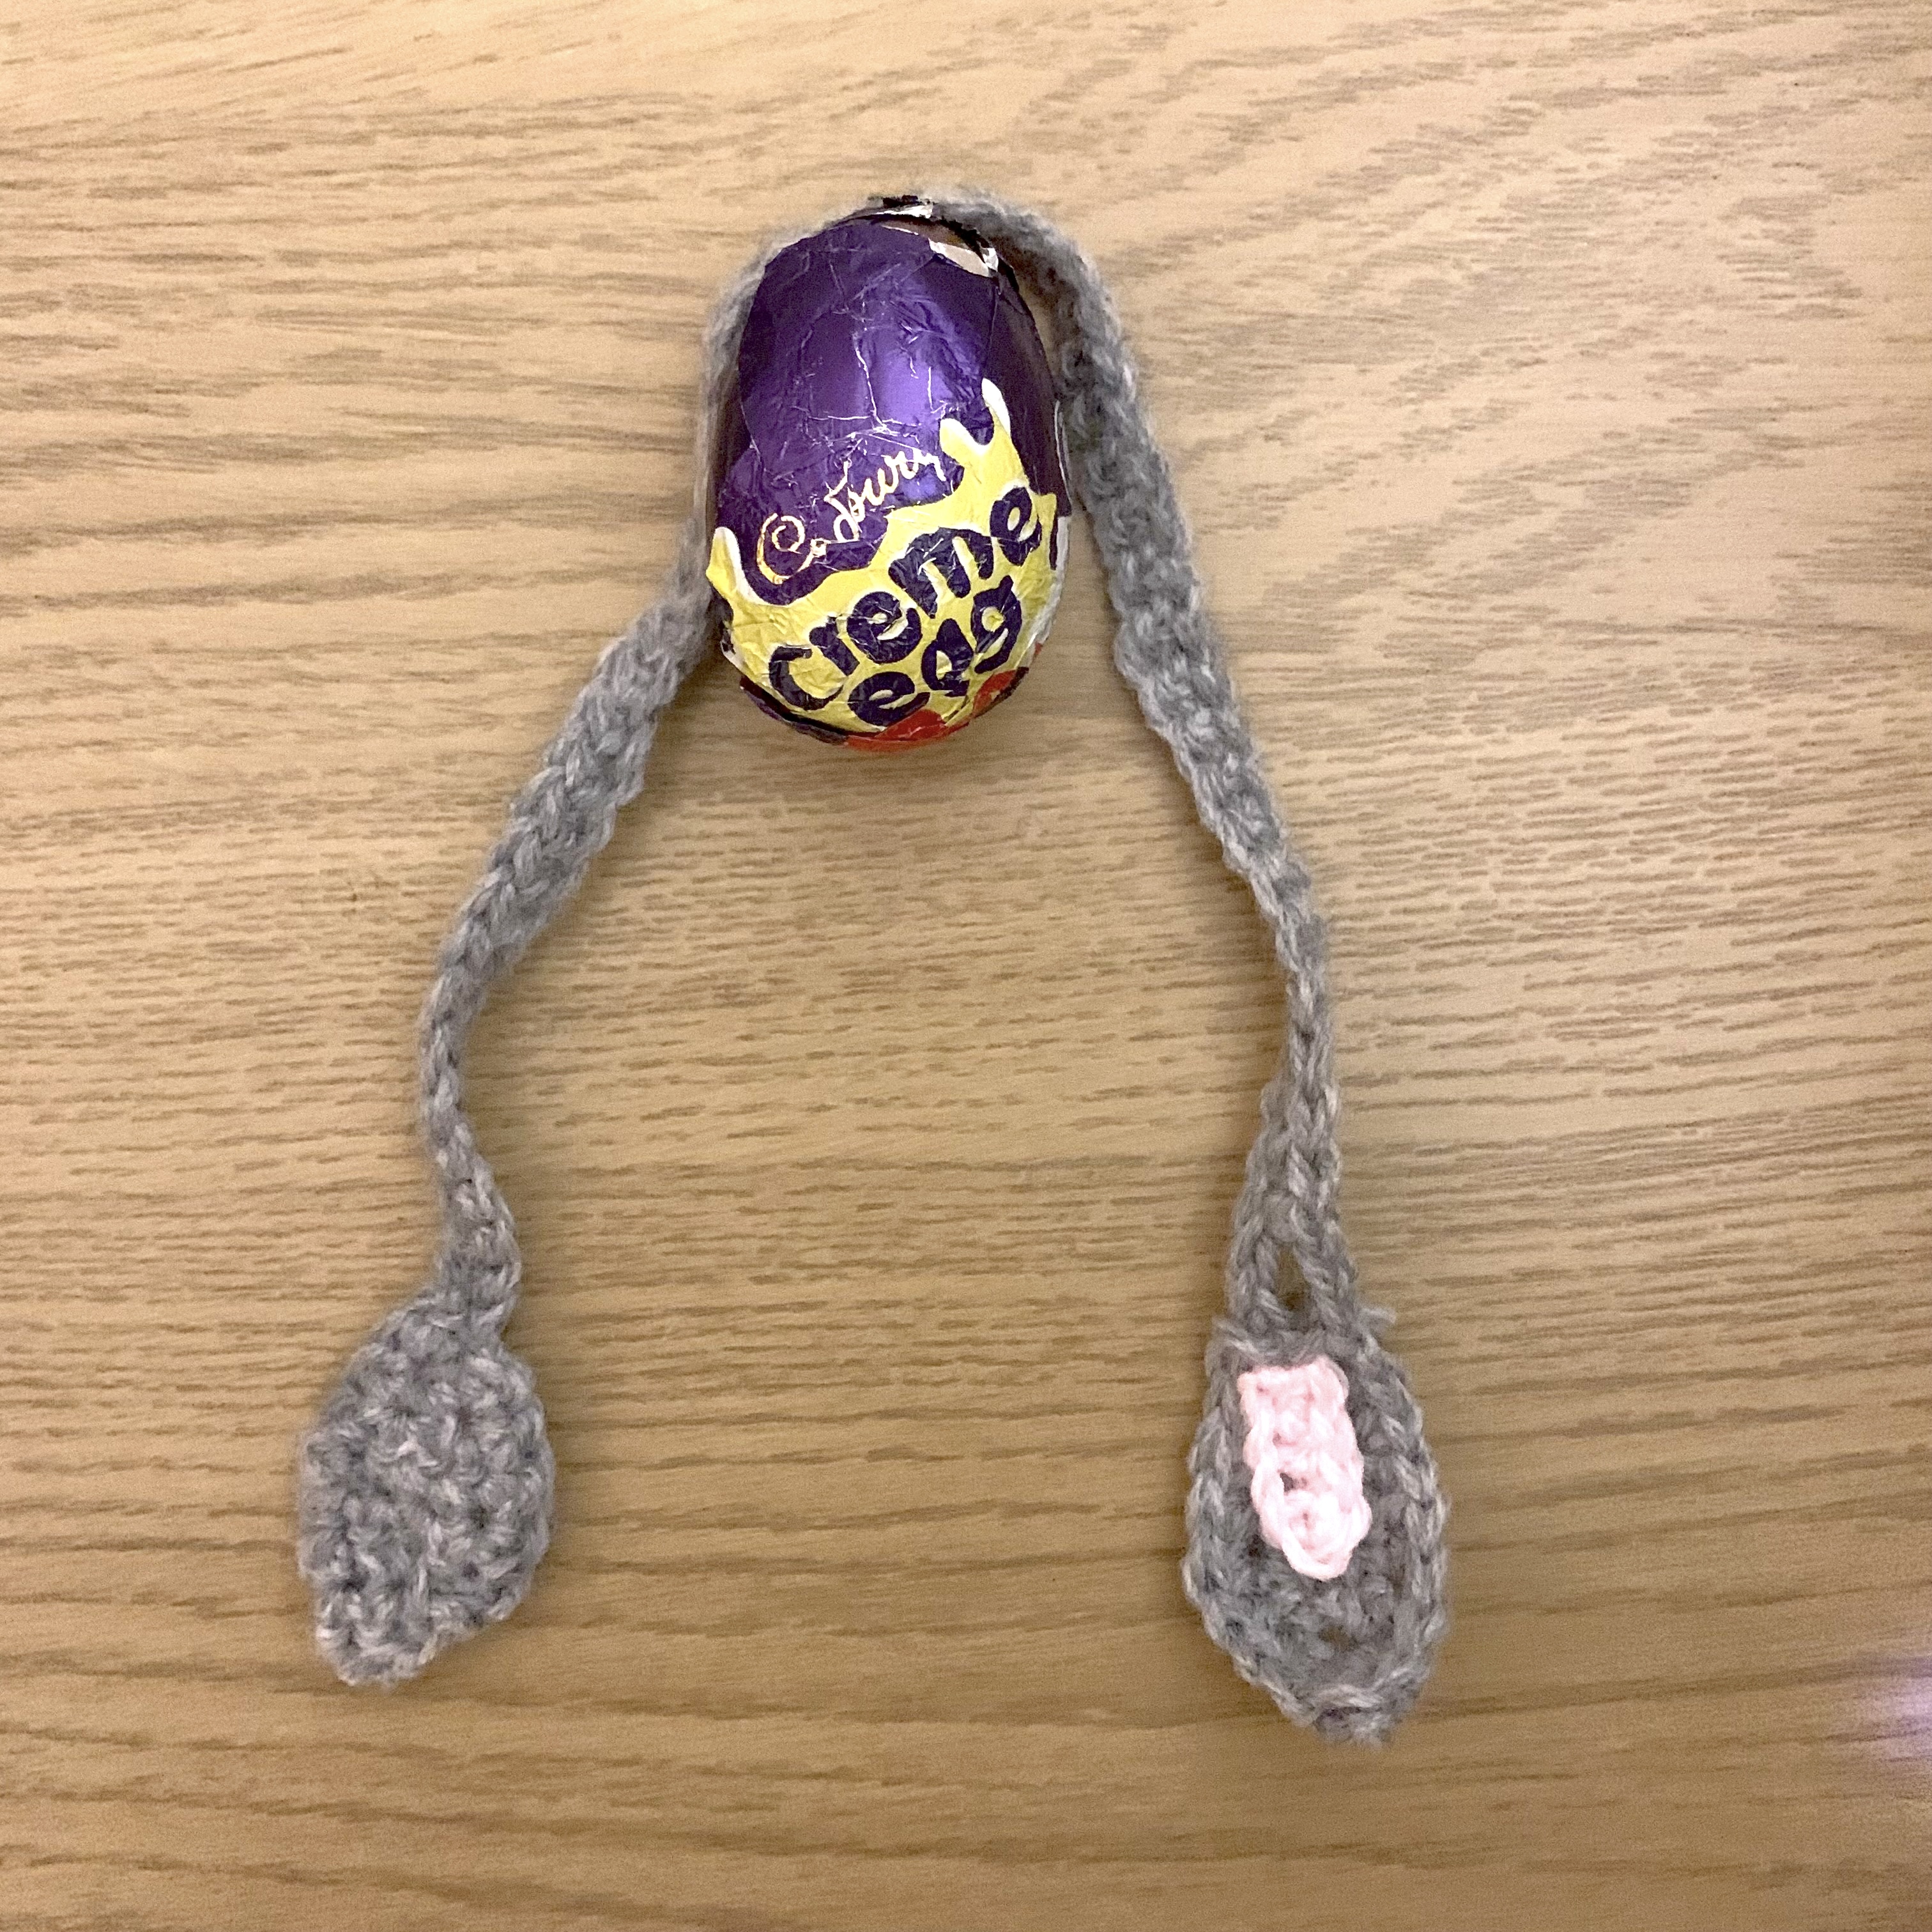
The first Easter crochet makes I’ve completed this year are some crochet Easter rabbit creme egg covers/holders, these are perfect for gifting little eggs with and can be made in any colours you like – great for personalising for its recipient. I used crochet feet for these but you can make them out of felt if you prefer.

Crochet Easter Make Patterns:
- For more Easter themed crochet patterns including crochet Easter rabbit bunting (and an egg version), rabbit napkin holders, Easter rabbit gifts, and other egg covers check out my crochet easter makes section.


Easter Sewing Makes:
- If you want some sewing Easter makes to go with your crochet easter makes including Easter rabbit bean bags, an Easter egg basket, and chick themed drawstring bags check out my Easter sewing makes section.


Crochet Easter Rabbit Creme Egg Cover/Holder Pattern
Materials
- 50g DK wool in light or dark grey – you could also make multicoloured rabbits too!.
- Small amount of pink DK wool to make the inner ear details.
- Small amount of white wool to make the tail.
- 4mm crochet hook.
- Small strip of card 1cm wide.
If you want to use felt for the feet instead of having crochet ones you will need some light or dark grey felt big enough to cut out 2 feet.
Crochet Easter Rabbit Creme Egg Cover/Holder Pattern
Making Crochet Easter Rabbit Band:
Using grey wool and a 4mm hook:
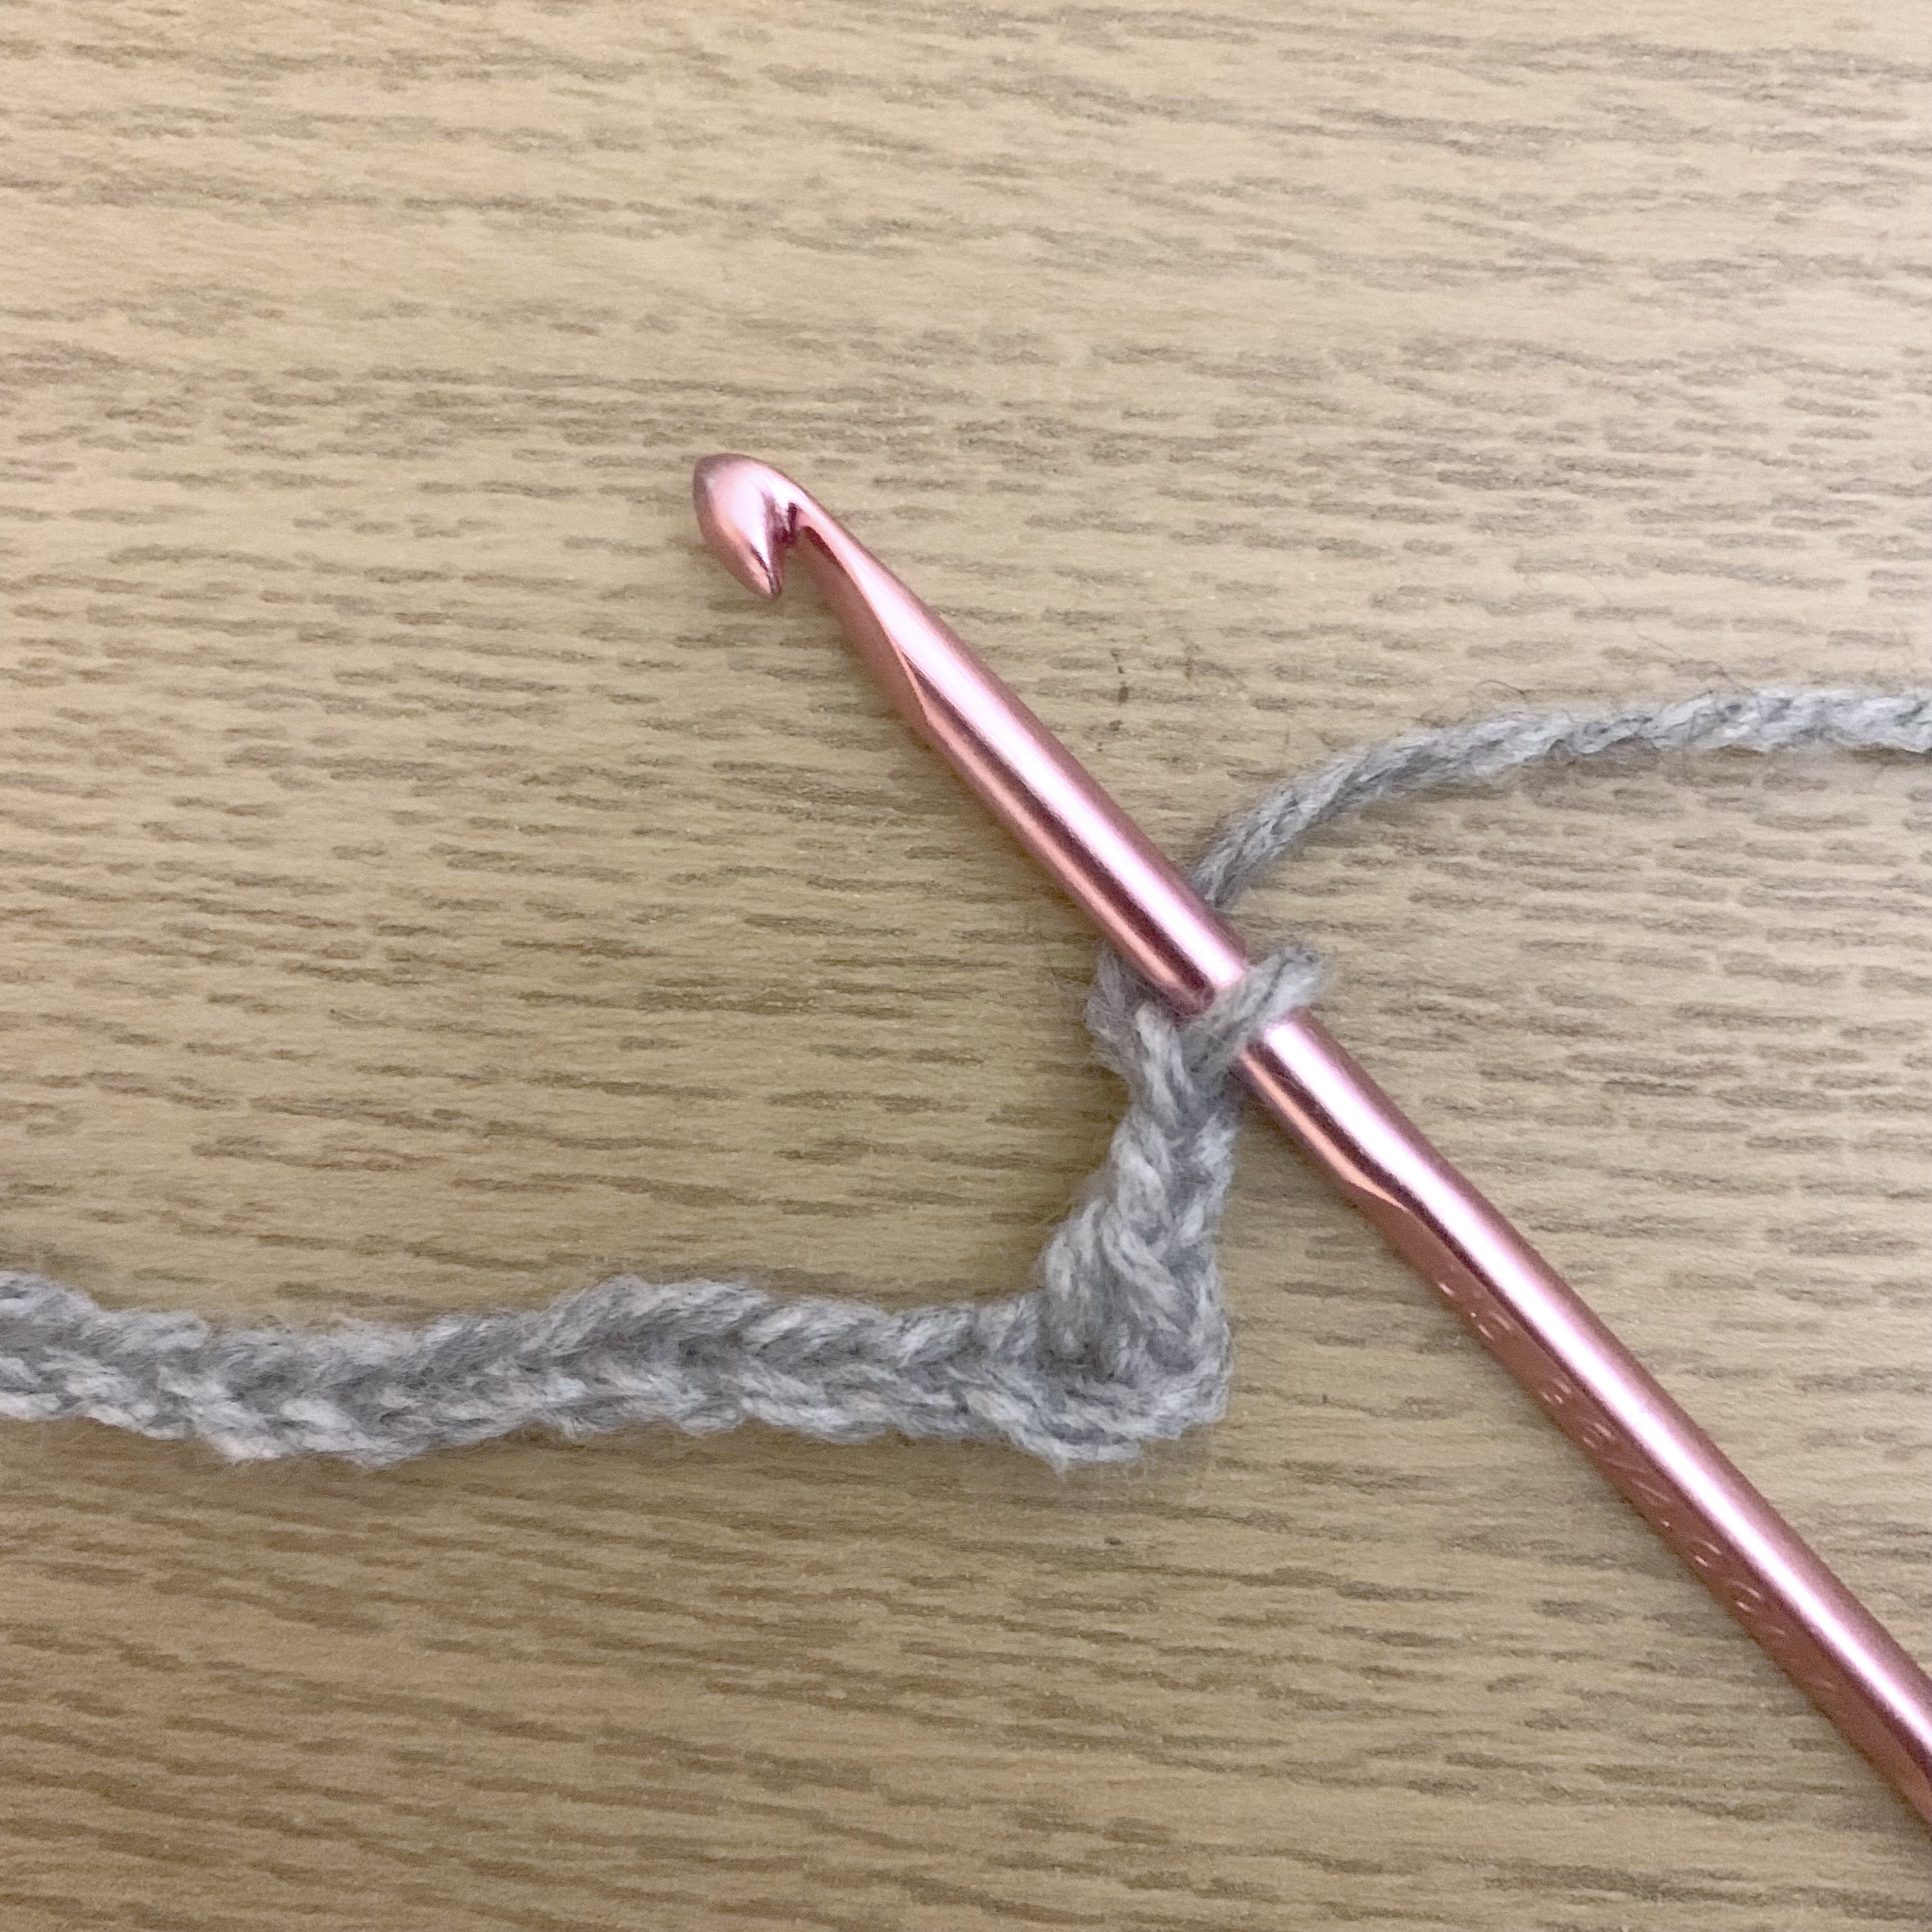
ch51.
Row 1: sc into 2nd ch from hook, ch2, skip 2, sc along rest of the row.


Forming ear 1:
Then without turning, work 2sc into the end of the row.
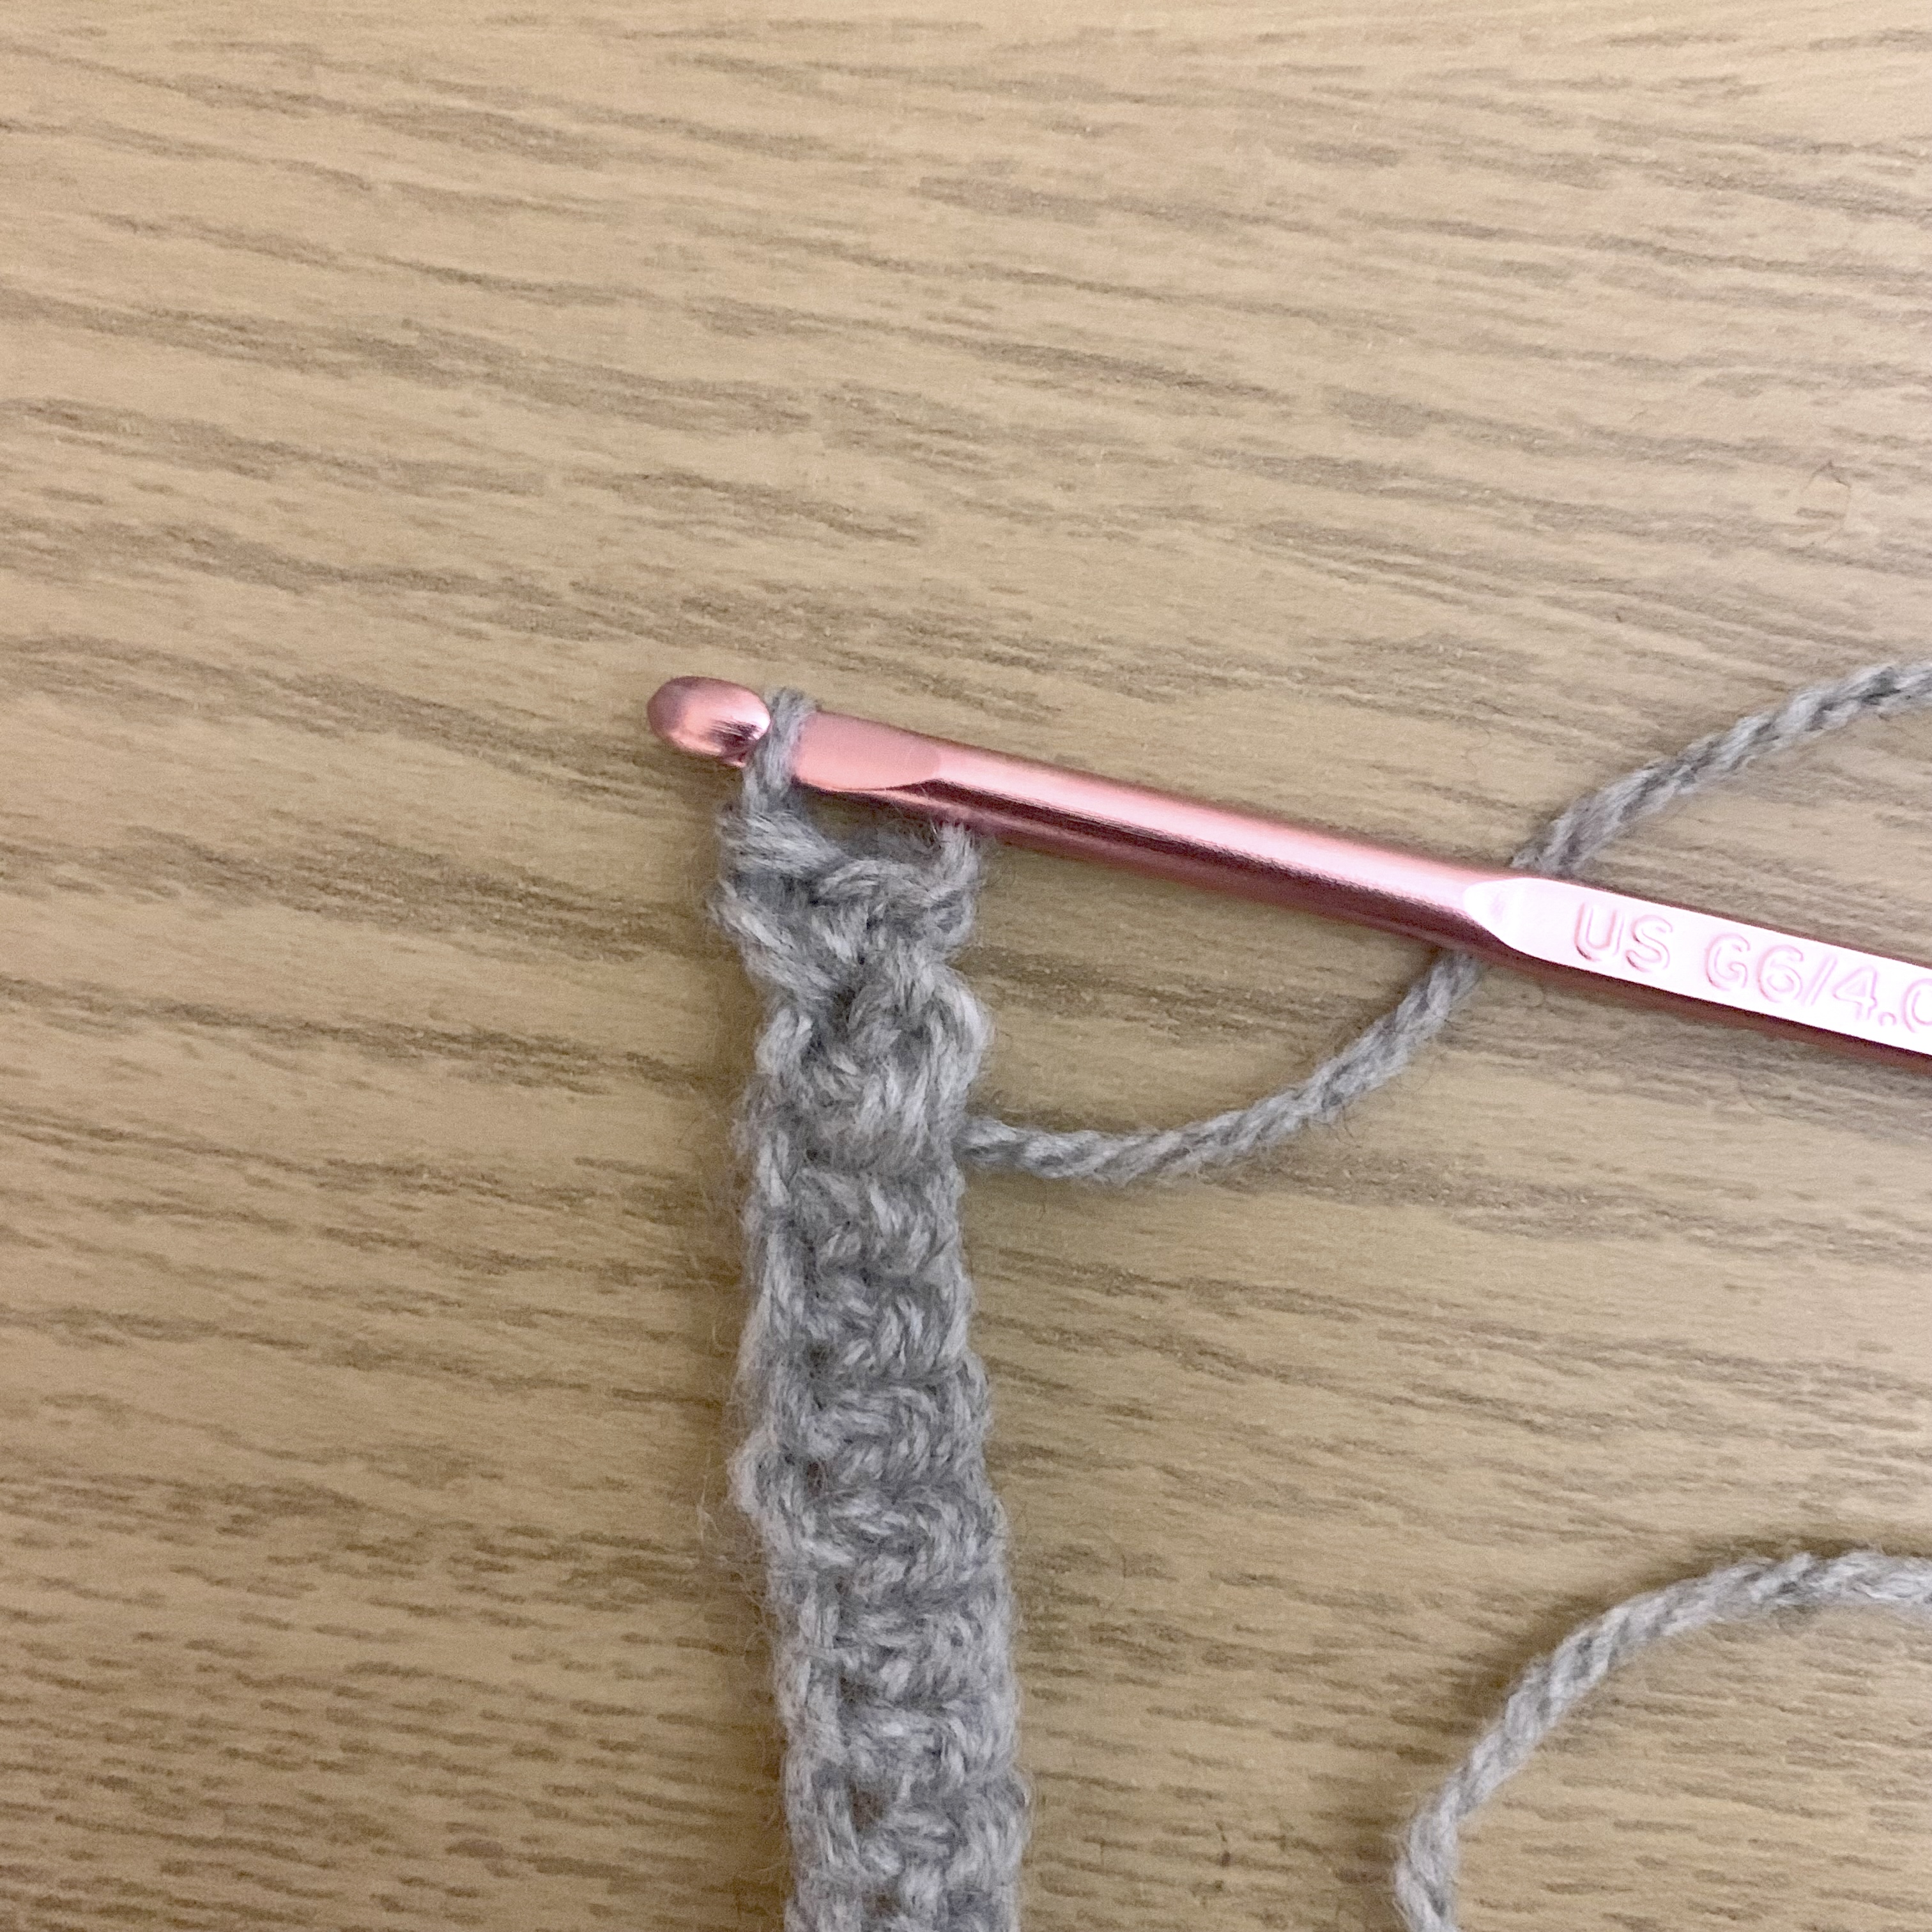
Row 1: ch1 (doesn’t count as a stitch) 2sc (2).
Row 2: ch1 (doesn’t count as a stitch) 2sc into next stitch twice (4).
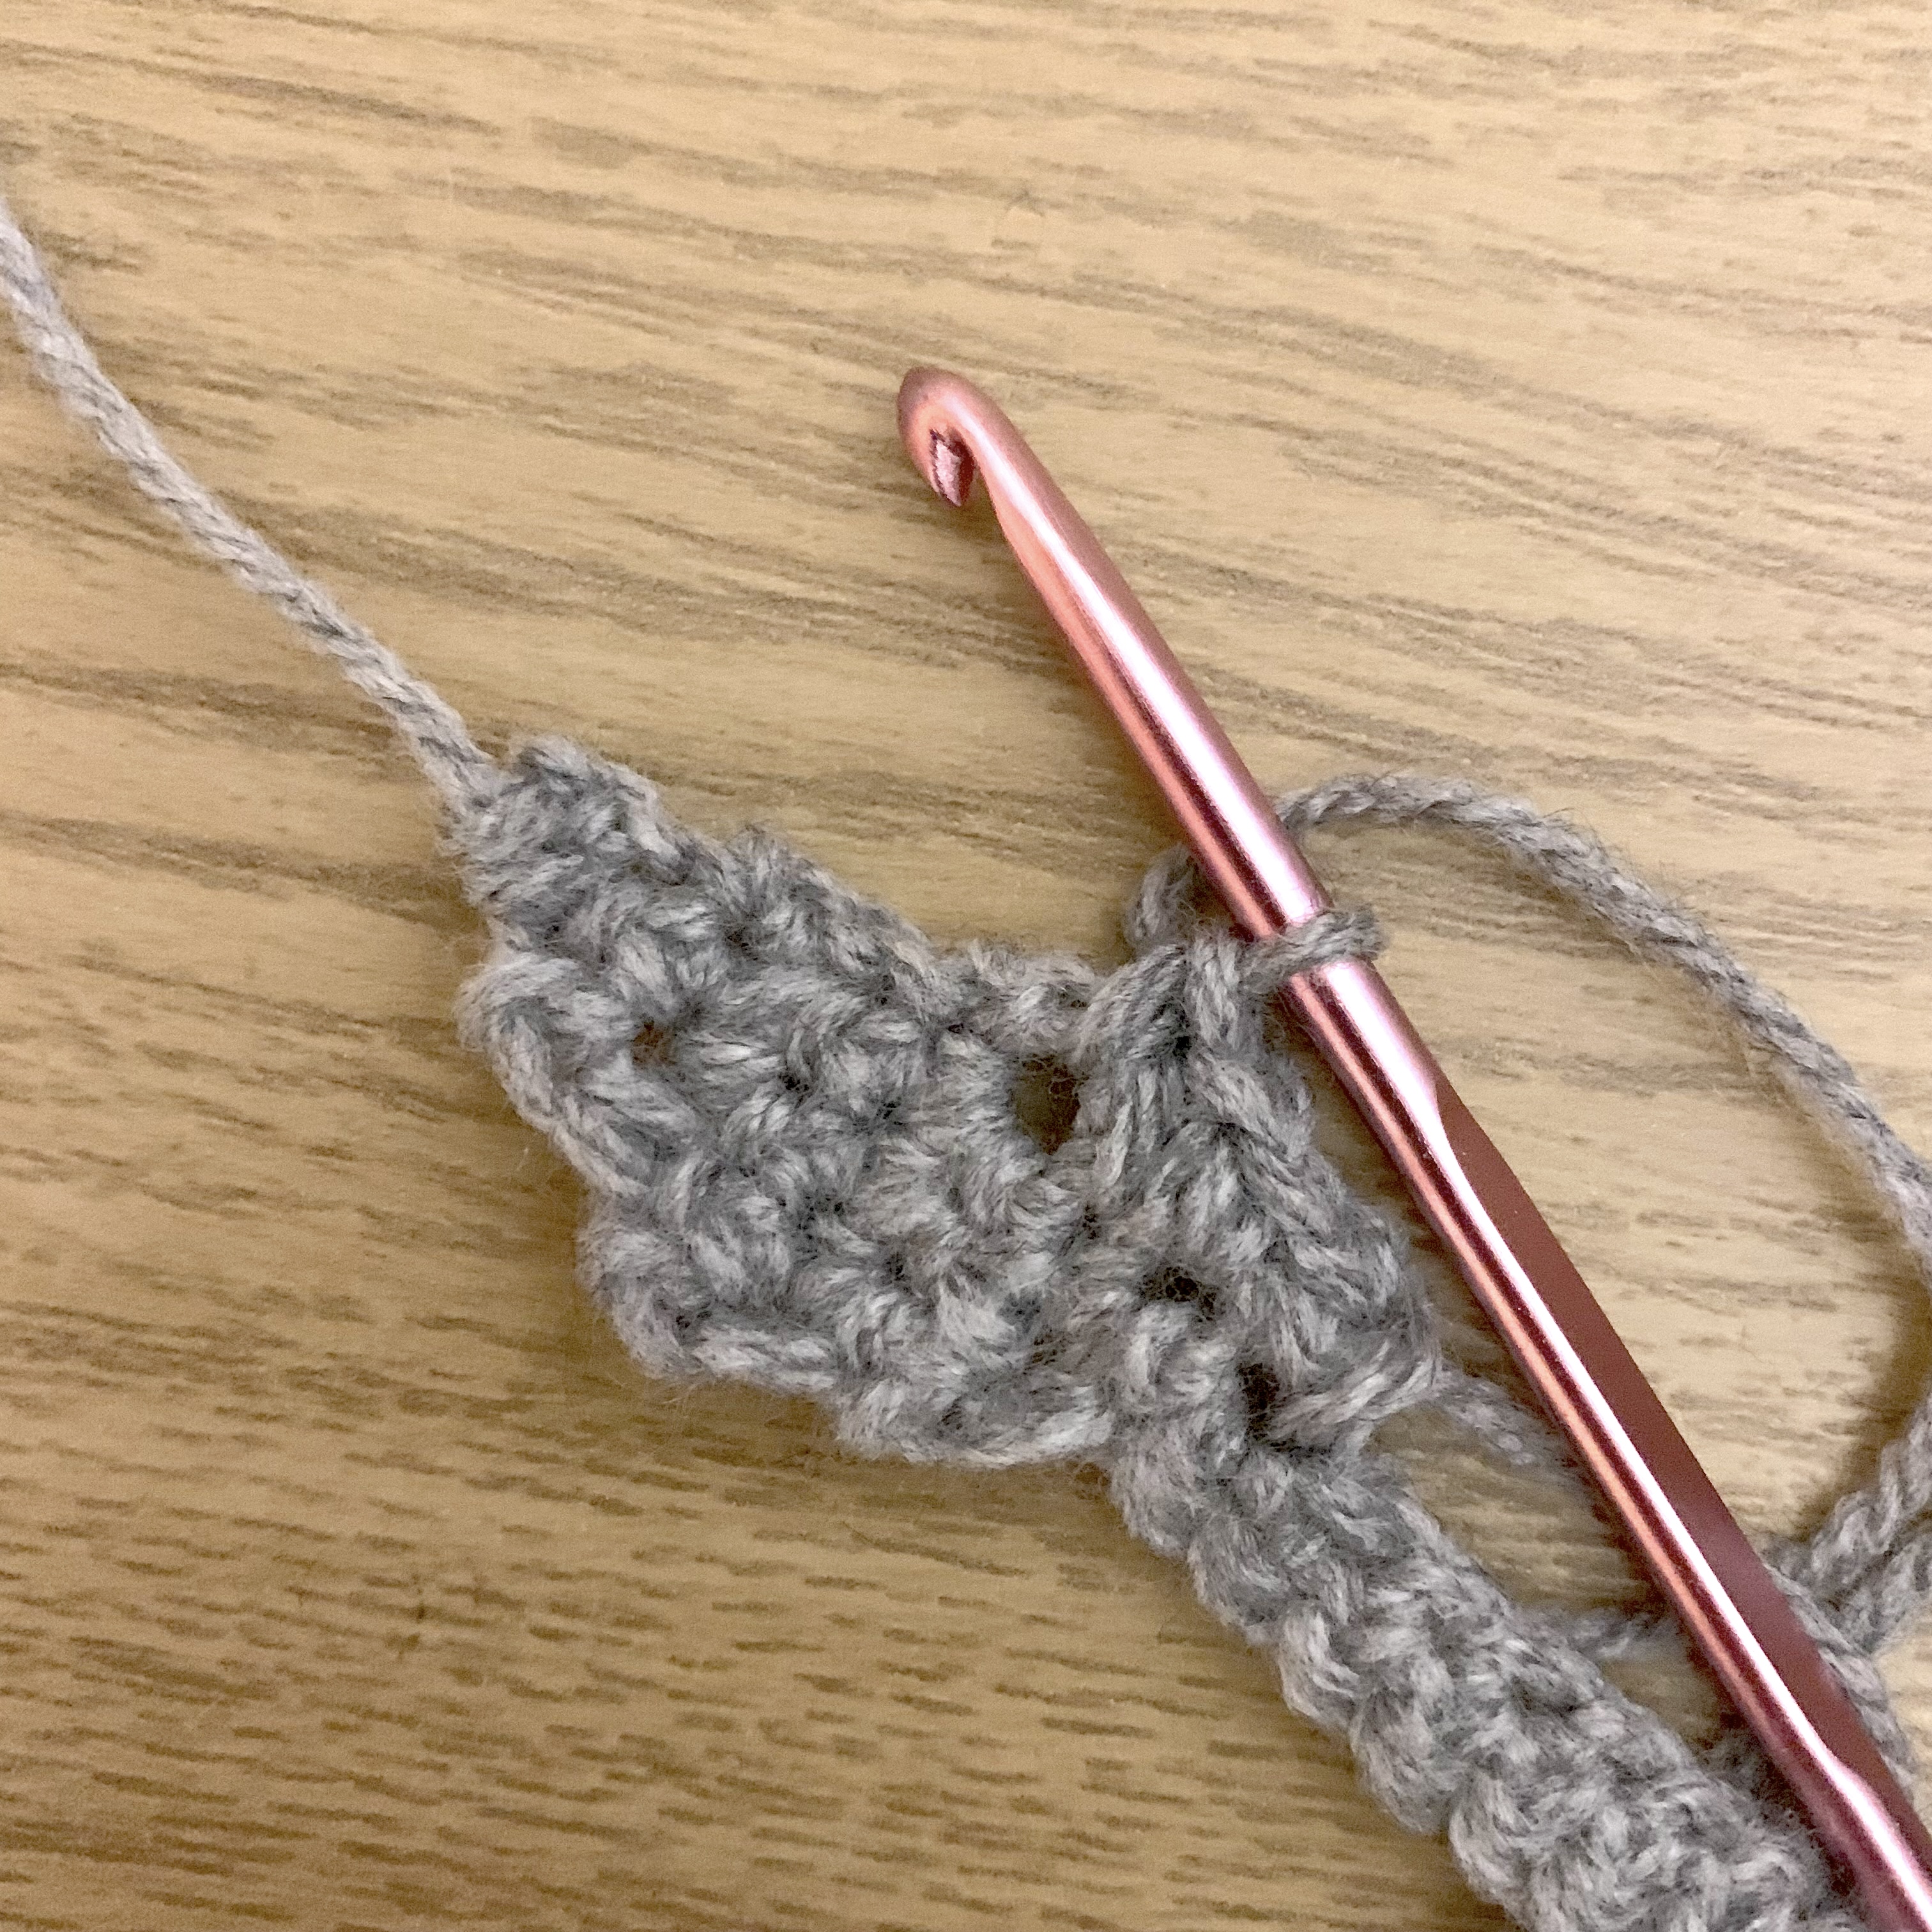
Rows 3-4: ch1 (doesn’t count as a stitch) sc along row.
Row 5: ch1 (doesn’t count as a stitch) sc2tog twice (2).
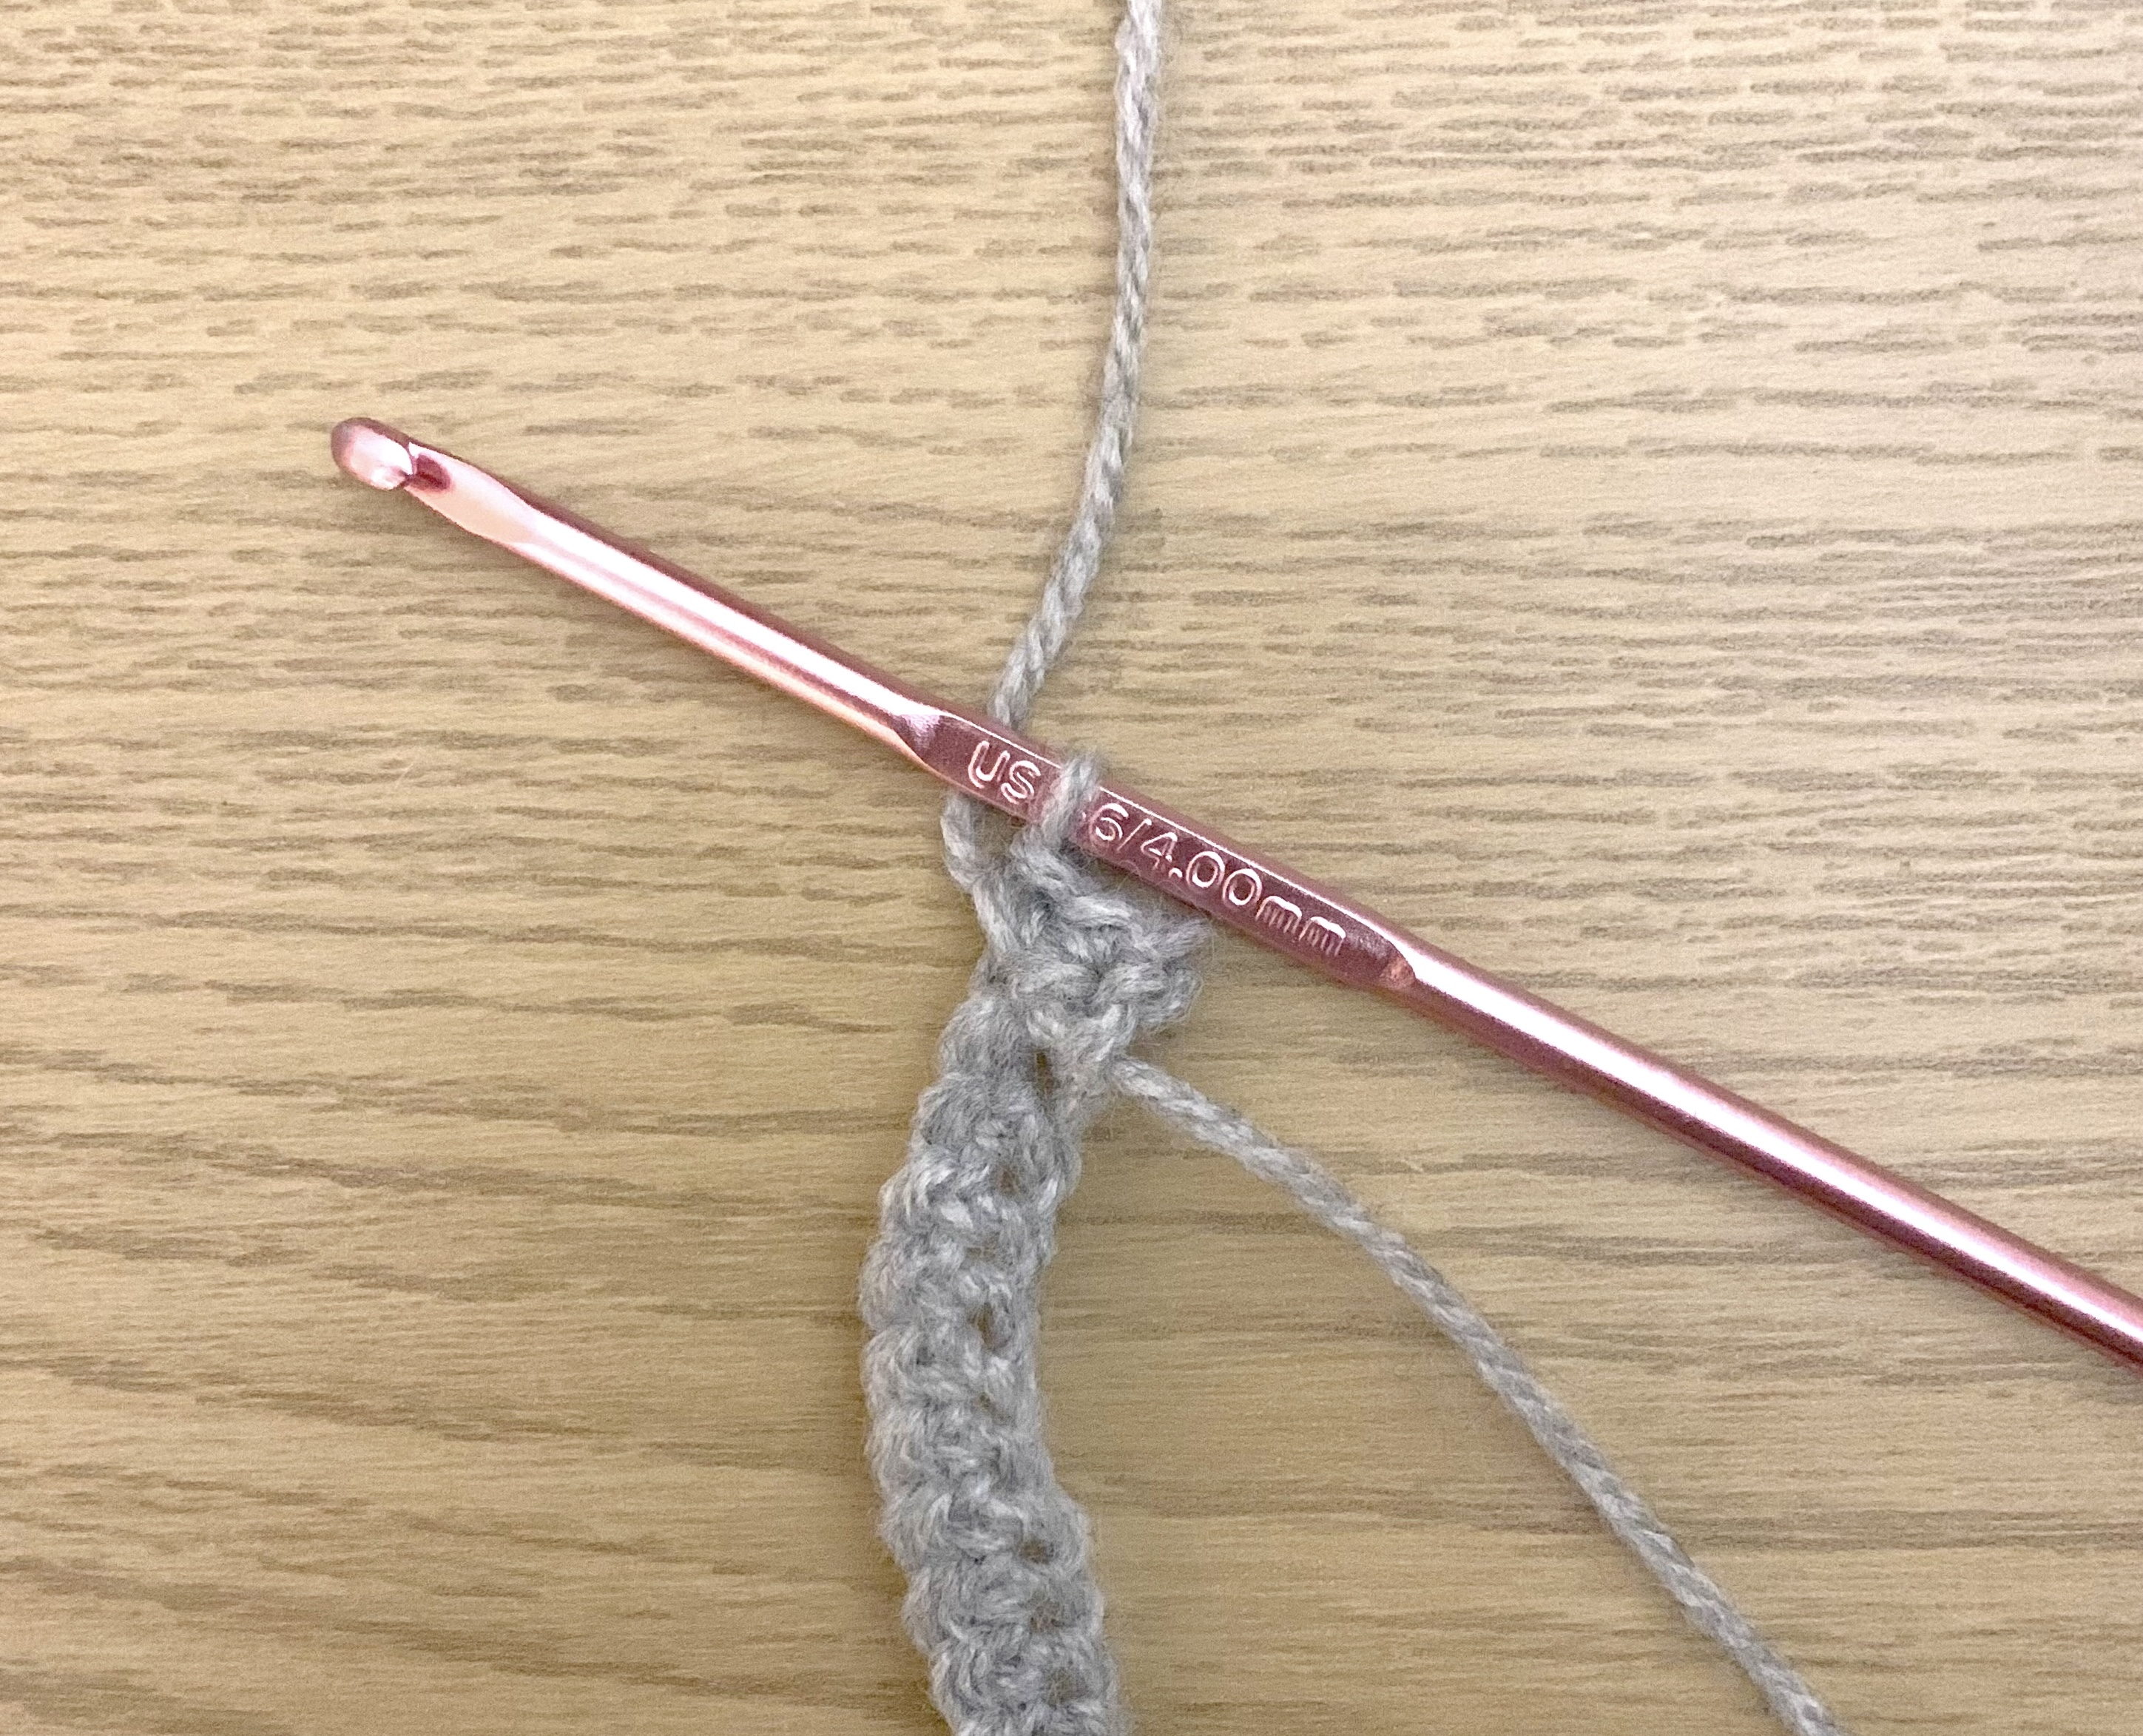
Row 6: ch1 (doesn’t count as a stitch) sc along row.
Row 7: ch1 (doesn’t count as a stitch) sc2tog (1).
Fasten off.

Cast on into the stitch at bottom right hand side of the ear (pull up loop, ch1, sc into same stitch).

Round 1: sc around the edge of the ear (sc stitches going into the end of the rows) until you reach the base of the ear on the left hand side.
Fasten off.

Forming ear 2:
At the opposite end of the band cast on (pull up loop, ch1, sc into same stitch), then complete a 2nd sc stitch, giving you 2sc stitches at the end of the band.

Row 1: ch1 (doesn’t count as a stitch) 2sc (2).
Row 2: ch1 (doesn’t count as a stitch) 2sc into next stitch twice (4).
Rows 3-4: ch1 (doesn’t count as a stitch) sc along row.
Row 5: ch1 (doesn’t count as a stitch) sc2tog twice (2).
Row 6: ch1 (doesn’t count as a stitch) sc along row.
Row 7: ch1 (doesn’t count as a stitch) sc2tog (1).
Fasten off.

Inner Ears – Make 2
Using pink wool and a 4mm hook:
ch5, sc into 2nd ch from hook, sc along rest of the row.
Fasten off, leaving long thread to attach.

Feet – Make 2
Using grey wool and a 4mm hook:
ch5, sc into 2nd ch from hook, sc along rest of the row, do not turn, next complete sc stitches down the other side of the chain.
Fasten off, leaving long thread to attach.
If using felt for the feet, cut of a foot shape from the felt.

Tail
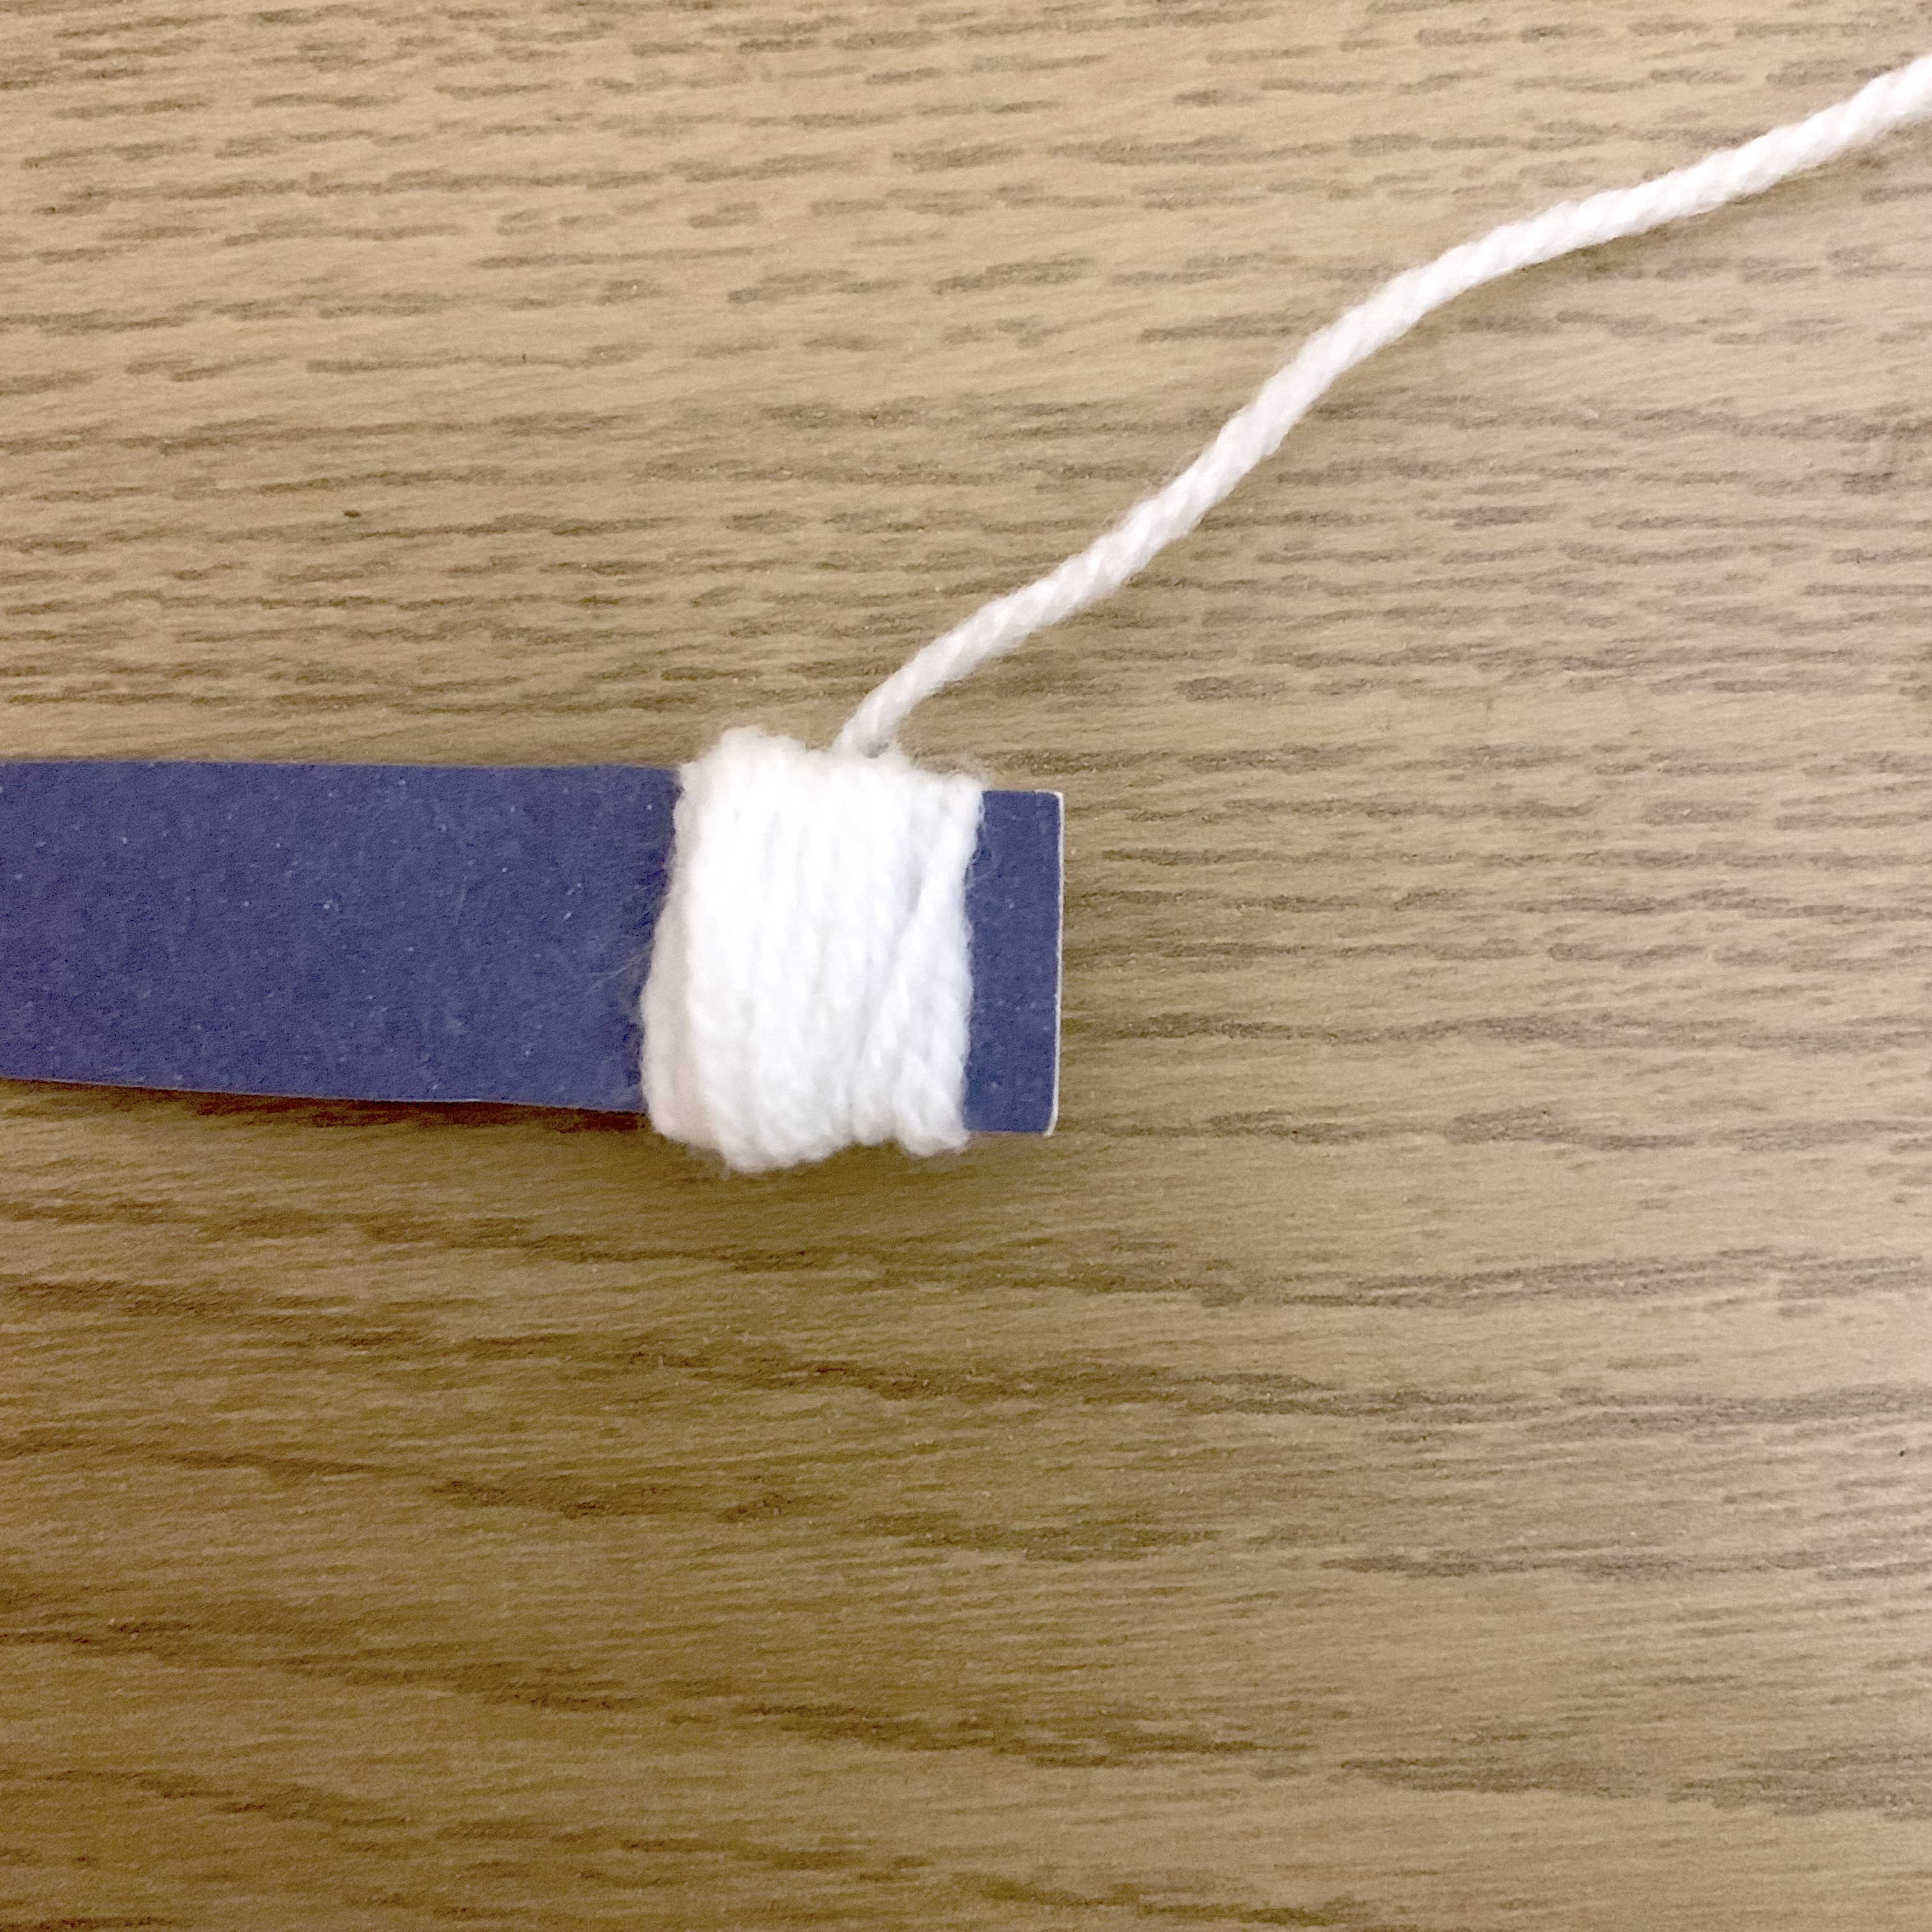
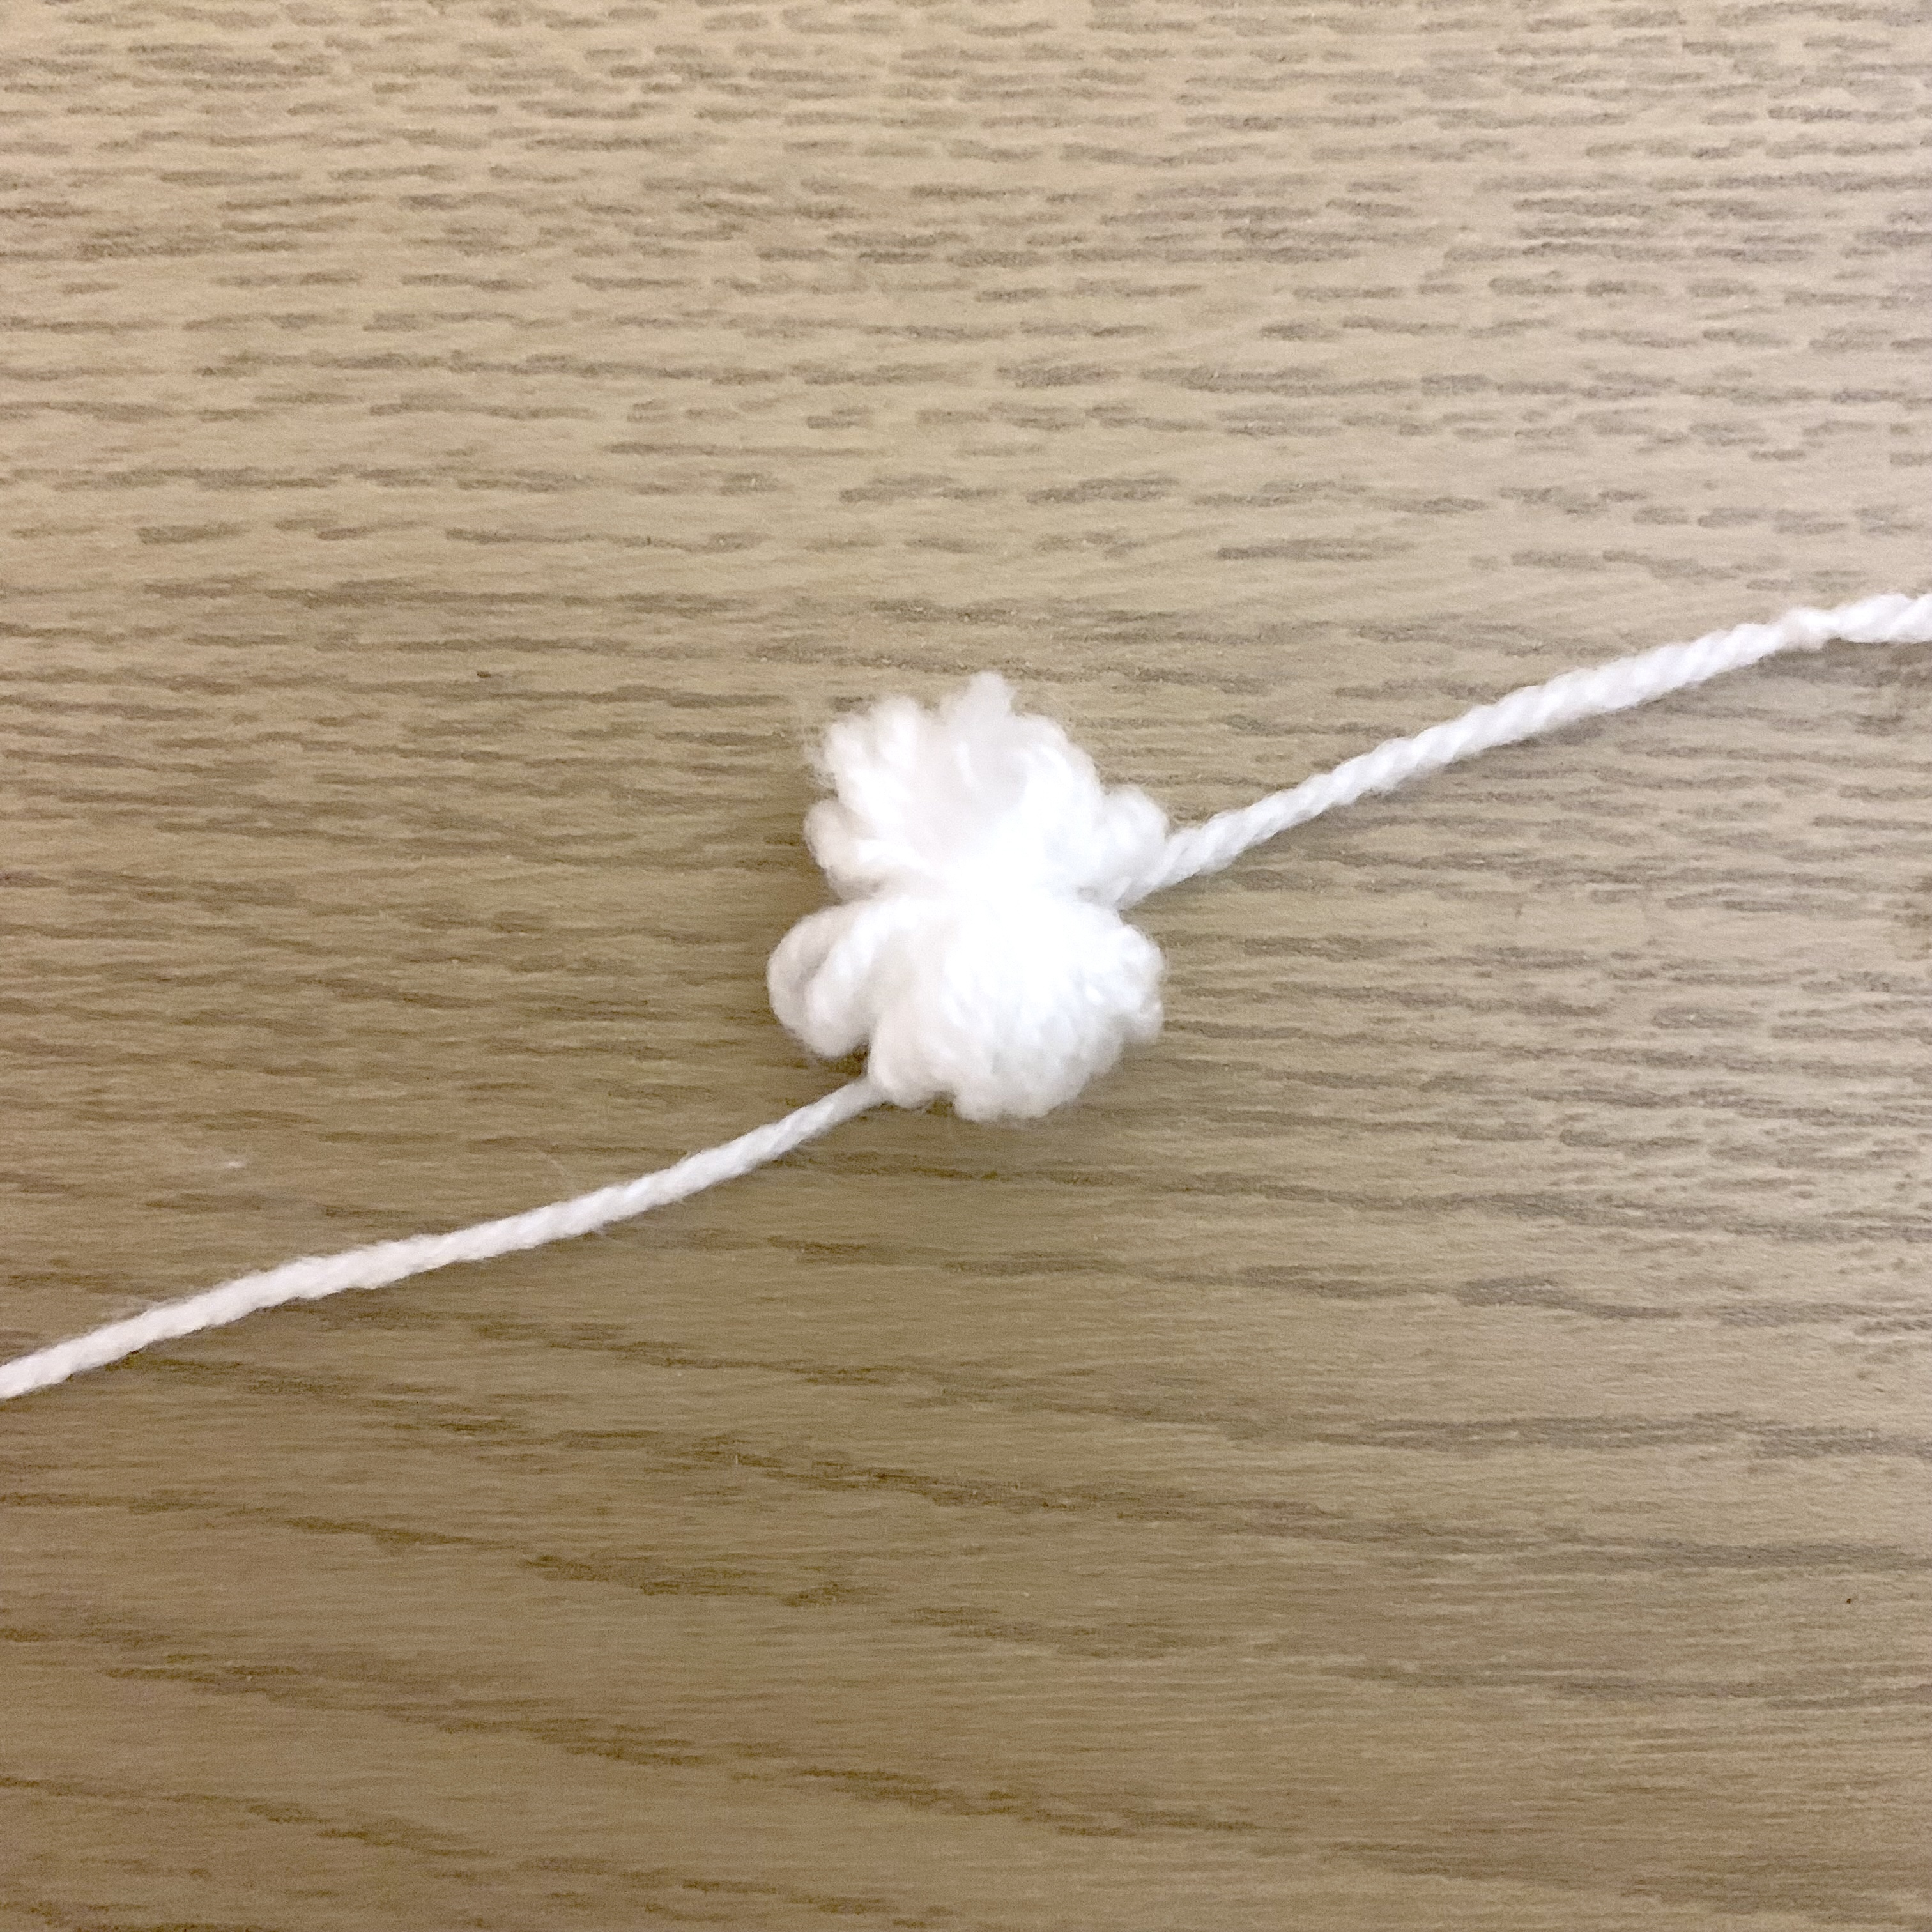
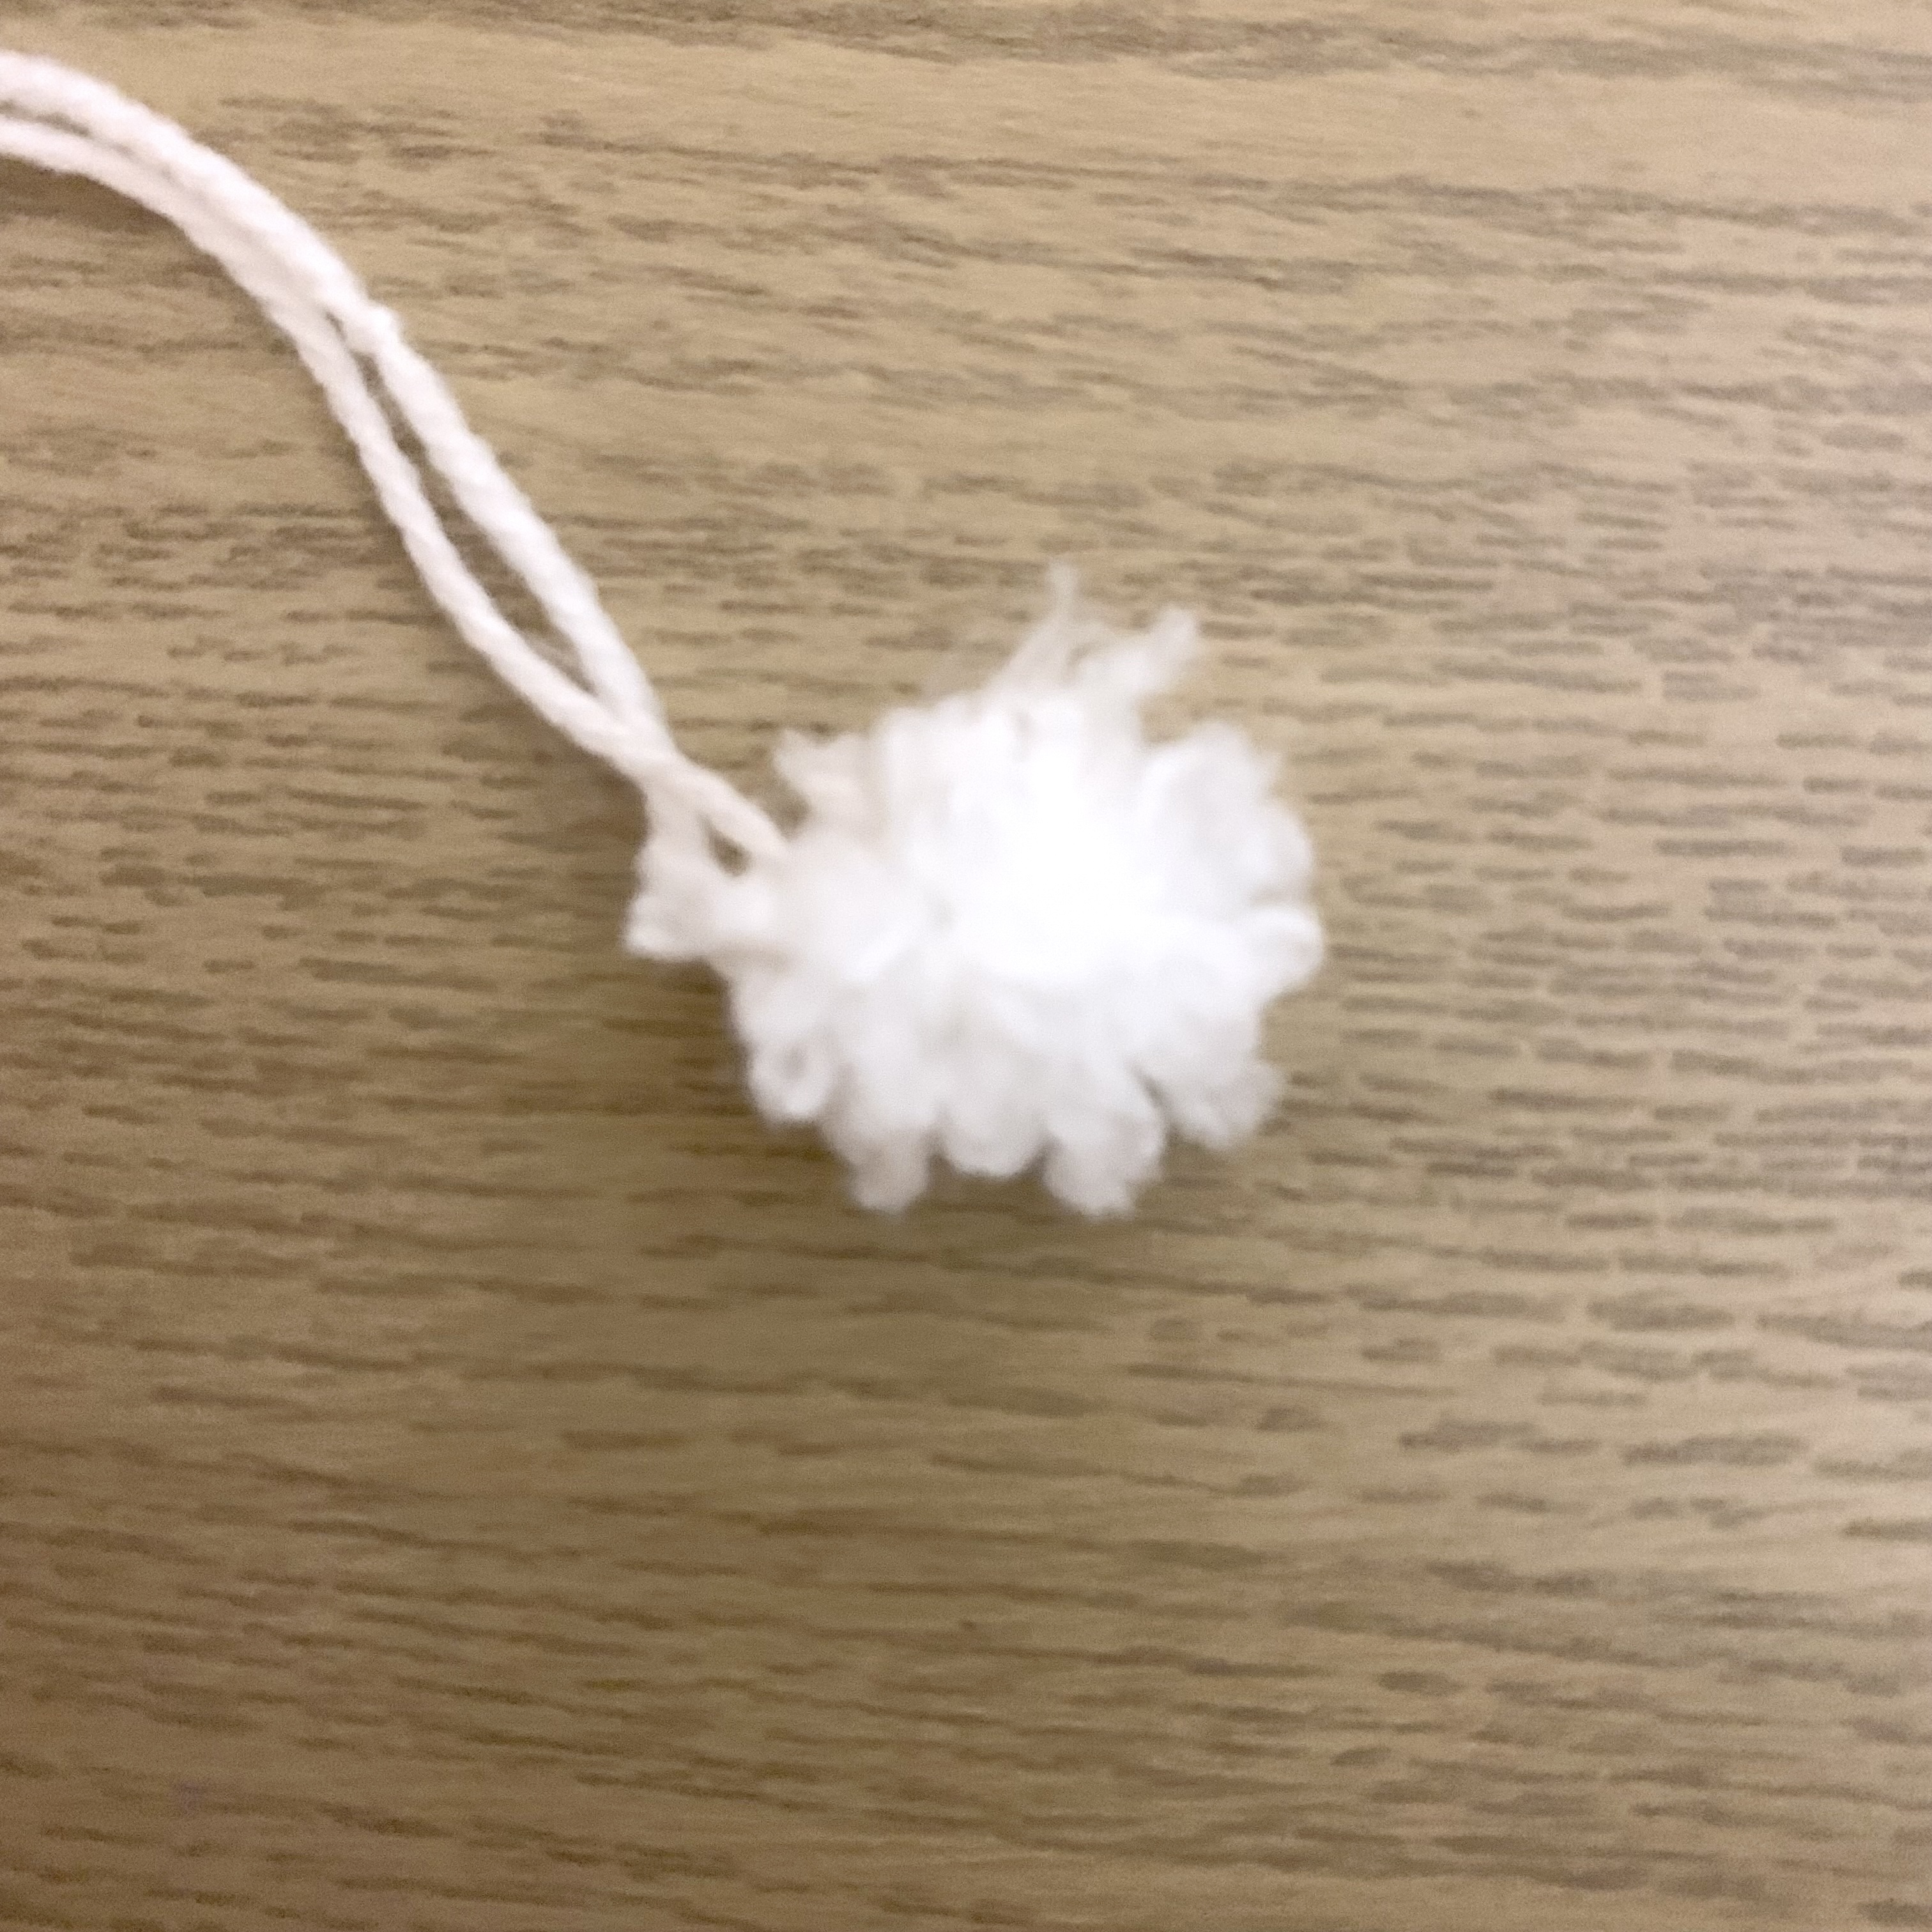
Take the 1cm wide strip of card and the white wool and wrap the white wool around the 1cm wide part of the card 20 times. Carefully pull the wool off from the card, tie around the middle using a 15cm long piece of the wool then cut the loops to make a mini pom pom.
Assembly
- Sew the pink inner ears onto the ears.


- Take the band and wrap it around the easter egg, next either sew the tail and feet on while still wrapped or mark where you want them to be, remove the band and sew them on.


Leave a comment